Love this? Save it for later!
Share the inspiration with your friends
Introduction
“You really think you can just slap some cheese and crackers on a board and call it a party?” my friend Lisa teased last Friday night. Honestly, I get it—charcuterie boards can look intimidating, like some fancy art project you’d never dare tackle. But here’s the funny part: I wasn’t always a charcuterie enthusiast. In fact, my first attempt was a total mess—half the ingredients didn’t make sense together, and the presentation? Let’s just say my cat wasn’t impressed. Yet, that night sparked something. I realized that building a charcuterie board isn’t about perfection; it’s about easy, approachable steps that make entertaining feel fun, not stressful.
Last weekend, while rummaging through the local farmer’s market, I bumped into an elderly gentleman named Mr. Harper. He was setting up a tiny stall with homemade jams and cured meats. We got to talking, and he shared his simple philosophy: “A good board tells a story and invites conversation.” That stuck with me. So I put together this Easy Beginner’s Charcuterie Board Guide to help you craft a spread that feels effortless and welcoming—whether it’s a spontaneous get-together or a planned soirée.
Maybe you’ve been there, staring at an empty platter, wondering where to start or feeling overwhelmed by endless options. I promise, once you get the hang of the basics, it’s a breeze—and honestly, a game changer for any host. Let me tell you why this guide stayed with me and why it’ll be your go-to for fuss-free entertaining.
Why You’ll Love This Recipe
From my many trial-and-error sessions (and a few kitchen disasters), I crafted this charcuterie board guide to be approachable yet impressive. Here’s why it stands out:
- Quick & Easy: You can pull everything together in under 30 minutes, perfect for last-minute plans or casual evenings.
- Simple Ingredients: No exotic or hard-to-find items here. Most components are pantry staples or easy-to-source from your local market.
- Perfect for Any Occasion: Whether it’s a cozy movie night, brunch with friends, or a holiday gathering, this board fits right in.
- Crowd-Pleaser: Balanced flavors and textures make it appealing to kids and adults alike—no fuss, just tasty bites.
- Unbelievably Delicious: Thoughtful combos of savory, sweet, crunchy, and creamy that hit all the right notes.
This isn’t just any charcuterie board—it’s a thoughtful assembly with easy techniques to mix and match flavors without stress. You’ll feel confident layering meats, cheeses, fruits, and extras in a way that looks stunning but takes minimal effort. It’s comfort food meets classy presentation, which makes you close your eyes after the first bite. Honestly, it transforms simple ingredients into a memorable experience every time.
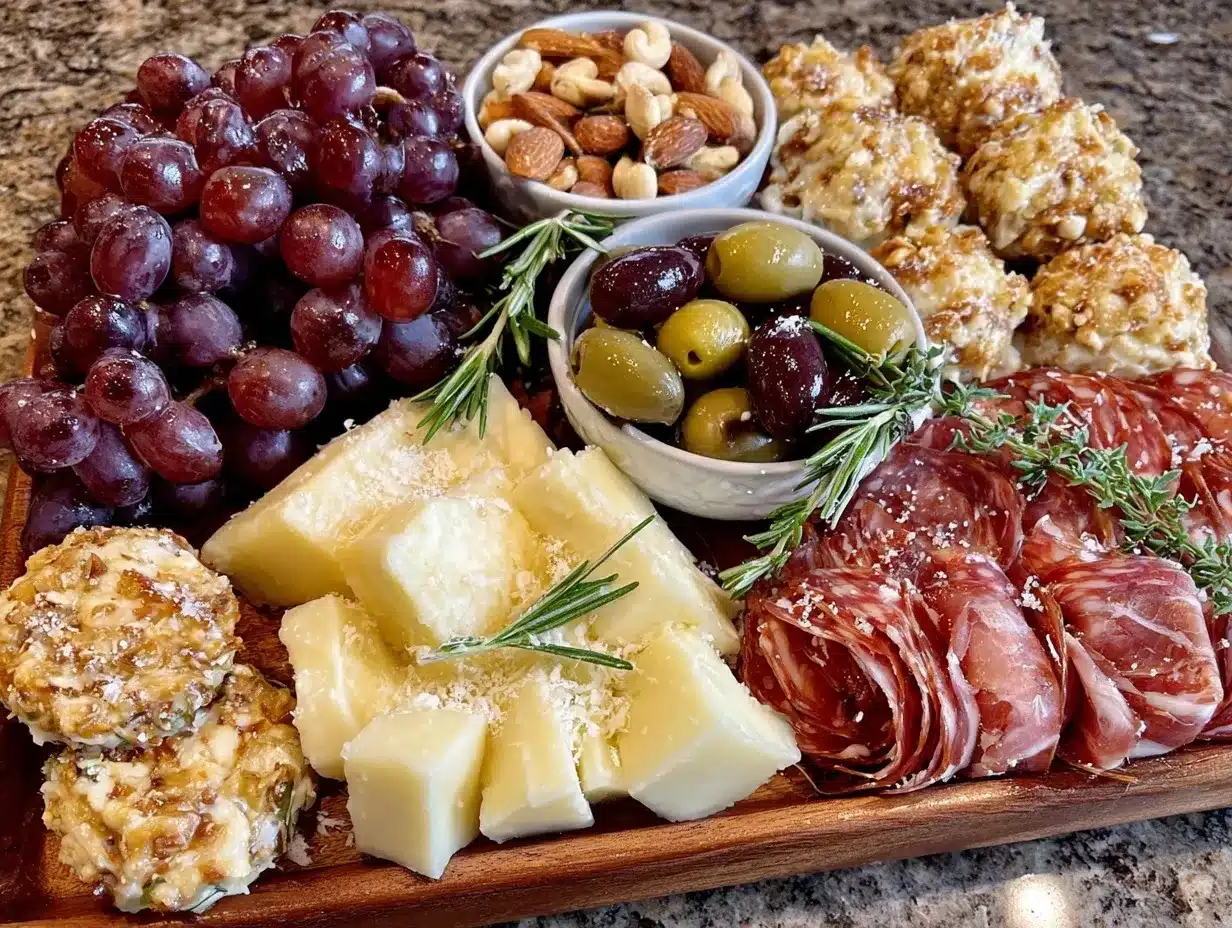
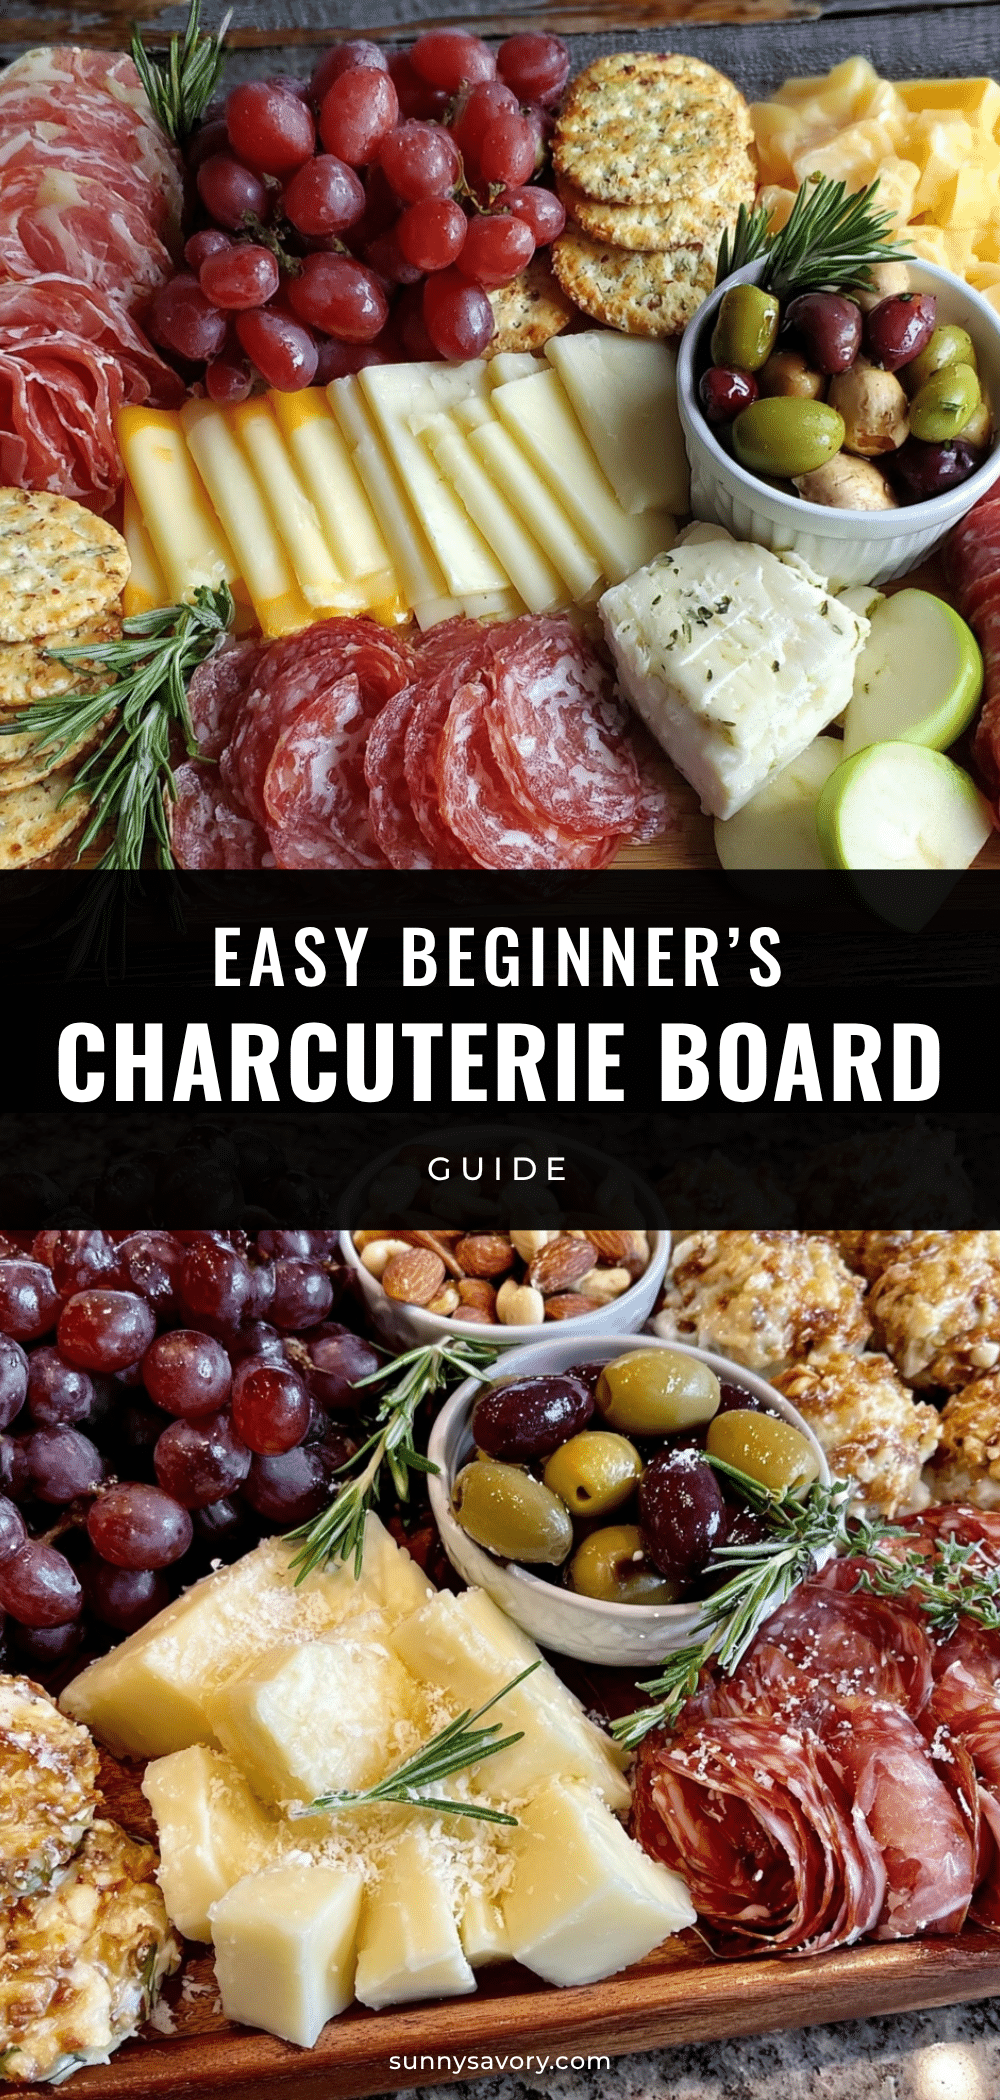
What Ingredients You Will Need
This charcuterie board uses straightforward, wholesome ingredients that complement each other beautifully. Most are pantry-friendly, with room to swap based on your preferences or seasonality.
- For the Meats:
- Thinly sliced cured meats like prosciutto, salami, or chorizo (look for a trusted brand like Applegate for quality and flavor)
- Sliced smoked sausage or pepperoni for a spicy kick
- For the Cheeses:
- Soft cheese such as brie or goat cheese (adds creaminess)
- Hard cheese like aged cheddar or manchego (for a firm texture and sharpness)
- Blue cheese or gorgonzola, optional for an extra tangy note
- For the Fresh Elements:
- Grapes or fresh berries (seasonal; summer berries are a delightful swap)
- Apple or pear slices (brush lightly with lemon juice to prevent browning)
- Fresh herbs like rosemary or thyme for garnish and aroma
- For the Crunch:
- Assorted crackers and breadsticks (choose sturdy varieties to hold toppings)
- Mixed nuts like almonds or walnuts (toasted for extra flavor)
- For the Sweet & Savory Touches:
- Fig jam or honey (adds a lovely contrast to the salty meats)
- Olives and pickles (for a briny pop)
Feel free to swap in almond flour crackers for gluten-free options or use dairy-free cheeses if needed. The key is to balance flavors and textures—creamy, crunchy, sweet, and savory. I usually hit up my local Whole Foods for fresh herbs and artisanal crackers, but your neighborhood store will have great picks too.
Equipment Needed
- Large wooden or slate platter: The classic base for a charcuterie board. If you don’t have one, a large cutting board or even a baking sheet lined with parchment works well.
- Small bowls or ramekins: For jams, olives, and nuts to keep things tidy and prevent mixing flavors.
- Cheese knives and spreaders: Different knives for soft and hard cheeses make serving easier.
- Tongue tongs or small forks: For picking up olives and small items without mess.
- Serving utensils: Toothpicks or cocktail picks for easy grabbing.
If you’re on a budget, thrift shops often have beautiful wooden boards or trays. I once snagged a cracked but charming wooden cutting board that adds rustic charm to my spreads. Just give it a quick sanding and wash before use. No fancy tools needed here—just what you have on hand, really.
Preparation Method
- Prepare your ingredients (10 minutes): Slice cheeses and meats into bite-sized pieces or strips. Wash and dry fresh fruits and herbs thoroughly. Toast nuts lightly if desired to bring out their aroma.
- Arrange small bowls on the board (5 minutes): Place jams, olives, and pickles in ramekins to avoid spills and keep flavors distinct.
- Place cheeses on the board (5 minutes): Space out the cheeses evenly around the platter to create focal points. Leave room for meats and accompaniments.
- Add cured meats (5 minutes): Fold or roll slices of meat for volume and texture. Arrange near cheeses that pair well, like prosciutto next to brie.
- Fill in with fresh fruits and nuts (5 minutes): Scatter grapes, berries, and nuts to fill gaps and add color contrast. You want the board to look abundant but balanced.
- Place crackers and breadsticks (5 minutes): Position crunchy elements along the edges or in small stacks to keep them crisp and accessible.
- Add garnish and final touches (2 minutes): Sprinkle fresh herbs like rosemary sprigs or thyme. Drizzle a bit of honey or place fig jam near creamy cheeses.
Pro tip: If you’re pressed for time, prep your ingredients ahead and assemble right before guests arrive to keep everything fresh. Also, don’t stress if the board isn’t perfectly symmetrical—natural, casual placements feel more inviting.
Cooking Tips & Techniques
Building a charcuterie board isn’t about cooking, per se, but there are some handy tricks to get it just right. First, always bring cheeses to room temperature before serving. Cold cheese dulls flavor and makes cutting tricky. I learned this the hard way when I chopped frozen brie once—sticky mess!
When arranging meats, folding slices in gentle waves or rolls adds volume and visual interest. Don’t just lay them flat; it’s about texture and making the board look full without crowding.
Balance salty and sweet elements carefully. If your meats and cheeses are strongly flavored, opt for milder jams or fresh fruit. And always offer a mix of textures—crunchy crackers, creamy cheese, juicy fruit—to keep every bite exciting.
Timing is key. Assemble last minute when possible to prevent dryness. If prepping early, cover the board loosely with plastic wrap and refrigerate, then remove wrap 30 minutes before serving.
Lastly, don’t forget the little extras—fresh herbs aren’t just pretty; they add aroma that elevates the entire experience without extra effort.
Variations & Adaptations
One of the best things about a charcuterie board is how flexible it is. Here are some tasty twists to try:
- Vegetarian version: Swap meats for marinated tofu slices, roasted veggies, or grilled halloumi. Load up on nuts, olives, and a variety of cheeses.
- Seasonal flavors: In fall, add roasted pumpkin seeds and dried cranberries. Summer calls for fresh figs and stone fruits like peaches or plums.
- International flair: Add Spanish manchego, Italian soppressata, and French cornichons for a European-inspired board.
- Gluten-free option: Use gluten-free crackers and seed-based crisps. Many brands like Simple Mills offer delicious varieties.
- Personal favorite: I love adding a drizzle of balsamic glaze over fresh figs and goat cheese—unexpected but oh-so-good.
Serving & Storage Suggestions
Serve your charcuterie board at room temperature for the best flavor. Set it out with plenty of napkins and small plates so guests can graze comfortably. Pair it with a crisp white wine, light red, or even sparkling water with lemon slices.
Leftovers? Wrap tightly in plastic wrap or transfer to airtight containers and refrigerate up to 3 days. Keep crackers separate to avoid sogginess. When reheating cheese, just let it sit at room temp for 20 minutes rather than microwaving to preserve texture.
Over time, flavors meld beautifully—especially jams and cured meats—so if you cover and chill the board after a party, the next day’s bites can be even tastier.
Nutritional Information & Benefits
This charcuterie board balances protein from cured meats and cheeses with healthy fats from nuts and antioxidants from fresh fruit. Choosing quality meats with minimal additives and incorporating fresh produce adds nutritional value.
It’s naturally gluten-free if you pick the right crackers and can be low-carb if you skip bread items. Keep in mind, cured meats can be high in sodium, so moderation is key.
From a wellness perspective, I appreciate how this recipe encourages mindful snacking with a variety of textures and flavors, making it easier to satisfy cravings without overindulging.
Conclusion
So there you have it—your go-to Easy Beginner’s Charcuterie Board Guide for Effortless Entertaining. It’s more than just throwing things on a platter; it’s about creating a welcoming, tasty experience without fuss. Feel free to customize based on what you love or what’s fresh at the market.
I still remember that first chaotic attempt and how far I’ve come—this guide is my way of sharing the joy and simplicity of charcuterie with you. If you try it, I’d love to hear how your board turned out or any fun twists you added—drop a comment or share your photos!
Happy entertaining, and may your gatherings be full of laughter, good food, and easy vibes.
FAQs
- What is the easiest way to start a charcuterie board? Start with a few types of cheese and cured meats, add some fresh fruit and nuts, then fill in with crackers and a sweet or savory dip.
- How long can I prepare a charcuterie board in advance? You can prep ingredients a day ahead, but assemble the board just before serving for freshest presentation.
- Can I make a charcuterie board for a large crowd? Absolutely! Just scale up ingredients and use multiple boards or platters to keep things accessible.
- What are good beverage pairings for a charcuterie board? Wine (white or red), sparkling water, or light beers work well. Pick drinks that complement but don’t overpower the flavors.
- How do I keep crackers from getting soggy? Keep crackers separate until serving or place them at the edges of the board away from moist ingredients.
Pin This Recipe!
Easy Beginner’s Charcuterie Board Guide 2024 Perfect for Effortless Entertaining

A simple and approachable guide to creating a beautiful and delicious charcuterie board perfect for any occasion, featuring easy-to-source ingredients and quick assembly.
- Prep Time: 10 minutes
- Cook Time: 0 minutes
- Total Time: 30 minutes
- Yield: 4 servings
- Category: Appetizer
- Cuisine: International
Ingredients
- Thinly sliced cured meats like prosciutto, salami, or chorizo
- Sliced smoked sausage or pepperoni
- Soft cheese such as brie or goat cheese
- Hard cheese like aged cheddar or manchego
- Blue cheese or gorgonzola (optional)
- Grapes or fresh berries (seasonal)
- Apple or pear slices (brush lightly with lemon juice to prevent browning)
- Fresh herbs like rosemary or thyme
- Assorted crackers and breadsticks
- Mixed nuts like almonds or walnuts (toasted)
- Fig jam or honey
- Olives and pickles
Instructions
- Prepare your ingredients: Slice cheeses and meats into bite-sized pieces or strips. Wash and dry fresh fruits and herbs thoroughly. Toast nuts lightly if desired.
- Arrange small bowls on the board: Place jams, olives, and pickles in ramekins to avoid spills and keep flavors distinct.
- Place cheeses on the board: Space out the cheeses evenly around the platter to create focal points, leaving room for meats and accompaniments.
- Add cured meats: Fold or roll slices of meat for volume and texture. Arrange near cheeses that pair well, like prosciutto next to brie.
- Fill in with fresh fruits and nuts: Scatter grapes, berries, and nuts to fill gaps and add color contrast, aiming for an abundant but balanced look.
- Place crackers and breadsticks: Position crunchy elements along the edges or in small stacks to keep them crisp and accessible.
- Add garnish and final touches: Sprinkle fresh herbs like rosemary sprigs or thyme. Drizzle a bit of honey or place fig jam near creamy cheeses.
Notes
Bring cheeses to room temperature before serving for best flavor. Fold meats for volume and texture. Assemble last minute if possible to keep ingredients fresh. Keep crackers separate until serving to avoid sogginess. Use plastic wrap and refrigerate if prepping early, then remove wrap 30 minutes before serving.
Nutrition
- Serving Size: One serving is appro
- Calories: 350
- Sugar: 7
- Sodium: 600
- Fat: 25
- Saturated Fat: 8
- Carbohydrates: 15
- Fiber: 2
- Protein: 12
Keywords: charcuterie board, easy entertaining, beginner charcuterie, party platter, cheese board, cured meats, appetizer, snack