Love this? Save it for later!
Share the inspiration with your friends
Introduction
“I never thought hard boiled eggs could be so… fuss-free,” my friend Mark said as he glanced over at my Instant Pot. It was one of those busy Wednesday evenings when I was rushing to prep snacks for a last-minute gathering. Honestly, I was more focused on not burning the popcorn than perfecting eggs. But there I was, watching the Instant Pot quietly hum away, hands completely free, while I cleaned up the kitchen mess—a cracked bowl here, a stray shell there. Maybe you’ve been there, scrambling to get everything ready and wishing cooking could just happen on its own.
This recipe came about after one of those chaotic nights when I just couldn’t face the usual egg-peeling battle. You know the drill: overcooked eggs with that sulfuric ring and shells that refuse to come off. I wanted a solution that required zero babysitting, no guesswork, and excellent results every time. So I put the Instant Pot to the test, and honestly, it changed everything. The eggs came out smooth, tender, and perfectly cooked without me hovering around. It’s hands-off cooking at its best, and now it’s my go-to for batch cooking breakfast, salads, or quick snacks.
What stuck with me most was how effortless it felt—like having a mini sous-chef who never complains or burns dinner. The recipe below breaks it down into five simple steps that anyone can follow, whether you’re a kitchen newbie or a seasoned pro. So let me tell you, if you’ve been intimidated by hard boiled eggs or dread the peeling process, this Instant Pot method just might become your new secret weapon.
Why You’ll Love This Recipe
From my countless tests and tweaking, I can say this is one of those recipes that delivers every single time. It’s not just about cooking eggs; it’s about freedom in the kitchen and a reliable result that feels like a small victory.
- Quick & Easy: Ready in about 15 minutes with zero hands-on time—perfect for hectic mornings or last-minute meal prep.
- Simple Ingredients: Just eggs and water—no fancy add-ons or special marinades needed.
- Perfect for Meal Prep: Great for making a batch to keep in the fridge for breakfasts, salads, or snacks all week.
- Crowd-Pleaser: Even the picky eaters in my family ask for these eggs—no rubbery whites or chalky yolks here.
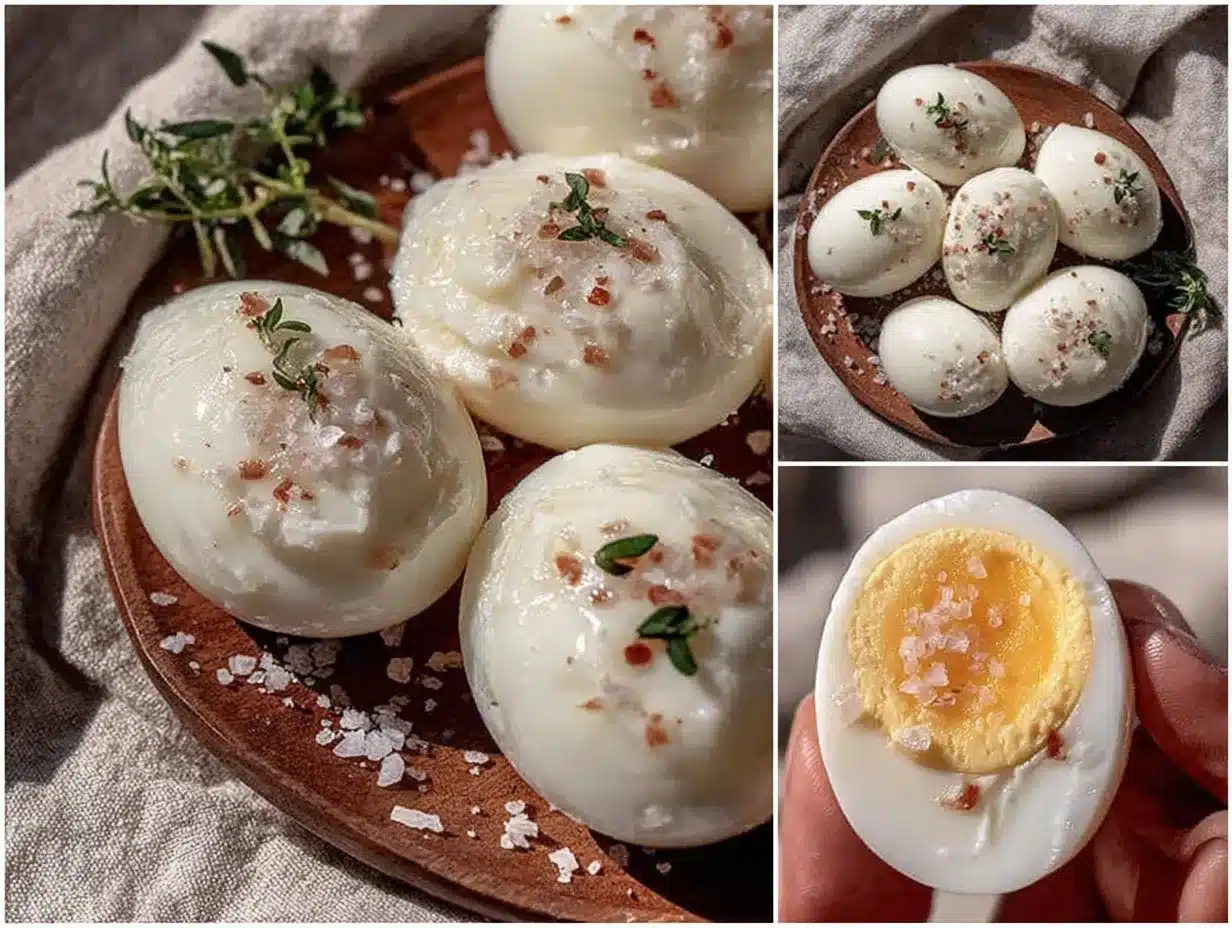
- Unbelievably Delicious: The texture is silky and creamy, with yolks that aren’t dry or crumbly.
What makes this recipe stand out is the hands-off approach combined with precise timing. The Instant Pot creates just the right steam pressure to cook eggs evenly, and the natural release method stops cooking exactly when it should. No more overcooked eggs or frustrating peeling sessions. Plus, it’s a method tested by real people who want breakfast without the drama—which, honestly, is me and my friends over and over again.
Try it for yourself—you might find you start making these eggs so often that your weekly grocery list ends up with a dozen more eggs every time. It’s comfort food simplified, and that’s a win in my book.
What Ingredients You Will Need
This recipe uses simple, wholesome ingredients to deliver perfectly cooked eggs without any guesswork. You likely have everything already stocked in your kitchen, which makes this a no-fuss staple.
- Large eggs: Use fresh or eggs that are a few days old for easier peeling. I prefer organic or free-range eggs from brands like Vital Farms when I can get them.
- Water: About 1 cup (240 ml) to create the steam pressure inside the Instant Pot. Filtered water is great if your tap is hard or heavily chlorinated.
Optional:
- Ice cubes or cold water: For the ice bath to stop cooking immediately after pressure release.
If you’re interested in a twist, you can add a teaspoon of white vinegar to the water to make peeling even easier, but honestly, I find it just adds an unnecessary step. The key is the cooking time and rapid cooling.
For substitutions, you might want to try smaller or extra-large eggs—just adjust the timing slightly if you do. And if you don’t have an Instant Pot, a pressure cooker with similar settings will work, but times could vary.
Equipment Needed
- Instant Pot or electric pressure cooker: This is the star of the show. I use a 6-quart model, but smaller or larger sizes work too.
- Steaming rack or trivet: Comes with most Instant Pots; it keeps the eggs out of the water so they steam evenly.
- Large bowl: For the ice bath to cool the eggs fast and stop cooking.
- Tongs or slotted spoon: To safely transfer hot eggs to the ice bath without burning your fingers.
If you don’t have a steaming rack, a heatproof bowl or small metal rack inside the pot can substitute. For budget-friendly options, any electric pressure cooker with manual settings will do the trick. Just be sure it can hold enough water to generate steam.
Maintenance tip: Keep the silicone sealing ring clean and free of food smells by washing with mild soap after each use. It helps the Instant Pot maintain proper pressure and extends its life.
Preparation Method
- Prepare the Instant Pot: Pour 1 cup (240 ml) of water into the Instant Pot inner pot. Place the steaming rack or trivet inside. This water is what creates the steam to cook the eggs perfectly.
- Arrange the eggs: Carefully place up to a dozen large eggs on the rack in a single layer. Make sure they’re not stacked, so they cook evenly. I usually use a spoon to gently set them down—last time I dropped one, and it cracked, so take it slow!
- Seal and set the Instant Pot: Close the lid and set the valve to the sealing position. Select the “Pressure Cook” or “Manual” setting on high pressure. Set the timer for 5 minutes. This timing is key: it’s what gives the eggs that silky texture without overcooking.
- Natural release: When the cooking time ends, let the pressure release naturally for 5 minutes. This means don’t touch the valve; just let it sit. After 5 minutes, carefully switch the valve to venting to release any remaining steam.
- Ice bath time: Quickly transfer the eggs to a large bowl filled with ice water. Let them sit for at least 5 minutes. This stops the cooking instantly and makes peeling easier. If you skip this, you risk rubbery whites and overcooked yolks.
Pro tip: If you struggle with peeling, gently crack the shell all over and peel under running water. Also, I learned that slightly older eggs peel better here—fresh eggs tend to cling to the shell more.
Once cooled, your eggs are ready to eat or store. I like to keep a batch in the fridge for quick snacks or toss them into my classic egg salad for a midday boost.
Cooking Tips & Techniques
Here’s what I picked up after making these eggs a dozen times and fixing mistakes along the way:
- Don’t skip the ice bath: It’s tempting, but cooling eggs fast is what stops the heat from carrying on. Otherwise, you’ll get overcooked yolks.
- Use the natural release: The five-minute natural pressure release is crucial. Quick releases can cause the eggs to jostle and crack inside the pot.
- Egg size matters: Large eggs work best here. If you use jumbo or extra-large, add 1 minute to the cook time; for medium, subtract 30 seconds.
- Tray or rack placement: Always keep eggs above the water level. Direct contact with water can cause uneven cooking or cracked shells.
- Test your Instant Pot: Models vary slightly. The first time, test with just a few eggs to see how your machine handles the timing.
Honestly, at first I was skeptical about pressure cooking eggs—felt too easy to mess up! But once you get the timing right, it’s hands-off magic. Plus, it frees you up for other kitchen tasks, like whipping up a quick creamy avocado toast while the eggs cook themselves.
Variations & Adaptations
This basic method is super adaptable, so you can switch it up to suit your taste or dietary needs:
- Soft boiled eggs: Reduce pressure cooking time to 3 minutes with the same natural release for a soft, jammy yolk perfect for breakfast bowls.
- Spiced eggs: After peeling, toss eggs in a mix of smoked paprika, salt, and pepper for a quick flavor boost.
- Gluten-free or paleo: This recipe is naturally gluten-free and paleo-friendly—no changes needed!
- Vegetarian and keto-friendly: Eggs fit perfectly into these diets, making this recipe a versatile protein source.
- Personal twist: I once soaked peeled eggs in soy sauce and mirin overnight to mimic a ramen-style egg—delicious and a fun twist on the classic.
You can also try cooking eggs in smaller batches or using different types of pressure cookers, just adjusting time slightly for your equipment or egg size.
Serving & Storage Suggestions
Serve these hard boiled eggs chilled or at room temperature. They’re perfect sliced over salads, chopped into sandwiches, or just seasoned with a pinch of salt and pepper for a quick snack.
For a simple presentation, slice in half and sprinkle with everything bagel seasoning or drizzle with a little olive oil and cracked black pepper for a savory bite. Paired with fresh veggies or a piece of crusty bread, they make a satisfying mini meal.
Store unpeeled eggs in the refrigerator in a covered container for up to one week. Once peeled, keep them in an airtight container with a damp paper towel to prevent drying out; they’re best eaten within 3-4 days.
To reheat peeled eggs, place them in warm water for a few minutes—microwaving tends to make them rubbery. Also, flavors develop nicely if you let peeled eggs sit overnight in the fridge, especially if you season them ahead of time.
Nutritional Information & Benefits
Each large hard boiled egg contains approximately 70 calories, 6 grams of high-quality protein, 5 grams of fat, and just under 1 gram of carbohydrates. They are a great source of vitamins like B12 and D, essential minerals such as selenium and choline, which support brain health and metabolism.
These eggs are naturally gluten-free, low-carb, and suitable for many diets including paleo and keto. Be mindful if you have an egg allergy, of course.
Personally, I appreciate how these eggs provide a quick, nutrient-dense snack that keeps me energized without a sugar crash. Plus, the protein helps me stay full through busy mornings or afternoon slumps.
Conclusion
If you’re looking for a straightforward, hands-off way to make perfect hard boiled eggs every time, this Instant Pot method is a winner. It takes the guesswork and hassle out of cooking eggs, freeing you up to focus on whatever else you need to do.
Feel free to tweak the timing or seasoning to fit your preferences—maybe you like them a bit softer, or with a hint of spice. I know I keep coming back to this recipe because it just works, reliably and easily.
Give it a try, and when you do, I’d love to hear how it went for you! Drop a comment or share your favorite egg variations—you know, those kitchen wins that make life just a little tastier. Happy cooking!
FAQs about Perfect Hands-Off Instant Pot Hard Boiled Eggs
How long do I cook hard boiled eggs in the Instant Pot?
Cook on high pressure for 5 minutes, then let the pressure release naturally for 5 minutes before quick releasing the remaining steam.
Can I cook more than a dozen eggs at once?
You can fit up to 18 eggs depending on your Instant Pot size, but arrange them in a single layer on the rack for even cooking.
Why do some eggs crack during cooking?
Eggs can crack if they touch the water directly or if placed too tightly. Use the rack to keep eggs above water and avoid stacking them.
How do I make peeling easier?
Cool eggs quickly in an ice bath right after cooking and peel under running water. Older eggs also peel more easily than very fresh ones.
Can I use this method for soft boiled eggs?
Yes! Reduce the cooking time to 3 minutes with the same natural release and ice bath to get a soft, jammy yolk.
Pin This Recipe!
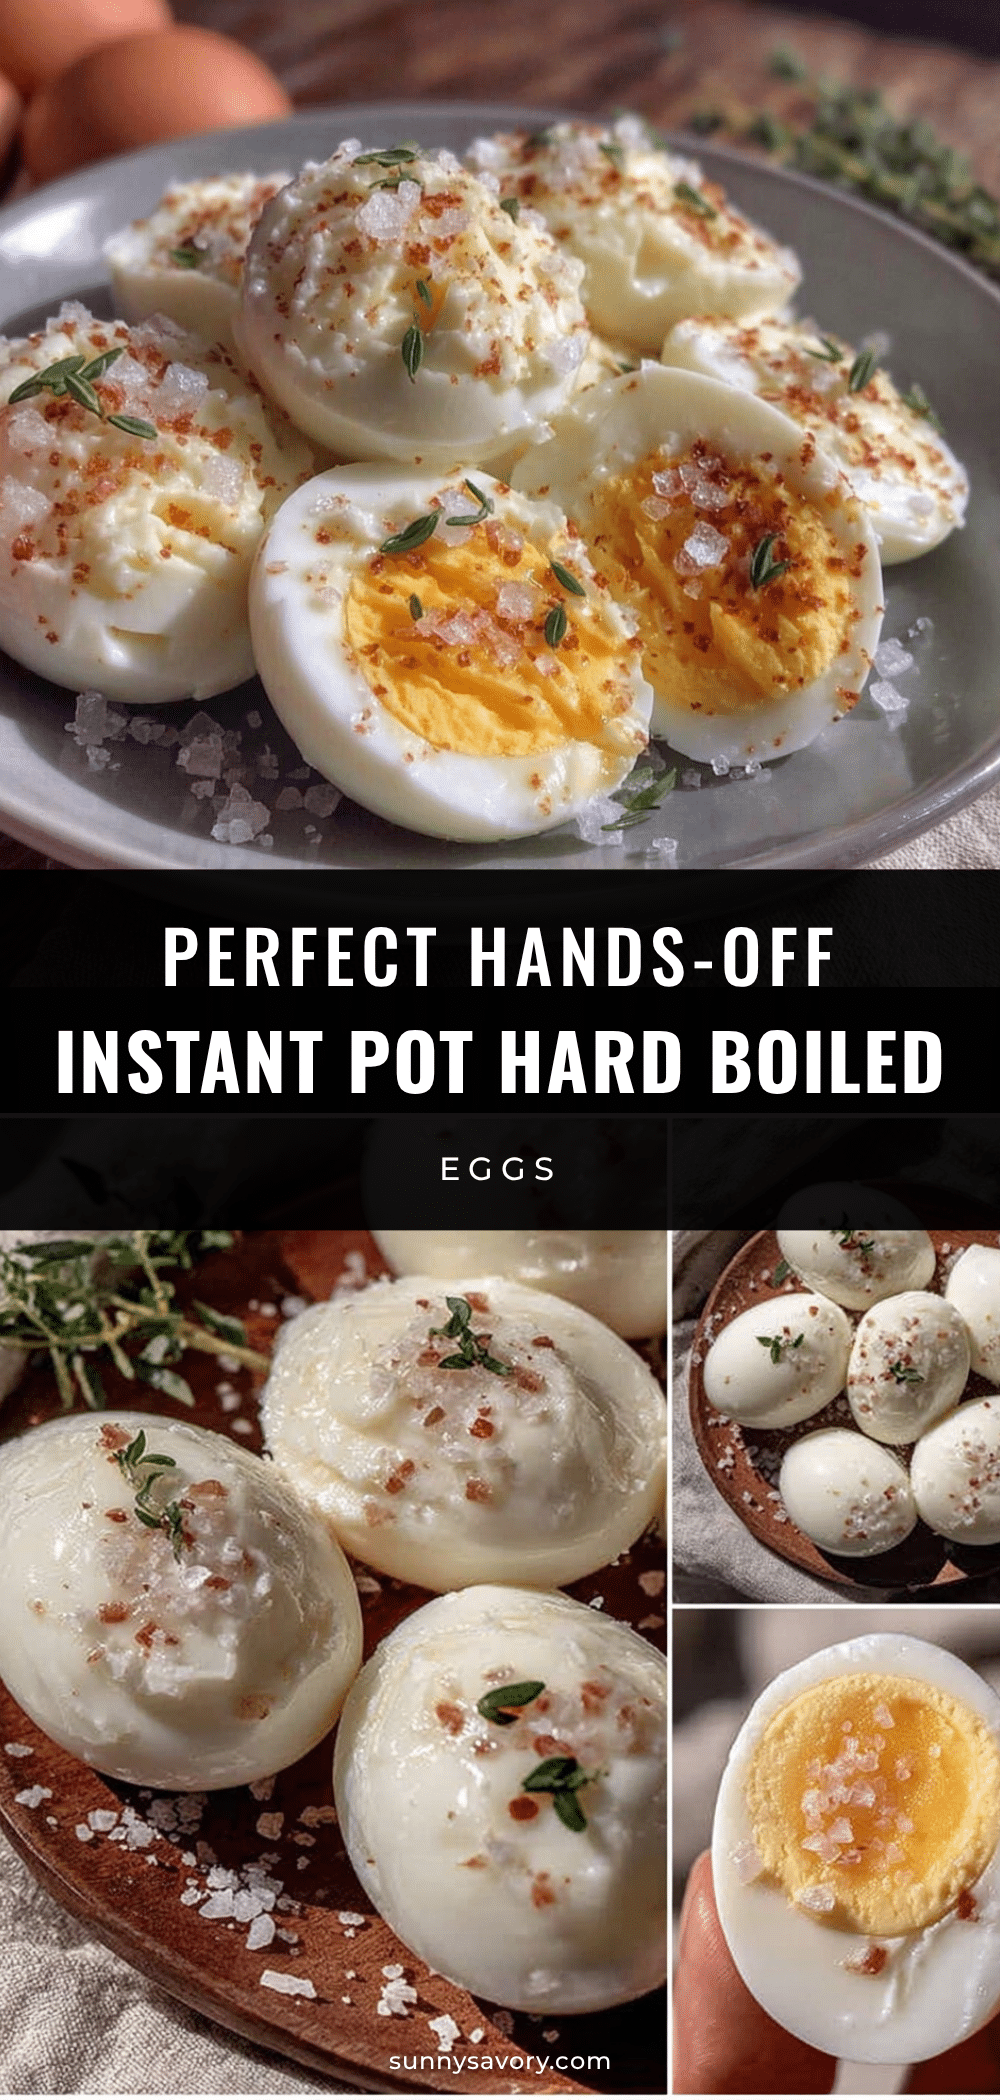
Perfect Hands-Off Instant Pot Hard Boiled Eggs

A fuss-free, hands-off method to make perfectly cooked hard boiled eggs using an Instant Pot, delivering smooth, tender eggs with easy peeling every time.
- Prep Time: 2 minutes
- Cook Time: 10 minutes
- Total Time: 15 minutes
- Yield: 12 servings 1x
- Category: Breakfast, Snack
- Cuisine: American
Ingredients
- Large eggs (fresh or a few days old)
- 1 cup (240 ml) water
- Ice cubes or cold water (for ice bath, optional)
- 1 teaspoon white vinegar (optional, for easier peeling)
Instructions
- Pour 1 cup (240 ml) of water into the Instant Pot inner pot and place the steaming rack or trivet inside.
- Carefully place up to a dozen large eggs on the rack in a single layer, avoiding stacking.
- Close the lid and set the valve to the sealing position. Select the ‘Pressure Cook’ or ‘Manual’ setting on high pressure and set the timer for 5 minutes.
- When cooking ends, let the pressure release naturally for 5 minutes, then carefully switch the valve to venting to release remaining steam.
- Quickly transfer the eggs to a large bowl filled with ice water and let sit for at least 5 minutes to stop cooking and ease peeling.
Notes
Use slightly older eggs for easier peeling. Do not skip the ice bath to prevent overcooking. Adjust cooking time for egg size: add 1 minute for jumbo/extra-large eggs, subtract 30 seconds for medium eggs. Natural pressure release for 5 minutes is crucial to avoid cracking.
Nutrition
- Serving Size: 1 large hard boiled
- Calories: 70
- Sugar: 0.6
- Sodium: 70
- Fat: 5
- Saturated Fat: 1.5
- Carbohydrates: 0.6
- Protein: 6
Keywords: Instant Pot, hard boiled eggs, easy eggs, hands-off cooking, meal prep, pressure cooker eggs, quick breakfast