Love this? Save it for later!
Share the inspiration with your friends
Last Tuesday, I was staring into the fridge after a long day, wondering what on earth I could make with a pound of ground beef, half an onion, and some shredded cheese. My neighbor, an older woman named Clara who gardens like a champion and never lets you leave her house without a jar of something, watched me from her porch as I was getting my mail. She didn’t say anything at first. Then she just pointed at my bag of groceries and said, “You got rice in there?” I nodded, confused. She smiled and said, “Then you got dinner. Brown the meat, throw in the rice, and don’t you dare skip the cheese at the end.” That was it. No formal recipe, no written list. Just a simple, confident instruction that felt more like a secret being passed along than a cooking lesson.
Honestly, I almost forgot about it. But the next night, I was tired, hungry, and had exactly zero energy for a complicated meal. So I tried it. I grabbed my biggest skillet, browned the beef, tossed in some pantry staples, and let it all simmer together. The smell that filled my kitchen was ridiculous—comforting, savory, and just a little bit cheesy. I mean, I didn’t even have to chop much. Clara’s method was pure genius in its simplicity. And the best part? That one pan. No piles of dishes, no multiple pots to scrub. Just dinner, done, in under thirty minutes.
You know that feeling when you take the first bite of something and you just know it’s going to become a regular in your rotation? That was this dish for me. It’s not fancy. It doesn’t need to be. The ground beef gets perfectly browned, the rice soaks up all that flavor, and the cheese melts into every single bite. It’s the kind of meal that makes you feel like you’ve got your life together, even when you’re just barely holding on. I’ve made it at least once a week since Clara shared her wisdom, and it always hits the spot. This is the recipe I keep coming back to, and I think you will too.
Why You’ll Love This Recipe
Let me tell you why this one-pan wonder has earned a permanent spot in my weekly meal plan. It’s not just about the taste, though that’s a huge part of it. It’s about how easy it is to pull off, even on your most chaotic days.
- Quick & Easy: From start to finish, this meal comes together in about 30 minutes. Perfect for those nights when you need dinner on the table fast.
- Simple Ingredients: You likely have most of these ingredients in your pantry and fridge right now. No fancy trips to a specialty store required.
- Perfect for Busy Weeknights: This is the ultimate weeknight warrior. It’s hearty, filling, and requires minimal effort.
- Crowd-Pleaser: Kids love the cheesy, savory flavor, and adults appreciate how satisfying it is. It’s a guaranteed hit with everyone.
- Unbelievably Delicious: The combination of seasoned ground beef, tender rice, and melted cheese is pure comfort food magic. It’s the kind of meal that makes you close your eyes after the first bite.
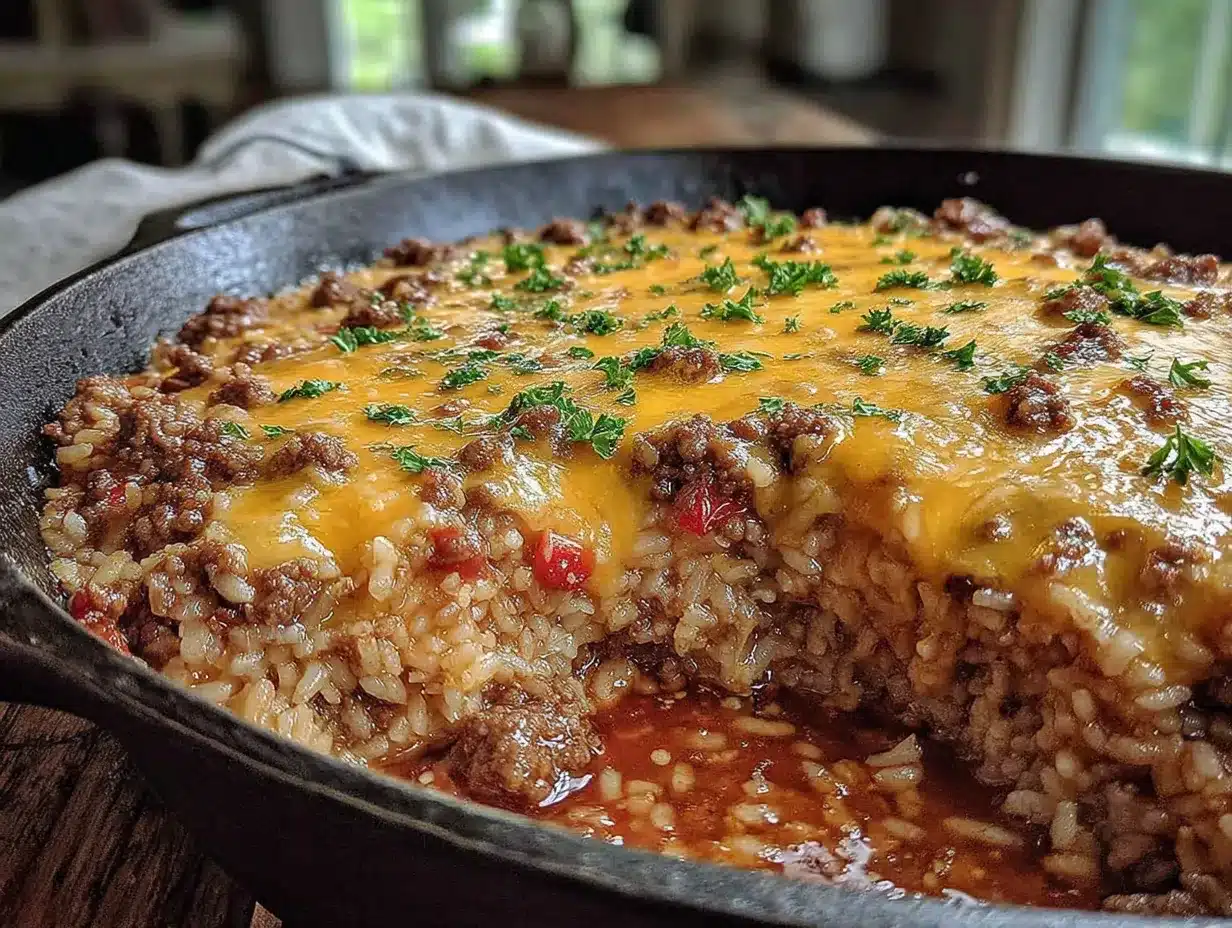
What makes this recipe different from the rest? For one, it’s a true one-pan meal. No pre-cooking the rice separately, no draining excess fat into another bowl. Everything happens in that single skillet, which means less cleanup and more flavor. The rice cooks directly in the broth, absorbing all the savory goodness from the beef and seasonings. And the cheese? It’s not just a garnish. It’s stirred in at the end to create a creamy, cohesive dish that feels way more indulgent than it actually is.
This recipe isn’t just good—it’s the kind that makes you feel like you’ve accomplished something. It’s comfort food reimagined: quicker, simpler, but with the same soul-soothing satisfaction. Perfect for impressing your family on a Tuesday night or turning a simple meal into something memorable without any stress.
What Ingredients You Will Need
This recipe uses simple, wholesome ingredients to deliver bold flavor and satisfying texture without the fuss. Most of these are pantry staples, making it an ideal last-minute dinner solution.
For the Base
- 1 lb ground beef (80/20 works best for flavor, but lean ground beef is fine too)
- 1 tablespoon olive oil (or any neutral cooking oil)
- 1 medium yellow onion, diced (about 1 cup)
- 3 cloves garlic, minced (fresh is best, but jarred minced garlic works in a pinch)
For the Rice and Broth
- 1 cup long-grain white rice, uncooked (rinsed well to remove excess starch)
- 2 cups beef broth (low-sodium recommended so you can control the salt)
- 1 can (14.5 oz) diced tomatoes, undrained (fire-roasted adds a nice smoky flavor)
- 1 teaspoon paprika (smoked paprika is a game-changer here)
- 1/2 teaspoon garlic powder
- 1/2 teaspoon onion powder
- 1/2 teaspoon salt (or to taste)
- 1/4 teaspoon black pepper
For the Cheesy Finish
- 1 1/2 cups shredded cheddar cheese (sharp cheddar gives the best flavor, but a Mexican blend works great too)
- 1/4 cup chopped fresh parsley (optional, for garnish)
Ingredient Tips: I personally prefer using 85/15 ground beef for this recipe—it has enough fat to keep the rice flavorful without being greasy. If you’re using a leaner blend like 93/7, add an extra tablespoon of oil to prevent sticking. For the broth, I recommend Swanson’s low-sodium beef broth for its consistent flavor. And for the cheese, please shred it yourself from a block if you have the time. Pre-shredded cheese often contains anti-caking agents that prevent it from melting smoothly.
Substitution Guidance: Need a gluten-free option? Just ensure your beef broth is certified gluten-free. Want to swap the ground beef? Ground turkey or ground chicken work beautifully here. For a vegetarian version, use plant-based ground “meat” and vegetable broth. You can also swap the cheddar for Monterey Jack, pepper jack for a kick, or a dairy-free cheese alternative if needed.
Equipment Needed
Here’s what you’ll need to make this recipe a success. The beauty of this dish is that it really only requires one main piece of equipment.
- Large, deep skillet or Dutch oven (12-inch recommended): This is your workhorse. A skillet with straight sides (about 2-3 inches deep) is ideal for holding all the ingredients and allowing the rice to cook without spilling over. I use my Lodge 12-inch cast iron skillet for this—it heats evenly and gives the beef a beautiful sear. If you don’t have a deep skillet, a large pot or Dutch oven works perfectly too.
- Wooden spoon or spatula: For breaking up the ground beef and stirring everything together. A silicone spatula is also great for scraping up any browned bits from the bottom of the pan.
- Measuring cups and spoons: For accurate ingredient portions.
- Sharp knife and cutting board: For dicing the onion and mincing the garlic.
- Lid that fits your skillet: This is crucial. You need a tight-fitting lid to trap the steam and cook the rice properly. If your skillet doesn’t have a lid, a sheet of aluminum foil crimped tightly around the edges works as a great substitute.
Budget-Friendly Tip: You don’t need a fancy, expensive skillet for this recipe. A basic non-stick skillet with a lid from any grocery store will work just fine. Just make sure it’s deep enough to hold everything without overflowing.
Preparation Method
Alright, let’s get cooking! This method is straightforward, but I’ve included some personal tips and sensory cues so you know exactly what to look for at each stage.
- Prep your ingredients first. Dice the onion, mince the garlic, and rinse the rice in a fine-mesh strainer under cold water until the water runs clear. This removes excess starch and prevents the rice from becoming gummy.
- Heat your skillet over medium-high heat. Add 1 tablespoon of olive oil and let it shimmer for about 30 seconds. Add the ground beef and break it apart with your wooden spoon. Cook for 5-7 minutes, stirring occasionally, until the beef is browned and no longer pink. Don’t rush this step—a good sear adds tons of flavor.
- Add the diced onion to the skillet with the beef. Cook for 3-4 minutes, stirring frequently, until the onion is soft and translucent. You should see the onion start to sweat and become fragrant.
- Stir in the minced garlic, paprika, garlic powder, onion powder, salt, and pepper. Cook for 30 seconds to 1 minute, stirring constantly, until the garlic is fragrant but not burned. Your kitchen should smell amazing at this point.
- Pour in the beef broth and the undrained diced tomatoes. Use your spoon to scrape up any browned bits from the bottom of the pan—that’s pure flavor. Bring the mixture to a gentle boil.
- Stir in the rinsed rice. Give everything a good stir to combine. Bring the mixture back to a boil, then reduce the heat to low. Cover the skillet with a tight-fitting lid.
- Let it simmer undisturbed for 18-20 minutes. Do not lift the lid during this time—you need that steam to cook the rice properly. Set a timer so you don’t forget.
- After 18 minutes, carefully remove the lid (steam will escape). Check the rice—it should be tender and have absorbed most of the liquid. If it’s still a bit crunchy, add 2-3 tablespoons of water or broth, re-cover, and cook for another 3-5 minutes.
- Remove the skillet from the heat. Sprinkle the shredded cheddar cheese evenly over the top of the rice mixture. Do not stir it in yet. Cover the skillet again and let it sit for 2-3 minutes. The residual heat will melt the cheese into a glorious, gooey blanket.
- After 2-3 minutes, remove the lid and stir the melted cheese into the rice until it’s evenly distributed. The dish should look creamy and cohesive. Taste and adjust salt and pepper if needed.
- Garnish with fresh parsley if desired, and serve immediately.
Personal Tip: I once forgot to rinse the rice, and the dish turned out a bit stickier than usual. It was still delicious, but rinsing really does make a difference in the final texture. Don’t skip it!
Cooking Tips & Techniques
Over the many times I’ve made this dish, I’ve learned a few things that make the process smoother and the results even better. Here are my best tips.
Don’t Overcrowd the Pan: When browning the ground beef, make sure it’s in a single layer. If you pile it up, it will steam instead of sear, and you’ll miss out on that deep, savory flavor. If your skillet isn’t large enough, cook the beef in two batches.
Toast the Rice (Optional but Amazing): For an extra layer of nutty flavor, try toasting the rice in the skillet for 1-2 minutes before adding the broth. Just stir it into the beef and onion mixture, let it cook for a minute, then proceed with the liquid. It adds a subtle complexity that elevates the whole dish.
Watch the Heat: Once you add the broth and rice and bring it to a boil, reduce the heat to a gentle simmer. A rolling boil will cook the rice unevenly and may cause the liquid to evaporate too quickly, leaving you with undercooked rice.
My Biggest Failure: The first time I made this, I used a non-stick skillet that was too small. The mixture bubbled up and overflowed, making a mess on my stovetop. I also lifted the lid twice to “check on it,” which released all the steam and left me with crunchy rice. Lesson learned: use a deep enough pan and resist the urge to peek!
Multitasking Strategy: While the rice is simmering (that 18-20 minute window), use that time to clean up your cutting board, wash the knife, and set the table. You’ll be amazed at how much you can get done while dinner cooks itself.
Variations & Adaptations
This recipe is incredibly versatile. Here are some ways you can make it your own.
- Spicy Southwest Version: Add 1 teaspoon of chili powder and 1/2 teaspoon of cumin along with the other spices. Use pepper jack cheese instead of cheddar, and stir in a can of drained black beans and a cup of frozen corn at the same time you add the rice. Top with sliced jalapeños for extra heat.
- Vegetable-Packed Version: Boost the nutrition by adding finely diced carrots, bell peppers, or zucchini. Sauté them with the onion before adding the garlic. You can also stir in a handful of fresh spinach at the very end, just before adding the cheese, and let it wilt from the residual heat.
- Low-Carb / Keto Adaptation: Swap the white rice for cauliflower rice. After browning the beef and sautéing the aromatics, stir in 4 cups of frozen cauliflower rice and 1/2 cup of beef broth. Cook covered for 5-7 minutes, then top with cheese. It’s a totally different dish, but still incredibly satisfying.
- Cheesy Taco Rice: Use taco seasoning instead of the individual spices. Stir in a can of drained corn and a can of drained black beans. Top with a dollop of sour cream and some fresh salsa before serving.
Personal Favorite Variation: I once made a “Loaded Baked Potato” version by adding cooked, crumbled bacon and a handful of sliced green onions at the end. It was absolutely ridiculous in the best way possible.
Serving & Storage Suggestions
This dish is best served hot, right after the cheese has melted. Here’s how to make the most of it.
Serving Temperature and Presentation: Serve it straight from the skillet for a rustic, family-style meal. Spoon it into bowls and top with a little extra shredded cheese, a sprinkle of fresh parsley, and a crack of black pepper. It pairs beautifully with a simple side salad dressed with a light vinaigrette to cut through the richness. Some steamed green beans or roasted broccoli also make excellent companions.
Complementary Dishes: A side of warm tortilla chips with salsa or guacamole is always a hit. For a heartier meal, serve it with a side of refried beans or a crusty piece of bread to soak up any extra cheesy goodness.
Storage Instructions: Store any leftovers in an airtight container in the refrigerator for up to 4 days. The flavors actually meld together and become even better the next day.
Reheating Methods: The best way to reheat this dish is in a skillet over medium-low heat. Add a splash of beef broth or water (about 1-2 tablespoons per serving) to help loosen the rice, and stir occasionally until heated through. You can also microwave individual portions in 30-second intervals, stirring in between. The texture won’t be quite as good as fresh, but it’s still delicious.
Freezer Instructions: This recipe freezes wonderfully. Let it cool completely, then transfer it to a freezer-safe container or zip-top bag. It will keep for up to 3 months. To thaw, place it in the refrigerator overnight. Reheat as directed above.
Flavor Development: As with many one-pot dishes, the flavors deepen and become more complex after a day in the fridge. If you can, make it a day ahead and reheat it for dinner. You won’t regret it.
Nutritional Information & Benefits
While this is definitely a comfort food, it does offer some nutritional benefits worth noting.
Estimated Nutritional Values (per serving, based on 6 servings):
- Calories: ~450
- Protein: ~28g
- Fat: ~18g
- Carbohydrates: ~45g
- Fiber: ~2g
- Iron: ~20% of the Daily Value
- Calcium: ~25% of the Daily Value (thanks to the cheese)
Health Benefits of Key Ingredients: Ground beef is an excellent source of high-quality protein, iron, and B vitamins, which are essential for energy production. The onions and garlic provide prebiotic fiber that supports gut health. Tomatoes are rich in lycopene, a powerful antioxidant. And yes, even the cheese contributes calcium and protein.
Dietary Considerations: This recipe is naturally gluten-free (just be sure to use certified gluten-free broth). It can be made dairy-free by using a plant-based cheese alternative and ensuring your broth is dairy-free. For a lower-carb option, see the cauliflower rice variation above.
Potential Allergens: This recipe contains dairy (cheese). It does not contain nuts, eggs, or soy, but always check your ingredient labels if you have specific allergies.
Personal Wellness Perspective: I believe in balance. This meal is hearty, satisfying, and full of flavor. It’s not a “health food,” but it’s made with real, whole ingredients. Pair it with a generous side of vegetables, and you’ve got a perfectly balanced plate that nourishes both body and soul.
Conclusion
Honestly, this Easy One-Pan Cheesy Ground Beef Rice has become my go-to for so many reasons. It’s the recipe I turn to when I’m short on time, low on energy, or just craving something deeply comforting. The fact that it all comes together in one skillet, with minimal cleanup, is just the cherry on top. It’s proof that you don’t need a dozen ingredients or complicated techniques to create a meal that feels special.
I really hope you give this recipe a try. Make it your own—add your favorite spices, throw in whatever vegetables you have on hand, or pile on extra cheese. That’s the beauty of a dish like this. It’s forgiving, adaptable, and always delicious.
I’d love to hear how it turns out for you! Drop a comment below and let me know if you tried any fun variations. Did you add a little heat? Did your kids go back for seconds? Share your experience—it makes my day to hear from you. And if you loved it, please share this recipe with a friend who needs a quick and easy dinner win. Happy cooking!
Frequently Asked Questions
Can I use brown rice instead of white rice?
Yes, you can, but you’ll need to adjust the cooking time and liquid. Brown rice typically requires about 40-45 minutes to cook and needs about 2 1/2 cups of liquid per cup of rice. Increase the beef broth to 3 cups and simmer covered for 40-45 minutes, checking for doneness. You may need to add a little extra broth if it dries out before the rice is tender.
Can I make this in an Instant Pot or pressure cooker?
Absolutely! Use the sauté function to brown the beef and cook the aromatics. Then add the broth, tomatoes, and rice. Pressure cook on high for 5 minutes with a natural release of 10 minutes. Stir in the cheese after releasing the pressure. You may need to reduce the broth to 1 1/2 cups since less liquid evaporates in a pressure cooker.
How can I make this recipe dairy-free?
Simply swap the shredded cheddar for a good-quality dairy-free cheese alternative. Look for one that melts well, like brands based on cashews or coconut oil. You can also omit the cheese entirely and add a tablespoon of nutritional yeast for a cheesy flavor without the dairy. The dish will still be delicious!
Can I freeze leftovers?
Yes, this recipe freezes beautifully. Let it cool completely, then transfer it to a freezer-safe container or zip-top bag. It will keep for up to 3 months. Thaw overnight in the refrigerator and reheat in a skillet with a splash of broth to restore the creamy texture.
Why is my rice still crunchy after 20 minutes?
This usually happens for one of three reasons: the heat was too high and the liquid evaporated too quickly, the lid wasn’t tight enough and steam escaped, or the rice wasn’t rinsed before cooking. If your rice is undercooked, add 2-3 tablespoons of broth or water, re-cover tightly, and cook on low for another 5 minutes. Check again and repeat if needed.
Pin This Recipe!

Easy One-Pan Cheesy Ground Beef Rice Recipe

A quick and easy one-pan meal featuring seasoned ground beef, tender rice, and melted cheddar cheese. Perfect for busy weeknights, this comforting dish comes together in about 30 minutes with minimal cleanup.
- Prep Time: 10 minutes
- Cook Time: 25 minutes
- Total Time: 35 minutes
- Yield: 6 servings 1x
- Category: Main Course
- Cuisine: American
Ingredients
- 1 lb ground beef (80/20 or 85/15 recommended)
- 1 tablespoon olive oil
- 1 medium yellow onion, diced (about 1 cup)
- 3 cloves garlic, minced
- 1 cup long-grain white rice, uncooked and rinsed
- 2 cups low-sodium beef broth
- 1 can (14.5 oz) diced tomatoes, undrained (fire-roasted preferred)
- 1 teaspoon paprika (smoked paprika recommended)
- 1/2 teaspoon garlic powder
- 1/2 teaspoon onion powder
- 1/2 teaspoon salt (or to taste)
- 1/4 teaspoon black pepper
- 1 1/2 cups shredded cheddar cheese (sharp cheddar recommended)
- 1/4 cup chopped fresh parsley (optional, for garnish)
Instructions
- Prep your ingredients: dice the onion, mince the garlic, and rinse the rice in a fine-mesh strainer under cold water until the water runs clear.
- Heat a large, deep skillet or Dutch oven over medium-high heat. Add 1 tablespoon olive oil and let it shimmer for about 30 seconds.
- Add the ground beef and break it apart with a wooden spoon. Cook for 5-7 minutes, stirring occasionally, until browned and no longer pink.
- Add the diced onion to the skillet. Cook for 3-4 minutes, stirring frequently, until soft and translucent.
- Stir in the minced garlic, paprika, garlic powder, onion powder, salt, and pepper. Cook for 30 seconds to 1 minute, stirring constantly, until fragrant.
- Pour in the beef broth and undrained diced tomatoes. Use your spoon to scrape up any browned bits from the bottom of the pan. Bring the mixture to a gentle boil.
- Stir in the rinsed rice. Bring back to a boil, then reduce heat to low. Cover the skillet with a tight-fitting lid.
- Let it simmer undisturbed for 18-20 minutes. Do not lift the lid during this time.
- After 18 minutes, carefully remove the lid. Check the rice—it should be tender and have absorbed most of the liquid. If still crunchy, add 2-3 tablespoons of water or broth, re-cover, and cook for another 3-5 minutes.
- Remove the skillet from the heat. Sprinkle the shredded cheddar cheese evenly over the top. Do not stir. Cover and let sit for 2-3 minutes until the cheese melts.
- Remove the lid and stir the melted cheese into the rice until evenly distributed. Taste and adjust salt and pepper if needed.
- Garnish with fresh parsley if desired, and serve immediately.
Notes
For best results, rinse the rice to remove excess starch. Use a deep enough pan to prevent overflow. Resist the urge to lift the lid while the rice simmers. For extra flavor, toast the rice in the skillet for 1-2 minutes before adding the broth. Leftovers can be stored in an airtight container in the refrigerator for up to 4 days or frozen for up to 3 months.
Nutrition
- Serving Size: 1 serving (about 1.5
- Calories: 450
- Sugar: 4
- Sodium: 680
- Fat: 18
- Saturated Fat: 8
- Carbohydrates: 45
- Fiber: 2
- Protein: 28
Keywords: one-pan meal, ground beef, cheesy rice, easy dinner, weeknight dinner, comfort food, 30-minute meal



