Love this? Save it for later!
Share the inspiration with your friends
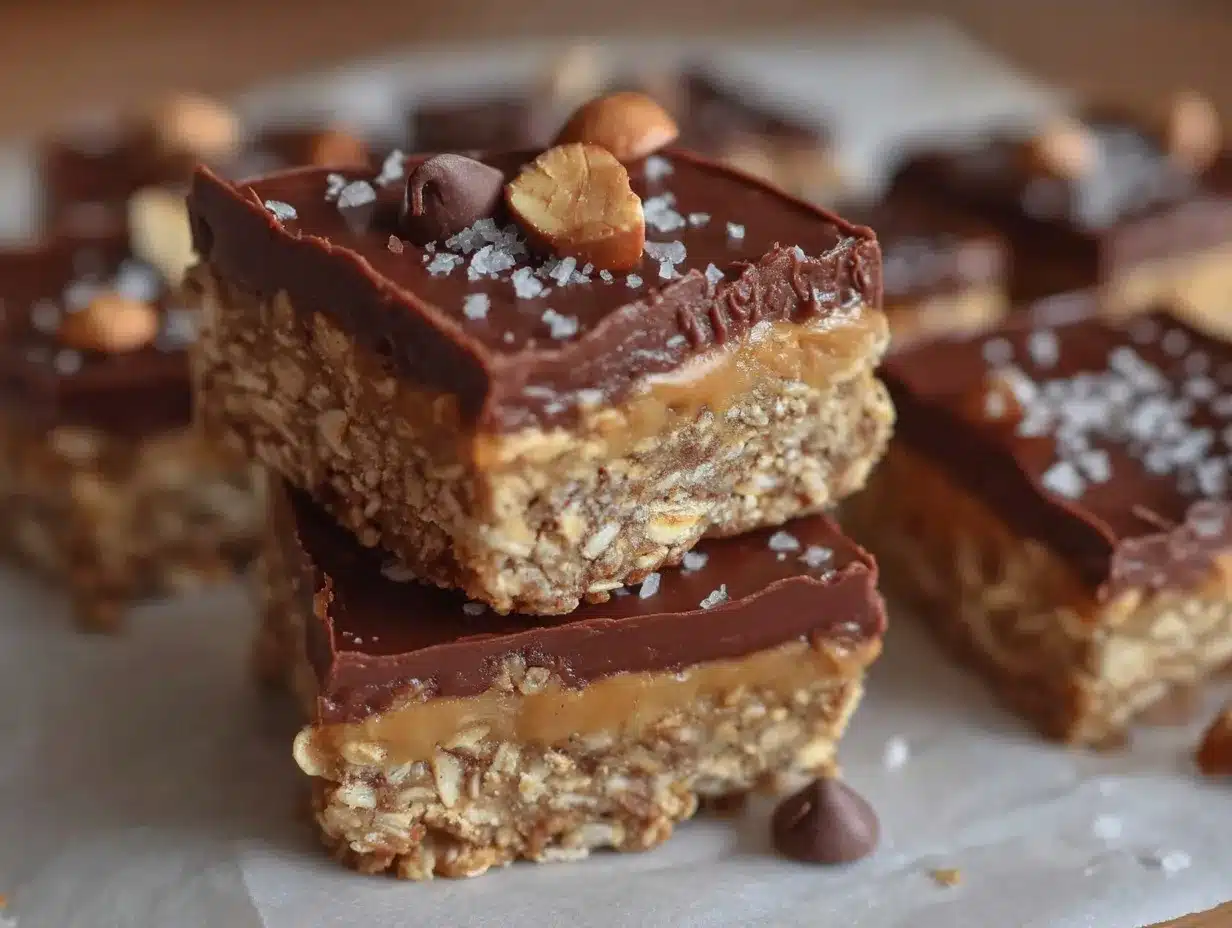
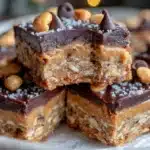
“You won’t believe how simple these are,” my coworker whispered across the break room table, sliding a tray of chocolate peanut butter oat bars toward me. It was a random Thursday afternoon, and honestly, I wasn’t expecting much. But one bite of these Easy No-Bake Chocolate Peanut Butter Oat Bars changed everything. The perfect balance of creamy peanut butter, rich chocolate, and hearty oats—without firing up an oven—made them the instant hit of our office treats.
Honestly, the magic started when I forgot to bring my usual snack to work. There I was, rummaging through my desk drawer, and that’s when I found the handwritten note from my friend Lisa with this recipe. She’d scribbled it down during our last coffee catch-up, swearing it was her “go-to” for quick, crowd-pleasing snacks. I gave it a shot, whipped these bars up in minutes, and brought them to the office the next day. You know that feeling when everyone suddenly wants your recipe? Yep, that was me.
Maybe you’ve been there—trying to find a treat that’s both satisfying and fuss-free, perfect for sharing with colleagues who somehow manage to be both picky and hungry at the same time. These bars fit the bill like nothing else. Plus, no baking means no heat, no waiting, and no excuse to avoid the kitchen. Let me tell you, this recipe stuck with me because it’s that easy and that good. Whenever I need an office treat that won’t disappoint, this is my secret weapon.
Why You’ll Love This Recipe
After testing this recipe multiple times (and yes, sampling way too many bars), I can confidently say it’s a keeper for anyone who loves hassle-free desserts with big flavor. These Easy No-Bake Chocolate Peanut Butter Oat Bars have so much going for them:
- Quick & Easy: Ready in under 20 minutes, perfect for last-minute office snacks or when you forget to prep ahead.
- Simple Ingredients: No fancy grocery store trips — just pantry basics like oats, peanut butter, honey, and chocolate chips.
- Perfect for Office Treats: They travel well, don’t melt easily, and are great for sharing with coworkers (trust me, I’ve tested this).
- Crowd-Pleaser: The classic combo of chocolate and peanut butter always wins over kids and adults alike.
- Unbelievably Delicious: Chewy oats mixed with creamy peanut butter and a chocolate drizzle create a texture and flavor that keeps you coming back.
What sets this recipe apart? It’s the no-bake simplicity that can often lead to dry or crumbly bars—but not here. The secret is in balancing the wet and dry ingredients, and the way the chocolate is melted and layered on top adds just the right touch of indulgence. Honestly, it’s like comfort food without the stress or the oven heat. If you want to impress your office crew without sweating it out, this recipe is your new best friend.
What Ingredients You Will Need
This recipe uses simple, wholesome ingredients to deliver bold flavors and a satisfying texture without the fuss. Most of these are pantry staples, and you can easily swap a few if needed.
- Old-Fashioned Rolled Oats – 2 cups (180 grams) (provides hearty chew and structure)
- Natural Creamy Peanut Butter – 1 cup (250 grams) (look for unsweetened for better balance)
- Honey – 1/2 cup (170 grams) (acts as the natural sweetener and binder)
- Vanilla Extract – 1 teaspoon (for subtle depth of flavor)
- Salt – 1/4 teaspoon (to enhance the flavors)
- Semi-Sweet Chocolate Chips – 1 cup (180 grams) (I prefer Ghirardelli for a smooth melt)
- Coconut Oil – 2 tablespoons (30 ml) (helps the chocolate set nicely)
Ingredient tips: If you’re vegan or dairy-free, swap honey with maple syrup and use dairy-free chocolate chips. For gluten-free, make sure to use certified gluten-free oats. In warmer climates, you might want to refrigerate the bars after setting to keep them firm.
Equipment Needed
- Mixing Bowl: A medium-sized bowl for combining ingredients. Nothing fancy needed here.
- 9×9 Inch (23×23 cm) Baking Dish: I use a glass dish, but any square pan lined with parchment paper works well to easily lift the bars out.
- Microwave-Safe Bowl or Double Boiler: For melting chocolate and coconut oil smoothly. I prefer the double boiler method to avoid overheating.
- Spoon or Spatula: For stirring and spreading the mixture evenly.
- Measuring Cups and Spoons: Accuracy helps, especially for the sticky ingredients.
If you don’t have a double boiler, a heatproof bowl over a pot of simmering water is a good alternative. Also, parchment paper is your best friend here — it saves you from scrubbing the pan later and keeps your bars intact.
Preparation Method
- Prepare the Pan: Line your 9×9 inch (23×23 cm) baking dish with parchment paper, leaving some overhang on the sides for easy removal. This takes about 2 minutes.
- Mix Wet Ingredients: In your mixing bowl, combine 1 cup (250 grams) creamy peanut butter and 1/2 cup (170 grams) honey. Stir until smooth and well blended, roughly 2 minutes. Use a spatula to scrape down the sides so nothing gets wasted.
- Add Vanilla and Salt: Stir in 1 teaspoon vanilla extract and 1/4 teaspoon salt. These tiny additions make a huge flavor difference, trust me.
- Incorporate Oats: Add 2 cups (180 grams) old-fashioned rolled oats. Mix together until every oat is coated with the peanut butter and honey mixture. The mixture should be sticky but hold together—if it feels too dry, add a teaspoon of water or more honey. This step usually takes 3 to 4 minutes.
- Press the Mixture: Transfer the oat mixture to your lined pan. Use the back of a spatula or your hands (lightly greased) to press it down firmly and evenly. Getting a compact base helps keep the bars from falling apart later. This takes about 3 minutes.
- Melt the Chocolate Layer: Combine 1 cup (180 grams) semi-sweet chocolate chips and 2 tablespoons (30 ml) coconut oil in a microwave-safe bowl or double boiler. Heat in 30-second intervals, stirring in between, until fully melted and smooth. This usually takes 2 to 3 minutes.
- Spread the Chocolate: Pour the melted chocolate mixture over the pressed oat base. Smooth it out evenly with a spatula. The chocolate layer should be thin but fully cover the top. This step takes 2 minutes.
- Chill to Set: Place the pan in the refrigerator for at least 1 hour to allow the bars to firm up completely. If you’re in a hurry, 30 minutes in the freezer works too, but watch carefully to avoid freezing solid.
- Cut and Serve: Once set, lift the bars out using the parchment paper overhang. Cut into 12 equal squares with a sharp knife. For the cleanest cuts, wipe the knife between slices.
Pro tip: If your bars seem crumbly when cutting, chill them a bit longer. Also, I once forgot the vanilla extract (don’t ask how), and while still tasty, it lacked that extra oomph—so don’t skip it!
Cooking Tips & Techniques
These no-bake bars might seem straightforward, but a few tips can make all the difference:
- Use natural peanut butter with no added sugar or oils for the best flavor and texture. It’s creamier and blends beautifully with honey.
- Don’t substitute quick oats here — they’ll make the texture mushy. Old-fashioned rolled oats give the right chew and hold.
- Melt the chocolate gently to prevent it from seizing. Stir often and avoid overheating, or you’ll end up with a grainy mess.
- Press the oat mixture firmly into the pan to prevent crumbly bars. I usually press down with the bottom of a glass or measuring cup for even pressure.
- Chill long enough — patience pays off here, especially if you want clean-cut bars that hold together.
One time, I tried swapping maple syrup for honey and ended up with a slightly softer bar that held just fine but took longer to set. So if you want a firmer texture, honey is your best bet. Also, multitasking by melting chocolate while pressing the oat base saves time and keeps things moving smoothly.
Variations & Adaptations
Feel free to tweak this recipe to match your preferences or dietary needs. Here are some ideas I’ve tried or would recommend:
- Nut-Free Version: Use sunflower seed butter instead of peanut butter, and swap chocolate chips for carob chips if needed.
- Added Crunch: Stir in chopped roasted peanuts or chopped almonds for extra texture.
- Fruit Boost: Mix in dried cranberries or raisins with the oats for a sweet-tart surprise.
- Seasonal Flavors: Add a pinch of cinnamon or pumpkin pie spice in the oat mixture for fall vibes.
- Protein-Packed: Add a scoop of your favorite protein powder to the oat mixture to make these bars more filling.
Once, I swapped the semi-sweet chocolate for dark chocolate with sea salt flakes on top — totally transformed the bars into a grown-up treat. You can also experiment with different types of nut butters or sweeteners to find your perfect combo.
Serving & Storage Suggestions
These bars are best served chilled or at room temperature. The chocolate topping is firm but melts pleasantly in your mouth.
For office treats, I recommend cutting them into bite-sized squares for easy sharing. Pair them with a cup of coffee or cold brew for an afternoon pick-me-up that’s not too sweet.
Store leftovers in an airtight container in the refrigerator for up to one week. They can also be frozen for up to 3 months — just thaw in the fridge overnight to keep their texture intact.
Reheat gently by letting them sit at room temperature for 10 minutes or warming briefly in the microwave (10-15 seconds) if you want a softer bite. Over time, the flavors meld, making the bars even tastier the next day.
Nutritional Information & Benefits
Each bar (assuming 12 servings) contains approximately:
| Calories | 190 kcal |
|---|---|
| Protein | 5 g |
| Fat | 11 g |
| Carbohydrates | 18 g |
| Fiber | 3 g |
These bars offer a good balance of protein and healthy fats from peanut butter, along with complex carbs and fiber from oats. The natural sweetener (honey) keeps sugar content moderate compared to processed snacks.
If you’re watching allergens, note that these contain peanuts and may contain traces of dairy from chocolate chips. Using allergen-free substitutions can make them suitable for various diets.
Personally, I appreciate having a treat that satisfies sweet cravings while still providing some nutrition and energy—perfect for keeping me fueled through busy workdays.
Conclusion
These Easy No-Bake Chocolate Peanut Butter Oat Bars have become my go-to solution whenever I need a quick, tasty, and shareable treat. They’re simple, reliable, and never fail to impress my coworkers. Whether you’re new to no-bake recipes or a seasoned pro, this one’s worth making again and again.
Feel free to personalize the mix-ins or try different nut butters to suit your taste. I’d love to hear how you make these bars your own, so don’t hesitate to leave a comment sharing your twists or questions!
Give it a try, and I promise you’ll find yourself reaching for these bars whenever you need a little chocolate-peanut butter comfort in your day. Happy snacking!
FAQs
Can I use crunchy peanut butter for this recipe?
Yes, you can! Just be aware that crunchy peanut butter will add texture and may make the bars slightly firmer.
How long do these bars last at room temperature?
They’re best kept refrigerated; at room temperature, they may become too soft after a few hours, especially in warm weather.
Can I substitute maple syrup for honey?
Maple syrup works as a vegan alternative but may result in a softer bar that takes longer to set.
Is it necessary to use coconut oil in the chocolate layer?
Coconut oil helps the chocolate set firmly and adds shine, but you can omit it if you prefer a thicker chocolate topping.
Can I make these bars nut-free?
Yes, swap peanut butter with seed butters like sunflower seed butter and use allergen-free chocolate chips to make a nut-free version.
By the way, if you enjoy this recipe, you might find the crispy garlic chicken equally satisfying for dinner or the hearty vegetable soup perfect for cozy lunches on busy days.
Pin This Recipe!
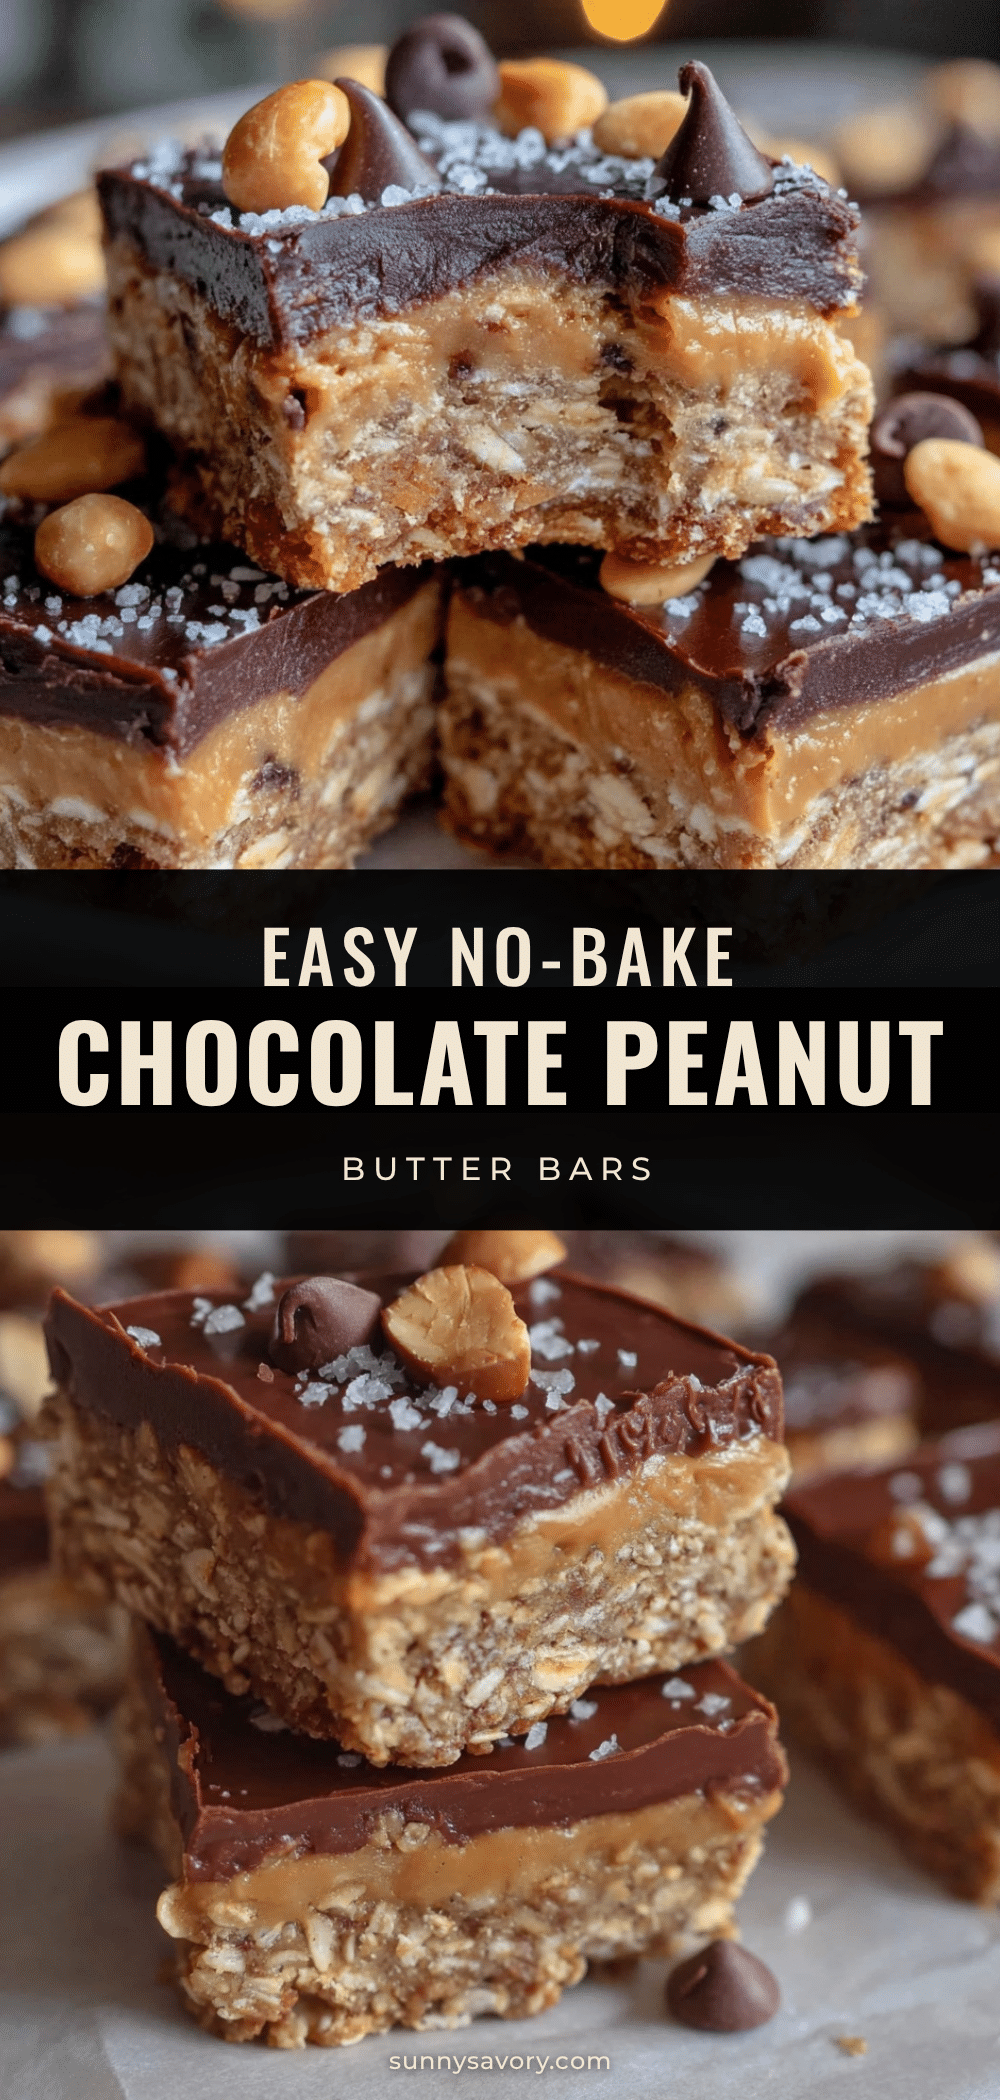
Easy No-Bake Chocolate Peanut Butter Oat Bars
These no-bake bars combine creamy peanut butter, rich chocolate, and hearty oats for a quick, fuss-free treat perfect for office snacks.
- Prep Time: 10 minutes
- Cook Time: 0 minutes
- Total Time: 1 hour 10 minutes
- Yield: 12 bars 1x
- Category: Dessert
- Cuisine: American
Ingredients
- 2 cups (180 grams) old-fashioned rolled oats
- 1 cup (250 grams) natural creamy peanut butter (unsweetened preferred)
- 1/2 cup (170 grams) honey
- 1 teaspoon vanilla extract
- 1/4 teaspoon salt
- 1 cup (180 grams) semi-sweet chocolate chips
- 2 tablespoons (30 ml) coconut oil
Instructions
- Line a 9×9 inch (23×23 cm) baking dish with parchment paper, leaving some overhang for easy removal.
- In a mixing bowl, combine peanut butter and honey. Stir until smooth and well blended.
- Add vanilla extract and salt to the mixture and stir well.
- Add rolled oats and mix until every oat is coated and the mixture is sticky but holds together. Add a teaspoon of water or more honey if too dry.
- Transfer the oat mixture to the lined pan and press down firmly and evenly using a spatula or lightly greased hands.
- Melt chocolate chips and coconut oil together in a microwave-safe bowl or double boiler, heating in 30-second intervals and stirring until smooth.
- Pour the melted chocolate over the pressed oat base and smooth it out evenly.
- Chill the pan in the refrigerator for at least 1 hour to set. Alternatively, chill in the freezer for 30 minutes but avoid freezing solid.
- Lift the bars out using the parchment paper overhang and cut into 12 equal squares. Wipe the knife between slices for clean cuts.
Notes
Use natural peanut butter with no added sugar or oils for best flavor and texture. Do not substitute quick oats as they make the bars mushy. Melt chocolate gently to avoid seizing. Press the oat mixture firmly to prevent crumbly bars. Chill long enough for clean cuts. For vegan or dairy-free, swap honey with maple syrup and use dairy-free chocolate chips. Refrigerate bars in warm climates to keep firm.
Nutrition
- Serving Size: 1 bar (1 of 12)
- Calories: 190
- Fat: 11
- Carbohydrates: 18
- Fiber: 3
- Protein: 5
Keywords: no-bake, chocolate, peanut butter, oat bars, easy dessert, office treats, quick snack