Love this? Save it for later!
Share the inspiration with your friends
“I wasn’t expecting a dessert showdown at the office potluck last Fourth of July,” I confessed to my coworker as I nervously balanced a dish in my hands. Honestly, I had thrown together this Easy No-Bake Red White and Blue Icebox Cake just minutes before heading out the door. The recipe was inspired by a late-night craving and the realization that I had zero time to bake anything fancy. You know that feeling when you want something festive but fuss-free? Yeah, this cake is exactly that.
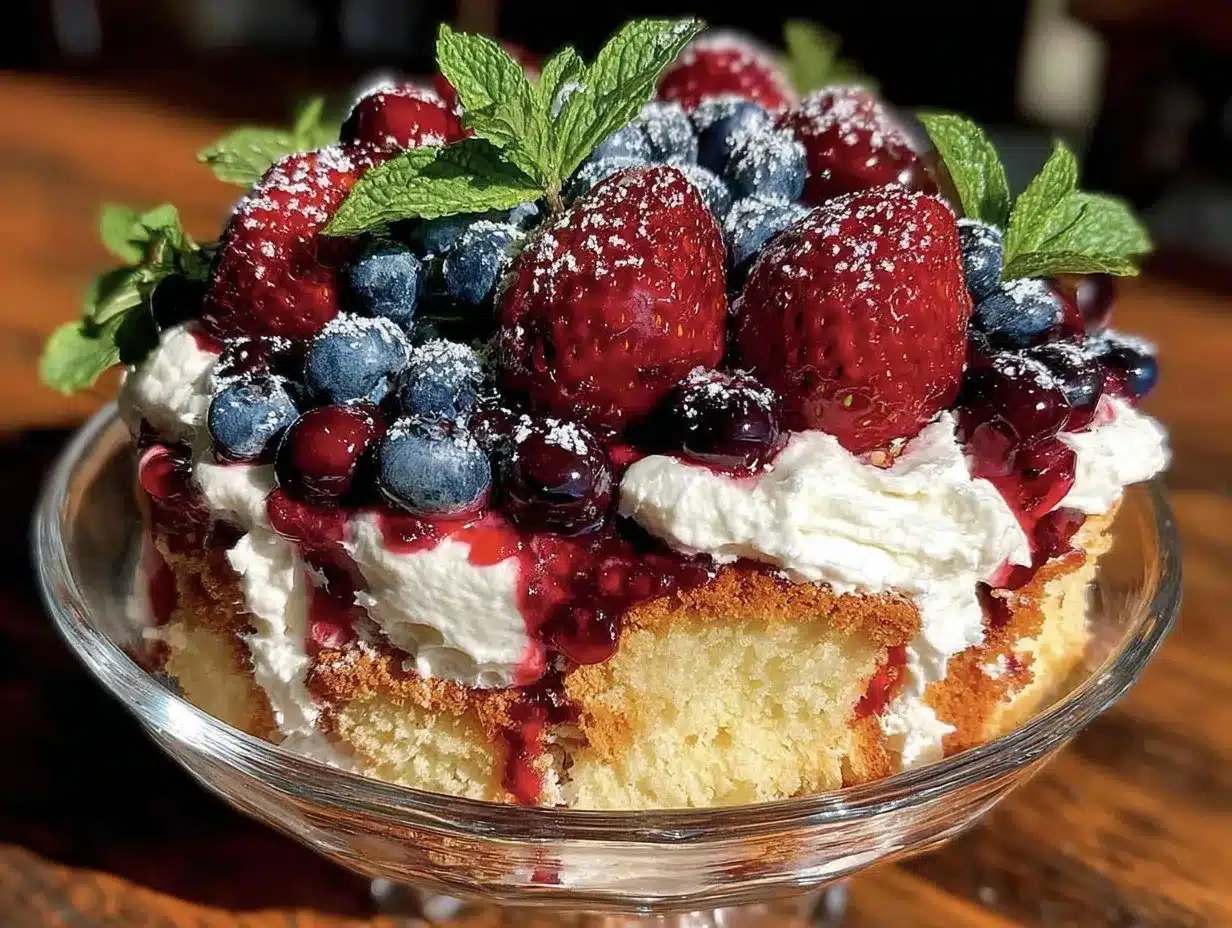
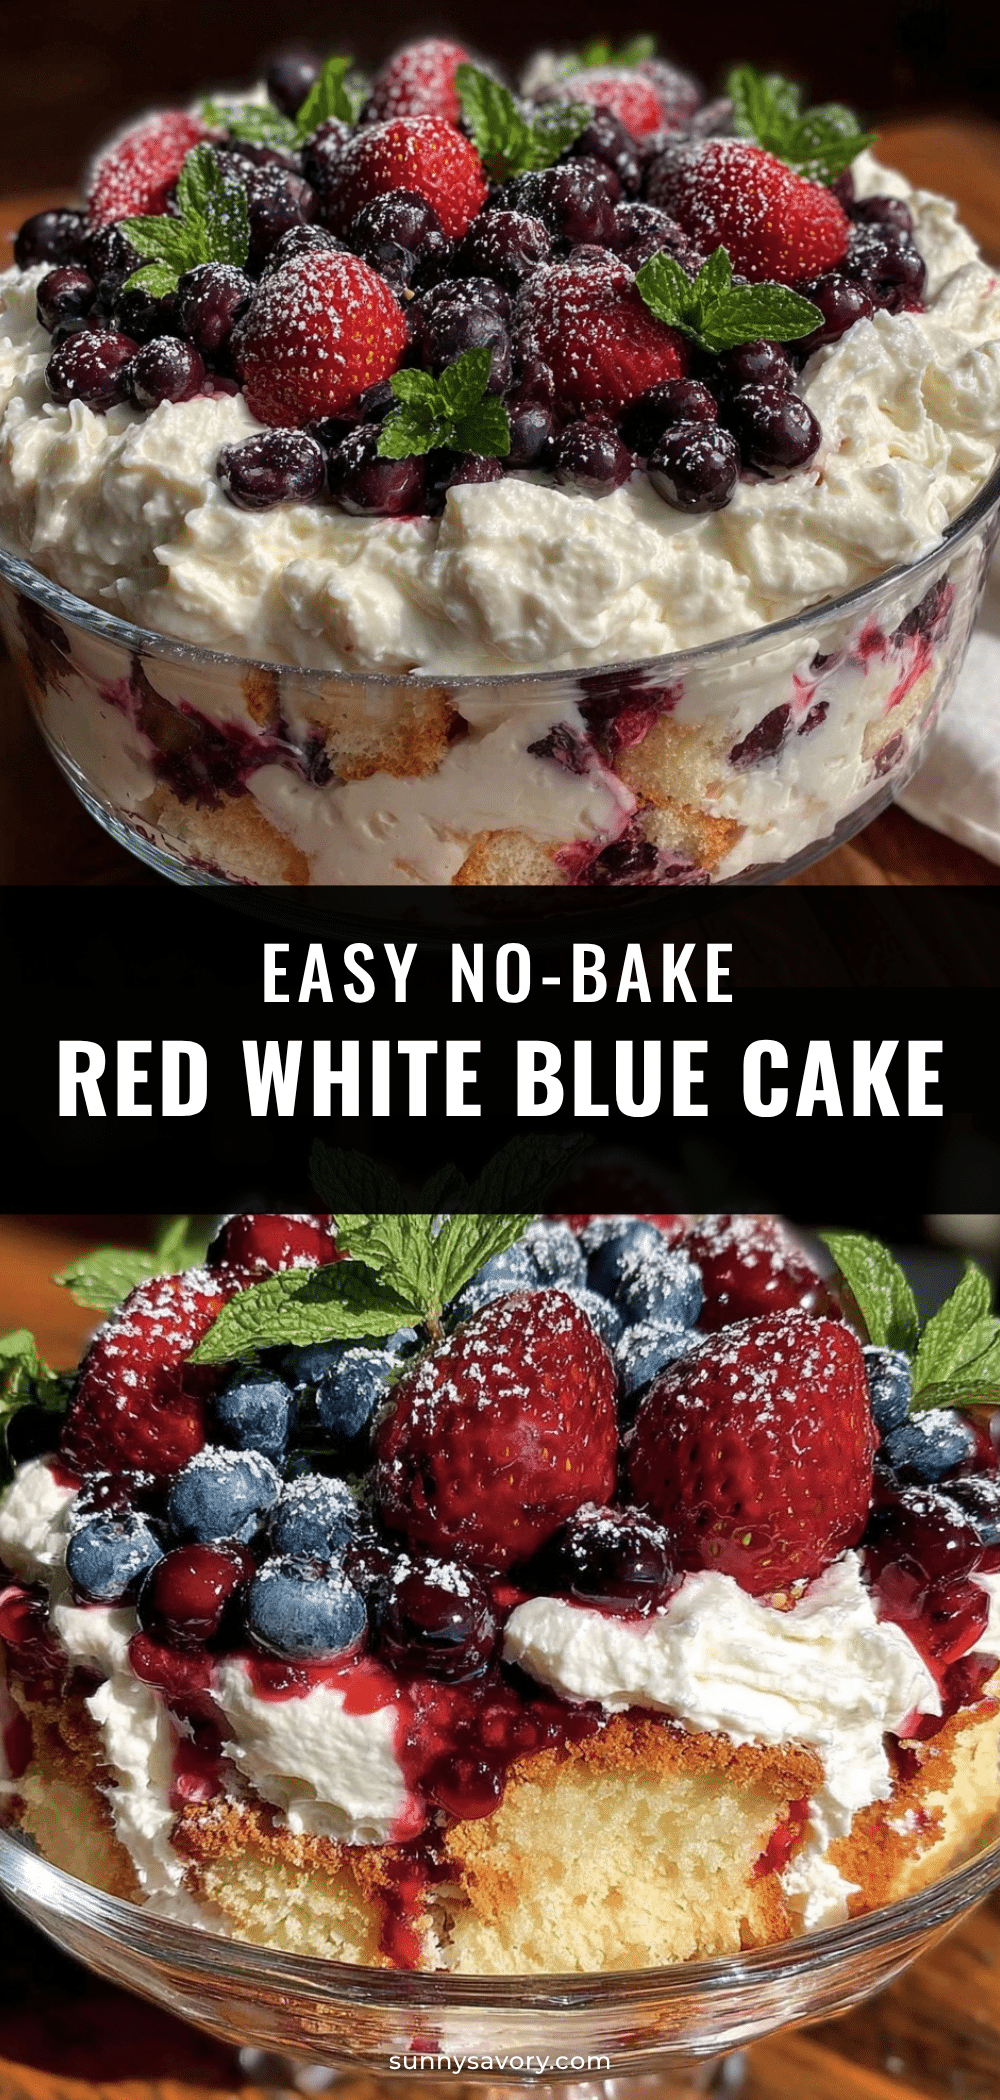
It all started when I overheard my colleague, Jenna, talking about her grandmother’s legendary icebox cake. I figured, why not try a patriotic twist? I grabbed some whipped cream, vanilla wafers, fresh strawberries, and blueberries, layered them with a dash of summer spirit, and popped it in the fridge. The vibrant red, white, and blue layers looked like a celebration on a plate—no oven needed.
By the time dessert rolled around, the compliments were pouring in. I made a mess trying to carry the platter through the hallway—classic me—but that cake stole the show. It’s funny how the simplest ideas can become favorites, right? Maybe you’ve been there: scrambling for a last-minute dessert that actually wows. That’s why this Easy No-Bake Red White and Blue Icebox Cake has stuck with me. It’s quick, colorful, and honestly, the perfect summer dessert to share with friends or family without any stress.”
Why You’ll Love This Recipe
This Easy No-Bake Red White and Blue Icebox Cake is more than just a pretty face. After testing it multiple times for potlucks, barbecues, and casual get-togethers, I can say it hits all the right notes—comfort, ease, and visual appeal.
- Quick & Easy: Comes together in under 20 minutes, giving you more time to enjoy the party or relax.
- Simple Ingredients: Uses pantry staples and fresh fruit—no hunting for rare items.
- Perfect for Summer: Light, cool, and refreshing—ideal for warm days and outdoor celebrations.
- Crowd-Pleaser: Kids love the sweet layers, and adults appreciate the fresh berries and creamy texture.
- Unbelievably Delicious: The crisp wafers soften just right, melding with the whipped cream and juicy fruit for a melt-in-your-mouth experience.
What makes this version stand out? Well, I take extra care layering the ingredients to get that iconic red, white, and blue look without mixing colors. Also, I prefer using homemade whipped cream instead of store-bought for a lighter, fluffier finish. The balance between tart berries and sweet cream feels just right—never too heavy or cloying.
Honestly, this isn’t just another no-bake cake; it’s a celebration on a plate that makes you pause and savor each bite. Whether you’re hosting a big crowd or just treating yourself on a sunny afternoon, this recipe makes you feel like you nailed the dessert game without breaking a sweat.
What Ingredients You Will Need
This recipe uses simple, wholesome ingredients to deliver bold flavor and satisfying texture without the fuss. Most are pantry staples, with fresh seasonal berries adding that perfect pop of color and brightness.
- Vanilla Wafers: About 60 wafers (around 200 grams) – I recommend Keebler for consistent crispness.
- Heavy Whipping Cream: 2 cups (480 ml), cold – fresh cream whips better for that fluffy texture.
- Powdered Sugar: ½ cup (60 grams) – to lightly sweeten the whipped cream.
- Vanilla Extract: 1 teaspoon – adds warmth and depth to the cream.
- Strawberries: 2 cups (about 300 grams), sliced – fresh and ripe for the best flavor.
- Blueberries: 1 cup (150 grams), washed and drained – firm and plump berries work best.
- Lemon Zest: 1 teaspoon (optional) – adds a subtle brightness to the cream layer.
Substitution tips: If you want a dairy-free version, swap heavy cream with coconut cream (chilled). For gluten-free, use gluten-free vanilla wafers or crispy ladyfingers. In summer, fresh berries are unbeatable, but frozen berries (thawed and drained) can work in a pinch.
Choosing ripe, fragrant strawberries is key—they bring sweetness and juiciness that balance the creamy layers. When picking vanilla extract, pure vanilla (not imitation) really makes a difference in flavor depth, trust me on this one.
Equipment Needed
- Mixing Bowl: A large bowl for whipping cream. Glass or metal bowls work best as they hold cold well.
- Electric Hand Mixer or Stand Mixer: To whip the cream to soft peaks quickly.
- Spatula: For folding in vanilla and lemon zest, and spreading layers evenly.
- 9×13-inch (23×33 cm) Baking Dish or Glass Pan: Ideal for layering the cake.
- Measuring Cups and Spoons: For precise ingredient portions.
- Knife and Cutting Board: For slicing strawberries neatly.
If you don’t have a mixer, a whisk works but expect a bit of an arm workout! I once whipped cream by hand because my mixer broke mid-prep—let’s just say it took longer but tasted just as good. For budget-friendly options, small handheld mixers perform just fine and are easy to clean.
Preparation Method
- Chill your mixing bowl and beaters: Pop them in the fridge for 15 minutes before whipping cream. Cold tools help the cream thicken faster. (Time: 15 minutes)
- Make the whipped cream: Pour the cold heavy cream into the chilled bowl. Beat on medium-high speed until soft peaks form (about 3-5 minutes). Add powdered sugar, vanilla extract, and optional lemon zest. Beat just until combined and the cream holds soft peaks—don’t overbeat or you’ll end up with butter! (Time: 7 minutes)
- Prepare the fruit: Wash and slice strawberries into thin pieces, keeping them uniform for even layering. Pat blueberries dry if needed to avoid extra moisture. (Time: 5 minutes)
- Start layering: Spread a thin layer of whipped cream on the bottom of your dish to prevent wafers from sticking. Then add a single layer of vanilla wafers, fitting them snugly but not overlapping too much.
- Add white layer: Spread a generous layer of whipped cream over the wafers, smoothing with a spatula.
- Add red layer: Arrange a layer of sliced strawberries evenly on top of the cream.
- Repeat layering: Add another layer of wafers, followed by whipped cream, then blueberries on top for the blue layer.
- Finish with whipped cream: Spread a final thick layer of whipped cream on top. Decorate with a few extra berries for garnish.
- Refrigerate: Cover the dish with plastic wrap and chill for at least 4 hours or overnight. This allows wafers to soften and flavors to meld beautifully.
- Serve: Slice with a sharp knife dipped in hot water for clean cuts. Enjoy chilled!
Tip: If you notice any syrupy liquid after refrigeration, it’s normal—berries release juice. Gently spoon it off before serving if preferred. Also, layering the berries gently helps avoid squishing them and keeps the cake looking fresh.
Cooking Tips & Techniques
Whipping cream can be tricky if you’re not used to it. Always start with cold cream and equipment, and stop whipping as soon as soft peaks form. Overwhipped cream turns grainy and eventually becomes butter—been there, done that!
When layering, try not to press down too hard on the wafers; the goal is to let them soak up moisture slowly without turning into mush. Patience is key here—you want that perfect balance of crispness and softness.
Multitasking tip: While the cream chills, prep your fruit and line your dish. This saves time and keeps everything fresh. Also, spreading cream evenly with a silicone spatula makes cleanup easier and keeps layers tidy.
Lastly, don’t skip the refrigeration time. The cake’s magic happens overnight as the wafers absorb moisture, creating that melt-in-your-mouth texture. If you’re in a rush, 4 hours works, but overnight is best.
Variations & Adaptations
- Dietary: Use coconut whipped cream and gluten-free wafers for a dairy-free, gluten-free version.
- Seasonal: Swap strawberries and blueberries for peaches and blackberries in late summer for a different twist.
- Flavor: Add a layer of lemon curd or strawberry jam between wafers and cream for extra zing.
- Cooking method: While this is a no-bake recipe, you can freeze individual portions for a frozen treat—just thaw slightly before serving.
- Personal variation: I once added crushed toasted almonds between layers for a nutty crunch that was surprisingly delicious.
Serving & Storage Suggestions
Serve this cake chilled straight from the fridge for the best texture and refreshing taste. It pairs beautifully with a light sparkling lemonade or iced tea on a warm day.
If you want to amp up the presentation, a few sprigs of fresh mint or a dusting of powdered sugar on top adds a lovely touch. For gatherings, slice into squares and serve on colorful plates to highlight the red, white, and blue layers.
Store leftovers tightly covered in the refrigerator for up to 3 days. The flavors deepen over time, but the wafers will continue softening, so it’s best enjoyed sooner rather than later.
Reheat? No need—this is a cold dessert best served as is. However, letting it sit out for 10 minutes before serving can take the chill off slightly, making it easier to taste all the layers.
Nutritional Information & Benefits
Each serving (about 1/12 of the cake) contains roughly 220 calories, 12 grams of fat, 25 grams of carbs, and 3 grams of protein. The fresh berries add a boost of vitamin C, antioxidants, and fiber, making this dessert a lighter choice compared to heavy cakes.
This recipe is naturally gluten-free if you choose gluten-free wafers, and can be dairy-free with coconut cream substitutions. It’s a nice balance of indulgence and fresh fruit benefits, perfect for those looking for a summer-friendly dessert that doesn’t weigh you down.
From my nutritionist friend’s perspective, desserts like this that incorporate fruit and limit processed sugars are a win-win. It’s a way to treat yourself while keeping things a bit lighter—something I appreciate especially during the hotter months.
Conclusion
This Easy No-Bake Red White and Blue Icebox Cake is a recipe that’s stuck with me because it’s simple, stunning, and truly satisfying. It’s one of those desserts you can whip up in a flash and still impress everyone—no fancy skills or last-minute oven panic required.
Feel free to customize the fruit or add your own spin with nuts or jams. Honestly, that’s what makes this recipe so fun and approachable. I love how it brings a little festive flair to any summer gathering, and I hope you enjoy making it as much as I do.
Give it a try, and let me know how your version turns out—I’d love to hear your twists or stories! Remember, great food is all about sharing and enjoying those simple moments together.
Frequently Asked Questions
Can I make this icebox cake ahead of time?
Absolutely! It actually tastes better after chilling overnight, which lets the wafers soften perfectly and flavors meld.
What if I don’t have vanilla wafers?
You can substitute with ladyfingers, graham crackers, or gluten-free cookies, depending on dietary needs.
Can I use frozen berries?
Yes, just thaw and drain them well to avoid excess liquid that might make the cake soggy.
Is this recipe suitable for kids?
Definitely! Kids usually love the sweet cream and fruit layers, and it’s a fun, colorful dessert for parties.
How do I store leftovers?
Keep the cake covered in the fridge for up to 3 days. The texture will soften over time but remains delicious.
For a delightful twist on festive desserts, you might also enjoy my no-bake patriotic cheesecake bars or the fresh berry trifle recipe perfect for summer gatherings.
Pin This Recipe!
Easy No-Bake Red White and Blue Icebox Cake
A quick, colorful, and refreshing no-bake icebox cake layered with vanilla wafers, whipped cream, strawberries, and blueberries—perfect for summer celebrations.
- Prep Time: 20 minutes
- Cook Time: 0 minutes
- Total Time: 4 hours 20 minutes
- Yield: 12 servings 1x
- Category: Dessert
- Cuisine: American
Ingredients
- About 60 vanilla wafers (around 200 grams or 7 ounces)
- 2 cups (480 ml or 16 fl oz) cold heavy whipping cream
- ½ cup (60 grams or 2.1 ounces) powdered sugar
- 1 teaspoon vanilla extract
- 2 cups (about 300 grams or 10.5 ounces) sliced fresh strawberries
- 1 cup (150 grams or 5.3 ounces) blueberries, washed and drained
- 1 teaspoon lemon zest (optional)
Instructions
- Chill your mixing bowl and beaters in the fridge for 15 minutes before whipping cream.
- Pour the cold heavy cream into the chilled bowl. Beat on medium-high speed until soft peaks form (about 3-5 minutes). Add powdered sugar, vanilla extract, and optional lemon zest. Beat just until combined and the cream holds soft peaks—do not overbeat.
- Wash and slice strawberries into thin pieces. Pat blueberries dry if needed to avoid extra moisture.
- Spread a thin layer of whipped cream on the bottom of your dish to prevent wafers from sticking. Add a single layer of vanilla wafers, fitting them snugly but not overlapping too much.
- Spread a generous layer of whipped cream over the wafers, smoothing with a spatula.
- Arrange a layer of sliced strawberries evenly on top of the cream.
- Add another layer of wafers, followed by whipped cream, then blueberries on top for the blue layer.
- Spread a final thick layer of whipped cream on top. Decorate with a few extra berries for garnish.
- Cover the dish with plastic wrap and refrigerate for at least 4 hours or overnight to allow wafers to soften and flavors to meld.
- Slice with a sharp knife dipped in hot water for clean cuts and serve chilled.
Notes
Chill mixing bowl and beaters before whipping cream for best results. Do not overbeat cream to avoid turning it into butter. Refrigerate at least 4 hours or overnight for best texture. Use gluten-free wafers and coconut cream for gluten-free and dairy-free versions. If syrupy liquid appears after refrigeration, gently spoon it off before serving.
Nutrition
- Serving Size: About 1/12 of the ca
- Calories: 220
- Fat: 12
- Carbohydrates: 25
- Protein: 3
Keywords: no-bake, icebox cake, summer dessert, patriotic dessert, red white and blue, easy dessert, whipped cream, vanilla wafers, strawberries, blueberries