Love this? Save it for later!
Share the inspiration with your friends
“I never thought pickles could be the star of my kitchen—honestly, I was more of a mustard fan,” I confessed to my friend Lisa one breezy autumn afternoon. She just laughed, shaking her head, and handed me a jar of her homemade fermented dill pickles. “Try these,” she said, “and tell me if your gut doesn’t thank you.” That moment stuck with me. It was a Tuesday, my kitchen cluttered with mismatched jars and a half-forgotten bread dough, when I finally cracked open that jar. One bite, and I was hooked—not just on the tangy crunch but on the idea of making my own fermented dill pickles for gut health. You know that feeling when something unexpectedly changes your routine? That was it.
Turns out, fermentation isn’t just some old-world kitchen magic; it’s a powerhouse for gut health, and these healthy fermented dill pickles are a perfect introduction. I mean, who doesn’t love a little crunch with a probiotic punch? It was fascinating to learn that the bacteria thriving in that brine weren’t just preserving cucumbers—they were creating beneficial probiotics that support digestion and immunity. My kitchen became a mini fermentation lab, with pickles patiently bubbling away on the counter, filling the air with that unmistakable sour aroma.
Maybe you’ve been there—curious about fermented foods but intimidated by the process. Well, I’m here to tell you this recipe is straightforward, forgiving, and, honestly, a joy to make. Plus, it’s a fun way to turn simple cucumbers into gut-loving snacks that keep you coming back for more. This recipe stuck with me because it’s not just about making pickles; it’s about embracing a small daily ritual that boosts well-being in the tastiest way possible.
Why You’ll Love This Recipe
After multiple test batches and tweaks, this healthy fermented dill pickles recipe has become my go-to for a gut-friendly snack. Here’s why I think you’ll love it just as much:
- Quick & Easy: From chopping to jar-filling, it takes under 20 minutes to get started—and then the magic happens while you wait.
- Simple Ingredients: No fancy or hard-to-find stuff here. Just fresh cucumbers, garlic, dill, salt, and water—things you likely already have in your kitchen.
- Perfect for Gut Health: Packed with natural probiotics, these pickles support digestion without any added sugars or preservatives.
- Crowd-Pleaser: Whether you’re bringing them to a potluck or enjoying them solo, these pickles always get compliments for their crisp texture and balanced flavor.
- Unbelievably Delicious: The perfect mix of tangy, salty, and herbaceous, they’re a snack that makes you close your eyes after the first bite—trust me.
This isn’t just any pickle recipe. The secret lies in the fermentation process combined with the use of fresh dill and garlic, which keeps the flavor vibrant and the crunch satisfying. I’ve experimented with a few brands of pickling salt, and I prefer Morton’s Pickling Salt for its purity and reliable results. Plus, the recipe allows you to customize the flavor intensity depending on how long you ferment, making it perfect for beginners and seasoned fermenters alike. You’ll find it’s the kind of recipe that turns an ordinary cucumber into a tangy, probiotic-packed powerhouse.
What Ingredients You Will Need
This recipe uses simple, wholesome ingredients to deliver bold flavor and satisfying texture without the fuss. Most are pantry staples, and substitutions are easy if you’re avoiding certain allergens or dietary restrictions.
- Fresh Cucumbers (2 pounds / 900 grams) – Look for firm, small-to-medium-sized pickling cucumbers with thin skins. These hold up best during fermentation and keep the crunch.
- Fresh Dill (3-4 sprigs) – The star herb here, providing that classic dill pickle aroma and flavor. If fresh isn’t available, dried dill can be used but won’t be as vibrant.
- Garlic Cloves (4-5, peeled) – Adds a lovely pungency and depth. Use organic garlic for the best taste.
- Pickling Salt (3 tablespoons / 45 grams) – Essential for proper fermentation; avoid iodized or table salt as additives can interfere with fermentation.
- Filtered Water (4 cups / 950 ml) – Chlorine-free water is important for fermentation success, so use spring or filtered water.
- Optional: Black Peppercorns (1 teaspoon) – Adds a subtle spice note.
- Optional: Red Pepper Flakes (1/2 teaspoon) – For a slight kick if you like a little heat.
Substitution Tips: Use sea salt instead of pickling salt but reduce quantity slightly. For a garlic allergy, try using shallots or skip garlic altogether. If you want a twist, fresh lemon slices can add a zesty note. These ingredients keep the recipe accessible but flavorful. I usually buy my cucumbers from the local farmer’s market on Saturdays—they’re fresher and more flavorful than grocery store ones, which makes a big difference here.
Equipment Needed
Making healthy fermented dill pickles doesn’t require fancy gadgets, but a few basics make the process smoother.
- Quart-sized Glass Mason Jars (2-3 jars) – Perfect for fermenting. Glass is non-reactive and lets you watch the bubbles form.
- Fermentation Weights or a Small Clean Glass Jar – To keep cucumbers submerged under the brine. If you don’t have weights, a small zip-top bag filled with water works just fine.
- Non-metallic Lid or Cloth Cover with Rubber Band – Metal lids can react with the brine; use plastic lids or breathable cloth to allow gases to escape.
- Measuring Spoons and Cups – For precise salt and water measurements.
- Sharp Knife and Cutting Board – To trim and slice cucumbers if you prefer spears or rounds.
If you’re on a budget, you can find mason jars cheaply at thrift stores or online. I learned the hard way that using a metal lid without lining can sometimes give the brine a metallic taste—so I always stick to plastic lids now. Also, keeping a small kitchen towel handy is a good idea, because sometimes the brine bubbles over a little during fermentation (ask me how I know!).
Preparation Method
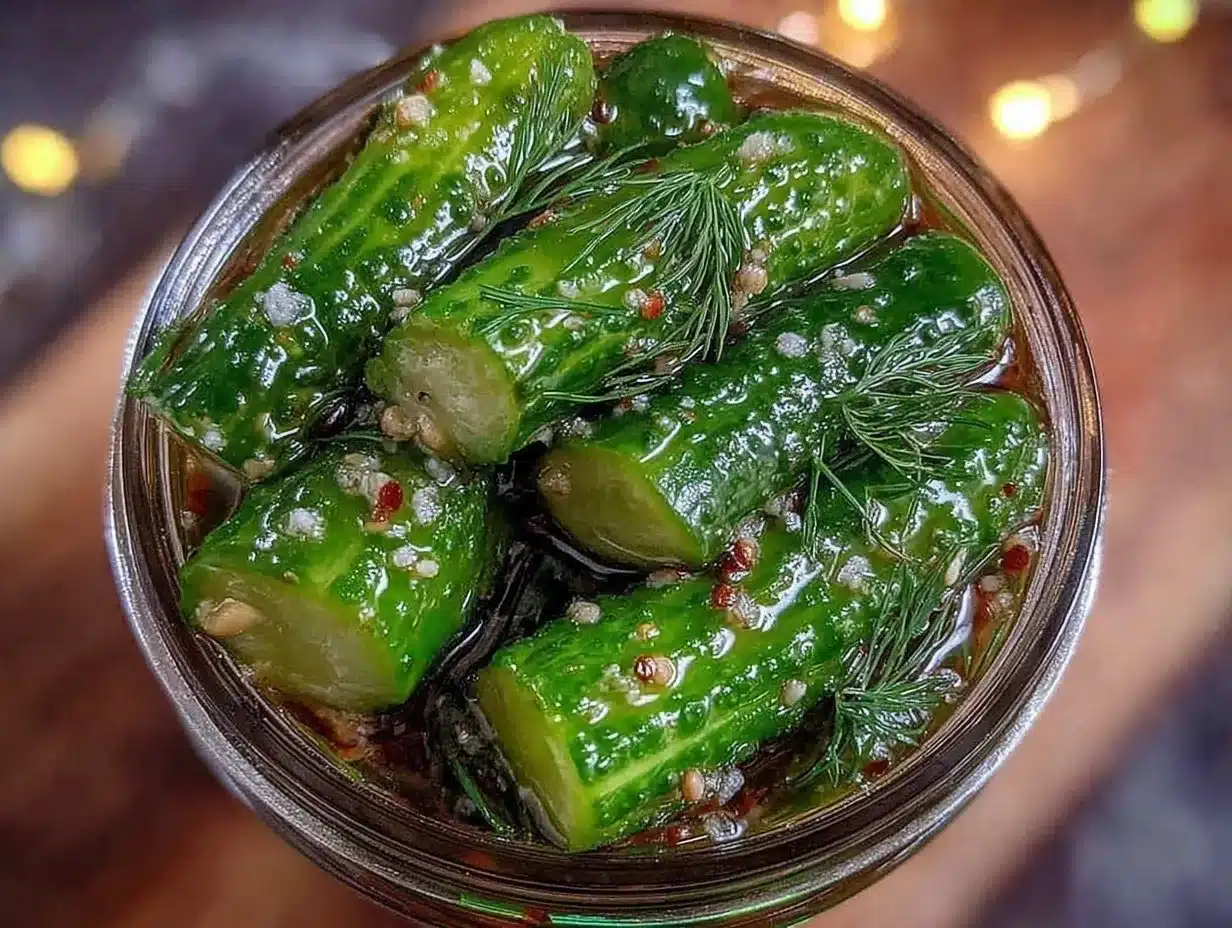
- Prepare the Brine: In a clean bowl, dissolve 3 tablespoons (45 grams) of pickling salt into 4 cups (950 ml) of filtered water. Stir until fully dissolved. This salty solution is what will ferment your cucumbers safely.
- Wash and Trim Cucumbers: Rinse cucumbers thoroughly under cold water. Cut off the blossom ends (about 1/4 inch) to prevent softening during fermentation. You can leave them whole or slice into spears or rounds depending on your preference.
- Fill Jars with Ingredients: Place 2-3 sprigs of fresh dill, 4-5 peeled garlic cloves, and optional peppercorns or red pepper flakes at the bottom of each mason jar. Pack cucumbers tightly but without crushing.
- Pour Brine Over Cucumbers: Pour the salted water over the cucumbers until they’re fully submerged. Leave about 1 inch (2.5 cm) of headspace at the top of the jar to allow for expansion.
- Weight and Cover: Use fermentation weights or a small clean jar to keep cucumbers submerged under the brine. Cover the jar with a non-metallic lid or a cloth secured with a rubber band to allow gases to escape.
- Ferment at Room Temperature: Place jars on your countertop away from direct sunlight. The ideal temperature is between 65-75°F (18-24°C). Let ferment for 5-7 days, checking daily to ensure cucumbers remain submerged and to skim any white residue (kahm yeast) if it forms.
- Test and Refrigerate: After 5 days, taste a pickle. If it’s tangy and flavorful, seal the jar with a regular lid and move it to the refrigerator. If not, let it ferment a few more days, tasting daily. Refrigeration slows fermentation and preserves the flavor.
Pro Tips: If you notice any mold (fuzzy, colored spots), discard that batch. The white film is harmless but skim it off. I once forgot to weigh down the cucumbers, and the tops turned soft—that was a lesson learned! Also, the pickles will keep developing flavor even in the fridge, so feel free to wait a week before digging in.
Cooking Tips & Techniques
Although fermenting pickles doesn’t involve heat, timing and technique are key to success.
- Keep Cucumbers Submerged: Oxygen exposure can spoil the batch. Use weights or a clean ziplock bag filled with water as a weight.
- Salt Matters: Using pickling or kosher salt without additives is crucial. Table salt can introduce anti-caking agents that interfere with fermentation.
- Temperature Control: Fermenting too warm may cause soft pickles; too cold slows down fermentation. Room temperature around 70°F (21°C) is ideal.
- Patience is Key: I’ve learned that tasting after 5 days is a good starting point, but some batches might need up to 10 days for full flavor development.
- Avoid Metal Utensils: Use wooden or plastic spoons when handling fermented foods to avoid metallic reactions.
- Clean Jars and Equipment: Sterilize everything well before starting to prevent unwanted bacteria.
I remember the first time I didn’t skim off the kahm yeast—it made the brine look cloudy, which freaked me out. Turns out it’s harmless, but it’s best to remove it for appearance and taste. Also, fermenting on a kitchen counter where I can peek at the jars daily makes the process less intimidating and more rewarding.
Variations & Adaptations
You can easily adapt this healthy fermented dill pickle recipe to suit your taste or dietary needs.
- Spicy Pickles: Add extra red pepper flakes or sliced jalapeños for a fiery kick.
- Garlic & Herb Mix: Include fresh thyme, rosemary, or bay leaves for an herbal twist.
- Low-Sodium Version: Reduce salt slightly, but be cautious as salt preserves safety; ferment at cooler temperatures to slow bacteria growth.
- Quick Pickles: For a less fermented, fresher taste, soak cucumbers in the brine for 24-48 hours in the fridge instead of fermenting at room temperature.
- Dill-Free: Substitute fresh dill with tarragon or dill seeds if fresh dill is unavailable.
Personally, I once made a batch with sliced cucumbers and added a few slices of fresh ginger for a gentle zing. It was surprisingly refreshing and got rave reviews from my pickling-averse sister. And if you want to try a cooked version, check out my crispy garlic chicken recipe for another simple, flavor-packed dish that pairs beautifully with pickles.
Serving & Storage Suggestions
These fermented dill pickles are best served chilled and make a crunchy, tangy snack anytime.
- Serving: Enjoy them straight from the jar, slice into sandwich toppings, or chop for a tangy salad addition.
- Pairings: They go wonderfully with rich dishes like smoked meats, or alongside creamy dips and cheeses. A cold glass of lemonade or iced tea can balance the tang nicely.
- Storage: Keep pickles refrigerated once fermentation is complete. They’ll stay fresh for up to 2 months.
- Reheating: Not applicable since these are eaten cold, but bring to room temperature for a milder flavor if preferred.
- Flavor Development: The longer they sit (up to a point), the more complex the flavor becomes. I find they taste best after a week in the fridge.
Once, I packed a jar for a picnic and forgot it on the counter for a day after refrigeration. It was a little more tangy but still delicious—proof that these pickles are forgiving little gems. For a different snack idea, I often keep a jar handy when making roasted garlic mashed potatoes to add a zesty crunch contrast.
Nutritional Information & Benefits
These healthy fermented dill pickles are low in calories (about 10 calories per pickle spear) and rich in probiotics thanks to natural fermentation. The live bacteria support gut microbiome balance, which is linked to improved digestion and immune function.
The cucumbers provide hydration and small amounts of vitamins K and C. Garlic adds natural antimicrobial properties, while dill offers antioxidants. This recipe is naturally gluten-free, vegan-friendly, and free from added sugars or preservatives.
From a wellness perspective, incorporating fermented foods like these pickles into your diet can promote a healthier gut flora, which many experts agree plays a role in overall well-being. Personally, after adding fermented pickles regularly, I noticed fewer bloating days and better digestive comfort.
Conclusion
Making healthy fermented dill pickles is a simple, rewarding way to add a gut health boost to your daily routine. This recipe combines easy-to-find ingredients and straightforward steps that anyone can manage—even if you’ve never fermented anything before. I love this recipe because it turns humble cucumbers into a probiotic-rich snack that tastes fantastic and feels good to eat.
Feel free to customize with your favorite herbs or spice levels and make it your own. Trust me, once you start fermenting, you’ll find yourself experimenting with all sorts of veggies. If you try this recipe, I’d love to hear how it goes—drop a comment below or share your own pickling adventures. Here’s to crunchy, tangy, gut-loving pickles that brighten your day and your digestion!
FAQs
How long do fermented dill pickles take to be ready?
Typically, they ferment at room temperature for 5-7 days, but taste-testing after day 5 will help you find your preferred tanginess.
Can I use regular table salt for fermentation?
It’s best to use pickling or kosher salt without additives, as table salt may contain anti-caking agents that interfere with fermentation.
What if my pickles turn out soft?
Soft pickles usually mean they weren’t kept submerged or fermented at too high a temperature. Keep them under the brine and aim for 65-75°F (18-24°C).
Is it normal to see white film on the brine?
Yes, that white film is called kahm yeast. It’s harmless and can be skimmed off with a clean spoon.
How should I store fermented pickles after fermentation?
Once ready, seal the jars with a lid and refrigerate. They’ll keep for up to 2 months and continue developing flavor slowly.
PrintHealthy Fermented Dill Pickles Recipe for Easy Gut Health Boost
A simple and gut-friendly fermented dill pickle recipe that transforms fresh cucumbers into probiotic-rich, crunchy snacks perfect for digestion and immunity support.
- Prep Time: 15 minutes
- Cook Time: 0 minutes (fermentation time 5-7 days)
- Total Time: 5-7 days fermentation plus 15 minutes prep
- Yield: 2-3 quart-sized jars (about 8-12 servings) 1x
- Category: Snack
- Cuisine: American
Ingredients
- 2 pounds (900 grams) fresh cucumbers (small-to-medium pickling cucumbers with thin skins)
- 3–4 sprigs fresh dill
- 4–5 peeled garlic cloves
- 3 tablespoons (45 grams) pickling salt
- 4 cups (950 ml) filtered water
- Optional: 1 teaspoon black peppercorns
- Optional: 1/2 teaspoon red pepper flakes
Instructions
- Prepare the brine by dissolving 3 tablespoons (45 grams) of pickling salt into 4 cups (950 ml) of filtered water in a clean bowl. Stir until fully dissolved.
- Wash cucumbers thoroughly under cold water and cut off the blossom ends (about 1/4 inch) to prevent softening during fermentation. Leave whole or slice into spears or rounds as preferred.
- Place 2-3 sprigs of fresh dill, 4-5 peeled garlic cloves, and optional peppercorns or red pepper flakes at the bottom of each quart-sized glass mason jar.
- Pack cucumbers tightly into the jars without crushing them.
- Pour the salted brine over the cucumbers until fully submerged, leaving about 1 inch (2.5 cm) of headspace at the top.
- Use fermentation weights or a small clean jar to keep cucumbers submerged under the brine.
- Cover the jar with a non-metallic lid or a cloth secured with a rubber band to allow gases to escape.
- Ferment jars at room temperature (65-75°F / 18-24°C) on the countertop away from direct sunlight for 5-7 days, checking daily to ensure cucumbers remain submerged and skimming off any white residue (kahm yeast).
- After 5 days, taste a pickle. If tangy and flavorful, seal the jar with a regular lid and refrigerate. If not, continue fermenting and tasting daily until desired flavor is reached.
- Keep refrigerated after fermentation to slow the process and preserve flavor.
Notes
Keep cucumbers fully submerged to avoid spoilage. Use pickling or kosher salt without additives. Ferment at room temperature between 65-75°F (18-24°C). Skim off harmless kahm yeast if it forms. Avoid metal lids or utensils to prevent metallic taste. Refrigerate after fermentation to preserve flavor and extend shelf life up to 2 months.
Nutrition
- Serving Size: 1 pickle spear
- Calories: 10
- Sugar: 1
- Sodium: 300
- Carbohydrates: 2
- Fiber: 1
Keywords: fermented pickles, dill pickles, gut health, probiotic snack, fermented foods, easy pickles, homemade pickles



