Love this? Save it for later!
Share the inspiration with your friends
“I wasn’t supposed to mess with the classic hard-boiled egg method—everyone swore by their own secret,” my coworker chuckled as she handed me a bright yellow container filled with perfectly cooked eggs one hectic Tuesday afternoon. I had just admitted defeat after a couple of sad, rubbery eggs that felt more like a science experiment gone wrong than a protein-packed snack. She explained her simple yet foolproof routine, which sounded almost too easy to be true. Honestly, I was skeptical.
Fast forward a week, I found myself in my tiny kitchen on a rainy evening, armed with a dozen eggs and her method scribbled on a napkin. I forgot to set the timer once, knocked over some salt, and nearly burned my fingers peeling the first egg—classic me. But despite those hiccups, I ended up with the kind of hard-boiled eggs that made me pause mid-bite and smile. The whites were tender but firm, the yolks creamy with just the right hint of richness, and best of all, they packed a punch of protein that kept me going through my afternoon slump.
Maybe you’ve been there—wanting a quick, healthy snack that doesn’t demand a lot of prep or clean-up. These eggs became my go-to for easy, filling bites whether I’m rushing out the door or need a no-fuss addition to a salad. Let me tell you, this isn’t the usual boiled egg story; it’s the one you’ll keep coming back to because it just works every single time.
Why You’ll Love This Recipe
After testing countless methods and tweaking details, I can confidently say this recipe nails what hard-boiled eggs should be—simple, reliable, and packed with protein. Here’s why it stands out:
- Quick & Easy: From fridge to snack in about 15 minutes, perfect for busy mornings or last-minute cravings.
- Simple Ingredients: Just eggs, water, and a pinch of salt; no store runs or fancy add-ons required.
- Perfect for Anytime Snacking: Whether it’s a post-workout boost or midday hunger fix, these eggs deliver.
- Crowd-Pleaser: Kids, adults, and even skeptics love the texture and flavor—no chalky yolks here.
- Unbelievably Delicious: The yolks have this buttery creaminess that feels indulgent without guilt.
What sets this apart? The little trick of starting eggs in cold water and carefully timing the simmer keeps the yolks from turning green and the whites from getting rubbery. Plus, peeling is a breeze—trust me, I’ve battled with stubborn shells before. This method feels like a secret handshake among egg lovers, but I’m sharing it with you because it’s all about making protein-packed snacking effortless and enjoyable.
Honestly, it’s the kind of snack that makes you close your eyes after the first bite and think, “Yep, this is exactly what I needed.” Whether you’re prepping for a picnic or just want a ready-to-go protein boost, this recipe has your back.
Ingredients Needed
This recipe keeps things straightforward with everyday ingredients you probably have on hand. Each component plays a simple but key role in crafting those perfect hard-boiled eggs.
- Large eggs (6-12): Fresh but not too fresh—eggs about a week old peel easier. I usually grab Organic Valley eggs for consistent quality.
- Cold water: Enough to cover the eggs by about an inch in your pot; starting cold helps prevent cracking.
- Salt (1 teaspoon): Added to the water to help with peeling and to slightly season the eggshells.
Optional add-ons:
- Ice cubes or cold water: For an ice bath after boiling, which stops the cooking process and makes peeling easier.
If you want to mix things up, you can swap regular eggs for pasture-raised or omega-3 enriched varieties for a nutritional boost. For those on a low-sodium diet, you can skip the salt without much impact on the final result.
Equipment Needed
- Medium or large saucepan: Big enough to hold your eggs in a single layer with room for water to circulate.
- Slotted spoon: To gently place eggs in the water and remove them without cracking.
- Timer or kitchen stopwatch: Precision matters here to avoid overcooking.
- Bowl for ice bath: A wide bowl or large mixing bowl to quickly cool eggs and stop cooking.
Don’t have a slotted spoon? No worries—use tongs carefully or a regular spoon with a bit of patience. I’ve also used my trusty silicone spatula to nudge eggs out of boiling water when I didn’t want to crack them. For budget-friendly options, any sturdy pot from your kitchen will do; no need for fancy gadgets.
Preparation Method
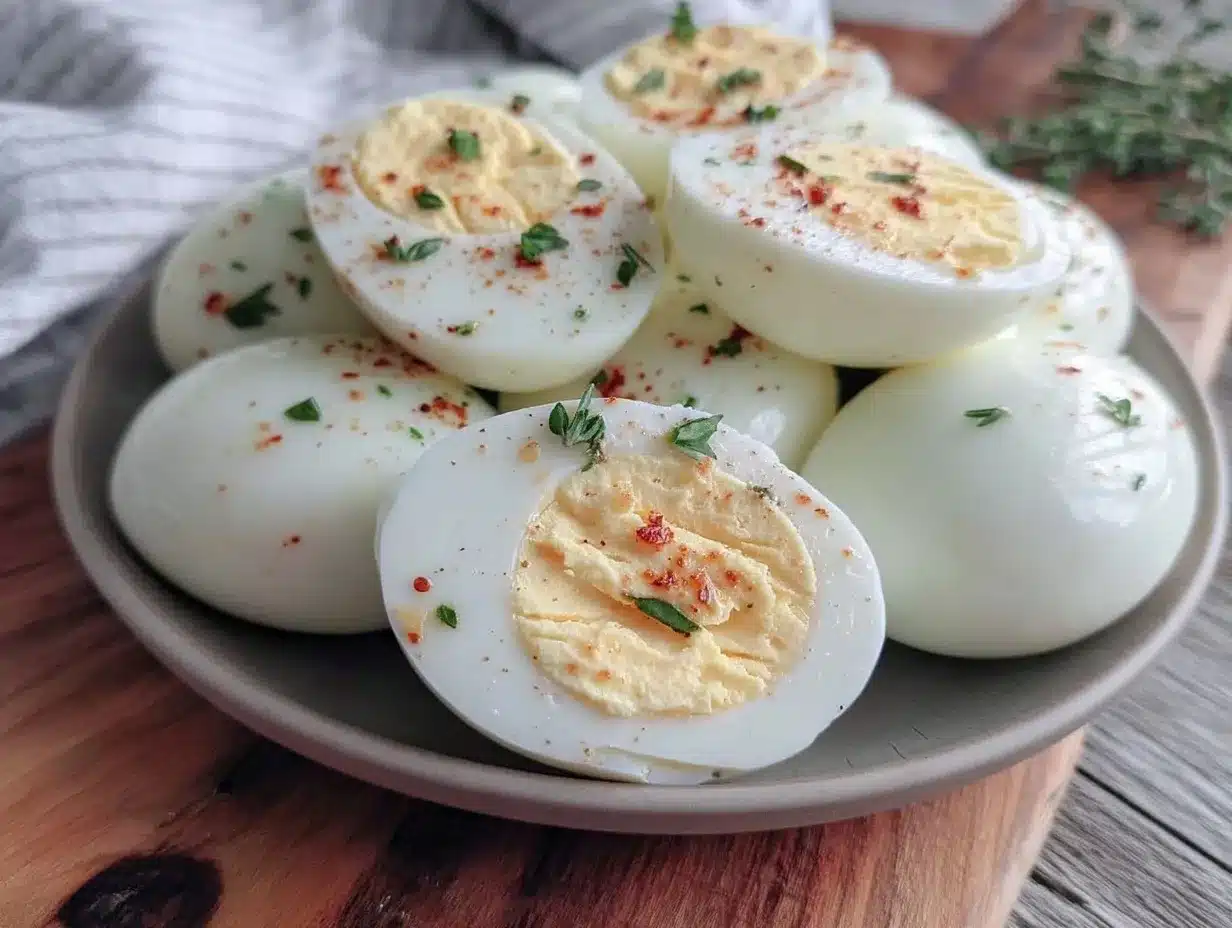
- Place eggs in a single layer in a saucepan: Use 6 to 12 large eggs. Pour in cold water until the eggs are covered by about 1 inch (2.5 cm). Add 1 teaspoon of salt to the water.
- Heat the water: Put the pan on medium-high heat and bring the water to a rolling boil. This usually takes about 8 to 10 minutes depending on your stove.
- Turn off the heat and cover: Once boiling, immediately remove the pan from heat and cover it with a lid. Do not remove the eggs yet! Let them sit.
- Set your timer: For perfectly cooked hard-boiled eggs, let them sit for 12 minutes (for large eggs). If your eggs are smaller, 9-10 minutes might suffice; for extra-large, try 13-14 minutes.
- Prepare an ice bath: While eggs are sitting, fill a bowl with ice and cold water.
- Transfer eggs to the ice bath: Using a slotted spoon, move eggs from hot water into the ice bath to cool for at least 5 minutes. This stops cooking and helps with peeling.
- Peel or store: Gently tap eggs on a hard surface, then peel under running water if you want immediate snacking. Otherwise, store unpeeled in the fridge for up to a week.
Pro tip: If peeling feels stubborn, peel eggs while still slightly warm or peel under running cold water to ease shell removal. The salt in the water makes a subtle difference in how shells separate, but don’t skip the ice bath—trust me, it’s a game-changer.
Sometimes I forget the timer, and the eggs get a bit overcooked. The yolks turn greyish, which is harmless but less appetizing. So keep your eye on the clock, and you’ll be golden.
Cooking Tips & Techniques
Cooking hard-boiled eggs might seem simple, but a few tricks make all the difference between a perfect snack and a frustrating mess.
- Start with cold water: This helps eggs heat evenly and reduces cracking.
- Don’t overcrowd the pot: Eggs need space to avoid bumping and cracking during boiling.
- Use a timer: Overcooking leads to that green ring around yolks and a sulfuric taste—no one wants that.
- Ice bath is essential: It halts cooking immediately and prevents the yolk from drying out.
- Peeling tips: Older eggs usually peel easier because the pH level changes. If you’re using super fresh eggs, consider letting them sit in the fridge for a few days first.
I once tried steaming eggs instead of boiling, which was a game-changer for peeling, but for quick snacking, this classic method feels more accessible. Also, I’ve learned that gently cracking the shell all over before peeling helps get under the membrane and keeps the white intact.
Multitasking tip: While eggs sit in the ice bath, prep your next meal or tidy up; it’s like a built-in productivity break.
Variations & Adaptations
Hard-boiled eggs might be simple, but they’re surprisingly versatile. Here are a few ways to mix it up depending on your taste or dietary needs:
- Seasoned Deviled Eggs: Mash the yolks with a bit of Greek yogurt, mustard, and smoked paprika for a creamy, protein-packed snack variation.
- Pickled Hard-Boiled Eggs: Soak peeled eggs in vinegar, water, and spices for 3-5 days for a tangy twist—perfect for adding zing to salads.
- Spiced Eggs: After peeling, sprinkle with everything bagel seasoning or chili powder for an extra flavor punch.
- Allergen-Friendly: For those avoiding dairy or gluten, this recipe fits right in, as eggs are naturally free from both.
- Cooking Method Swap: Try steaming eggs for 13 minutes as an alternative; it often results in easier peeling and less cracking.
Personally, I once added turmeric to the boiling water for a subtle golden hue and a hint of warm flavor—fun experiment, though I prefer the classic for everyday snacking.
Serving & Storage Suggestions
Serve these protein-packed hard-boiled eggs chilled or at room temperature. They’re fantastic on their own with a sprinkle of salt and pepper or sliced atop a fresh green salad for a quick lunch.
Pair with crunchy veggies, whole-grain crackers, or a dollop of hummus for balanced snacking. A cup of herbal tea or a refreshing cucumber water complements the mild egg flavor beautifully.
Store unpeeled eggs in a covered container or the egg carton in the refrigerator for up to one week. Peeled eggs keep best submerged in water in a sealed container—just change the water daily to maintain freshness.
To reheat, avoid the microwave (it can get rubbery). Instead, let them come to room temperature or briefly warm in hot water for a minute or two if you prefer them warm. Flavors actually deepen slightly when chilled, making them a perfect make-ahead snack.
Nutritional Information & Benefits
Each large hard-boiled egg packs about 6 grams of high-quality protein, making it an excellent choice for muscle repair and keeping you full longer. They’re low in calories (approximately 70 per egg) and provide vital nutrients like vitamin B12, choline, and selenium.
Eggs have healthy fats and are naturally gluten-free, fitting well into many diets including low-carb, ketogenic, and paleo. Just a heads-up if you have an egg allergy—this recipe isn’t suitable.
From a wellness perspective, I appreciate how eggs offer a nutrient-dense snack that’s portable and requires no refrigeration outside short periods, perfect for an active lifestyle.
Conclusion
This perfect protein-packed hard-boiled eggs recipe is your shortcut to a healthy, satisfying snack that’s as reliable as your favorite pair of sneakers. I love how it takes minimal effort but delivers maximum nutrition and flavor every time. You can customize it to fit your mood—whether that means spicing things up or keeping it classic.
Give it a try, and I bet you’ll find yourself reaching for these eggs when hunger strikes, just like I do. Feel free to share your own twists or questions in the comments—I’m always curious about how you make this recipe your own.
Remember, snacking healthy doesn’t have to be complicated. Here’s to many protein-packed bites ahead!
Frequently Asked Questions
How long can I store hard-boiled eggs in the fridge?
Unpeeled hard-boiled eggs can be stored safely in the refrigerator for up to one week. If peeled, keep them submerged in water in a sealed container and change the water daily for best freshness.
Why do some hard-boiled eggs have a greenish ring around the yolk?
That green ring happens when eggs are overcooked or cooked at too high a temperature. It’s harmless but can affect flavor and texture. Using the timing method in this recipe helps avoid it.
What’s the best way to peel hard-boiled eggs easily?
Peeling under running cold water helps loosen the shell. Also, eggs that are a few days old peel better than very fresh ones. Gently cracking the shell all over before peeling can make the process smoother.
Can I use brown eggs for this recipe?
Absolutely! Brown eggs cook the same way as white eggs. The color difference doesn’t affect cooking time or taste.
Is it okay to boil eggs straight from the fridge?
Yes, but starting eggs in cold water reduces cracking. If you add cold eggs directly to boiling water, they might crack more easily due to temperature shock.
PrintPerfect Protein-Packed Hard-Boiled Eggs Recipe for Easy Healthy Snacking
A simple, reliable method for perfectly cooked hard-boiled eggs that are tender, creamy, and packed with protein—ideal for quick, healthy snacking.
- Prep Time: 5 minutes
- Cook Time: 15 minutes
- Total Time: 20 minutes
- Yield: 6-12 servings 1x
- Category: Snack
- Cuisine: American
Ingredients
- 6–12 large eggs (about a week old for easier peeling)
- Cold water (enough to cover eggs by about 1 inch)
- 1 teaspoon salt
- Optional: ice cubes or cold water for ice bath
Instructions
- Place eggs in a single layer in a medium or large saucepan. Use 6 to 12 large eggs.
- Pour in cold water until the eggs are covered by about 1 inch (2.5 cm). Add 1 teaspoon of salt to the water.
- Put the pan on medium-high heat and bring the water to a rolling boil (about 8 to 10 minutes).
- Once boiling, immediately remove the pan from heat and cover it with a lid. Do not remove the eggs yet.
- Set a timer for 12 minutes for large eggs (9-10 minutes for smaller eggs, 13-14 minutes for extra-large eggs).
- While eggs are sitting, prepare an ice bath by filling a bowl with ice and cold water.
- Using a slotted spoon, transfer eggs from hot water into the ice bath to cool for at least 5 minutes.
- Gently tap eggs on a hard surface and peel under running water if eating immediately, or store unpeeled in the fridge for up to one week.
Notes
Start eggs in cold water to prevent cracking and ensure even cooking. Use a timer to avoid overcooking and green yolks. An ice bath stops cooking immediately and makes peeling easier. Peel eggs under running water or while slightly warm for best results. Older eggs peel easier than very fresh eggs.
Nutrition
- Serving Size: 1 large hard-boiled
- Calories: 70
- Sugar: 1
- Sodium: 70
- Fat: 5
- Saturated Fat: 1.5
- Carbohydrates: 1
- Protein: 6
Keywords: hard-boiled eggs, protein snack, easy snack, healthy snack, quick snack, boiled eggs, egg recipe



