Love this? Save it for later!
Share the inspiration with your friends
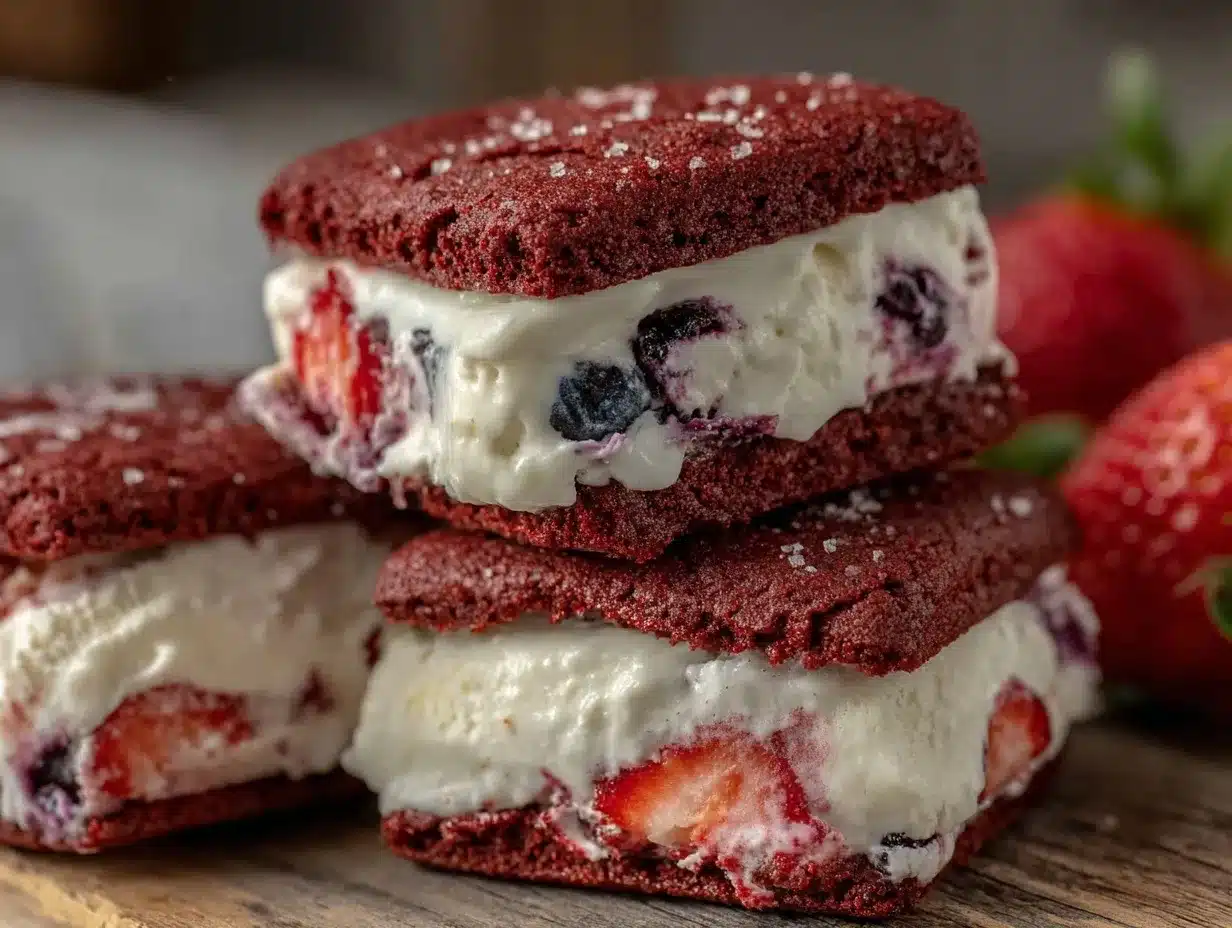
Last Fourth of July, I found myself scrambling in the kitchen with just an hour before the neighborhood block party. Honestly, I wasn’t planning to bring anything fancy—just something quick to beat the heat. But then my neighbor, Linda, popped over with a big grin, holding a cracked bowl full of vibrant red, white, and blue ingredients. “You’ve gotta try these ice cream sandwiches,” she said. Well, that cracked bowl turned into one of the best summer treats I’ve ever tasted. The colors alone made it a hit before anyone even took a bite. I mean, you know that feeling when a simple dessert becomes the star of the party? These Delicious Red White and Blue Ice Cream Sandwiches did just that.
It wasn’t perfect at first—I forgot the sprinkles and almost used regular vanilla instead of the creamy homemade version Linda swore by. But the way the fresh berries balanced the cool ice cream with the soft, buttery cookies was something I couldn’t get out of my head all summer. Maybe you’ve been there, trying to whip up something festive but ending up with a mess of half-baked ideas. This recipe, though? It’s easy, beautiful, and honestly, a little bit magical. It stuck with me, and now I make these every summer, whether for a last-minute barbecue or just an afternoon treat that brings smiles.
Why You’ll Love This Recipe
This red white and blue ice cream sandwiches recipe is my go-to for sunny days, and here’s why it might become yours too:
- Quick & Easy: Ready in under 30 minutes, perfect for those last-minute summer gatherings or a spontaneous craving.
- Simple Ingredients: No need to hunt down exotic stuff; everything’s likely sitting in your fridge or pantry.
- Perfect for Summer Parties: Whether it’s a picnic, Independence Day, or just a warm afternoon, these sandwiches bring festive vibes effortlessly.
- Crowd-Pleaser: Kids love the colorful fun, and adults appreciate the fresh berry burst and creamy texture.
- Unbelievably Delicious: The creamy ice cream and tender cookies with a hint of vanilla make every bite melt in your mouth.
What sets this recipe apart from others? It’s the way the homemade cookie base and lightly sweetened ice cream combine with fresh berries—red strawberries, white vanilla, and blue blueberries—giving you that patriotic punch without feeling too sugary or over the top. Plus, there’s a secret touch of lemon zest in the cookies that gives a fresh twist you wouldn’t expect but will love. Honestly, this is the kind of dessert that makes you close your eyes for a second after the first bite. It’s nostalgic and festive, but also fresh and light—just what summer desserts should be.
What Ingredients You Will Need
This recipe uses simple, wholesome ingredients to deliver bold flavor and satisfying texture without the fuss. Most are pantry staples or easy to find fresh at your local market.
- For the Cookies:
- 1 ¾ cups (220g) all-purpose flour
- ½ teaspoon baking powder
- ¼ teaspoon baking soda
- ¼ teaspoon salt
- ½ cup (115g) unsalted butter, softened (I recommend Plugrá for great texture)
- ¾ cup (150g) granulated sugar
- 1 large egg, room temperature
- 1 teaspoon vanilla extract (use pure vanilla for best flavor)
- 1 teaspoon lemon zest (adds a bright, fresh note)
- For the Ice Cream:
- 1 pint (475ml) vanilla ice cream, softened (Ben & Jerry’s or homemade if you’re feeling ambitious)
- For the Filling & Decoration:
- 1 cup (150g) strawberries, hulled and sliced (fresh is best; frozen works too, just thaw first)
- 1 cup (150g) blueberries, fresh or thawed from frozen
- Optional: rainbow sprinkles or nonpareils for garnish
If you want a gluten-free option, swap the all-purpose flour for almond flour or a gluten-free baking mix. For dairy-free versions, coconut yogurt or a plant-based ice cream works well too. Just make sure your ice cream is firm enough to hold together when sandwiched.
Equipment Needed
- Baking sheet lined with parchment paper or a silicone baking mat – I prefer silicone mats because they’re reusable and make cleanup a breeze.
- Mixing bowls – one large for cookie dough and a smaller one for berries.
- Electric mixer or sturdy wooden spoon – I’ve used both, but a stand mixer saves your arm from cramping.
- Spoon or small ice cream scoop for portioning ice cream evenly.
- Plastic wrap or wax paper to wrap sandwiches for freezing.
- Optional: cookie scoop to keep cookies uniform in size.
If you don’t have a stand mixer, no worries. The butter and sugar cream together easily with a hand mixer or even by hand if you’re patient. For freezing your sandwiches, a flat container or tray works well to keep them from sticking together.
Preparation Method
- Preheat the oven to 350°F (175°C). Line a baking sheet with parchment paper or a silicone baking mat. This helps cookies bake evenly and prevents sticking.
- Mix the dry ingredients. In a medium bowl, whisk together 1 ¾ cups (220g) flour, ½ teaspoon baking powder, ¼ teaspoon baking soda, and ¼ teaspoon salt. Set aside.
- Cream the butter and sugar. In a large mixing bowl, beat ½ cup (115g) softened unsalted butter with ¾ cup (150g) granulated sugar until light and fluffy, about 3-4 minutes. This step is key for tender cookies.
- Add the egg, vanilla, and lemon zest. Beat in one large egg and 1 teaspoon vanilla extract, then add lemon zest. The zest adds a subtle brightness that cuts through the sweetness.
- Combine wet and dry ingredients. Gradually add the flour mixture to the wet ingredients, mixing on low speed or stirring gently until just combined. Don’t overmix or cookies get tough.
- Portion the dough. Use a cookie scoop or tablespoon to drop dough onto the prepared baking sheet, spacing them about 2 inches (5 cm) apart. Flatten each slightly with your fingers for even baking.
- Bake for 10-12 minutes. Cookies should be lightly golden around the edges but still soft in the center. The smell at this point is irresistible—warm, buttery with a hint of lemon!
- Cool completely. Let cookies cool on the baking sheet for 5 minutes, then transfer to a wire rack. This step prevents soggy bottoms when assembled.
- Prepare the berries. While cookies cool, rinse and slice strawberries. Pat blueberries dry to avoid extra moisture in the sandwiches.
- Assemble the ice cream sandwiches. Take one cookie, spread about 2 tablespoons (30 ml) of softened vanilla ice cream evenly over the flat side, then top with a few sliced strawberries and blueberries. Press gently with another cookie to form a sandwich.
- Wrap and freeze. Wrap each sandwich tightly in plastic wrap or wax paper to avoid freezer burn and stickiness. Freeze for at least 1 hour to firm up before serving.
- Serve chilled. Remove from freezer 5 minutes before serving for easier bites.
Quick tip: If your ice cream is too hard to spread, let it soften for 5 minutes at room temperature. If too soft, pop the sandwiches back in the freezer for 10 minutes before wrapping. Trust me; these little adjustments save a lot of mess.
Cooking Tips & Techniques
Making these ice cream sandwiches smooth and scrumptious every time means paying attention to a few things I’ve learned the hard way. First, don’t skip chilling the cookies completely before assembly. I once rushed and ended up with half-melted ice cream sliding off warm cookies—total mess! Cooling also helps the cookies retain their soft yet firm texture.
Use softened ice cream, not melted. This makes spreading easier and keeps the sandwich intact. You can scoop the ice cream into balls and then gently press flat on the cookie to avoid overworking it.
When mixing the cookie dough, be careful not to overmix once the flour is added. Overmixing activates gluten and makes cookies tough. Stop mixing as soon as you see no more flour streaks.
Multitasking tip: While cookies bake, prep your berries and set up your assembly station. This way, you’re ready to go once cookies cool down.
Lastly, consider freezing the sandwiches individually before stacking in a container. It prevents sticking and keeps their shape better.
Variations & Adaptations
- Berry swap: Try raspberries or blackberries instead of blueberries for a tart twist that still fits the red and blue theme.
- Chocolate chip cookies: Use your favorite chocolate chip cookie recipe as the base for a richer take on this classic dessert.
- Dairy-free version: Substitute the vanilla ice cream with coconut milk-based or almond milk-based alternatives. Also, swap butter in cookies with dairy-free margarine.
- Mini sandwiches: Make bite-sized versions for kids’ parties or easy snacking.
- My personal twist: Adding a tiny pinch of cinnamon to the cookie dough gave these sandwiches a warm depth that surprised my family one summer.
Serving & Storage Suggestions
Serve these ice cream sandwiches straight from the freezer or let them soften for about 5 minutes for easier bites. They look fantastic on a bright platter, garnished with a few whole berries or a sprig of mint for a fresh pop of color. Pair well with cold lemonade or iced tea for a full summer vibe.
Store leftovers wrapped tightly in the freezer for up to 5 days. For best texture, avoid letting them thaw completely before eating. To reheat slightly, let them sit at room temperature just a bit or microwave for 5-7 seconds, but be careful not to melt the ice cream.
Flavors also mellow and blend a little more after a day or two in the freezer, making these sandwiches even better if you have the patience to wait. Honestly, that anticipation makes the treat taste even sweeter!
Nutritional Information & Benefits
Each red white and blue ice cream sandwich contains approximately 250-300 calories, depending on portion size and specific ingredients used. The cookies provide carbohydrates and a bit of fat from the butter, while the ice cream adds creamy richness.
Fresh strawberries and blueberries pack antioxidants, vitamin C, and fiber, making these sandwiches a slightly healthier indulgence than your average dessert. Using real fruit is a great way to sneak in some nutrients without sacrificing flavor.
Gluten-free and dairy-free options make this recipe accessible for various dietary needs. Just be sure to choose compatible ice cream and flour alternatives. For those watching sugar, consider a low-sugar ice cream or reducing sugar in the cookie dough slightly.
Conclusion
These red white and blue ice cream sandwiches are more than just a colorful dessert; they’re a slice of summer joy you can whip up anytime. Whether you’re hosting a barbecue, packing a picnic, or simply craving a sweet, cool treat, this recipe fits the bill with its easy prep and festive flair.
Feel free to make it your own—swap berries, tweak the cookie flavors, or try dairy-free versions. I keep coming back to this recipe because it’s reliable, delicious, and always sparks smiles. So go ahead, give it a try, and let me know how your first bite made you feel!
FAQs About Red White and Blue Ice Cream Sandwiches
Can I make these ice cream sandwiches ahead of time?
Absolutely! Assemble and freeze them up to 5 days in advance. Just keep them tightly wrapped to prevent freezer burn.
What’s the best way to soften ice cream for spreading?
Leave it out at room temperature for 5 minutes or until it’s soft enough to spread but not melted.
Can I use store-bought cookies instead of homemade?
Yes, but homemade cookies give a fresher taste and better texture. If using store-bought, go for soft, thick cookies.
How do I keep the berries from making the cookies soggy?
Pat berries dry before assembling and don’t add too many. Wrapping sandwiches tightly and freezing quickly helps lock in freshness.
Are there vegan options for this recipe?
You can use vegan butter and dairy-free ice cream alternatives to make this recipe vegan-friendly. Just check that your cookie recipe also fits vegan requirements.
For a similar summer treat with a crispy twist, you might enjoy my crispy garlic chicken recipe, which pairs beautifully with fresh salads and seasonal sides.
Pin This Recipe!
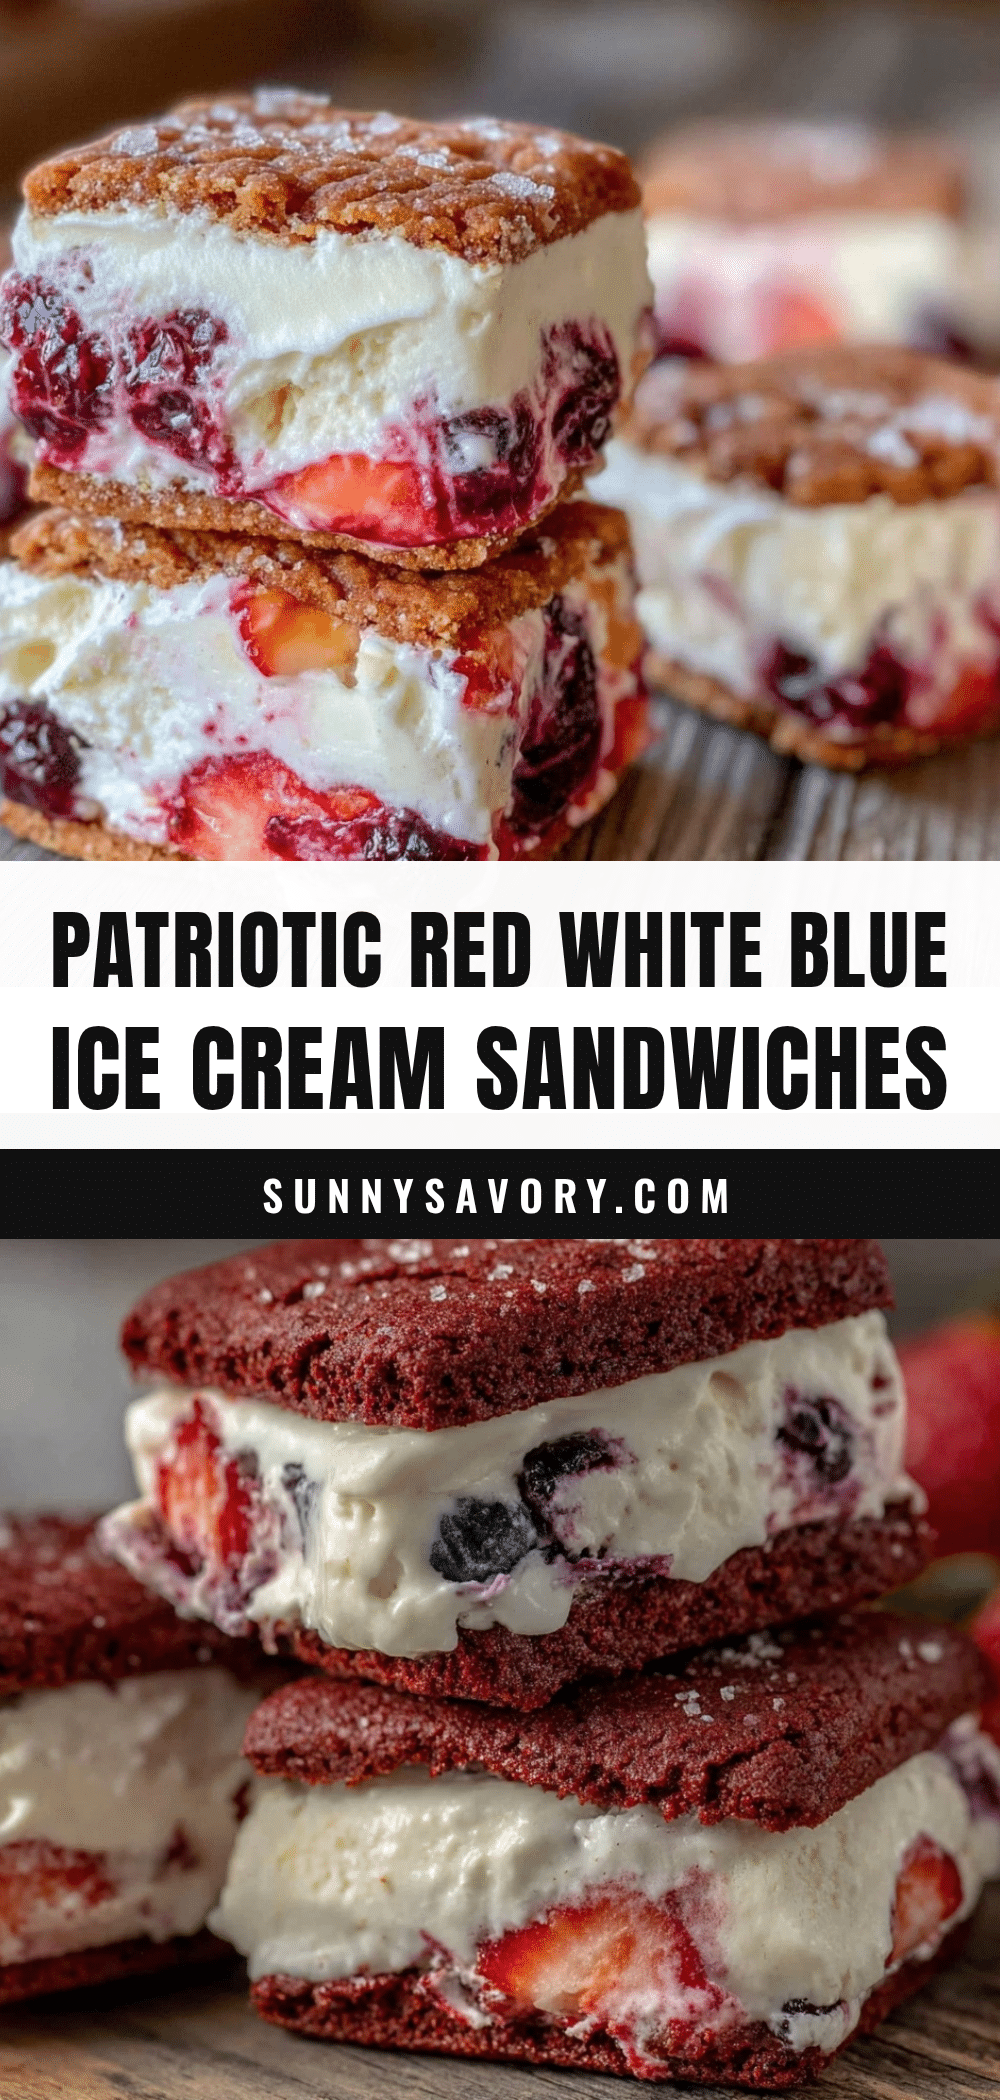
Red White and Blue Ice Cream Sandwiches

A quick and easy summer dessert featuring homemade lemon-zested cookies, creamy vanilla ice cream, and fresh red strawberries and blue blueberries assembled into festive ice cream sandwiches.
- Prep Time: 15 minutes
- Cook Time: 12 minutes
- Total Time: 1 hour 27 minutes
- Yield: 12 sandwiches 1x
- Category: Dessert
- Cuisine: American
Ingredients
- 1 ¾ cups (220g) all-purpose flour
- ½ teaspoon baking powder
- ¼ teaspoon baking soda
- ¼ teaspoon salt
- ½ cup (115g) unsalted butter, softened
- ¾ cup (150g) granulated sugar
- 1 large egg, room temperature
- 1 teaspoon vanilla extract
- 1 teaspoon lemon zest
- 1 pint (475ml) vanilla ice cream, softened
- 1 cup (150g) strawberries, hulled and sliced
- 1 cup (150g) blueberries
- Optional: rainbow sprinkles or nonpareils for garnish
Instructions
- Preheat the oven to 350°F (175°C). Line a baking sheet with parchment paper or a silicone baking mat.
- In a medium bowl, whisk together flour, baking powder, baking soda, and salt. Set aside.
- In a large mixing bowl, beat softened butter with granulated sugar until light and fluffy, about 3-4 minutes.
- Beat in the egg, vanilla extract, and lemon zest until combined.
- Gradually add the flour mixture to the wet ingredients, mixing on low speed or stirring gently until just combined. Do not overmix.
- Use a cookie scoop or tablespoon to drop dough onto the prepared baking sheet, spacing about 2 inches apart. Flatten each slightly with fingers.
- Bake for 10-12 minutes until cookies are lightly golden around edges but still soft in the center.
- Cool cookies on the baking sheet for 5 minutes, then transfer to a wire rack to cool completely.
- Rinse and slice strawberries; pat blueberries dry.
- To assemble, spread about 2 tablespoons of softened vanilla ice cream evenly over the flat side of one cookie, top with sliced strawberries and blueberries, then press with another cookie to form a sandwich.
- Wrap each sandwich tightly in plastic wrap or wax paper and freeze for at least 1 hour to firm up.
- Remove from freezer 5 minutes before serving for easier bites.
Notes
Do not overmix the cookie dough once flour is added to avoid tough cookies. Cool cookies completely before assembling to prevent melting ice cream. Use softened ice cream for easier spreading. Freeze sandwiches individually before stacking to prevent sticking. For gluten-free, substitute flour with almond flour or gluten-free mix. For dairy-free, use plant-based ice cream and margarine.
Nutrition
- Serving Size: 1 ice cream sandwich
- Calories: 275
- Sugar: 20
- Sodium: 120
- Fat: 12
- Saturated Fat: 7
- Carbohydrates: 35
- Fiber: 2
- Protein: 3
Keywords: ice cream sandwiches, summer dessert, red white and blue, patriotic dessert, homemade cookies, vanilla ice cream, fresh berries