Love this? Save it for later!
Share the inspiration with your friends
Introduction
The sun was just starting to dip behind the neighbor’s maple tree last July 3rd when the faint sound of distant fireworks and the unmistakable scent of freshly cut grass hit me — and suddenly I was eight, sitting cross-legged on the cracked driveway of our old house on Maplewood Lane. My next-door friend, Lisa, had just pulled out a big Tupperware filled with what she called “magic bars,” but honestly, they were these no-bake ice cream sandwich bars, layered with cookie crumbs, ice cream, and a splash of nostalgia. I remember the way the cold cream melted just enough against the warm breeze and how sticky my fingers got trying to hold onto those slippery squares.
It was chaos too — her little brother spilled juice on the sidewalk, and the dog barked at a passing cyclist, but amidst all that, those bars felt like a secret summer treasure. I mean, I’ve tried recreating that feeling a hundred times, chasing that cool, sweet rush on a hot day, and honestly, this Easy 4th of July No-Bake Ice Cream Sandwich Bars recipe comes closest. Maybe you’ve been there too — trying to catch a fleeting memory with a bite of something familiar but new. And these bars? They’re simple, festive, and just the right kind of messy summer fun.
Why You’ll Love This Recipe
After testing this recipe through many summer cookouts and last-minute celebrations, I can say it’s a winner for so many reasons. Here’s what makes these Easy 4th of July No-Bake Ice Cream Sandwich Bars stand out:
- Quick & Easy: Comes together in under 20 minutes, perfect for those spontaneous summer gatherings or when you forget dessert until last minute.
- Simple Ingredients: No fancy or hard-to-find items — just basics like ice cream, cookies, and sprinkles, which you probably already have on hand.
- Perfect for 4th of July: The red, white, and blue sprinkles or berries make it a festive hit without extra fuss.
- Crowd-Pleaser: Everyone from kids to adults can’t get enough of these bars; they’re sweet, creamy, and just a little crunchy.
- Unbelievably Delicious: The combo of creamy ice cream sandwiched between crumbly cookies is comfort food with a summer twist.
This isn’t just another ice cream dessert — it’s the kind that makes you pause mid-bite, close your eyes, and remember a perfect summer day. Honestly, these bars are my go-to when I want something fuss-free but still show stopping. Plus, swapping in your favorite ice cream flavors or cookie types makes it easily customizable without complicating things.
What Ingredients You Will Need
This recipe uses simple, wholesome ingredients to deliver a cool, satisfying dessert without the hassle of baking. Most of these are pantry staples, and you can easily swap or customize based on what’s in your kitchen.
- Ice Cream: 1.5 quarts (1.4 liters) of vanilla ice cream, slightly softened (I prefer Haagen-Dazs for its creamy texture, but any good-quality brand works)
- Cookies: 30 to 40 chocolate sandwich cookies (like Oreos), crushed into fine crumbs — this forms the base and topping
- Butter: 6 tablespoons (85 grams) unsalted butter, melted (adds richness and helps bind the crumb layers)
- Sweetened Condensed Milk: 1/2 cup (120 ml) — optional but recommended for extra creaminess and to hold the crumbs together
- Fresh Berries: 1 cup mixed blueberries and sliced strawberries (for the patriotic red and blue accents)
- Sprinkles: 1/4 cup red, white, and blue sprinkles or edible stars for decoration
Ingredient Tips: For a gluten-free option, try gluten-free sandwich cookies, or swap in dairy-free ice cream if needed. In summer, fresh berries are perfect, but frozen berries (thawed and drained) work in a pinch. If you want extra crunch, sprinkle chopped nuts or mini chocolate chips on top.
Equipment Needed
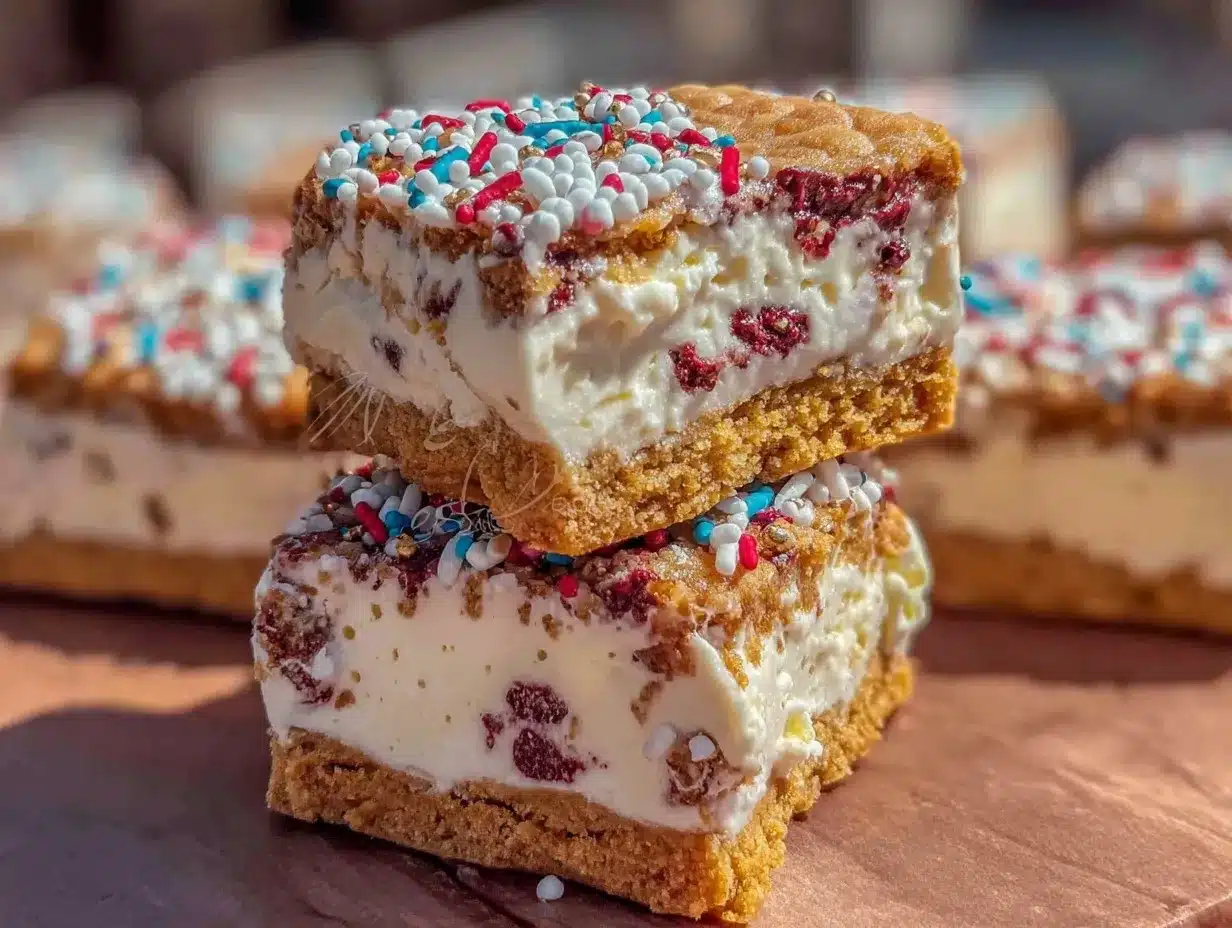
- 9×13 inch (23×33 cm) baking dish or pan — if you don’t have this exact size, anything close will do; just adjust layering accordingly
- Mixing bowls — one large for mixing crumbs and butter, another for softening ice cream
- Measuring cups and spoons — for accuracy, though eyeballing works once you get comfortable
- Plastic wrap or aluminum foil — to cover the pan while freezing
- Food processor or sturdy plastic bag and rolling pin — to crush cookies
- Spatula or spoon — for spreading layers evenly
- Sharp knife — for slicing bars cleanly when frozen
I once tried using a hand blender for the crumbs, but it made them too fine, almost powdery, which didn’t hold up well. Crushing cookies by hand or with a rolling pin gives just the right texture. Also, a non-stick baking dish makes cleanup easier, but I’ve managed with glass pans just fine.
Preparation Method
- Crush the Cookies: Place the chocolate sandwich cookies in a food processor and pulse until fine crumbs form. If you don’t have a processor, put cookies in a sturdy plastic bag and crush with a rolling pin. You want a mix of fine crumbs and small chunks for texture. (5 minutes)
- Mix the Base Crumbs: In a large bowl, combine 2 cups (about 200 grams) of the cookie crumbs with melted butter and sweetened condensed milk. Stir well until the mixture resembles wet sand. Press this mixture firmly into the bottom of your 9×13 inch pan to create an even crust layer. (5 minutes)
- Layer the Ice Cream: Soften the vanilla ice cream slightly at room temperature for about 5 minutes — it should be scoopable but not melted. Spread the ice cream evenly over the cookie crust using a spatula, smoothing it out gently. (5 minutes)
- Add the Topping: Sprinkle the remaining cookie crumbs over the ice cream layer, followed by fresh berries placed evenly on top. Finish with a scatter of red, white, and blue sprinkles for that festive touch. (5 minutes)
- Freeze: Cover the pan tightly with plastic wrap or foil and freeze for at least 4 hours, preferably overnight, to allow the ice cream to firm up and the layers to set properly.
- Serve: Remove from freezer about 10 minutes before cutting to make slicing easier. Use a sharp knife to cut into bars or squares. Keep frozen until ready to serve for best results.
Pro Tip: If the cookie crust feels too crumbly, add a tablespoon more melted butter next time. And if you find your ice cream melts too fast while spreading, pop it back in the freezer for a few minutes before continuing.
Cooking Tips & Techniques
Making these no-bake ice cream sandwich bars is straightforward, but a few insider tips make a big difference. First, when crushing cookies, you want a mix of fine crumbs and small pieces — too fine and the layers won’t hold well, too chunky and they won’t stick together. I’ve learned that pressing the crust firmly with the back of a spoon helps create a solid base that won’t crumble apart.
Softening the ice cream just enough is key — if it melts too much, it will soak into the crust and make it soggy. If it’s too hard, spreading becomes a struggle and the layers look uneven. I usually set a timer when I take the ice cream out so I don’t get distracted and forget it on the counter!
Another tip is to use a sharp knife warmed under hot water before slicing the bars — it cuts cleaner and prevents crumbling. Also, covering the bars tightly while freezing prevents ice crystals on top and keeps the bars smooth.
Lastly, timing your prep so you make these bars a day ahead makes serving stress-free and gives the flavors a chance to meld. I’ve pulled these out at neighborhood picnics, and honestly, they’re always the first dessert to disappear.
Variations & Adaptations
These ice cream sandwich bars are incredibly versatile, which is perfect when you want to switch things up without losing that easy vibe.
- Dairy-Free Version: Use dairy-free vanilla ice cream and dairy-free sandwich cookies. Coconut condensed milk or a drizzle of maple syrup can replace the sweetened condensed milk.
- Flavor Twists: Swap vanilla ice cream with strawberry or blueberry for a fruity punch. For a chocolate lover’s dream, use chocolate ice cream and double chocolate cookies.
- Seasonal Adaptations: In fall, try pumpkin ice cream with crushed gingersnap cookies and a sprinkle of cinnamon instead of sprinkles. Summer berry combos can be swapped for tropical fruits like mango and pineapple.
- Crunch Factor: Add chopped toasted nuts, mini chocolate chips, or even crushed pretzels on top for extra texture and flavor contrast.
- Personal Favorite: I once threw in a layer of salted caramel sauce between the crust and ice cream — it was a messy but divine upgrade that made the bars even more addictive.
Serving & Storage Suggestions
These bars are best served cold straight from the freezer. Letting them sit out for about 10 minutes before serving softens the ice cream just enough for easy bites. Arrange on a tray with a few extra fresh berries and a small bowl of whipped cream for an inviting presentation.
Leftovers keep well wrapped in the freezer for up to 2 weeks. To reheat slightly, just let them sit at room temperature for 5-10 minutes — avoid microwaving unless you want a messy puddle! Over time, the flavors meld beautifully, so these bars taste even better the next day.
Pair these bars with iced tea, lemonade, or a sparkling white wine for an adult-friendly twist at summer parties. They also make a fun, casual dessert for backyard barbecues or summer picnic recipes you might be planning.
Nutritional Information & Benefits
Each bar (depending on size) contains approximately 250-300 calories, with a balance of fats and carbs from the ice cream and cookies. The fresh berries add antioxidants and vitamins, giving a little health boost amid the indulgence.
This dessert is naturally gluten-free if you choose the right cookies, and can be dairy-free with simple swaps. It’s a fun treat that fits into most lifestyles — perfect for summer when you want something cool, sweet, and fuss-free without overthinking.
I like to think of these bars as a little summer joy wrapped up in every bite — a reminder that sometimes, simple ingredients can bring the most satisfying moments.
Conclusion
These Easy 4th of July No-Bake Ice Cream Sandwich Bars are more than just dessert — they’re a small celebration on a plate. They come together fast, taste amazing, and carry that special summer energy that’s just hard to find in other recipes. Whether you stick with the classic vanilla and chocolate combo or mix in your own flavors, this recipe is foolproof fun.
I keep coming back to it because it feels like a little slice of those perfect summer evenings, the kind where time slows down and sweet memories are made. I’d love to hear how you make these your own — maybe you add extra sprinkles or swap in a favorite ice cream flavor? Drop a comment below and share your version — let’s keep this summer tradition going!
Here’s to plenty of sunshine, good friends, and lots of easy, delicious treats.
FAQs
Can I make these bars ahead of time?
Absolutely! These bars actually taste better after freezing overnight, so making them a day ahead is ideal for the best texture and flavor.
What if I don’t have chocolate sandwich cookies?
You can use any crunchy cookie you like — graham crackers, shortbread, or even crushed pretzels work well for the crust and topping layers.
How do I prevent the bars from melting too fast when serving?
Serve them straight from the freezer and only take out what you’ll eat in 10-15 minutes. Letting them soften slightly before cutting helps with clean slices.
Can I use other ice cream flavors?
Yes! Feel free to experiment with strawberry, chocolate, or even mint ice cream to suit your taste and occasion.
Are these bars suitable for dairy-free diets?
Yes, just swap in dairy-free ice cream and suitable cookies. You can also replace the sweetened condensed milk with a dairy-free alternative or a natural sweetener like maple syrup.
Pin This Recipe!
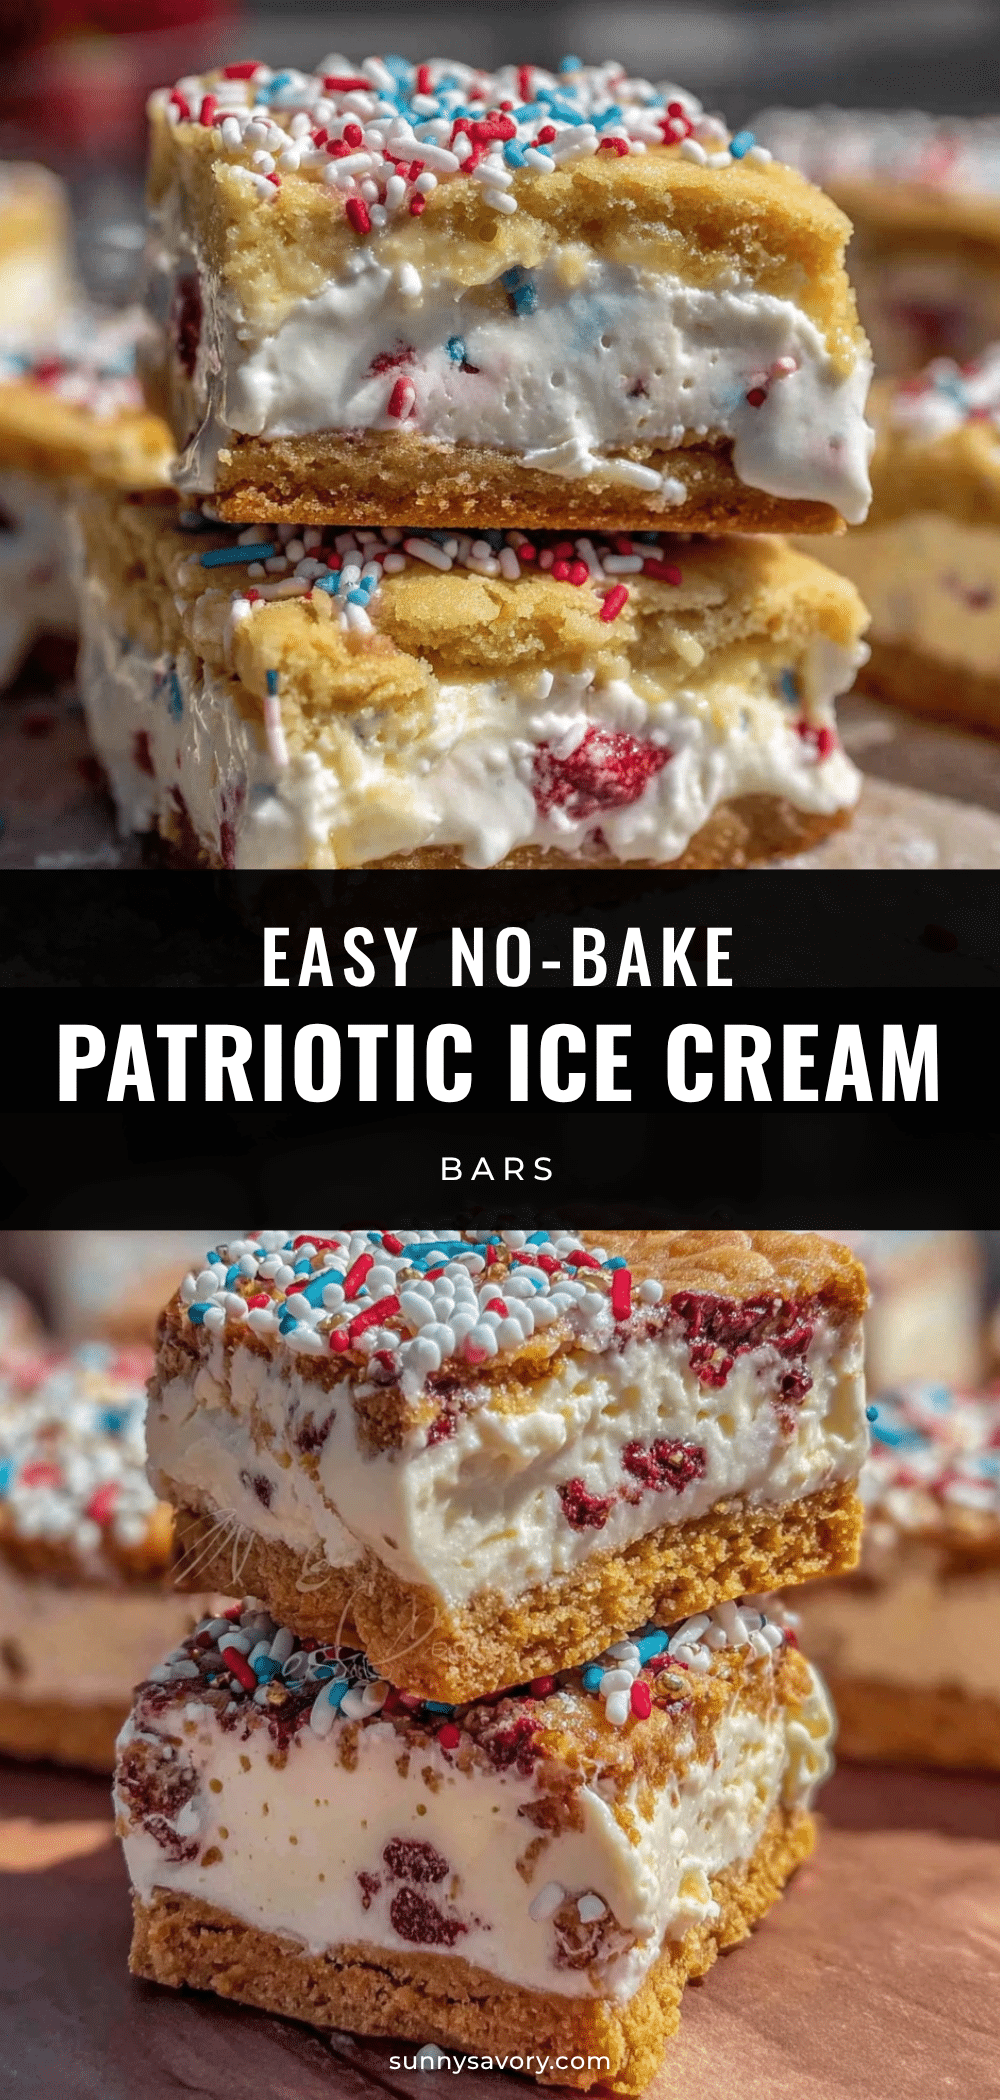
Easy 4th of July No-Bake Ice Cream Sandwich Bars

A simple, festive, and delicious no-bake ice cream sandwich bar recipe perfect for summer gatherings and 4th of July celebrations. Layers of cookie crumbs, creamy ice cream, fresh berries, and sprinkles come together quickly for a crowd-pleasing treat.
- Prep Time: 20 minutes
- Cook Time: 0 minutes
- Total Time: 4 hours 20 minutes
- Yield: 12 servings 1x
- Category: Dessert
- Cuisine: American
Ingredients
- 1.5 quarts (1.4 liters) vanilla ice cream, slightly softened
- 30 to 40 chocolate sandwich cookies (like Oreos), crushed into fine crumbs
- 6 tablespoons (85 grams) unsalted butter, melted
- 1/2 cup (120 ml) sweetened condensed milk (optional)
- 1 cup mixed fresh blueberries and sliced strawberries
- 1/4 cup red, white, and blue sprinkles or edible stars
Instructions
- Crush the chocolate sandwich cookies in a food processor until fine crumbs form, leaving some small chunks for texture. Alternatively, crush cookies in a sturdy plastic bag with a rolling pin. (5 minutes)
- In a large bowl, combine 2 cups (about 200 grams) of the cookie crumbs with melted butter and sweetened condensed milk. Stir until the mixture resembles wet sand. Press firmly into the bottom of a 9×13 inch pan to form an even crust layer. (5 minutes)
- Soften the vanilla ice cream at room temperature for about 5 minutes until scoopable but not melted. Spread evenly over the cookie crust using a spatula, smoothing gently. (5 minutes)
- Sprinkle the remaining cookie crumbs over the ice cream layer. Evenly distribute fresh berries on top, then scatter red, white, and blue sprinkles for decoration. (5 minutes)
- Cover the pan tightly with plastic wrap or aluminum foil and freeze for at least 4 hours, preferably overnight, to allow layers to set.
- Remove from freezer about 10 minutes before cutting. Use a sharp knife to slice into bars or squares. Keep frozen until ready to serve.
Notes
For gluten-free, use gluten-free sandwich cookies. For dairy-free, use dairy-free ice cream and cookies, and substitute sweetened condensed milk with coconut condensed milk or maple syrup. Press crust firmly to avoid crumbling. Soften ice cream just enough to spread without melting. Warm knife under hot water before slicing for clean cuts. Make a day ahead for best flavor and texture.
Nutrition
- Serving Size: 1 bar (approximate)
- Calories: 275
- Sugar: 22
- Sodium: 150
- Fat: 14
- Saturated Fat: 8
- Carbohydrates: 34
- Fiber: 1
- Protein: 3
Keywords: no-bake, ice cream sandwich bars, 4th of July dessert, summer treat, easy dessert, patriotic dessert, ice cream bars



