Love this? Save it for later!
Share the inspiration with your friends
Introduction
“You know that feeling when you suddenly crave something bright and tangy, but also sweet and simple? That was me last Thursday afternoon. I was halfway through cleaning my cluttered kitchen when my neighbor, Mrs. Lane, popped in with a plate of these shimmering, sun-yellow squares. She smiled and said, ‘You’ll want to try these—my secret summer hack.’ Honestly, I wasn’t expecting much, but one bite of those easy quick 20-minute lemonade bars, and let me tell you, I was hooked. The perfect balance of zingy lemon and just-right sweetness, all wrapped up in a buttery crust that practically melts in your mouth.
Mrs. Lane’s recipe came from her niece, who apparently whipped it up as a last-minute treat for a potluck. What started as a rushed attempt turned into a crowd favorite, and now it’s my go-to whenever I want something fresh and fast. I did make a mess trying to zest lemons over my favorite cracked mixing bowl (don’t ask), but it was worth every crumb. Maybe you’ve been there, juggling a million things and still wanting a homemade dessert that doesn’t require hours in the kitchen.
So, let me walk you through these lemonade bars that have stayed with me ever since. Plus, I’ll share three refreshing variations that keep the recipe feeling new and exciting every time you make it. Trust me, these bars are the kind of treat where you close your eyes after the first bite and think, “Yep, this is exactly what summer tastes like.”
Why You’ll Love This Recipe
After testing dozens of citrus desserts, I can confidently say this easy quick 20-minute lemonade bars recipe hits the sweet spot every time. It’s not just the speed (though that’s a lifesaver on busy days)—it’s the texture, the bright flavor, and the versatility that make it stand out. Here’s what makes these lemonade bars a kitchen must-have:
- Quick & Easy: Ready in under 20 minutes, perfect when time’s tight but you want to impress.
- Simple Ingredients: Uses pantry staples and fresh lemons—no complicated or exotic items needed.
- Perfect for Any Occasion: From casual afternoon snacks to brunch spreads, these bars fit right in.
- Crowd-Pleaser: The bright lemon flavor and buttery crust always get enthusiastic nods from both kids and adults.
- Unbelievably Delicious: The tangy-sweet balance combined with a melt-in-your-mouth base is pure comfort food with a twist.
What sets this recipe apart is the way the crust and lemon filling come together without fuss—no fancy whipping or chilling required. I’ve found that gently folding the lemon zest into the filling gives it an irresistible aroma. Plus, the variations I’ll share add fun twists that keep everyone guessing. Honestly, it’s the kind of recipe that turns a simple dessert into a memorable moment, whether you’re sharing it on a sunny porch or wrapping it up for a neighbor’s treat.
What Ingredients You Will Need
This recipe uses simple, wholesome ingredients to deliver bold lemon flavor and a satisfying buttery crust without any hassle. Most of these are pantry staples, with fresh lemon bringing that signature tang. You can swap a few items to suit your pantry or preferences—I’ll note those too.
- For the crust:
- 1 cup (125g) all-purpose flour (I like King Arthur for consistent texture)
- 1/4 cup (50g) granulated sugar
- 1/2 cup (113g) unsalted butter, softened (room temperature for easy mixing)
- Pinch of salt
- For the lemon filling:
- 2 large eggs, room temperature (for best consistency)
- 3/4 cup (150g) granulated sugar
- 1/4 cup (30g) all-purpose flour
- 1/2 cup (120ml) fresh lemon juice (about 2-3 lemons, freshly squeezed)
- 1 tablespoon lemon zest (adds bright aroma)
- Optional for dusting:
- Powdered sugar
Substitutions: Use almond flour for a gluten-free crust option, but the texture will be a bit different. Swap butter for coconut oil if dairy-free, but chill the crust a bit longer before baking. If fresh lemons aren’t available, bottled lemon juice works but fresh zest is a must for that zesty punch.
Equipment Needed
- 8×8-inch (20x20cm) baking pan: I prefer glass pans for even baking, but metal works fine too.
- Mixing bowls: One for crust, one for filling—medium size is perfect.
- Electric mixer or sturdy whisk: You can mix by hand, but a mixer speeds things up.
- Zester or fine grater: For fresh lemon zest, which is a game changer.
- Citrus juicer: Optional, but makes squeezing lemons easier and less messy.
- Spatula: To spread crust and fold ingredients gently.
If you don’t have a zester, a microplane works great too. And if your mixing bowls are scratched or stained like mine, don’t worry—it happens to the best of us. Just be careful when handling hot bars, and use oven mitts to avoid kitchen mishaps (I learned that the hard way).
Preparation Method
- Preheat your oven to 350°F (175°C). Lightly grease your 8×8-inch baking pan or line it with parchment paper to make removal easier. This step takes about 5 minutes.
- Make the crust: In a medium bowl, combine 1 cup (125g) flour, 1/4 cup (50g) sugar, and a pinch of salt. Add 1/2 cup (113g) softened unsalted butter. Using your fingers or a pastry cutter, mix until the mixture resembles coarse crumbs. Don’t overwork it—crumbly is good here.
- Press the crust: Firmly press the crust mixture into the bottom of your prepared pan, creating an even layer. I find using the bottom of a glass or measuring cup helps pack it down nicely. Bake for 15 minutes, until lightly golden around the edges. You’ll notice a warm, buttery aroma filling your kitchen—that’s your signal it’s ready.
- Prepare the filling while crust bakes: In another bowl, whisk together 2 large eggs and 3/4 cup (150g) sugar until smooth and slightly thickened. Add 1/4 cup (30g) flour and mix until combined. Stir in 1/2 cup (120ml) fresh lemon juice and 1 tablespoon lemon zest. The filling should be pourable but not too runny.
- Pour the filling over the hot crust: As soon as the crust comes out of the oven, carefully pour the lemon filling on top. Return the pan to the oven and bake for an additional 15 minutes. The filling will set but still jiggle slightly in the center—perfect texture. If you bake longer, it risks drying out.
- Cool & dust: Let the bars cool completely in the pan on a wire rack (about 30-40 minutes). Once cooled, dust with powdered sugar if you like. Cut into 12 squares and serve chilled or at room temperature.
Pro tip: If your crust edges are browning too fast, loosely cover them with foil halfway through baking. Also, zest the lemons before juicing to avoid losing any flavorful oils. I usually zest over a plate to catch every bit!
Cooking Tips & Techniques
One thing I’ve learned making these lemonade bars is that gentle mixing is key. Over-beating the filling can cause bubbles or cracks on top, and no one wants a cracked lemon bar! When folding in the lemon juice, do it slowly to keep that silky texture.
Also, temperature matters—using room temperature eggs helps the filling come together smoothly. Cold eggs can cause lumps or uneven baking.
Don’t skip the zest! It adds a fresh burst that bottled lemon juice alone just can’t match. I once tried skipping the zest on a whim, and honestly, the bars felt flat.
Timing is your friend here. Bake the crust fully before adding filling to avoid sogginess. And trust your oven but check bars starting at 13 minutes during the second bake—you want just a slight jiggle in the center.
If multitasking, prepare the filling while the crust bakes—that saves time and keeps things efficient without stress. Lastly, cool bars completely before slicing for neat squares; warm bars tend to crumble.
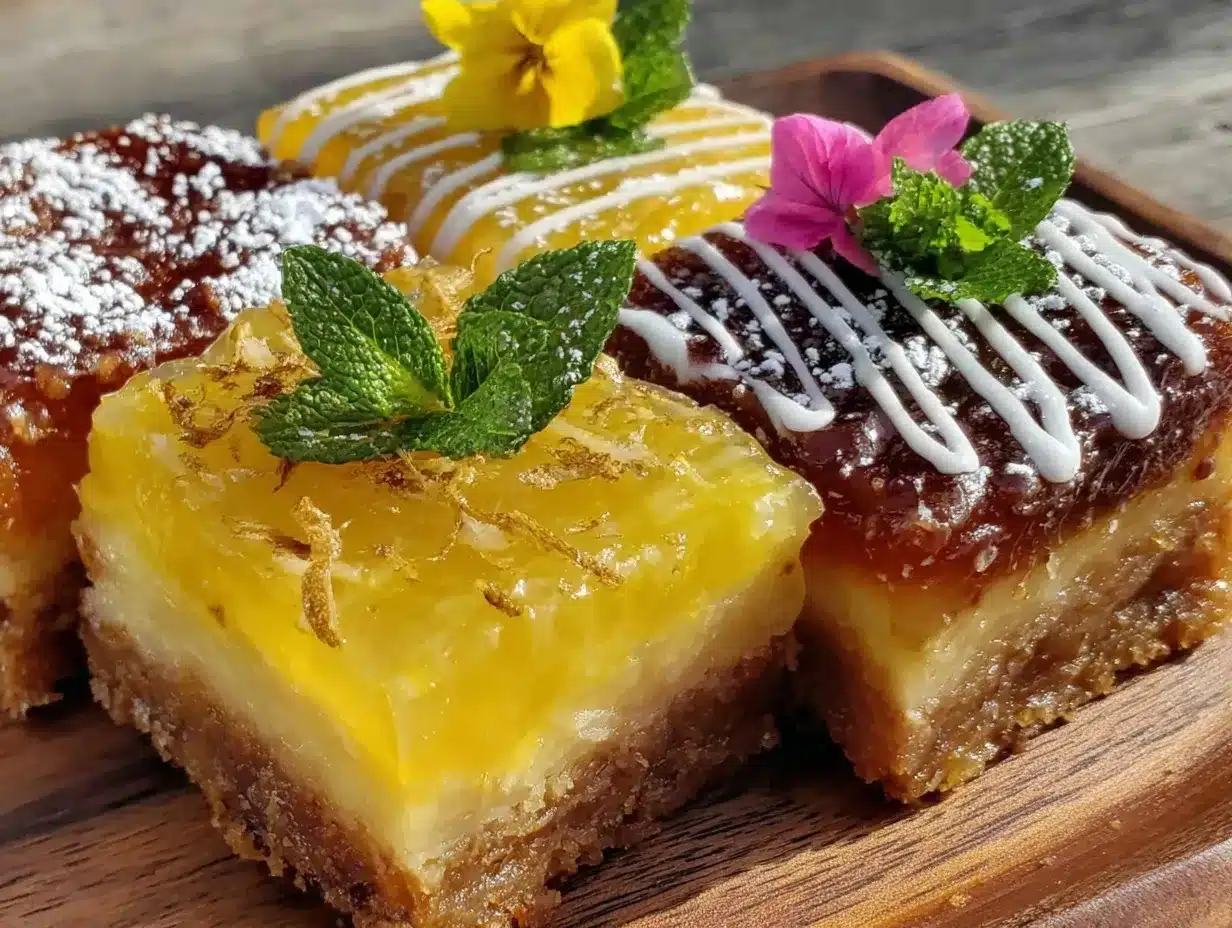
Variations & Adaptations
- Berry Lemonade Bars: Gently fold 1/2 cup (75g) fresh raspberries or blueberries into the filling before baking. The fruit adds bursts of sweetness and a pretty pop of color.
- Coconut Lemonade Bars: Add 1/4 cup (20g) shredded unsweetened coconut to the crust and sprinkle some on top before baking. This gives a tropical twist with a bit of texture.
- Lavender Lemonade Bars: Stir 1 teaspoon culinary lavender buds (lightly crushed) into the filling for a subtle floral note. It’s unexpected but wonderfully fragrant.
For a lower sugar option, reduce sugar by 1/4 cup (50g) in the filling and balance with a tablespoon of honey or maple syrup. If you prefer a gluten-free version, substitute the crust flour with almond or oat flour, though keep in mind the texture will be less crisp.
One time, I made the berry version with frozen raspberries when fresh weren’t available. Just thaw and drain them well to avoid extra moisture in the bars. They turned out beautifully and kept well in the fridge for days.
Serving & Storage Suggestions
These lemonade bars are best served chilled or at room temperature. I love plating them on a simple white dish with a fresh mint sprig for a pop of color. They pair wonderfully with a cup of iced tea or a glass of sparkling water with lemon slices.
Store leftover bars in an airtight container in the refrigerator for up to 4 days. They keep their flavor and texture quite well. For longer storage, freeze bars wrapped tightly in plastic wrap and foil for up to 2 months. Thaw overnight in the fridge before serving.
When reheating, avoid the microwave if you want to preserve texture—just bring to room temperature or enjoy chilled. Flavors actually mellow and blend beautifully after a day, so making them a day ahead is a great idea for gatherings.
Nutritional Information & Benefits
Each lemonade bar contains roughly 150 calories, with moderate carbs and fats from the butter and sugar. The fresh lemon juice provides a good dose of vitamin C, which supports immunity and skin health. Using real lemon zest adds antioxidants and bright citrus oils.
This recipe is naturally gluten-containing but can be adapted for gluten-free diets. It’s free from nuts unless you add them as a variation. For those watching sugar intake, the recipe’s sugar can be adjusted down with minor texture changes.
Overall, these bars offer a sweet treat that feels light and fresh compared to heavier desserts, perfect for when you want a little indulgence without feeling weighed down.
Conclusion
If you’re looking for a dessert that’s quick, fuss-free, and bursting with bright lemon flavor, these easy quick 20-minute lemonade bars are exactly what you need. They’re flexible, approachable, and have become a staple in my recipe box for good reason. I love how you can tweak the flavors to keep things interesting, and honestly, it’s hard to resist going back for seconds.
Try making the classic version first, then experiment with the variations to suit your mood or occasion. I’d love to hear how you personalize these bars or what twist you discover next. Drop a comment below or share your photos—I’m always excited to see how this simple recipe turns into your own refreshing treat.
Remember, great baking doesn’t have to be complicated. Sometimes, the best moments come from the easiest recipes shared with good company.
Frequently Asked Questions
Can I use bottled lemon juice instead of fresh?
Yes, but fresh lemon juice and zest give the best flavor. Bottled juice can sometimes taste flat, so consider adding extra zest to boost brightness.
How do I store leftover lemonade bars?
Store in an airtight container in the fridge for up to 4 days, or freeze them wrapped tightly for up to 2 months.
Can I make these bars vegan?
To make vegan, substitute eggs with flax eggs (1 tbsp flaxseed meal + 3 tbsp water per egg) and use vegan butter or coconut oil. Texture will be slightly different but still tasty.
What’s the best way to cut the bars cleanly?
Cool them completely, then use a sharp knife wiped clean between cuts. Cutting when warm can cause crumbling.
Can I double this recipe for a larger batch?
Yes! Use a 9×13-inch pan and adjust baking times slightly—watch closely to avoid overbaking.
By the way, if you enjoy citrus desserts, you might find my crispy garlic chicken recipe a great savory companion for your next meal. And if you love easy sweets, check out the refreshing blueberry lemon muffins recipe for something just as bright and zesty.
Pin This Recipe!

Easy Quick 20-Minute Lemonade Bars Recipe with 3 Refreshing Variations

Bright and tangy lemonade bars with a buttery crust, ready in under 20 minutes. Perfect for a quick, refreshing dessert with versatile variations.
- Prep Time: 5 minutes
- Cook Time: 30 minutes
- Total Time: 35 minutes
- Yield: 12 bars 1x
- Category: Dessert
- Cuisine: American
Ingredients
- 1 cup (125g) all-purpose flour
- 1/4 cup (50g) granulated sugar
- 1/2 cup (113g) unsalted butter, softened
- Pinch of salt
- 2 large eggs, room temperature
- 3/4 cup (150g) granulated sugar
- 1/4 cup (30g) all-purpose flour
- 1/2 cup (120ml) fresh lemon juice (about 2–3 lemons)
- 1 tablespoon lemon zest
- Powdered sugar (optional for dusting)
Instructions
- Preheat your oven to 350°F (175°C). Lightly grease an 8×8-inch baking pan or line it with parchment paper.
- In a medium bowl, combine 1 cup flour, 1/4 cup sugar, and a pinch of salt. Add 1/2 cup softened unsalted butter and mix until the mixture resembles coarse crumbs.
- Press the crust mixture firmly into the bottom of the prepared pan to create an even layer. Bake for 15 minutes until lightly golden around the edges.
- While the crust bakes, whisk together 2 large eggs and 3/4 cup sugar until smooth and slightly thickened. Add 1/4 cup flour and mix until combined. Stir in 1/2 cup fresh lemon juice and 1 tablespoon lemon zest.
- Pour the lemon filling over the hot crust as soon as it comes out of the oven. Return the pan to the oven and bake for an additional 15 minutes until the filling sets but still jiggles slightly in the center.
- Let the bars cool completely in the pan on a wire rack (about 30-40 minutes). Dust with powdered sugar if desired. Cut into 12 squares and serve chilled or at room temperature.
Notes
If crust edges brown too fast, cover with foil halfway through baking. Zest lemons before juicing to retain oils. Use room temperature eggs for smooth filling. Avoid over-beating filling to prevent cracks. Cool bars completely before cutting for neat squares. Variations include adding berries, coconut, or lavender. For gluten-free, substitute almond flour for crust. For dairy-free, use coconut oil and chill crust longer before baking.
Nutrition
- Serving Size: 1 bar (1/12 of recip
- Calories: 150
- Sugar: 14
- Sodium: 70
- Fat: 8
- Saturated Fat: 5
- Carbohydrates: 20
- Fiber: 0.5
- Protein: 2
Keywords: lemonade bars, lemon dessert, quick dessert, easy lemon bars, summer dessert, citrus bars, buttery crust, refreshing dessert