Love this? Save it for later!
Share the inspiration with your friends
I was standing in line at a tiny farmers market in Santa Fe, fanning myself with a paper bag, when the woman in front of me turned around and handed me a roasted pepper. She didn’t say anything at first. She just held it out like it was a gift, which, honestly, it was. The skin was blistered and blackened, and the smell that came off it—smoky, sweet, with just a hint of heat—stopped me mid-sentence. I was talking to my husband about something boring, probably what we were having for dinner that week, and I just stopped. “What is that?” I asked. She laughed and said, “That’s Hatch season, honey. You haven’t lived until you’ve put one of these on a burger.”
I took it from her, burned my fingers, and ate it right there. Standing in the New Mexico sun with juice running down my chin. And let me tell you, she was right. That single moment changed how I thought about cheeseburgers forever. I mean, I’d always been a classic burger person—lettuce, tomato, onion, done. But this? This was something else entirely. The char from the fire, the way the pepper softened into almost a jam, the little kick that builds on your tongue without overwhelming everything else. I bought two dozen peppers that day and spent the next week figuring out how to turn that experience into a burger I could make at home.
Maybe you’ve been there—you taste something on vacation or at a random market stand, and you spend months trying to recreate it. That was me with these Smoky Roasted Hatch Green Chili Cheeseburgers. I burned a lot of peppers. I made a lot of patties that were either too dry or too greasy. But eventually, I got it right. And now, every time I fire up the grill and smell those peppers roasting, I’m right back in that parking lot. This recipe stayed with me because it’s not just a burger. It’s a memory you can eat. And honestly, that’s the best kind of recipe to share.
Why You’ll Love This Recipe
Let’s be real for a second. There are a million burger recipes out there. But these Smoky Roasted Hatch Green Chili Cheeseburgers are different, and I’m not just saying that because I’m biased. After testing this recipe about a dozen times—yes, a dozen—I can tell you exactly why this one wins.
- Quick & Easy: You can have these on the table in under 30 minutes. The peppers roast while the patties form, and everything comes together without a ton of fuss.
- Simple Ingredients: No fancy grocery trips needed. Ground beef, cheese, buns, and Hatch chiles. That’s the backbone. You probably have the rest in your pantry.
- Perfect for Grilling Season: These are made for summer cookouts, but they work just as well on a cast-iron skillet in the middle of January.
- Crowd-Pleaser: I’ve served these to kids, picky eaters, and serious food snobs. They all go quiet after the first bite. That’s the sign.
- Unbelievably Delicious: The smoky char from the roasted peppers mixed with the juicy beef and melted cheese? It’s next-level comfort food. You’ll close your eyes on the first bite. I promise.
What makes this recipe different from every other Hatch chili burger out there is the technique. Most recipes just throw raw or canned chiles on top. Not here. I roast the peppers until the skin is completely blackened, then I sweat them in a covered bowl to lock in all that smoky flavor. Then, I chop them and mix a little into the ground beef itself, not just as a topping. That little trick makes every single bite taste like Hatch season, not just the bites where you get a pepper slice.
This is the kind of burger that makes people ask for the recipe before they’ve even finished eating. It’s comfort food reimagined—faster than you’d expect, but with the same soul-soothing satisfaction you want from a great burger. Perfect for impressing guests without the stress, or turning a Tuesday night into something memorable.
What Ingredients You Will Need
This recipe uses simple, honest ingredients to deliver that bold, smoky flavor without any complicated steps. Most of these are pantry staples or easy to find at your local grocery store during late summer and early fall.
- Fresh Hatch green chiles (4-5 medium) – These are the star of the show. Look for them at farmers markets or specialty stores from August through September. If you can’t find Hatch, Anaheim or Poblano peppers work as a substitute, though the flavor will be milder.
- Ground beef (1.5 lbs, 80/20 blend) – The 80/20 ratio is key here. You need enough fat to keep the patties juicy, especially since the peppers add a little moisture too. I prefer grass-fed beef from a local butcher when I can get it.
- Sharp cheddar cheese (4 slices) – Cheddar holds up well to the smoky heat. Pepper jack is also fantastic if you want more spice. Use thick-cut slices so they melt slowly.
- Hamburger buns (4, brioche or potato) – Brioche buns add a touch of sweetness that balances the heat. Toasting them is non-negotiable in my kitchen.
- Smoked paprika (1 teaspoon) – This reinforces the roasted flavor from the chiles. Regular paprika works, but smoked is better here.
- Garlic powder (1/2 teaspoon) – Adds depth without being overpowering. Fresh garlic can burn on the grill, so stick with powder.
- Salt (1 teaspoon, plus more for peppers) – Use kosher salt for the patties. It dissolves better and seasons more evenly.
- Black pepper (1/2 teaspoon, freshly ground) – Freshly ground makes a difference here. Pre-ground is too dusty.
- Neutral oil (1 tablespoon, like avocado or canola) – For rubbing on the peppers before roasting. Helps the skin char evenly.
- Mayonnaise (2 tablespoons) – Spread on the toasted buns. It adds richness and helps the bun hold up to the juicy patty.
- Lettuce and tomato (optional, for topping) – I like butter lettuce and a thick slice of heirloom tomato when they’re in season.
I recommend buying Hatch chiles from Melissa’s Produce if you can’t find them locally. They ship fresh during the season, and the quality is always consistent. For the beef, I’ve had great results with ButcherBox ground beef—it’s fatty enough and has real flavor. If you’re using frozen peppers, roast them from frozen without thawing first. It actually works better that way.
Equipment Needed
You don’t need a lot of fancy gear for these Smoky Roasted Hatch Green Chili Cheeseburgers. Here’s what I use and what you can substitute if you’re improvising.
- Gas or charcoal grill – A grill gives you that authentic smoky char. If you don’t have one, a cast-iron skillet or grill pan works perfectly indoors.
- Sheet pan or aluminum foil – For roasting the peppers. I use a half-sheet pan lined with foil for easy cleanup.
- Mixing bowl – A medium bowl for combining the meat and seasonings. Glass or stainless steel works best.
- Tongs – For flipping the peppers and the patties. Long-handled ones keep your hands safe from the heat.
- Small bowl and plastic wrap – For sweating the roasted peppers. A covered bowl traps the steam and makes peeling easier.
- Knife and cutting board – For chopping the peppers. A sharp chef’s knife makes quick work of it.
- Spatula – A wide metal spatula is best for flipping burgers without breaking them.
- Instant-read thermometer – Not required, but helpful if you’re unsure about doneness. I aim for 160°F for well-done beef.
I’ve made these burgers with nothing but a campfire and a stick before. It works. But having the right tools makes the process smoother and more enjoyable. A good cast-iron skillet is worth the investment if you cook burgers often.
Preparation Method
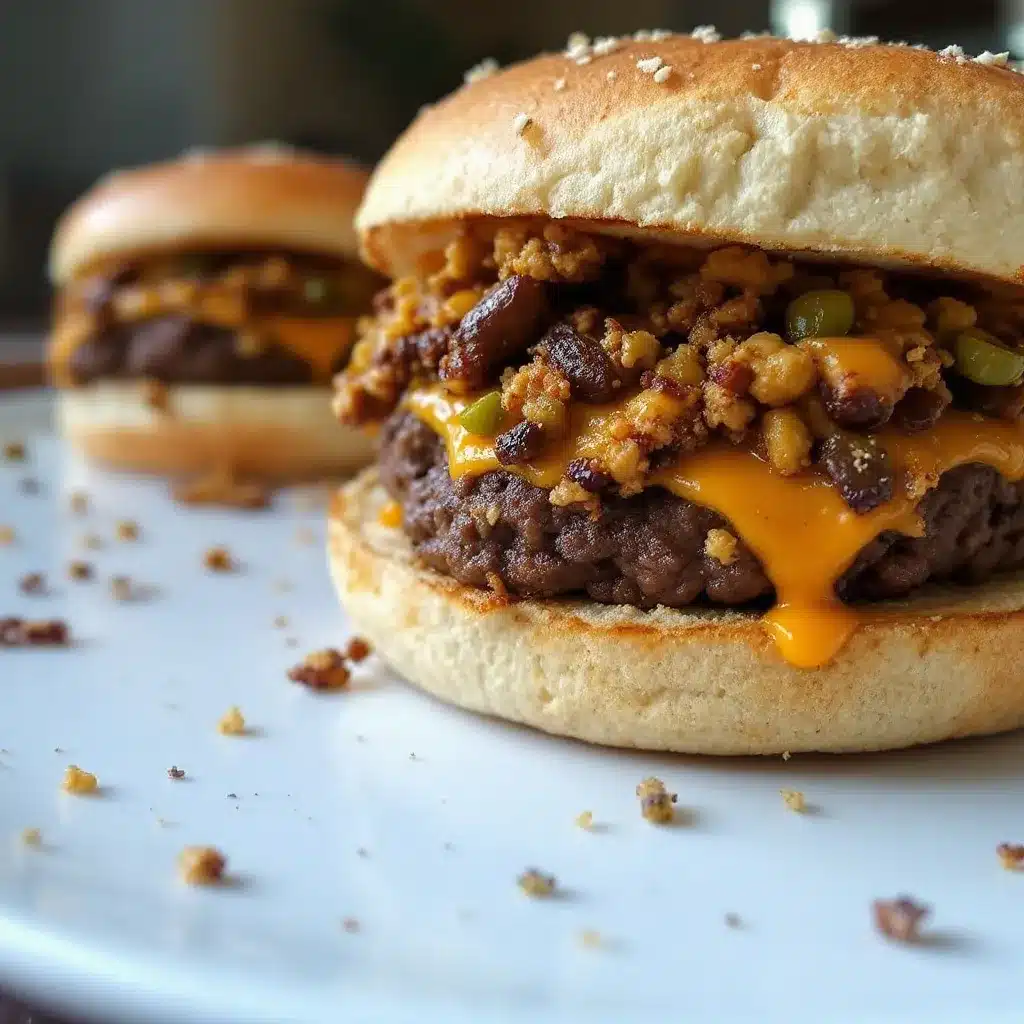
Alright, let’s get cooking. This method has been tested and tweaked over many batches, so follow it closely the first time, then feel free to make it your own.
- Roast the Hatch chiles. Preheat your grill to high heat, or set your oven broiler to high. Rub the peppers with the neutral oil and place them directly on the grill grates or on a foil-lined sheet pan under the broiler. Roast for 8-12 minutes, turning every few minutes with tongs, until the skin is completely blackened and blistered. Don’t rush this step. You want the skin charred all over.
- Sweat the peppers. Transfer the hot, blackened peppers to a small bowl and cover tightly with plastic wrap. Let them sit for 10 minutes. This traps the steam and loosens the skin, making it peel off in big strips instead of little annoying pieces. I learned this trick from that woman at the market, and it’s a game-changer.
- Peel and chop. Once the peppers are cool enough to handle, rub the blackened skin off with your fingers or a paper towel. It should come off easily. Remove the stems and seeds (leave some seeds if you want more heat). Chop the flesh into small pieces. You should have about 1/2 to 3/4 cup of chopped chiles. Set half aside for the patties and half for topping.
- Make the patties. In a medium mixing bowl, combine the ground beef, half of the chopped chiles, smoked paprika, garlic powder, salt, and black pepper. Mix gently with your hands until just combined. Overmixing makes tough burgers. Divide the mixture into 4 equal portions and shape them into patties about 3/4-inch thick. Make a small indentation in the center of each patty with your thumb. This helps them cook evenly and prevents them from puffing up into meatballs.
- Grill the patties. Reduce the grill heat to medium-high (about 400-450°F). Place the patties on the grill grates and cook for 4-5 minutes per side for medium-well, or until the internal temperature reaches 160°F. Only flip once. Resist the urge to press down on the patties with your spatula. That squeezes out the juices, and you worked hard to keep them in there.
- Add the cheese. In the last minute of cooking, place a slice of cheddar cheese on each patty. Close the grill lid or cover with a metal bowl to trap the heat and melt the cheese quickly. It should be gooey and slightly dripping over the edges.
- Toast the buns. While the cheese melts, split your buns and place them cut-side down on the grill for about 30-60 seconds. Watch them closely—they burn fast. You want light golden marks, not blackened edges.
- Assemble the burgers. Spread a thin layer of mayonnaise on the bottom half of each toasted bun. Place the cheeseburger patty on top. Add the reserved chopped Hatch chiles, then lettuce and tomato if using. Top with the other half of the bun. Serve immediately while the cheese is still molten.
One thing I always mess up is forgetting to rest the patties. Let them sit for 2-3 minutes after grilling if you can. It lets the juices redistribute so they don’t run all over your bun. I usually forget because I’m too hungry, but when I remember, it’s worth it.
Cooking Tips & Techniques
After making these Smoky Roasted Hatch Green Chili Cheeseburgers more times than I care to count, I’ve picked up a few tricks that make the process smoother and the results more consistent.
Don’t skip the sweating step. I know it adds 10 minutes, but peeling hot peppers without sweating them first is a miserable experience. The skin sticks, you end up tearing the flesh, and you lose half the pepper. Covered bowl, 10 minutes, done. It’s the difference between a frustrating prep and an easy one.
Watch your heat level. Hatch chiles vary wildly in spiciness. Some batches are mild and fruity, others will light you up. If you’re sensitive to heat, remove all the seeds and membranes after roasting. If you want a kick, leave some seeds in the chopped mixture. I once made a batch with particularly fiery peppers and didn’t adjust—my husband was drinking milk with his burger. Learn from my mistake.
Keep your hands clean. Wear gloves when handling the roasted peppers if you have sensitive skin. The capsaicin lingers, and you will inevitably rub your eye two hours later. I speak from painful experience.
Multitask smartly. While the peppers are sweating, form your patties and get your buns ready. While the patties are grilling, prep your toppings. This recipe moves fast once you start cooking, so having everything within reach makes the process feel effortless instead of chaotic.
Use a thermometer. I know, I know, real grill masters don’t need one. But for consistent results, especially if you’re cooking for a crowd, an instant-read thermometer takes the guesswork out. 160°F is safe and still juicy with 80/20 beef.
Variations & Adaptations
This recipe is flexible, and I’ve tried several variations over the years. Here are some of my favorites.
- Spicy Southwest Version: Add 1/2 teaspoon of cumin and 1/4 teaspoon of cayenne to the beef mixture. Top with pepper jack cheese instead of cheddar, and add sliced pickled jalapeños. This version has serious kick.
- Turkey Burger Adaptation: Substitute ground turkey (93/7 blend) for the beef. Add 1 tablespoon of olive oil and 1 extra tablespoon of chopped chiles to keep the patties moist. Turkey dries out faster, so cook to 165°F and don’t overcook.
- Vegetarian Option: Use a thick portobello mushroom cap instead of beef. Marinate the mushroom in olive oil, smoked paprika, and garlic powder for 15 minutes before grilling. Roast the chiles as directed, then pile them on the mushroom with melted cheese. It’s surprisingly satisfying.
- Smokier Flavor: Add 1/2 teaspoon of liquid smoke to the beef mixture if you’re cooking indoors on a stovetop. It mimics the grill flavor without actually firing one up.
- Milder Version for Kids: Use only half the roasted chiles in the patties and skip the topping entirely. Or substitute roasted red bell peppers for a completely heat-free version that still has that sweet, smoky taste.
I once tried adding bacon to this burger, which sounds like a no-brainer, but honestly, it overpowered the chiles. The Hatch flavor is delicate enough that it gets lost under too many strong additions. Keep it simple. Let the peppers shine.
Serving & Storage Suggestions
These Smoky Roasted Hatch Green Chili Cheeseburgers are best served fresh off the grill, but here’s how to handle leftovers and make the most of your batch.
Serving: Serve the burgers immediately while the cheese is still melted and the buns are warm. I like to set up a little topping bar with extra roasted chiles, sliced avocado, pickled onions, and hot sauce so everyone can customize their own. A side of crispy sweet potato fries or a simple green salad with lime vinaigrette complements the smoky flavors perfectly.
Storage: If you have leftover cooked patties, let them cool completely, then store them in an airtight container in the refrigerator for up to 3 days. Keep the toppings and buns separate to avoid sogginess. The roasted chiles can be stored in a sealed container in the fridge for up to 5 days.
Reheating: Reheat the patties in a skillet over medium-low heat with a splash of water or beef broth, covered, for 2-3 minutes per side. This steams them back to juiciness without drying them out. The microwave works in a pinch, but it toughens the meat. Toaster-oven the buns separately for best results.
Freezing: You can freeze the uncooked patties for up to 3 months. Place them on a baking sheet in the freezer until solid, then wrap each individually in plastic wrap and store in a freezer bag. Thaw in the refrigerator overnight before grilling. I’ve also frozen the roasted, chopped chiles in small portions—they thaw quickly and taste almost as good as fresh.
The flavors actually deepen overnight. Leftover patties chopped up and tossed into a breakfast hash with eggs and potatoes? That’s a happy accident I discovered one morning and now look forward to.
Nutritional Information & Benefits
Here’s the rough nutritional breakdown for one Smoky Roasted Hatch Green Chili Cheeseburger (with bun and cheese, without optional toppings).
| Nutrient | Amount |
|---|---|
| Calories | ~540 |
| Protein | 35g |
| Fat | 32g |
| Carbohydrates | 28g |
| Fiber | 3g |
| Sugar | 6g |
| Sodium | 780mg |
Hatch green chiles are surprisingly nutritious. They’re packed with vitamin C—one pepper has more than an orange—and contain capsaicin, which may help boost metabolism and reduce inflammation. The beef provides high-quality protein, iron, and B vitamins. Using grass-fed beef adds more omega-3 fatty acids compared to grain-fed.
If you’re watching your sodium, reduce the salt in the patties and skip the added salt on the peppers. The cheese and mayo add enough saltiness on their own. This recipe is naturally gluten-free if you use gluten-free buns, and you can make it dairy-free by omitting the cheese or using a plant-based alternative.
Conclusion
These Smoky Roasted Hatch Green Chili Cheeseburgers are more than just a summer recipe. They’re a celebration of a short, magical season when Hatch chiles appear and everyone gets a little obsessed. I make them every year when the peppers show up at the market, and every year, I’m reminded why that stranger handed me a roasted pepper and changed my burger game forever.
Don’t be afraid to tweak the heat level or swap the cheese. The beauty of this recipe is how forgiving it is. You can make it your own and still end up with something genuinely delicious. I’d love to hear how yours turn out. Did you go heavy on the chiles? Try the turkey version? Discover a new topping combo? Drop a comment below and let me know. And if you share a photo on Pinterest or Instagram, tag me—I always love seeing these burgers in other people’s kitchens.
Now go fire up that grill. Hatch season waits for no one.
Frequently Asked Questions
Can I use canned Hatch chiles instead of fresh?
Yes, you can use canned roasted Hatch chiles in a pinch. Drain them well and pat them dry with paper towels before using. The flavor won’t be as smoky or vibrant, but it still works. Fresh is always better when they’re in season.
How do I know when Hatch chiles are in season?
Hatch chile season typically runs from late July through September, with the peak in August. Look for them at farmers markets, specialty grocery stores, or order online from New Mexico growers. Some stores also carry frozen roasted Hatch chiles year-round.
Can I make the patties ahead of time?
Absolutely. Form the patties up to 24 hours in advance and keep them covered in the refrigerator. Bring them to room temperature for about 20 minutes before grilling for more even cooking. You can also freeze the uncooked patties for up to 3 months.
What if I can’t find Hatch chiles at all?
Anaheim peppers are the closest substitute. They’re milder but have a similar shape and texture. Poblano peppers also work and have a slightly earthier flavor. Roast them the same way as Hatch chiles. The result won’t be identical, but it’ll still be a fantastic burger.
How do I reduce the spiciness if the chiles are too hot?
Remove all the seeds and white membranes after roasting—that’s where most of the heat lives. You can also mix the chopped chiles with a little sour cream or Greek yogurt before adding them to the burger to mellow the spice. Or simply use fewer chiles in the patty mixture.
Pin This Recipe!
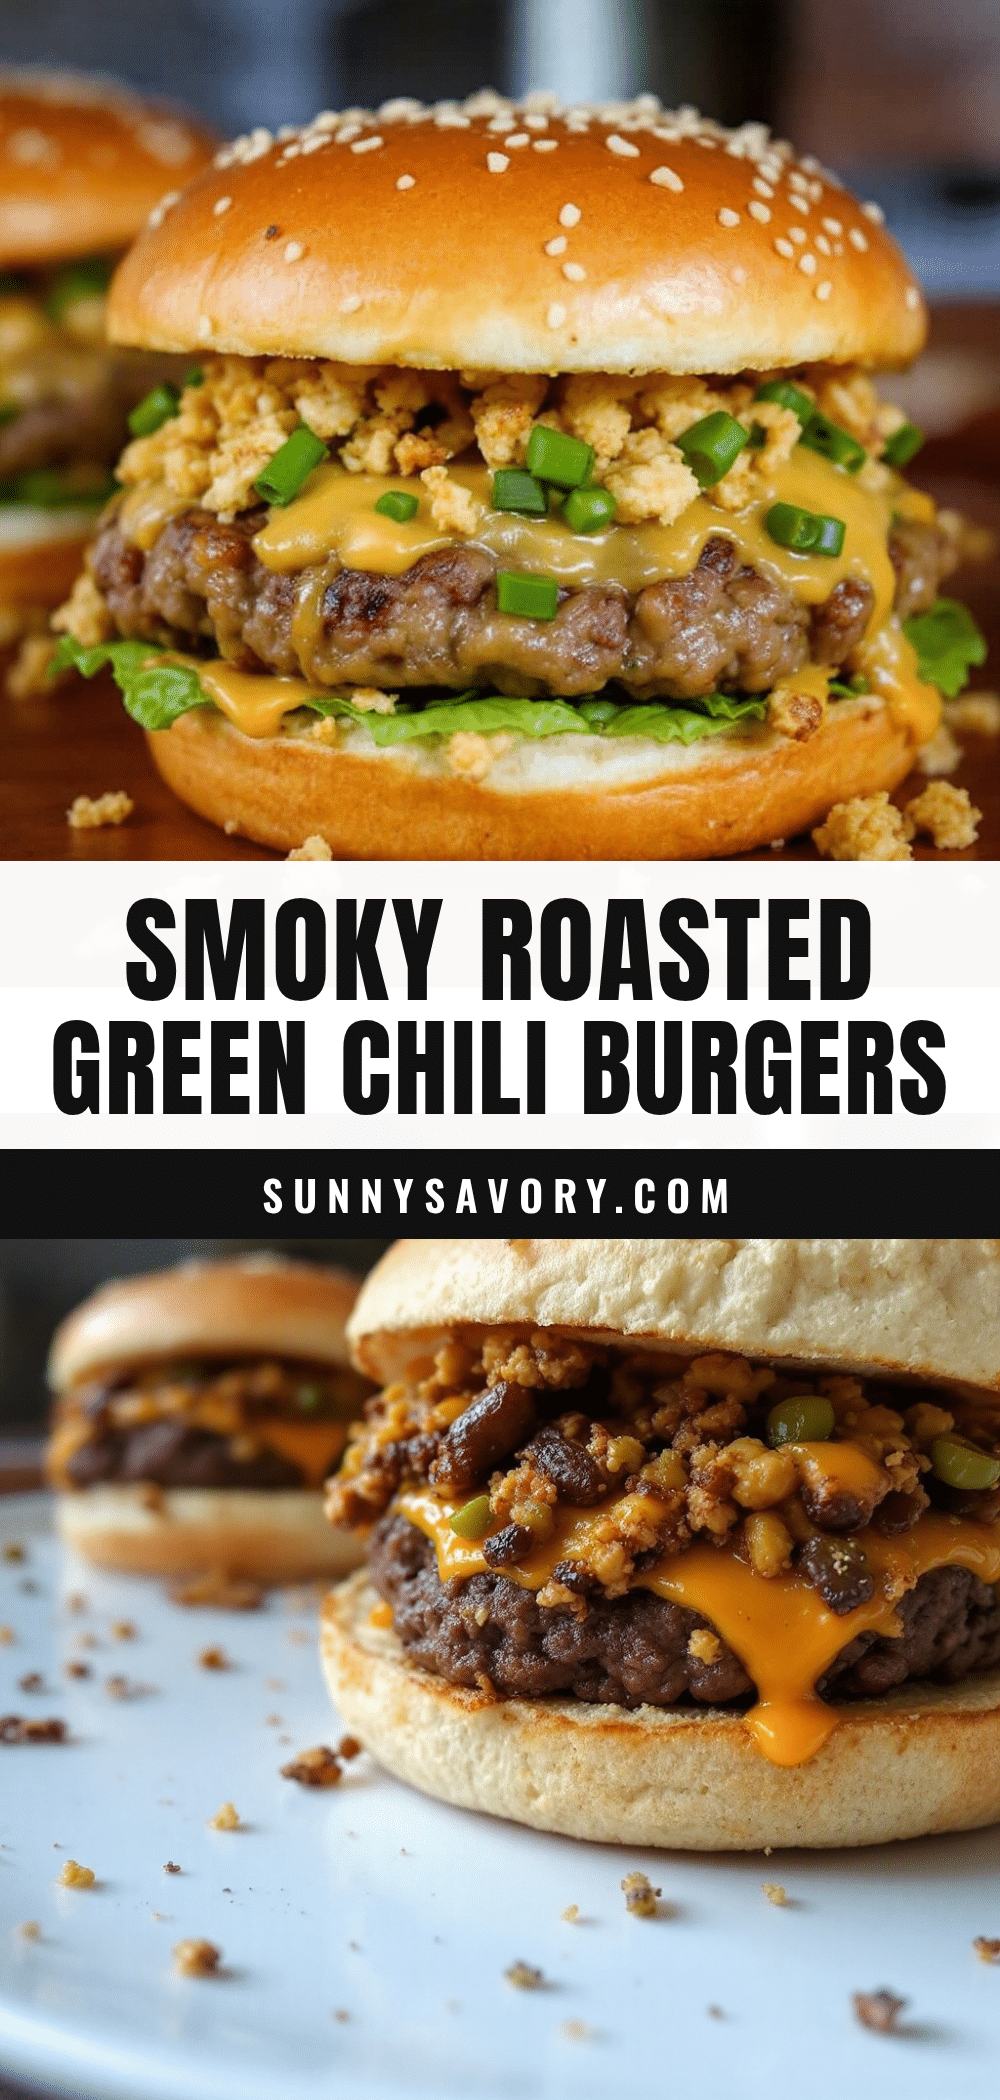
Smoky Roasted Hatch Green Chili Cheeseburgers
Juicy cheeseburgers infused with smoky roasted Hatch green chiles, topped with melted cheddar and served on toasted brioche buns. A quick and easy recipe that captures the essence of Hatch season in every bite.
- Prep Time: 15 minutes
- Cook Time: 15 minutes
- Total Time: 30 minutes
- Yield: 4 servings 1x
- Category: Main Course
- Cuisine: American
Ingredients
- 4–5 medium fresh Hatch green chiles
- 1.5 lbs ground beef (80/20 blend)
- 4 slices sharp cheddar cheese
- 4 hamburger buns (brioche or potato)
- 1 teaspoon smoked paprika
- 1/2 teaspoon garlic powder
- 1 teaspoon kosher salt, plus more for peppers
- 1/2 teaspoon freshly ground black pepper
- 1 tablespoon neutral oil (avocado or canola)
- 2 tablespoons mayonnaise
- Lettuce and tomato (optional, for topping)
Instructions
- Roast the Hatch chiles: Preheat grill to high heat or oven broiler to high. Rub peppers with oil and place directly on grill grates or on a foil-lined sheet pan under the broiler. Roast for 8-12 minutes, turning every few minutes, until skin is completely blackened and blistered.
- Sweat the peppers: Transfer hot peppers to a small bowl and cover tightly with plastic wrap. Let sit for 10 minutes to loosen the skin.
- Peel and chop: Once cool enough to handle, rub off blackened skin. Remove stems and seeds. Chop flesh into small pieces (about 1/2 to 3/4 cup). Set half aside for patties and half for topping.
- Make the patties: In a medium bowl, combine ground beef, half of the chopped chiles, smoked paprika, garlic powder, salt, and black pepper. Mix gently with hands until just combined. Divide into 4 equal portions and shape into 3/4-inch thick patties. Make a small indentation in the center of each patty with your thumb.
- Grill the patties: Reduce grill heat to medium-high (400-450°F). Place patties on grill and cook for 4-5 minutes per side for medium-well, or until internal temperature reaches 160°F. Flip only once; do not press down on patties.
- Add the cheese: In the last minute of cooking, place a slice of cheddar on each patty. Close grill lid or cover with a metal bowl to melt cheese.
- Toast the buns: While cheese melts, place buns cut-side down on grill for 30-60 seconds until lightly golden.
- Assemble the burgers: Spread mayonnaise on bottom half of each toasted bun. Place cheeseburger patty on top. Add reserved chopped Hatch chiles, then lettuce and tomato if using. Top with other half of bun. Serve immediately.
Notes
Don’t skip the sweating step—it makes peeling the peppers much easier. Wear gloves when handling roasted peppers to avoid capsaicin burns. Let patties rest for 2-3 minutes after grilling to redistribute juices. For a milder version, remove all seeds and membranes from the chiles. For more heat, leave some seeds in the chopped mixture.
Nutrition
- Serving Size: 1 burger
- Calories: 540
- Sugar: 6
- Sodium: 780
- Fat: 32
- Saturated Fat: 12
- Carbohydrates: 28
- Fiber: 3
- Protein: 35
Keywords: Hatch green chili cheeseburger, roasted Hatch chile burger, smoky burger, green chili burger, easy burger recipe, summer grilling



