Love this? Save it for later!
Share the inspiration with your friends
My nephew asked why I couldn’t just dip the pretzels in white chocolate and call them witch fingers. I started to explain why that wouldn’t work—then stopped. I was in the middle of a very serious Halloween baking session, armed with almond slivers for fingernails and red food coloring for bloody cuticles. I had the whole thing planned out, a multi-step process that would take hours and result in perfectly creepy, anatomically questionable fingers. He was eight, and he was watching me stress over pretzel rods.
Honestly, I almost ignored him. I mean, I’m the one who writes recipes for a living. I know that witch fingers need that knobby, knuckle-like shape you only get from shaping dough. Right? But there he was, holding up a plain pretzel rod and a bag of white melting wafers, looking at me like I was missing something obvious. I took a deep breath, put down my almond slivers, and let him show me. He dipped the end of the pretzel into the melted chocolate, added a single green candy melt for a wart, and held it up. It looked exactly like a witch finger. A crunchy, salty, sweet witch finger. I felt my entire lesson plan crumble.
That moment taught me something I still think about every time I make these Spooky White Chocolate Witch Finger Pretzel Rods. Sometimes the simplest idea is the best one. You don’t need to spend hours shaping dough to get a creepy Halloween treat. You just need a good pretzel rod, some white chocolate, and a little bit of imagination. Maybe you’ve been there—overcomplicating a recipe when a kid or a friend has a better, faster idea. It’s humbling, but it’s also how you end up with a recipe that actually works for real life. These witch fingers have become my go-to Halloween recipe, and I keep making them because they’re genuinely fun, ridiculously easy, and always the first thing to disappear from the treat table.
Why You’ll Love This Recipe
Let me tell you why these Spooky White Chocolate Witch Finger Pretzel Rods have earned a permanent spot in my Halloween rotation. I’ve tested a lot of spooky snacks over the years, and this one wins every time for a few very specific reasons.
- Quick & Easy: You can have a full batch of these witch fingers ready in under 20 minutes. No baking, no complicated shaping, no waiting for dough to chill. It’s the kind of recipe you can whip up after work or while helping kids with homework.
- Simple Ingredients: You only need four or five ingredients for the base recipe. Chances are you already have pretzel rods and white chocolate in your pantry. The creepy decorations are totally up to you.
- Perfect for Halloween Parties: These are made for spooky gatherings. They look genuinely unsettling on a platter, but they’re completely approachable for even the pickiest eaters. Kids love them, adults sneak them when they think no one is looking.
- Crowd-Pleaser: The salty-sweet combination is basically irresistible. The crunch of the pretzel, the creamy white chocolate, and that little bit of candy coating make for a texture party in your mouth.
- Unbelievably Delicious: I’m not kidding when I say these are dangerously good. The white chocolate coating softens slightly against the pretzel, creating this perfect contrast that keeps you reaching for just one more.
What makes this recipe different from all the other witch finger tutorials out there? It’s the simplicity. I’ve seen versions that require you to bake finger-shaped cookies, paint on edible blood, and individually place each almond sliver fingernail. That’s beautiful, but it’s not realistic for most of us on a busy Halloween week. This version gives you the same creepy effect with about 90% less effort. You get the witch finger look, the satisfying crunch, and the sweet white chocolate coating without spending your entire evening in the kitchen.
This recipe is the kind that makes you close your eyes after the first bite. It’s Halloween fun reimagined—faster, simpler, but with the same spooky satisfaction. Perfect for impressing party guests without stress, or turning a simple snack into something memorable.
What Ingredients You Will Need
This recipe uses simple, everyday ingredients to create something that looks like it crawled out of a witch’s kitchen. Most of these are pantry staples or easily found at any grocery store, especially around Halloween.
- Pretzel rods (12-16 rods): The backbone of your witch fingers. Look for thick, sturdy pretzel rods that won’t break easily when you dip them. I personally prefer the Snyder’s of Hanover brand for their consistent thickness and satisfying crunch. You want rods that are straight and relatively uniform in size so your witch fingers look consistent.
- White chocolate melting wafers (12 ounces): These are different from regular white chocolate chips. Melting wafers contain a bit of oil, which helps them melt smoothly and set with a nice, hard shell. I recommend Ghirardelli or Merckens brands for the best results. If you can only find white chocolate chips, add a teaspoon of coconut oil to help them melt smoothly.
- Green candy melts or green food coloring (optional): For that classic witchy green skin tone. You can use green candy melts for a more vibrant color, or simply tint your white chocolate with green gel food coloring. I’ve done both, and honestly, the candy melts give a more consistent color. Wilton makes good green candy melts that are widely available.
- Sliced almonds (for fingernails): These create the perfect witch fingernail shape. Look for whole sliced almonds, not slivered or chopped. You want that teardrop shape that looks like a real nail. Toast them lightly in a dry pan for extra flavor and a more realistic, aged appearance.
- Red decorating gel or red candy melts (for bloody tips): This is optional but highly recommended for the full spooky effect. A little dab of red gel at the tip of the finger, just under the almond nail, creates that “just dug up” look. Wilton red decorating icing works great for this.
- Witchy decorations (optional): This is where you can get creative. Green sprinkles, edible glitter, small candy warts (use mini chocolate chips or green M&Ms), or even a dusting of black sanding sugar. I like to add a single green candy melt “wart” to each finger for that extra creepy texture.
Substitution Guidance: If you’re avoiding dairy, use dairy-free white chocolate chips and a splash of coconut oil. For a nut-free version, skip the almond fingernails and use a small piece of white chocolate shaped into a nail, or simply pipe a nail shape with more white chocolate. You can also use dark chocolate or milk chocolate instead of white for a different look—bloody dark chocolate fingers are equally creepy.
Equipment Needed
You don’t need much fancy equipment for these witch fingers, which is part of their charm. Here’s what I use every time.
- Microwave-safe bowl: For melting your white chocolate. A glass measuring cup works perfectly because the spout makes dipping easier.
- Baking sheet lined with parchment paper or a silicone baking mat: This is where your witch fingers will set. The parchment prevents sticking and makes cleanup a breeze.
- Spoon or small spatula: For stirring the melting chocolate and helping coat the pretzels if needed.
- Tweezers (optional but helpful): For placing those tiny almond fingernails and candy warts with precision. I use kitchen tweezers, but clean craft tweezers work too.
- Piping bag or small zip-top bag: If you want to pipe on bloody details or extra chocolate accents. A snack-size zip-top bag with a tiny corner snipped off works perfectly.
- Wax paper or paper towels: For resting the dipped pretzels while you work on the decorations.
I’ve made these with just a bowl, a spoon, and a baking sheet more times than I can count. The tweezers are a nice-to-have, not a necessity. If you’re making these with kids, skip the tweezers and let them place decorations with their fingers—it’s more fun that way.
Preparation Method

Making these Spooky White Chocolate Witch Finger Pretzel Rods is almost embarrassingly easy. Here’s how I do it, step by step.
- Prepare your workspace. Line a large baking sheet with parchment paper or a silicone baking mat. Make sure you have all your decorations ready—almond slices, candy warts, red gel, sprinkles. Once you start dipping, things move quickly, and you don’t want to be hunting for supplies.
- Melt the white chocolate. Place your white chocolate melting wafers in a microwave-safe bowl. Microwave in 30-second intervals, stirring well after each interval, until the chocolate is completely smooth and glossy. This usually takes about 1.5 to 2 minutes total. Be careful not to overheat—white chocolate burns easily and becomes grainy. If you’re using green candy melts or adding green food coloring, stir it in now until the color is uniform. I like a pale, sickly green for that authentic witch skin tone.
- Test the consistency. Dip the end of a pretzel rod into the melted chocolate. It should coat the pretzel smoothly and evenly. If the chocolate is too thick, add a teaspoon of coconut oil or vegetable shortening and stir. If it’s too thin, let it sit for a minute to cool and thicken slightly.
- Dip the pretzels. Working one at a time, dip the end of each pretzel rod into the melted chocolate. Submerge about 2 to 3 inches of the pretzel—this will be the “finger” part. Lift it out and let the excess chocolate drip back into the bowl. Gently tap the pretzel against the side of the bowl to help smooth out the coating.
- Place on the baking sheet. Lay the dipped pretzel on the prepared baking sheet. Leave a little space between each one so they don’t stick together. Work quickly—you want to add the decorations while the chocolate is still wet.
- Add the fingernail. Immediately after placing the pretzel on the sheet, press a sliced almond into the chocolate at the tip of the “finger.” The pointed end of the almond should face outward, like a nail. Press gently so it stays in place. Repeat for each pretzel.
- Add warts and decorations. While the chocolate is still wet, press a green candy melt, mini chocolate chip, or small candy into the chocolate to create a witchy wart. I like to add one or two warts per finger, placed randomly for a more organic, creepy look. You can also sprinkle on green sanding sugar or edible glitter at this stage.
- Let them set. Allow the witch fingers to set completely at room temperature. This takes about 15 to 20 minutes, depending on the humidity in your kitchen. Don’t rush this step—if the chocolate isn’t fully set, the decorations will slide off when you try to move them.
- Add the bloody details (optional). Once the chocolate is fully set, use your red decorating gel or melted red candy melts to add a small dab of “blood” at the tip of each finger, just under the almond nail. You can also add a few drops along the side for a more gruesome effect. Let the red gel set for a few minutes before handling.
- Serve or store. Your witch fingers are ready to serve! Arrange them on a platter with the “fingers” pointing in different directions for maximum creepiness.
Sensory cues: When you dip the pretzel, listen for that slight sizzle as the cold pretzel hits the warm chocolate. The chocolate should look glossy and smooth, not streaky or thick. When you press the almond nail, you should feel it sink slightly into the chocolate—that’s how you know it’s properly adhered. The finished fingers should have a satisfying snap when you bite into them, followed by the creamy melt of the white chocolate.
Cooking Tips & Techniques
I’ve made these witch fingers more times than I care to count, and I’ve learned a few things the hard way. Let me save you some trouble.
Don’t overheat the chocolate. This is the number one mistake I see. White chocolate is delicate. If you microwave it for too long or at too high a power, it will seize up into a grainy, unusable mess. Always use 30-second intervals and stir thoroughly between each one. The chocolate should be warm, not hot. If it starts to look thick and lumpy, you’ve gone too far—start over with fresh chocolate.
Work in small batches. If you’re making a large batch, melt only half the chocolate at a time. As the chocolate sits, it will start to thicken and cool, making it harder to get a smooth coating. Melting in smaller batches ensures your chocolate stays at the perfect consistency throughout the process.
Keep the pretzels at room temperature. Cold pretzels can cause the chocolate to seize or develop a dull, streaky appearance. Let your pretzel rods sit out for a few minutes before you start dipping. Room temperature pretzels also help the chocolate adhere better.
Use a fork for dipping. If you’re struggling to get an even coating, try using a fork to dip the pretzels. Place the pretzel on the fork, lower it into the chocolate, and use a spoon to pour chocolate over the top. Lift it out and let the excess drip off. This gives you more control and a more uniform coating.
Let them set completely before moving. I learned this one the messy way. If you try to move a witch finger before the chocolate is fully set, the coating will crack and the decorations will fall off. Be patient. Let them sit for a full 20 minutes, or even pop them in the refrigerator for 10 minutes if you’re in a hurry.
Variations & Adaptations
These witch fingers are incredibly flexible. Here are a few ways I’ve adapted them over the years.
Dark Chocolate Witch Fingers: Swap the white chocolate for dark or milk chocolate. The dark chocolate gives a more sinister look, especially if you add red “blood” details. Use black sanding sugar for a truly gothic appearance.
Gluten-Free Version: Use gluten-free pretzel rods. There are several good brands available now, and they work exactly the same way. Just check the label to make sure your white chocolate is also gluten-free.
Vegan Witch Fingers: Use dairy-free white chocolate and vegan pretzel rods. Add a teaspoon of coconut oil to help the dairy-free chocolate melt smoothly. The texture will be slightly different, but the effect is just as creepy.
Monster Mash-Up: Turn these into monster fingers instead of witch fingers. Use blue or purple candy melts for the coating, add candy eyes instead of fingernails, and use black decorating gel for stitches. My nephew loved this version even more than the original.
Spicy Witch Fingers: Add a pinch of cayenne pepper or chili powder to the melted chocolate for a sweet-and-spicy kick. The heat pairs surprisingly well with the salty pretzel and sweet chocolate. Just be careful not to add too much—you want a subtle warmth, not a fire-breathing monster.
Serving & Storage Suggestions
These witch fingers are best served at room temperature, arranged on a platter with the “fingers” pointing every which way. I like to scatter a few extra almond slices and green sprinkles around the platter for a witchy, graveyard vibe.
Presentation tips: Serve them upright in a tall glass or jar for a truly creepy “hand reaching out” effect. You can also arrange them in a circle on a round platter, with the fingernails pointing inward, like a coven gathering around a cauldron. For Halloween parties, I often place them on a bed of black decorating sugar or crushed chocolate cookies to look like dirt.
Storage: Store your witch fingers in an airtight container at room temperature for up to a week. Layer them between sheets of parchment paper to prevent them from sticking together. Do not refrigerate them—the chocolate can develop condensation, which will make the coating look dull and cause the decorations to slide off.
Freezing: You can freeze these for up to 2 months. Place them in a single layer on a baking sheet and freeze until solid, then transfer to a freezer-safe container or zip-top bag. Thaw at room temperature for about 15 minutes before serving. The chocolate might develop a slight bloom (white streaks), but they’ll still taste great.
Flavor development: These are actually better the next day. The white chocolate sets fully overnight, developing a firmer snap, and the flavors of the pretzel and chocolate meld together beautifully. If you can resist eating them all on day one, you’ll be rewarded on day two.
Nutritional Information & Benefits
Let’s be real—these are a treat, not a health food. But here’s what you’re looking at per witch finger (based on a standard recipe making 12 fingers).
Estimated nutritional values per finger: Approximately 180 calories, 9g fat, 24g carbohydrates, 2g protein, 15g sugar. These numbers will vary based on the specific brands and decorations you use.
Health highlights: The pretzel rods provide a small amount of iron and B vitamins. Almonds (if you use them for fingernails) offer healthy fats, vitamin E, and magnesium. White chocolate contains calcium from the milk solids. Of course, these benefits are minimal given the portion size—but it’s nice to know there’s something besides sugar in there.
Dietary considerations: This recipe contains gluten (from the pretzels), dairy (from the white chocolate), and nuts (from the almonds). For a nut-free version, skip the almonds and use a small piece of white chocolate for the fingernail. For a gluten-free version, use gluten-free pretzel rods. For a dairy-free version, use dairy-free white chocolate.
My personal perspective: I believe in balance. These witch fingers are a fun, indulgent treat for a special occasion. I don’t stress about the sugar content on Halloween. I focus on making memories, having fun in the kitchen, and enjoying the season. Life is too short to count calories on candy day.
Conclusion
These Spooky White Chocolate Witch Finger Pretzel Rods are proof that the best recipes often come from the simplest ideas. My nephew taught me that day in the kitchen—sometimes you don’t need a complicated technique or a long list of ingredients. You just need a good base, a little creativity, and the willingness to try something unexpected.
I love this recipe because it’s genuinely fun to make. It’s the kind of project that brings people together, whether you’re making them with kids, friends, or just for yourself on a quiet October evening. The process is quick, the results are impressive, and the taste is absolutely addictive. Plus, there’s something deeply satisfying about watching people’s faces when they realize the creepy finger they just bit into is actually a delicious pretzel rod.
I encourage you to make these your own. Customize the colors, try different decorations, experiment with flavors. That’s the beauty of a simple recipe—it leaves room for your personality to shine through. And if you come up with a variation I haven’t tried, please share it in the comments. I’m always looking for new ideas, especially from people who, like my nephew, see things a little differently.
Happy Halloween, and happy snacking!
Frequently Asked Questions
Can I use regular white chocolate chips instead of melting wafers?
Yes, but you’ll need to add a teaspoon of coconut oil or vegetable shortening to help them melt smoothly. White chocolate chips contain less cocoa butter than melting wafers, so they can be thicker and more prone to seizing. The coconut oil helps create a smoother, more dip-able consistency.
How far in advance can I make these witch fingers?
You can make them up to a week in advance. Store them in an airtight container at room temperature, layered between sheets of parchment paper. They actually get better after a day or two as the chocolate fully sets. Just don’t refrigerate them, or the chocolate may develop condensation.
My white chocolate seized up and became grainy. What went wrong?
This usually happens when the chocolate gets too hot or comes into contact with water. Always microwave in short intervals and stir thoroughly. Make sure your bowl and utensils are completely dry. If your chocolate does seize, you can try adding a tablespoon of vegetable shortening or coconut oil and stirring vigorously—sometimes it will smooth out.
Can I make these without almond fingernails for a nut-free version?
Absolutely. You can pipe a small nail shape using more white chocolate, or use a small piece of white chocolate candy melt shaped into a teardrop. Another option is to use a small candy corn for a more whimsical, less creepy nail. Just make sure to check all your ingredients for nut contamination if you’re serving someone with a nut allergy.
How do I get the green color to look more like witch skin?
Start with a pale, sickly green rather than a bright, neon green. Use a tiny amount of green gel food coloring—just a small dab on a toothpick, stirred into the melted white chocolate. You can also add a tiny drop of yellow or brown food coloring to create a more muted, realistic witchy tone. Green candy melts give a more consistent color if you prefer that route.
Pin This Recipe!
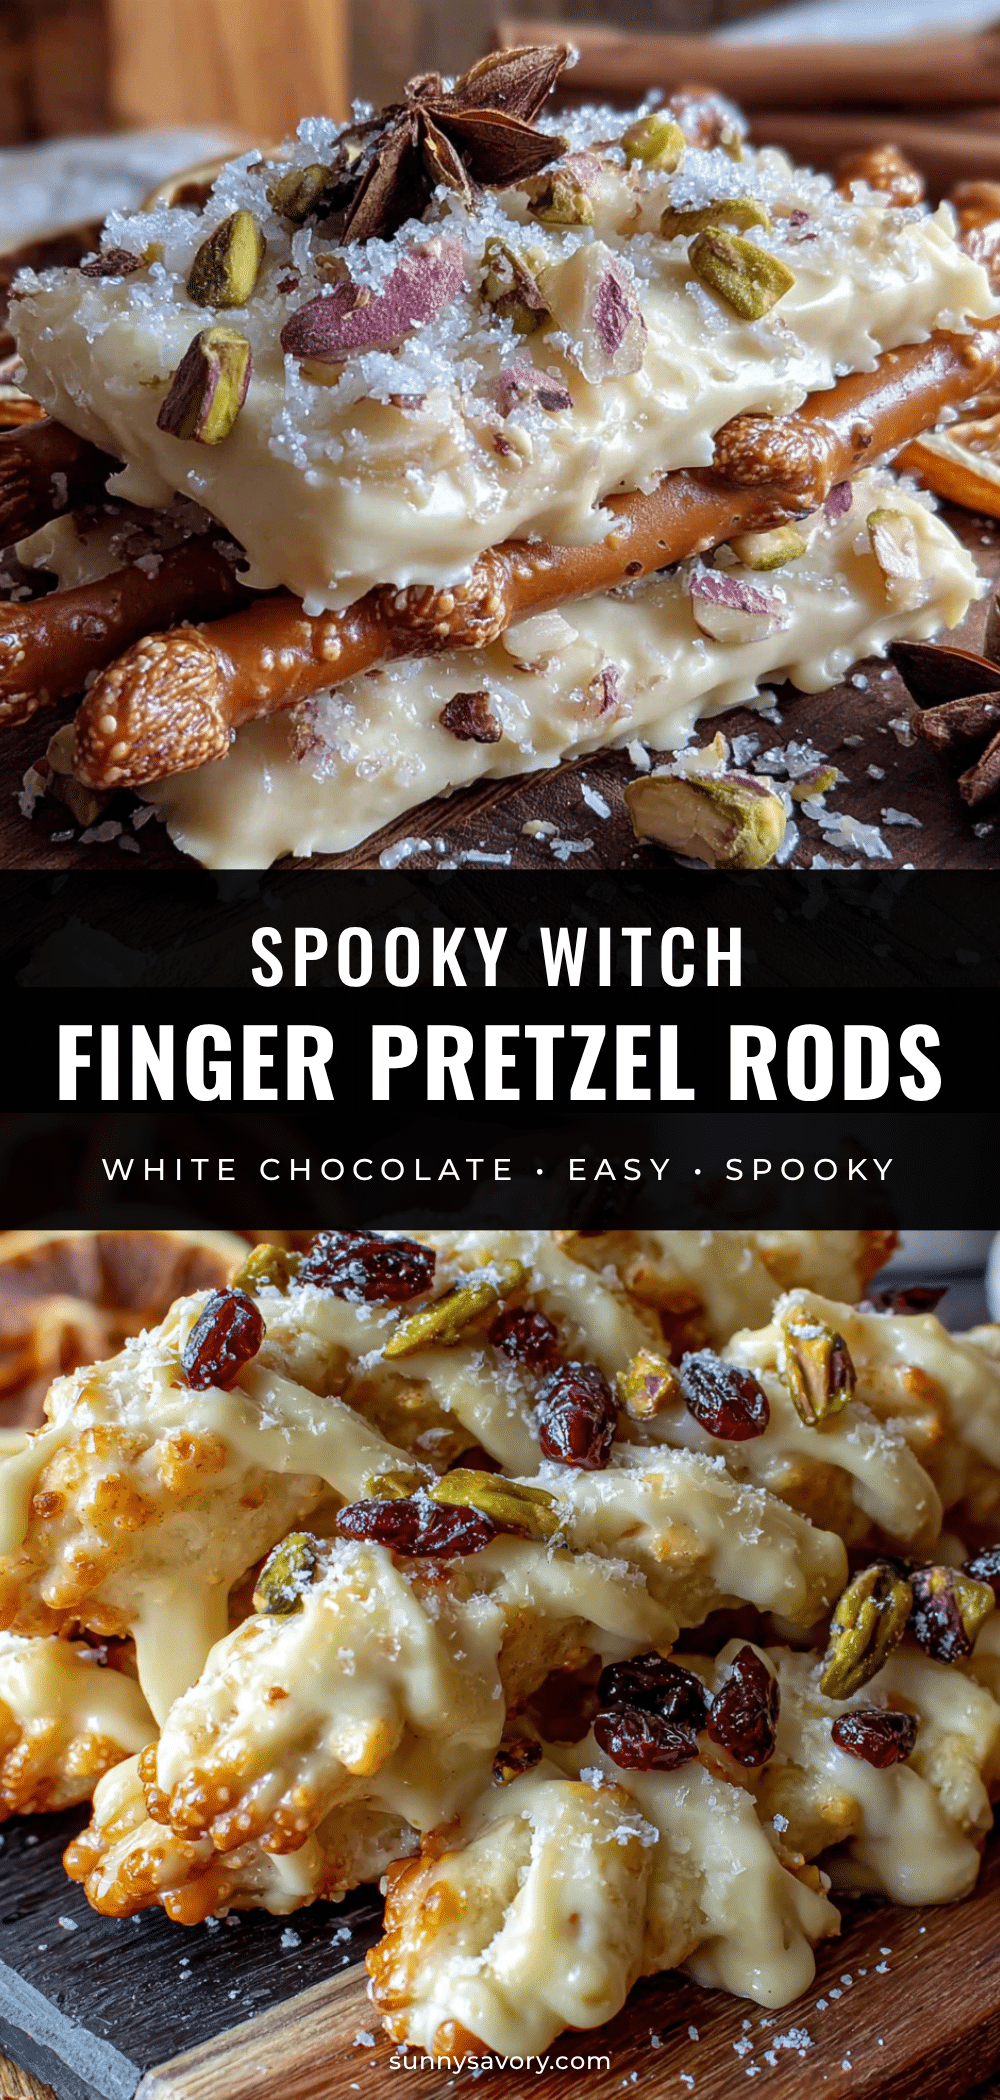
Spooky White Chocolate Witch Finger Pretzel Rods: Best Easy Halloween Treat

These Spooky White Chocolate Witch Finger Pretzel Rods are a quick and easy Halloween treat that looks creepy but tastes amazing. Made with just a few simple ingredients, they’re perfect for parties and guaranteed to be a crowd-pleaser.
- Prep Time: 10 minutes
- Cook Time: 2 minutes
- Total Time: 20 minutes
- Yield: 12-16 servings 1x
- Category: Dessert
- Cuisine: American
Ingredients
- 12–16 pretzel rods
- 12 ounces white chocolate melting wafers
- Green candy melts or green food coloring (optional)
- Sliced almonds (for fingernails)
- Red decorating gel or red candy melts (for bloody tips)
- Witchy decorations (optional): green sprinkles, edible glitter, mini chocolate chips, green M&Ms
Instructions
- Prepare your workspace: Line a large baking sheet with parchment paper or a silicone baking mat. Have all decorations ready.
- Melt the white chocolate: Place white chocolate melting wafers in a microwave-safe bowl. Microwave in 30-second intervals, stirring well after each, until smooth and glossy (about 1.5 to 2 minutes total). If using green candy melts or food coloring, stir in now.
- Test the consistency: Dip the end of a pretzel rod into the melted chocolate. It should coat smoothly. If too thick, add 1 teaspoon coconut oil or vegetable shortening; if too thin, let cool slightly.
- Dip the pretzels: Working one at a time, dip the end of each pretzel rod into the melted chocolate, submerging about 2 to 3 inches. Lift out and let excess drip off. Gently tap against the bowl to smooth the coating.
- Place on baking sheet: Lay the dipped pretzel on the prepared baking sheet, leaving space between each. Work quickly to add decorations while chocolate is wet.
- Add the fingernail: Immediately press a sliced almond into the chocolate at the tip of the ‘finger,’ pointed end outward. Press gently to adhere.
- Add warts and decorations: While chocolate is still wet, press a green candy melt, mini chocolate chip, or small candy into the chocolate for a wart. Add sprinkles or edible glitter if desired.
- Let them set: Allow witch fingers to set completely at room temperature, about 15 to 20 minutes.
- Add the bloody details (optional): Once set, use red decorating gel or melted red candy melts to add a small dab of ‘blood’ at the tip of each finger, just under the almond nail. Let set for a few minutes.
- Serve or store: Arrange on a platter and serve, or store in an airtight container at room temperature.
Notes
Don’t overheat the white chocolate; it burns easily. Work in small batches if making a large amount. Keep pretzels at room temperature for best coating. Let set completely before moving to avoid cracking. Store in an airtight container at room temperature for up to a week; do not refrigerate. For nut-free version, skip almonds and use a small piece of white chocolate for the nail.
Nutrition
- Serving Size: 1 witch finger
- Calories: 180
- Sugar: 15
- Sodium: 200
- Fat: 9
- Saturated Fat: 5
- Carbohydrates: 24
- Fiber: 1
- Protein: 2
Keywords: Halloween treats, witch fingers, pretzel rods, white chocolate, easy Halloween recipe, spooky snacks, no-bake dessert



