Love this? Save it for later!
Share the inspiration with your friends
The PTA Halloween party was in six hours and I’d completely forgotten. I mean, I’d remembered to buy the candy for the goody bags, but that was about it. Everyone else would be bringing elaborate themed cupcakes with fondant ghosts and those impressive cake pops that look like they took three days. I had a bag of navel oranges, some chocolate pudding cups from my kid’s lunch stash, and a few pretzel sticks. Honestly, I almost just threw a tablecloth over my head and called it a costume.
But then my neighbor, Karen, knocked on my door to borrow an extension cord and saw me staring into the fridge like it held the answers to the universe. “You look panicked,” she said. I told her the situation, and she just laughed. “Make those no-bake jack-o-lantern treats,” she said. “They’re stupid easy and the kids go nuts for them.” I had no idea what she was talking about, but she was already pulling ingredients out of my pantry. Fifteen minutes later, I had a tray of the cutest little pumpkin faces staring back at me.
I brought them to the party feeling a little sheepish, honestly. I mean, they were just oranges and pudding. But you know what happened? They disappeared first. The kids grabbed them before the cupcakes even got touched. One mom asked me for the recipe, and another said they looked so much more fun than the usual sugar overload. I just smiled and said it was a last-minute thing—which, let me tell you, is the truth.
That’s why I keep making these easy no-bake jack-o-lantern treats every year now. They’re not fancy, they’re not complicated, and they definitely don’t require any baking skills. But there’s something about that moment when you hand a kid a little orange pumpkin face with a pudding smile—it just feels like Halloween. And honestly, that’s the whole point.
Why You’ll Love This Recipe
Let me tell you why these little guys have become my go-to Halloween recipe. I’ve tested this with my own kids, my niece’s class party, and even a grown-up Halloween potluck at work. They work every single time.
- No Oven Required: Seriously, zero baking. No waiting for the oven to preheat, no worrying about burning anything. You just assemble and serve.
- Kid-Friendly: This is the kind of recipe where you can hand the kids a bag of oranges and let them go to town. My seven-year-old can make these by herself now.
- Healthy-ish Option: Let’s face it, Halloween is a sugar fest. These use fresh fruit and pudding, so you get a little nutrition in there without the kids even noticing.
- Budget-Friendly: A bag of oranges costs a few bucks, and you probably already have the pudding and pretzels in your pantry. No special ingredients needed.
- Perfect for Parties: They’re portable, they don’t get soggy, and they’re individually portioned. No cutting, no serving utensils required.
What makes these different from every other Halloween treat out there? It’s the texture, honestly. You get that bright, citrusy pop from the orange, the creamy coolness of the pudding, and that salty crunch from the pretzel stem. It’s like a little party in your mouth. Plus, they’re just so darn cute. I mean, who can resist a smiling pumpkin face?
This recipe isn’t just good—it’s the kind that makes you feel like a Halloween hero without actually doing any work. And that, my friends, is the best kind of recipe.
What Ingredients You Will Need
This recipe uses the simplest ingredients you can imagine. Most of these are probably in your kitchen right now, or at least on your next grocery list. The beauty of these easy no-bake jack-o-lantern treats is that they’re more about assembly than actual cooking.
- Fresh Oranges: You’ll need one navel orange per treat. Pick oranges that are round and firm with a flat bottom so they sit steady. I like the big ones because they’re easier to carve. Look for ones with smooth skin—it makes drawing the faces easier.
- Chocolate Pudding Cups: The pre-made cups work perfectly here. I usually buy the Jell-O brand because they’re consistently creamy, but any brand works. You could also make your own pudding from a box, but honestly, the cups save so much time.
- Pretzel Sticks: These become the pumpkin stem. You want the thin, straight kind, not the thick twists. Snyder’s of Hanover makes good ones that don’t break easily. Just snap them in half so you have a short little stem.
- Black Food Coloring Marker: This is the secret weapon. You can find these at any craft store or in the baking aisle. They look like a regular marker but the ink is food-safe. You’ll use it to draw the jack-o-lantern faces right onto the orange peel.
- Green Licorice or Fruit Leather (Optional): If you want to get fancy, you can add a little vine or leaf on top. I use a small strip of green fruit leather cut into a leaf shape. Totally optional, but cute.
That’s it. Seriously. No butter, no sugar, no flour. Just five ingredients and you’re in business. If you’re making these for a school party, check for nut-free pudding cups just to be safe. Most are, but it’s worth a look.
One thing I learned the hard way: don’t use clementines or mandarins. They’re too small and the peel is too thin. You need a good, thick orange peel to draw on. Navel oranges are the sweet spot—pun intended.
Equipment Needed
You don’t need much for these easy no-bake jack-o-lantern treats, which is part of the charm. Here’s what you’ll need:
- A Sharp Knife: You’ll use this to cut the top off the oranges. A paring knife works great because it’s small and precise.
- A Spoon: A regular teaspoon works fine for scooping out the orange segments. A grapefruit spoon with a serrated edge makes it even easier, but not necessary.
- A Cutting Board: Just to protect your counter. Oranges can be juicy.
- A Small Bowl: For holding the orange segments you scoop out. Eat them as a snack while you work!
- Paper Towels: You’ll want to pat the inside of the oranges dry so the pudding doesn’t get watery.
That’s really it. No mixer, no baking sheet, no fancy gadgets. If you have hands and a knife, you’re good to go. I’ve made these at my friend’s house using her butter knife and it worked fine. Just be careful not to cut yourself.
Preparation Method
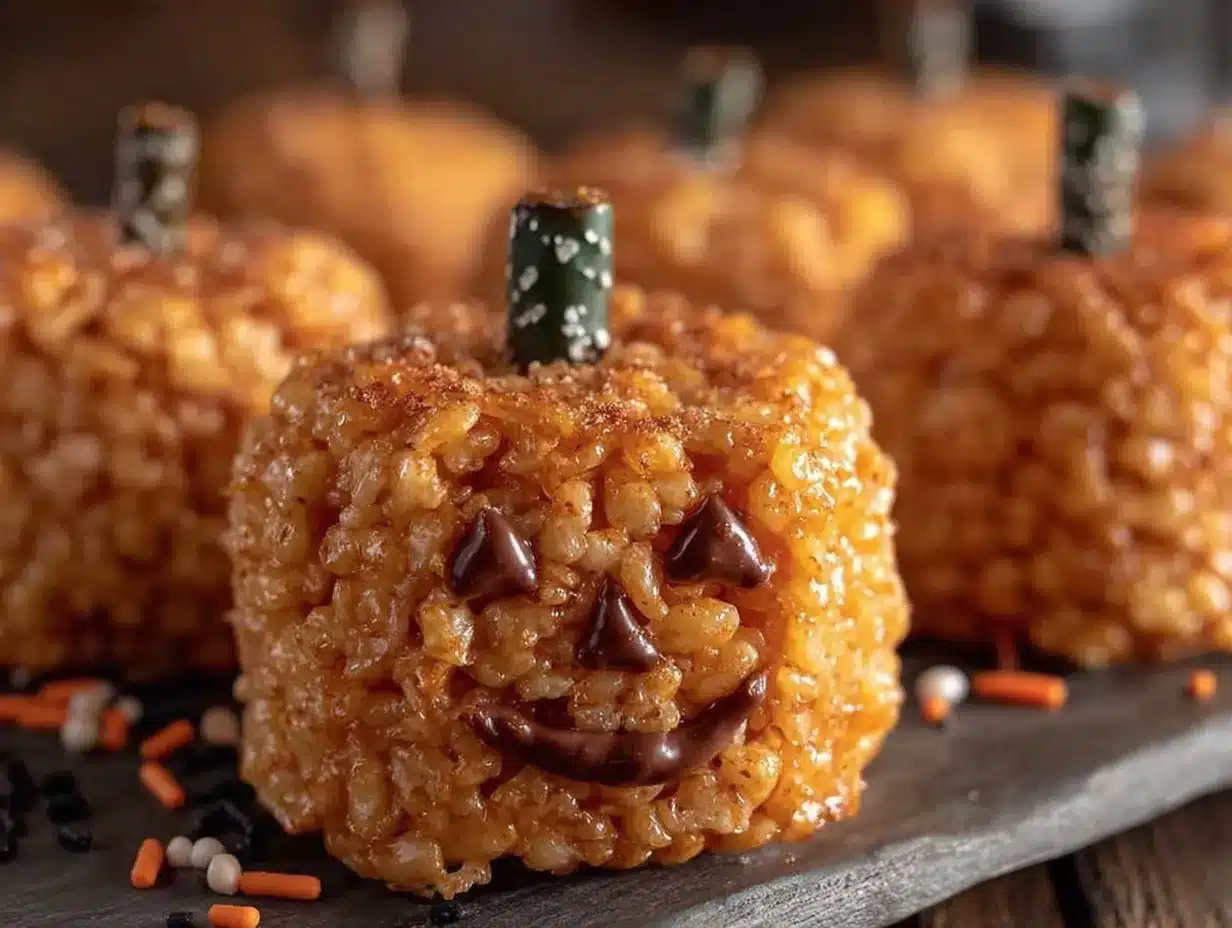
Alright, let’s get to the fun part. These easy no-bake jack-o-lantern treats come together in about 20 minutes, maybe 30 if you’re letting the kids help. Here’s how I do it:
- Prep the Oranges (5 minutes): Wash and dry your oranges. Using a sharp knife, cut off the top quarter of each orange—this is where the stem will go. Set the tops aside. Now, use your spoon to scoop out the orange segments from inside. Be gentle so you don’t tear the peel. You want a clean, empty orange shell. Pat the inside dry with a paper towel.
- Draw the Faces (5 minutes): Take your black food coloring marker and draw a jack-o-lantern face on each orange. I like to do the classic triangle eyes and a jagged smile. But you can get creative—my daughter once drew a cat face on hers. The marker dries almost instantly, so you don’t have to wait. If you mess up, just wipe it off with a damp paper towel and start over.
- Fill with Pudding (5 minutes): Open your pudding cups and spoon the pudding into the hollowed-out oranges. Fill them almost to the top, leaving a little room for the “lid.” I use about half a cup of pudding per orange. Smooth the top with the back of your spoon.
- Add the Stem (2 minutes): Take a pretzel stick and snap it in half. Gently push the broken end into the top of the pudding, right in the center. It should stand up straight like a little stem. If it wobbles, push it in a tiny bit deeper.
- Place the Lid (2 minutes): Take the top you cut off earlier and place it back on the orange, right over the pretzel stem. The stem should poke through the top. It looks like a little pumpkin hat. If the top doesn’t sit flat, trim a tiny bit more off the bottom.
- Add Optional Decorations (2 minutes): If you’re using green fruit leather for leaves, cut small leaf shapes and attach them to the top with a tiny dab of pudding as “glue.” Or just leave them plain—they’re adorable either way.
- Chill and Serve (optional): You can serve these immediately, but I like to pop them in the fridge for about 15 minutes to let the pudding set up a bit. It makes them easier to handle. Plus, cold pudding is just better.
One thing I always tell people: don’t overfill the oranges. The pudding will squish out when you put the lid on, and it gets messy. Leave about a quarter-inch of space at the top. Trust me on this one.
Cooking Tips & Techniques
I’ve made these easy no-bake jack-o-lantern treats about a dozen times now, and I’ve learned a few things the hard way. Here are my best tips:
Choose the Right Oranges: This is the most important tip. You want oranges that are round and have a flat bottom. If they’re too pointy or lopsided, they’ll tip over. I actually test them at the store by setting them on the display and giving them a little push. If they wobble, they go back.
Don’t Tear the Peel: When you’re scooping out the orange segments, go slow. The peel is surprisingly fragile. If you tear a hole in the bottom, the pudding will leak out. I’ve had this happen more times than I’d like to admit. Use a gentle scraping motion, not a jabbing one.
Dry the Inside Thoroughly: This is a step I skipped once and regretted. If there’s any moisture left inside the orange shell, it will make the pudding watery. Use a paper towel and really get in there. I fold the towel into a point and twist it around inside.
Practice Your Face Drawing: If you’re nervous about freehanding the faces, practice on a piece of paper first. Or, you can use a toothpick to lightly scratch the design into the peel before you trace it with the marker. That way, if you mess up, you just wipe the scratch away.
Make Ahead Tip: You can hollow out the oranges and draw the faces a day ahead. Just store them in the fridge in a sealed container. Then fill them with pudding right before serving. This is a lifesaver for parties.
Variations & Adaptations
One of the best things about these easy no-bake jack-o-lantern treats is how easy they are to customize. Here are some variations I’ve tried and loved:
Dairy-Free Version: Use coconut cream pudding or any dairy-free pudding cup. Most grocery stores carry them now. The texture is a little different, but the taste is still amazing. My sister-in-law is lactose intolerant and she loves these.
Different Pudding Flavors: Who says you have to use chocolate? Vanilla pudding gives a nice contrast to the orange flavor. Butterscotch is also fantastic. I once made a batch with lemon pudding and it tasted like a creamsicle. So good.
Fruit Leather Faces: Instead of drawing on the faces with a marker, you can cut tiny shapes out of black fruit leather and stick them on the orange. It gives a more 3D effect. My kids love doing this because it feels like a craft project.
Mini Version: Use clementines or cuties for a bite-sized version. You’ll need to be more careful with the scooping, and you’ll use less pudding. These are perfect for toddler hands. Just skip the pretzel stem and use a tiny piece of green candy.
Spooky Variations: Instead of happy jack-o-lantern faces, try making spooky ones. Draw angry eyebrows, a crooked smile, or even a little scar. My teenage nephew made a batch with zombie faces last year and they were a hit at his Halloween party.
Serving & Storage Suggestions
These easy no-bake jack-o-lantern treats are best served cold, right out of the fridge. The contrast between the cool pudding and the room-temperature orange is just perfect. I like to arrange them on a platter with some fake leaves or spider webs around them for a festive touch.
For a Halloween party, I set them out on a tray with a sign that says “Pick a Pumpkin!” The kids go wild. They’re also great for classroom parties because they’re individually portioned and easy to grab. No mess, no fuss.
Storage: These are best eaten within 2-3 hours of assembly. After that, the orange juice starts to seep into the pudding and it gets runny. If you need to make them ahead, hollow out the oranges and draw the faces up to 24 hours in advance. Store the empty shells in the fridge in a sealed container. Fill them with pudding just before serving.
Leftover Pudding: If you have leftover pudding cups, just save them for snacks. You can also use the leftover orange segments in a smoothie or just eat them as a healthy treat. Nothing goes to waste.
One thing I’ve noticed: the flavors actually get better after about 30 minutes in the fridge. The orange flavor kind of infuses into the pudding a little bit. It’s subtle, but it’s there. So if you can wait, give them a little chill time.
Nutritional Information & Benefits
Let’s be real—these are a treat, not a health food. But compared to a lot of Halloween options, they’re actually pretty reasonable. Here’s the breakdown for one treat (using one pudding cup split between two oranges):
- Calories: Approximately 180-200 calories
- Fat: 4-6 grams (mostly from the pudding)
- Sugar: 22-25 grams (some natural from the orange, some added from the pudding)
- Fiber: 3-4 grams (from the orange)
- Vitamin C: 70% of your daily value (from the orange)
The best part? You’re getting a whole serving of fruit in each treat. That orange is packed with vitamin C, fiber, and antioxidants. The pudding adds calcium and protein. So while it’s not exactly a salad, it’s a lot better than a handful of candy corn.
If you’re watching your sugar intake, you can use sugar-free pudding cups. They work just as well. I’ve also used Greek yogurt mixed with a little honey instead of pudding for a higher-protein version. It’s not as sweet, but it’s still delicious.
Conclusion
These easy no-bake jack-o-lantern treats have become a staple in my Halloween rotation, and I don’t see that changing anytime soon. They’re fun, they’re simple, and they always get a smile—from kids and adults alike. There’s just something magical about a little orange pumpkin face grinning up at you from a plate.
I love that this recipe lets me be creative without being stressed. I can draw silly faces, try different pudding flavors, or let the kids take over completely. And when the party’s over, I don’t have a sink full of baking dishes to wash. It’s a win all around.
I’d love to see what you come up with! Try different face designs, experiment with the pudding flavors, or add your own little touches. Leave a comment below and tell me how your jack-o-lantern treats turned out. And if you share them on Pinterest, tag me—I want to see those cute little pumpkin faces! Happy Halloween, friends!
Frequently Asked Questions
Can I use a different type of fruit instead of oranges?
You can, but oranges really work best because of the thick peel. Grapefruits are too big and the peel is too bitter. Apples or pears don’t have a peel you can draw on. Stick with navel oranges for the best results.
How far in advance can I make these?
You can hollow out the oranges and draw the faces up to 24 hours ahead. Store them in the fridge in a sealed container. But don’t add the pudding until right before you serve them, or they’ll get soggy.
Are these safe for kids with nut allergies?
Most pudding cups are nut-free, but always check the label. The pretzels and oranges are typically nut-free as well. If you’re serving these at a school party, check with the teacher about any specific allergies in the class.
Can I use homemade pudding instead of the cups?
Absolutely! Just make a batch of your favorite chocolate or vanilla pudding from scratch. Let it cool and set up in the fridge before spooning it into the oranges. It might be a little thinner than the cup version, so let it set longer.
What if I can’t find a black food coloring marker?
No problem! You can use a toothpick dipped in black food coloring to draw the faces. Or cut tiny shapes from black fruit leather and stick them on. You could even use a permanent marker on a piece of tape and stick that on—but that’s not food-safe, so I don’t recommend it.
Pin This Recipe!

Easy No-Bake Jack-O-Lantern Treats

These easy no-bake jack-o-lantern treats are made with fresh oranges, chocolate pudding, and pretzel sticks. They’re a fun, healthy-ish Halloween snack that kids love and are perfect for parties.
- Prep Time: 20 minutes
- Cook Time: 0 minutes
- Total Time: 20 minutes
- Yield: 4 servings 1x
- Category: Dessert
- Cuisine: American
Ingredients
- 1 navel orange per treat
- 1 chocolate pudding cup per treat (or half a cup per orange)
- 1 pretzel stick per treat (thin, straight kind)
- Black food coloring marker
- Green licorice or fruit leather (optional, for decoration)
Instructions
- Wash and dry the oranges. Using a sharp knife, cut off the top quarter of each orange. Set the tops aside.
- Use a spoon to scoop out the orange segments from inside, being gentle to avoid tearing the peel. Pat the inside dry with a paper towel.
- Using a black food coloring marker, draw a jack-o-lantern face on each orange (e.g., triangle eyes and a jagged smile).
- Open the pudding cups and spoon the pudding into the hollowed-out oranges, filling almost to the top. Smooth the top with the back of a spoon.
- Snap a pretzel stick in half and gently push the broken end into the center of the pudding to create a stem.
- Place the top of the orange back on, over the pretzel stem, so the stem pokes through. Trim the top if needed to sit flat.
- Optionally, cut small leaf shapes from green fruit leather and attach to the top with a dab of pudding.
- Serve immediately or chill in the fridge for 15 minutes to set the pudding.
Notes
Choose round, firm navel oranges with a flat bottom for stability. Don’t use clementines or mandarins as the peel is too thin. Dry the inside of the oranges thoroughly to prevent the pudding from becoming watery. For best results, hollow out oranges and draw faces up to 24 hours ahead, then fill with pudding just before serving. These are best eaten within 2-3 hours of assembly.
Nutrition
- Serving Size: 1 jack-o-lantern tre
- Calories: 180200
- Sugar: 2225
- Sodium: 150200
- Fat: 46
- Saturated Fat: 23
- Carbohydrates: 3035
- Fiber: 34
- Protein: 23
Keywords: no-bake, Halloween, jack-o-lantern, treats, oranges, pudding, kid-friendly, easy, party snack



