Love this? Save it for later!
Share the inspiration with your friends
My sister-in-law Jen wasn’t trying to impress anyone that Tuesday afternoon. I’d stopped by to borrow a cake pan for a charity bake sale, and the smell hit me before I even got through the mudroom. Something warm. Something buttery. Something that made no sense for 2 PM on a random November weekday.
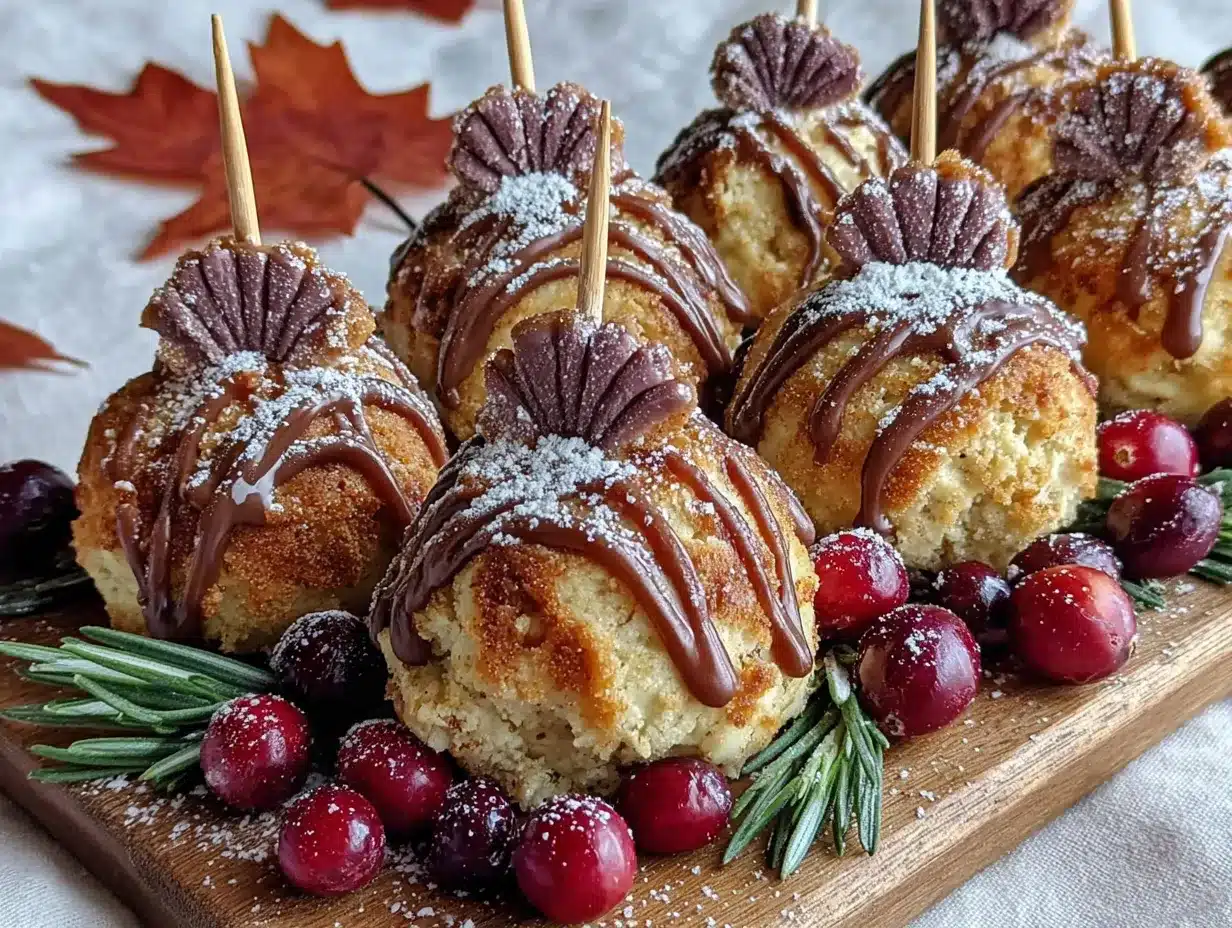
She was standing at her kitchen island, completely unfazed, rolling little balls of what looked like leftover cake in her palms. Her dog was asleep under the stool. There was a half-empty mug of cold coffee next to her elbow. And there, on a parchment-lined sheet tray, were these ridiculous little turkey faces staring up at me. Candy eyes. Little orange candy corn beaks. They were absurd. They were adorable. And honestly, I stood there for a solid ten seconds before I could even say hello.
“Oh, these?” she said when I finally pointed at them. “Just something I threw together for the kids’ class party.” Just something. Like she hadn’t just created the most charming Thanksgiving dessert I’d ever seen. Like it was no big deal. Maybe you’ve been there—watching someone do something effortlessly brilliant while you’re still trying to figure out where you left your measuring spoons.
I begged her for the method right there, scribbling notes on the back of an envelope while she talked me through it, licking frosting off her thumb between sentences. That was three years ago, and these little turkey cake pops have been on my Thanksgiving table every single year since. They’re the thing guests fight over. The thing kids sneak before dinner. The thing that makes me look like I spent way more time than I actually did.
Why You’ll Love This Recipe
Let me tell you why these little guys have become my secret weapon for holiday hosting. I’ve tested this method at least a dozen times across different kitchens, different ovens, and different levels of chaos (including one Thanksgiving where I burned the sweet potatoes and had to start over). These cake pops work every single time.
- Completely Make-Ahead Friendly : You can prep these three days before your gathering. The cake balls freeze beautifully, and the decorating can happen the morning of. Less stress, more hosting.
- Simple Ingredients : Boxed cake mix, canned frosting, candy melts, and a few decorating candies. No specialty baking supply store required. Your regular grocery trip covers everything.
- Perfect for Thanksgiving Gatherings : These are the conversation starter on your dessert table. Adults love the nostalgia. Kids love the faces. Everyone loves grabbing one with their coffee after the big meal.
- Scales Beautifully : Need 12 for a small Friendsgiving? Easy. Need 48 for the extended family reunion? Double the batch. The method stays exactly the same.
- Actually Fun to Make : I mean it. There’s something deeply satisfying about rolling those cake balls and watching the turkey faces come together. It’s the kind of kitchen project that makes you feel like a kid again.
What makes this version different from the other turkey cake pop recipes floating around? It’s the texture. Most cake pops turn out dense and heavy—almost like eating a brick of sugar. My method uses a specific ratio of cake to frosting that keeps the inside light and tender. Plus, I’ve figured out the trick to getting the candy coating smooth without it cracking or seizing. That’s the difference between cake pops that look homemade in a good way and cake pops that look like a disaster.
This recipe is the one that makes you close your eyes after the first bite. It’s comfort food reimagined for the holiday table—faster, cuter, but with the same soul-soothing satisfaction. Perfect for impressing your guests without stress, or turning a simple Thanksgiving dessert into something memorable.
What Ingredients You Will Need
This recipe uses simple, straightforward ingredients to create something that looks way more complicated than it actually is. Most of these are pantry staples or easy to find at any grocery store during the holiday season.
For the Cake Base
- 1 box yellow cake mix (I prefer Duncan Hines or Betty Crocker for consistent results)
- 3 large eggs, room temperature
- 1/2 cup vegetable oil (or melted butter for richer flavor)
- 1 cup water (or milk for extra tenderness)
For Binding
- 1/2 cup cream cheese frosting (store-bought is fine; I use Pillsbury for convenience)
- 1/4 cup vanilla frosting (adds sweetness without making it too wet)
For the Turkey Decorations
- 12 ounces candy melts in brown (Wilton brand works best for smooth melting)
- 1 tablespoon coconut oil or shortening (this is the secret to thin, crack-free coating)
- 48 candy eyes (the small ones, about 6mm size)
- 48 orange candy corn pieces (for the beaks)
- 24 red candy melts or red M&Ms (for the wattle—that’s the red dangly part under the beak)
- 1/2 cup candy melts in assorted fall colors (orange, red, yellow for feather decorations)
- 48 lollipop sticks (the 6-inch size is perfect)
Ingredient Selection Tips: Look for candy melts that are fresh—older ones can get clumpy and refuse to melt smoothly. If you can’t find brown candy melts, use milk chocolate melting wafers instead. The coconut oil or shortening is non-negotiable here; it thins the coating just enough to dip without the pop cracking. For the candy eyes, Wilton makes the best ones that actually stick. The cheap off-brand eyes sometimes slide right off.
Substitution Guidance: Use a gluten-free yellow cake mix for a gluten-free version. Swap the cream cheese frosting with dairy-free vanilla frosting if needed. No candy corn? Use small orange M&Ms and flatten them slightly for the beak shape. For the feathers, you can use any combination of fall-colored candy melts or even colored white chocolate.
Equipment Needed
You don’t need a ton of fancy equipment for these, but a few specific tools make the process much smoother. I’ve learned the hard way what works and what doesn’t.
- 9×13-inch baking pan (metal works better than glass for even baking)
- Large mixing bowls (at least two)
- Hand mixer or stand mixer (you can do it by hand, but a mixer saves your arm)
- Cookie scoop or small ice cream scoop (for uniform cake balls)
- Baking sheet lined with parchment paper
- Microwave-safe bowls (for melting candy)
- Styrofoam block or cake pop stand (for drying the pops upright)
- Piping bags or small zip-top bags (for decorating details)
- Toothpicks (for placing tiny decorations)
Budget-Friendly Alternatives: No lollipop sticks? Use pretzel sticks instead—they’re edible and add a salty contrast. No Styrofoam block? Poke holes in a cardboard box or use a colander turned upside down. I’ve used both in a pinch, and they work fine. For melting, you don’t need a double boiler; a microwave works perfectly if you go in 30-second bursts.
Personal Experience: The first time I made these, I used a glass baking dish and ended up with unevenly baked cake that was too dry on the edges. Metal pans distribute heat much better for this recipe. Also, invest in a good cookie scoop—the difference between uniform cake balls and a mess of uneven sizes is worth the $8.
Preparation Method
- Bake the cake. Preheat your oven to 350°F (175°C). Grease your 9×13-inch pan well. Mix the cake mix, eggs, oil, and water according to package directions—usually about 2 minutes on medium speed. Pour into the pan and bake for 28-32 minutes, until a toothpick inserted in the center comes out clean. Let the cake cool completely in the pan. This is crucial. Warm cake turns into mushy, unworkable cake balls.
- Crumble the cake. Once the cake is completely cool (I mean completely—stick it in the fridge for 30 minutes if you’re impatient), crumble it into a large bowl. Use your hands. Get in there. You want fine, even crumbs with no large chunks. This takes about 3-4 minutes of dedicated crumbling. Put on a podcast. It’s meditative.
- Add the frosting. Add the cream cheese frosting and vanilla frosting to the crumbled cake. Mix with your hands or a spatula until the mixture holds together when squeezed. It should feel like damp sand. Not wet. Not dry. If it crumbles apart, add another tablespoon of frosting. If it feels greasy, you’ve added too much—scoop in a little more crumbled cake to balance it.
- Form the cake balls. Using your cookie scoop, portion out uniform balls. Roll each one between your palms until smooth. Place them on the parchment-lined baking sheet. You should get about 24 balls from this recipe. Refrigerate for at least 1 hour, or freeze for 20 minutes if you’re in a hurry. Cold cake balls are essential for the dipping step.
- Melt the brown candy coating. Place the brown candy melts in a microwave-safe bowl with 1 tablespoon of coconut oil. Microwave in 30-second bursts, stirring thoroughly between each, until completely smooth. Don’t rush this. Overheating ruins the texture. The coating should be thin enough to drip off your spoon in a steady stream.
- Dip the lollipop sticks. Remove only 4-5 cake balls from the refrigerator at a time. Dip the tip of a lollipop stick into the melted candy, then insert it about halfway into a cake ball. This acts as glue. Return to the refrigerator for 5 minutes to set. This prevents the cake ball from spinning on the stick during dipping.
- Dip the cake pops. Holding the stick, submerge the cake ball completely in the melted brown coating. Gently tap the stick on the edge of the bowl to let excess coating drip off. Don’t shake it—tap it. Rotate the pop slowly as you lift it out. This helps the coating self-level. Insert the stick into your Styrofoam block. Repeat with all pops.
- Add the turkey features immediately. While the coating is still wet, press two candy eyes into each pop. Add one orange candy corn piece for the beak, pointing downward. Add one red candy melt or M&M for the wattle. Work quickly—the coating sets fast. If it starts to harden, microwave the coating for 10 seconds to reheat it.
- Make the feather decorations. Melt your fall-colored candy melts separately. Transfer each color to a small piping bag or zip-top bag with a tiny corner snipped off. Pipe small feather shapes onto parchment paper in sets of three (one orange, one red, one yellow per turkey). Let them set completely, about 10 minutes. Gently peel them off the parchment.
- Attach the feathers. Dab a tiny amount of melted brown coating on the back of each feather set. Press them onto the back of each turkey cake pop, positioning them like a fan. Let everything set completely, about 20 minutes. Store in an airtight container in the refrigerator.
Sensory Cues: The cake should smell buttery and golden when it’s done. The crumb mixture should feel like slightly damp playdough—it should hold a shape when squeezed but not stick to your fingers. The candy coating should look glossy and smooth, not streaky or thick. When you tap the stick, you should see the excess coating drip in a steady, even stream.
Cooking Tips & Techniques
I’ve made more cake pops than I care to count, and I’ve messed up plenty along the way. Here’s what I’ve learned so you don’t have to repeat my mistakes.
The Temperature Trap: The biggest mistake people make is trying to dip warm cake balls. The coating cracks because the cake expands slightly as it warms up. Keep your cake balls cold. Like, really cold. I freeze mine for a full 20 minutes before dipping. The coating sets before the cake has a chance to warm up, and you get that perfect smooth shell.
The Coating Consistency: If your candy coating is too thick, it will clump on the cake ball and look lumpy. If it’s too thin, it will run off completely. The perfect consistency is like warm honey. Add coconut oil a teaspoon at a time until you get that flow. I once added too much oil and ended up with coating that wouldn’t set at all—had to start over with fresh melts.
Multitasking Strategy: Bake the cake the day before. Crumble and mix the next morning. Form the balls and refrigerate while you make lunch. Dip and decorate in the afternoon. This breaks the process into manageable chunks and keeps you from feeling overwhelmed. Trust me, trying to do everything in one afternoon will make you want to throw the whole project out the window.
The Spin Problem: If your cake ball keeps spinning on the stick when you try to dip it, you didn’t use enough melted coating as glue on the stick tip. Dip that stick deeper next time. Also, make sure the cake ball is fully chilled before inserting the stick. Room temperature cake balls are slippery and uncooperative.
Consistency Tip: Use a kitchen scale to portion your cake balls if you want them perfectly uniform. Each ball should weigh about 35-40 grams. This ensures they all dip evenly and set at the same time. Plus, they look gorgeous arranged on a platter when they’re all the same size.
Variations & Adaptations
Once you master the basic turkey, the possibilities are endless. Here are some variations I’ve tried and loved.
Chocolate Turkey Cake Pops: Use a devil’s food cake mix and chocolate frosting instead of yellow cake and cream cheese frosting. The dark coating against the bright candy eyes and orange beak is striking. My nephew declared these “the best ones yet” at last year’s Thanksgiving.
Pumpkin Spice Turkey Cake Pops: Add 1 teaspoon of pumpkin pie spice to the yellow cake mix before baking. Use cream cheese frosting as the binder. The warm spice flavor pairs perfectly with the sweet candy coating. These are my personal favorite—they taste like fall in a single bite.
Gluten-Free Version: Use a gluten-free yellow cake mix and ensure your candy melts are certified gluten-free. The texture is slightly more delicate, so handle the cake balls gently when dipping. Everything else stays the same. I’ve made these for a gluten-sensitive guest, and she couldn’t tell the difference.
Vegan Turkey Cake Pops: Use a vegan cake mix, replace eggs with flax eggs (1 tablespoon ground flaxseed + 3 tablespoons water per egg), and use vegan frosting. Most candy melts are vegan, but check the label. The texture is a bit denser, but the flavor is still fantastic. I tested this version last spring for a friend’s vegan potluck, and they disappeared within minutes.
Mini Turkey Bites: Use a melon baller instead of a cookie scoop to make tiny cake balls about half the size. Use short lollipop sticks or toothpicks. These are perfect for kids’ parties or as a light dessert after a heavy Thanksgiving meal. They’re also great for portion control—I can eat three minis without feeling guilty.
Serving & Storage Suggestions
These turkey cake pops are meant to be the star of your Thanksgiving dessert table, and presentation matters. Here’s how I serve them for maximum impact.
Serving Temperature: Serve them slightly chilled—straight from the refrigerator is perfect. The coating stays firm and the cake stays tender. If they sit out at room temperature for more than an hour, the coating can get slightly sticky, so keep them chilled until serving time.
Presentation Ideas: Arrange the turkey cake pops in a small pumpkin or hollowed-out acorn squash for a festive display. Stick them in a foam block covered with fall-colored tissue paper. Or simply stand them upright in a tall glass vase filled with candy corn. The visual impact of 24 little turkey faces staring up at your guests is absolutely worth the effort.
What to Serve Alongside: These pair beautifully with warm apple cider or a spiced chai latte. For a full dessert spread, set them next to a pumpkin pie and a pecan tart. The cake pops add a fun, playful element that balances the more traditional desserts. I also like to serve them with a bowl of vanilla ice cream for dipping—trust me, the combination is incredible.
Storage Instructions: Store in an airtight container in the refrigerator for up to 5 days. Place them upright in the container, or lay them flat in a single layer with parchment between each layer. Do not stack them without protection—the candy eyes will get scratched off.
Freezing Tips: You can freeze the undecorated cake balls for up to 3 months. Wrap them individually in plastic wrap, then place in a freezer bag. Thaw in the refrigerator overnight before dipping and decorating. The flavor actually improves after freezing—the cake gets more moist as it thaws.
Reheating Note: These are served cold, so no reheating needed. If you want a warm version, skip the candy coating and serve the plain cake balls with warm caramel sauce drizzled over them. It’s a completely different dessert, but equally delicious.
Nutritional Information & Benefits
Let’s be honest—these are a treat, not a health food. But knowing what’s in them helps you enjoy them mindfully, especially during a holiday known for overindulgence.
Estimated Nutritional Values (per cake pop):
- Calories: 185
- Total Fat: 9g
- Saturated Fat: 4g
- Cholesterol: 18mg
- Sodium: 145mg
- Total Carbohydrates: 25g
- Sugars: 16g
- Protein: 2g
Health Benefits of Key Ingredients: The eggs in the cake mix provide protein and choline, which supports brain health. The cream cheese frosting contains calcium from the dairy. And the candy coating? Well, it makes people happy. Sometimes that’s enough.
Dietary Considerations: These contain wheat, dairy, and eggs. For gluten-free or vegan options, check the variations section above. They are not low-carb or keto-friendly, but they are portion-controlled at a reasonable 185 calories each. One or two make a satisfying dessert without derailing your entire holiday eating plan.
Allergen Notes: Common allergens present include wheat (in the cake mix), dairy (in the frosting and candy melts), and eggs. Some candy melts may contain soy lecithin. Always check labels if serving guests with allergies.
Personal Wellness Perspective: I believe in balance. These cake pops are part of my Thanksgiving tradition, and I don’t feel guilty about enjoying them. The key is moderation—I have one with my coffee after dinner, and I savor every single bite. That’s the kind of relationship with food that actually works.
Conclusion
These Guest-Favorite Thanksgiving Turkey Cake Pops have become the most requested item on my holiday menu, and I completely understand why. They’re adorable without being fussy. They’re impressive without requiring professional baking skills. And they bring a sense of joy to the table that a regular slice of pie just can’t match.
I love that this recipe came from Jen’s casual Tuesday afternoon—proof that the best ideas often happen when we’re not trying so hard. Every time I make them, I think of her standing in that kitchen, licking frosting off her thumb, completely unaware that she was creating a tradition that would spread through our whole family.
Now I want to hear from you. Are you making these for Thanksgiving dinner? For a Friendsgiving gathering? For a classroom party? I’d love to know how they turn out. Drop a comment below with your photos and any tweaks you made—I’m always looking for new variations to try. And if you loved this recipe, share it with a friend who needs a showstopper dessert for their holiday table. Happy Thanksgiving, and happy baking!
Frequently Asked Questions
Can I use a different cake flavor? Absolutely. Chocolate, red velvet, or spice cake all work beautifully. Just adjust the frosting flavor to match. Chocolate cake with chocolate frosting makes for a delicious dark turkey.
Why did my candy coating crack? This usually happens when the cake ball is too cold or too warm when dipped. Make sure your cake balls are thoroughly chilled but not frozen solid. Also, ensure your coating isn’t too thick—add a little more coconut oil if needed.
How far in advance can I make these? You can make the cake balls up to 3 days ahead and store them in the refrigerator. Dip and decorate them the day before serving for best results. The decorated pops stay fresh for up to 5 days in the refrigerator.
Can I freeze the finished cake pops? Yes, but the candy coating may develop condensation when thawing. It’s better to freeze the undecorated cake balls and dip them fresh. If you must freeze finished pops, wrap them individually and thaw in the refrigerator overnight with the wrapper on to absorb moisture.
My cake balls are too dry. What went wrong? You either overbaked the cake or didn’t add enough frosting. Next time, check the cake a few minutes early and add frosting a tablespoon at a time until the mixture holds together. For this batch, add a little milk or extra frosting and mix again until the texture improves.
Pin This Recipe!
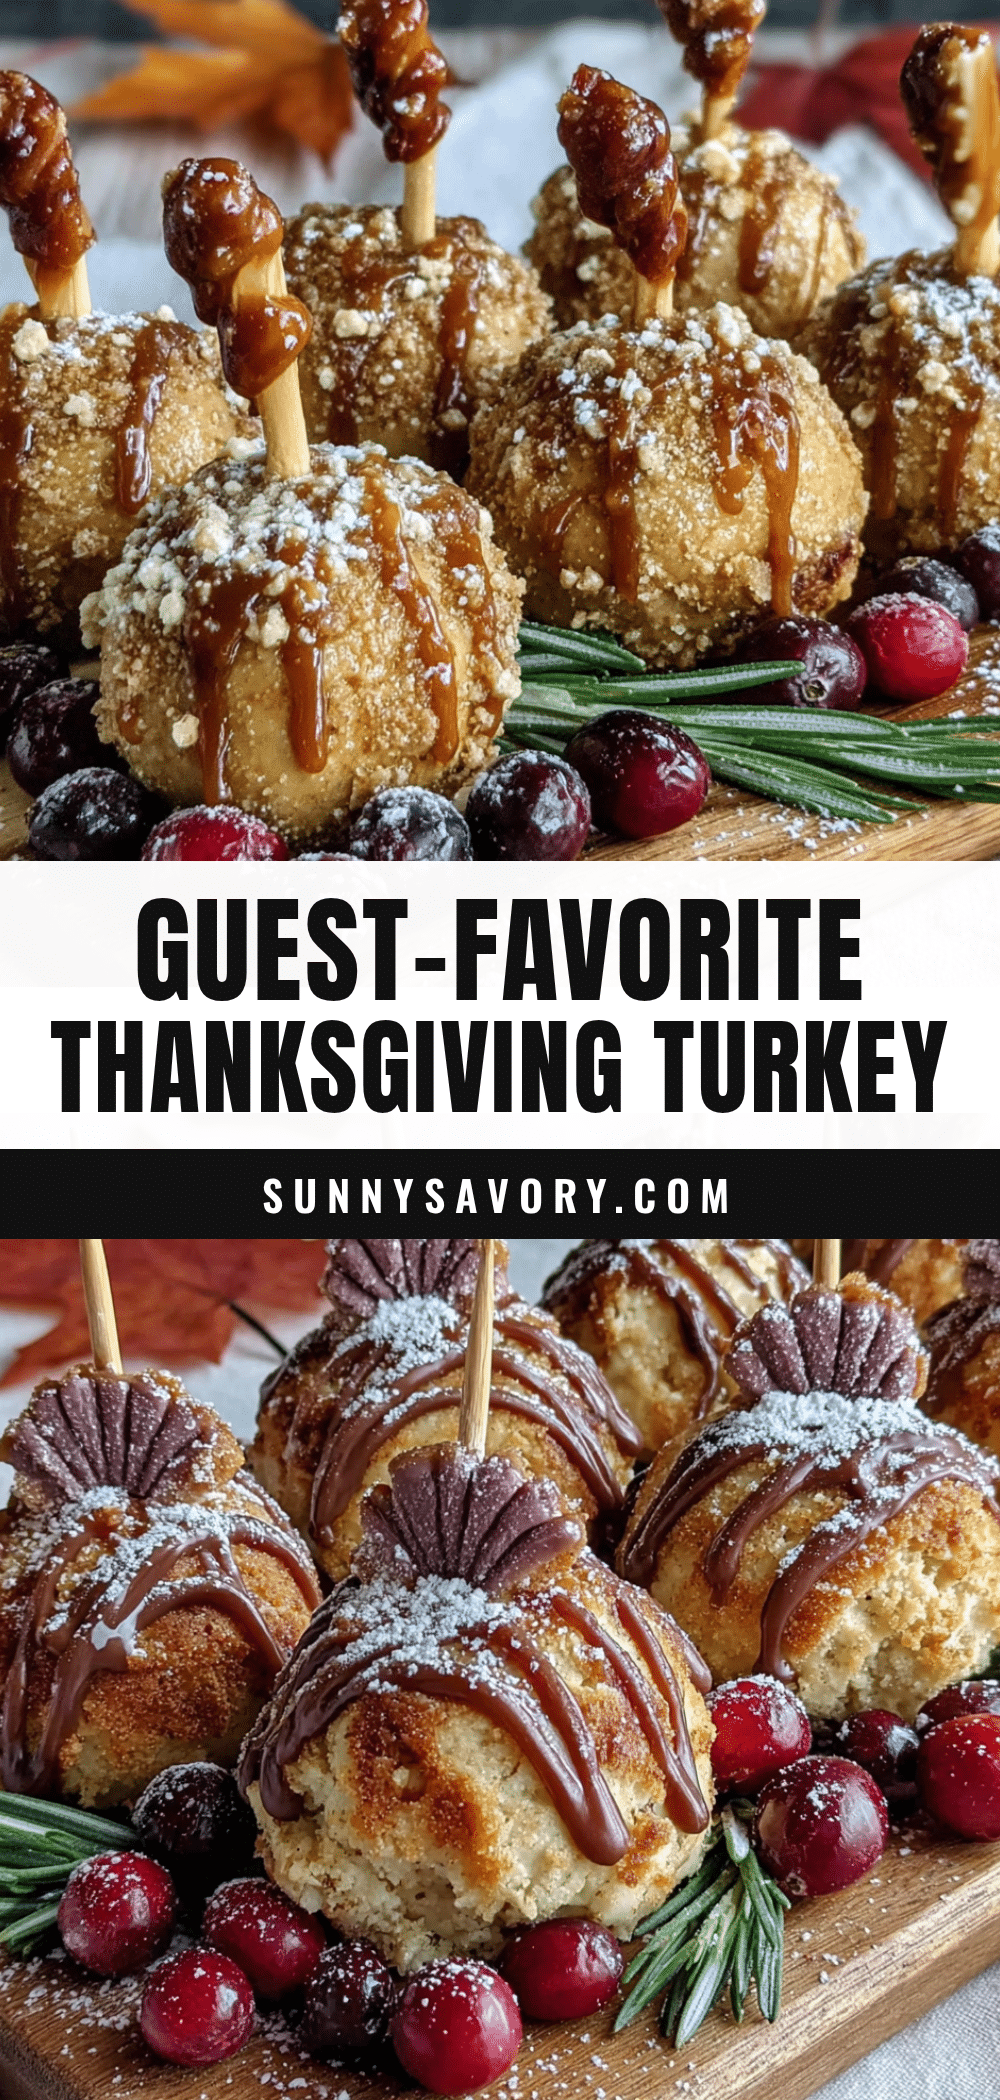
Best Homemade Thanksgiving Turkey Cake Pops Recipe
Adorable and delicious turkey-shaped cake pops made with yellow cake mix, cream cheese frosting, and candy melts. Perfect for Thanksgiving gatherings, these make-ahead treats are fun to decorate and sure to impress guests of all ages.
- Prep Time: 30 minutes
- Cook Time: 30 minutes
- Total Time: 1 hour (plus chilling and decorating time)
- Yield: 24 servings 1x
- Category: Dessert
- Cuisine: American
Ingredients
- 1 box yellow cake mix (Duncan Hines or Betty Crocker)
- 3 large eggs, room temperature
- 1/2 cup vegetable oil (or melted butter)
- 1 cup water (or milk)
- 1/2 cup cream cheese frosting (store-bought, e.g., Pillsbury)
- 1/4 cup vanilla frosting
- 12 ounces brown candy melts (Wilton brand)
- 1 tablespoon coconut oil or shortening
- 48 candy eyes (6mm size)
- 48 orange candy corn pieces
- 24 red candy melts or red M&Ms
- 1/2 cup assorted fall-colored candy melts (orange, red, yellow)
- 48 lollipop sticks (6-inch)
Instructions
- Preheat oven to 350°F (175°C). Grease a 9×13-inch metal baking pan. Mix cake mix, eggs, oil, and water according to package directions (about 2 minutes on medium speed). Pour into pan and bake 28-32 minutes until a toothpick inserted in center comes out clean. Cool completely in pan.
- Crumble the completely cooled cake into a large bowl using your hands until fine, even crumbs form (about 3-4 minutes).
- Add cream cheese frosting and vanilla frosting to crumbled cake. Mix with hands or spatula until mixture holds together when squeezed (like damp sand). If too dry, add another tablespoon of frosting; if too wet, add more crumbled cake.
- Using a cookie scoop, portion out uniform cake balls (about 35-40 grams each). Roll each between palms until smooth. Place on parchment-lined baking sheet. Refrigerate at least 1 hour or freeze 20 minutes.
- Place brown candy melts and 1 tablespoon coconut oil in a microwave-safe bowl. Microwave in 30-second bursts, stirring thoroughly between each, until completely smooth and thin enough to drip steadily from a spoon.
- Remove only 4-5 cake balls from refrigerator at a time. Dip tip of a lollipop stick into melted candy, then insert about halfway into a cake ball. Return to refrigerator for 5 minutes to set.
- Holding the stick, submerge cake ball completely in melted brown coating. Gently tap stick on edge of bowl to let excess drip off. Rotate pop slowly as you lift it out. Insert stick into Styrofoam block. Repeat with all pops.
- While coating is still wet, press two candy eyes into each pop. Add one orange candy corn piece for the beak (pointing downward). Add one red candy melt or M&M for the wattle. Work quickly; if coating hardens, microwave for 10 seconds to reheat.
- Melt fall-colored candy melts separately. Transfer each color to a small piping bag or zip-top bag with a tiny corner snipped off. Pipe small feather shapes onto parchment paper in sets of three (one orange, one red, one yellow per turkey). Let set completely, about 10 minutes. Gently peel off parchment.
- Dab a tiny amount of melted brown coating on the back of each feather set. Press onto the back of each turkey cake pop, positioning like a fan. Let set completely, about 20 minutes. Store in an airtight container in the refrigerator.
Notes
Keep cake balls very cold before dipping to prevent coating from cracking. Add coconut oil a teaspoon at a time to achieve a thin, smooth coating. For best results, bake the cake the day before and break the process into manageable steps. If cake balls spin on the stick, use more melted coating as glue on the stick tip.
Nutrition
- Serving Size: 1 cake pop
- Calories: 185
- Sugar: 16
- Sodium: 145
- Fat: 9
- Saturated Fat: 4
- Carbohydrates: 25
- Protein: 2
Keywords: Thanksgiving, turkey cake pops, cake pops, holiday dessert, turkey dessert, easy cake pops, make-ahead dessert



