Love this? Save it for later!
Share the inspiration with your friends
The PTA bake sale was in twelve hours, and I’d completely forgotten. My son had reminded me three times, and I’d nodded along while mentally planning Tuesday’s dinner. The sign-up sheet came home crumpled in his backpack, and I’d signed us up for “something special” before realizing the date. Everyone else would be bringing their grandmother’s famous bundt cakes or perfectly frosted sugar cookies. I had half a can of pumpkin puree, a block of cream cheese, and a bag of gingersnaps that were already a little bit broken. Honestly, I almost just sent in a store-bought pie and called it a day. But my kid looked at me with those big eyes and said, “Mom, you make the best stuff.” So there I was at 9 PM, wondering if desperation and pantry odds and ends could actually produce a miracle. Let me tell you, they did. These Kid-Approved Pumpkin Cheesecake Bars with Gingersnap Crust won the bake sale the next day. I’m not kidding — the table was empty by 10:30 AM, and three different parents asked me for the recipe. Maybe you’ve been there, staring at your pantry and hoping for the best. This is that recipe.
Why You’ll Love This Recipe
I have tested this recipe more times than I care to count — through three different pumpkin puree brands, two types of cream cheese, and one very memorable incident where I forgot the sugar entirely. These bars have earned their spot in my permanent rotation. Here is why you will love them too:
- Quick & Easy: Comes together in about 20 minutes of active prep time. The oven does the rest of the work while you handle homework, laundry, or just sit down for five minutes.
- Simple Ingredients: Nothing fancy here. You probably already have most of these in your kitchen, especially if you keep cream cheese and canned pumpkin on hand during fall.
- Perfect for Family Meals & Events: Great for bake sales, Thanksgiving dessert tables, or just a Tuesday night treat that makes everyone smile.
- Crowd-Pleaser: My kids devour these, my husband asks for seconds, and even my picky neighbor who “doesn’t like pumpkin” ate three bars before admitting she loved them.
- Unbelievably Delicious: The gingersnap crust adds this warm, spicy crunch that pairs perfectly with the creamy, smooth pumpkin cheesecake filling. It’s next-level comfort food that tastes like fall in every bite.
What makes these bars different from every other pumpkin dessert? Two things: the gingersnap crust and the cream cheese to pumpkin ratio. The crust is not just a base — it is a flavor anchor that keeps every bite interesting. And the filling has just enough cream cheese to give you that tangy richness without overwhelming the pumpkin. It is not just another version of pumpkin bars. It is my best version, tested and approved by actual kids and adults.
This recipe isn’t just good — it is the kind that makes you close your eyes after the first bite. It is comfort food reimagined in bar form, perfect for impressing guests without stress, or turning a simple family dessert into something memorable.
What Ingredients You Will Need
This recipe uses simple, wholesome ingredients to deliver bold flavor and satisfying texture without the fuss. Most of these are pantry staples during fall, and the rest are easy to find at any grocery store.
For the Gingersnap Crust
- 2 cups (about 200g) gingersnap cookie crumbs — I use Nabisco or store brand, both work fine
- 1/4 cup (50g) granulated sugar
- 6 tablespoons (85g) unsalted butter, melted
- 1/4 teaspoon salt (optional, but it balances the sweetness nicely)
For the Pumpkin Cheesecake Filling
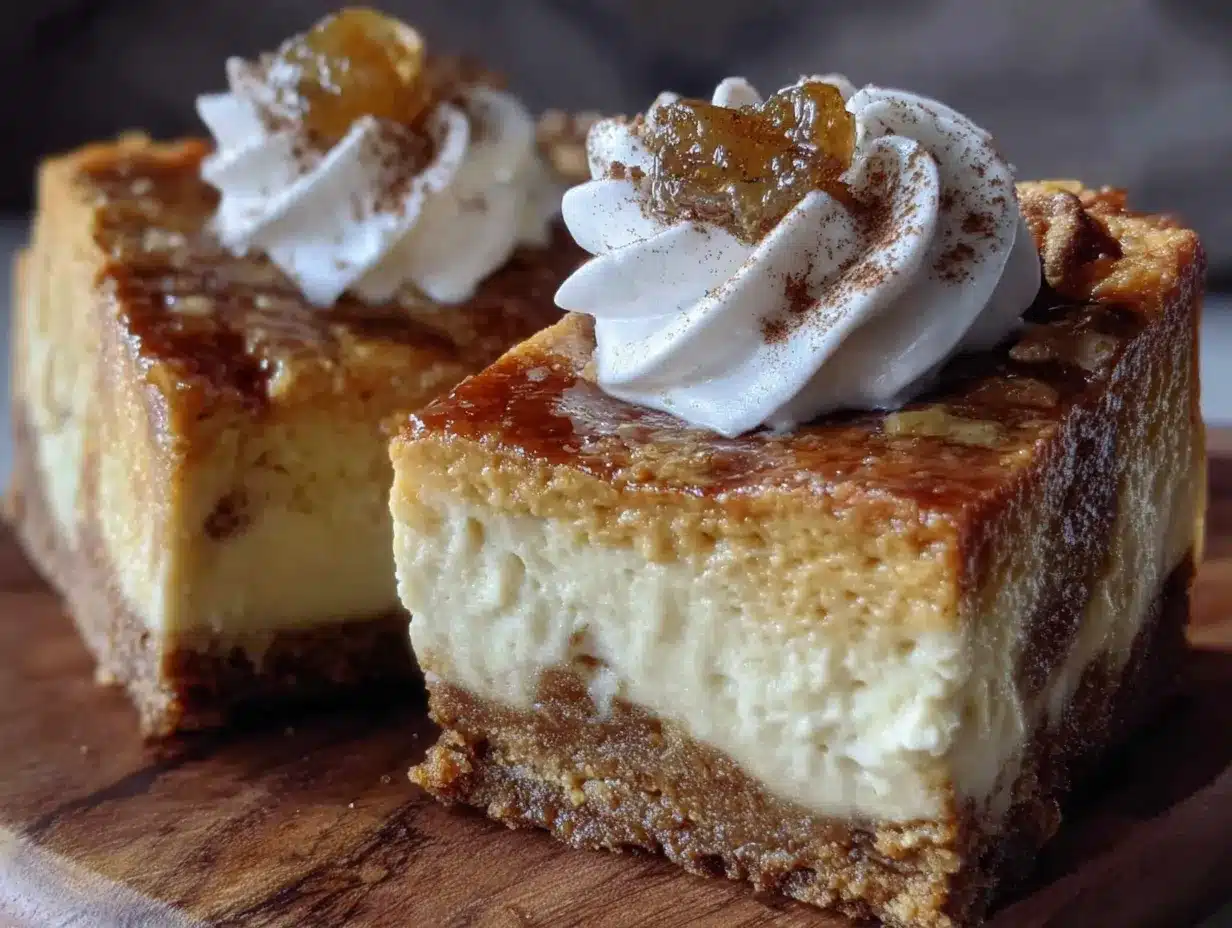
- 16 ounces (450g) cream cheese, softened to room temperature (full-fat works best for texture)
- 3/4 cup (150g) granulated sugar
- 1 cup (245g) pumpkin puree — not pumpkin pie filling, just plain pumpkin
- 2 large eggs, room temperature
- 1 teaspoon vanilla extract
- 1 teaspoon pumpkin pie spice (or make your own with cinnamon, nutmeg, ginger, and cloves)
- 1/2 teaspoon ground cinnamon
- 1/4 teaspoon salt
For the Topping (Optional but Recommended)
- 1/2 cup (120ml) heavy cream
- 1 tablespoon powdered sugar
- 1/2 teaspoon vanilla extract
- Caramel sauce for drizzling (store-bought is fine)
Ingredient tips from my kitchen: Use full-fat cream cheese — low-fat versions can make the filling grainy. I learned that the hard way. For the gingersnaps, any brand works, but avoid the super hard ones that are more like rocks. You want cookies that crumble easily. If you cannot find gingersnaps, graham crackers with 1/2 teaspoon of ground ginger and 1/4 teaspoon of cloves work as a substitute. For the pumpkin puree, I prefer Libby’s for consistent texture, but store brands work just as well.
Equipment Needed
You do not need a professional kitchen for these bars. Here is what you will need:
- 9×9 inch baking pan (an 8×8 works too, bars will be slightly thicker)
- Parchment paper (trust me on this — it makes lifting the bars out so much easier)
- Mixing bowls (one medium for crust, one large for filling)
- Electric hand mixer or stand mixer (a whisk and strong arm work too, but mixer is easier)
- Food processor or zip-top bag and rolling pin for crushing cookies
- Rubber spatula
- Measuring cups and spoons
- Cooling rack
I have made this recipe with a cheap hand mixer that sounded like it was dying, and it still turned out perfectly. Do not overthink the equipment. If you do not have a food processor, put the gingersnaps in a zip-top bag and go to town with a rolling pin. It is oddly satisfying and the kids love helping with that part.
Preparation Method
- Preheat your oven to 350°F (175°C). Line your 9×9 inch baking pan with parchment paper, leaving some overhang on two sides. This creates handles for lifting the bars out later. I forgot the parchment paper once and spent 20 minutes trying to pry bars out of the pan. Do not be like me.
- Make the crust. If using whole gingersnaps, crush them in a food processor until you have fine crumbs. You need about 2 cups of crumbs. In a medium bowl, combine the gingersnap crumbs, sugar, and salt. Pour in the melted butter and stir until every crumb is moistened. It should look like wet sand. Press this mixture firmly into the bottom of your prepared pan. Use the bottom of a measuring cup to really pack it down — a loose crust will fall apart when you cut the bars.
- Bake the crust. Place the pan in the preheated oven and bake for 10 minutes. The crust should look set and smell amazing. Remove from the oven and let it cool slightly while you make the filling. Keep the oven on.
- Make the filling. In a large bowl, beat the softened cream cheese with an electric mixer until smooth and creamy — about 2 minutes. Scrape down the sides of the bowl. Add the sugar and beat until combined, another minute. Add the pumpkin puree and mix until smooth. The mixture should be a beautiful orange color with no lumps.
- Add the eggs and flavorings. Add the eggs one at a time, beating on low speed after each addition until just combined. Do not overmix — too much air will cause cracks on top. Add the vanilla extract, pumpkin pie spice, cinnamon, and salt. Mix on low until everything is incorporated. The batter will be thick and silky.
- Assemble the bars. Pour the pumpkin cheesecake filling over the pre-baked crust. Use a spatula to spread it evenly to the edges. Give the pan a gentle tap on the counter to release any air bubbles.
- Bake. Place the pan in the oven and bake for 35-40 minutes. The edges should look set and slightly puffed, but the center should still jiggle slightly when you gently shake the pan. This is normal — it will continue to set as it cools. Overbaking will make the bars dry and cracked.
- Cool completely. Place the pan on a cooling rack and let it cool to room temperature — about 1 hour. Then transfer to the refrigerator and chill for at least 4 hours, or overnight. This step is not optional. The bars need time to firm up so you can cut clean slices.
- Cut and serve. Once fully chilled, use the parchment paper handles to lift the entire block out of the pan. Place on a cutting board and use a sharp knife to cut into squares. Wipe the knife clean between cuts for the neatest edges. Serve cold or at room temperature.
Cooking Tips & Techniques
I have made these bars probably twenty times now, and I have learned a few things the hard way. Here are my best tips:
Room temperature ingredients matter. Cold cream cheese creates lumps that no amount of mixing will fix. Take it out of the fridge 30 minutes before you start. Same with the eggs — if you forget, place them in a bowl of warm water for 5 minutes.
Do not overmix the filling. I know it is tempting to keep beating until it is perfectly smooth, but too much air incorporation causes cracks. Mix just until each ingredient is incorporated, then stop. Those little cracks on top? Nobody cares once the bars are cut and served, but if you want a smooth top, mix gently.
The water bath is optional. Traditional cheesecake recipes call for a water bath to prevent cracking. I have tested these bars with and without one, and honestly, the difference is minimal. Skip it. Save yourself the hassle of wrapping your pan in foil and hoping water does not leak in.
Patience is key. I know you want to cut into these bars immediately. I have been there. But warm cheesecake is a mess. Chilling for at least 4 hours gives you clean, beautiful squares. Overnight is even better. The flavors meld and the texture becomes perfectly creamy.
Use a sharp knife. A dull knife will drag through the filling and ruin your edges. Run the knife under hot water, wipe it dry, then cut. Clean the blade between each cut. This takes an extra minute but makes your bars look professional.
Variations & Adaptations
One of the best things about this recipe is how adaptable it is. Here are some variations I have tried and loved:
- Gluten-Free Version: Use gluten-free gingersnaps or gluten-free graham crackers. The recipe works exactly the same. I have tested this with Schar brand cookies and it turned out perfectly.
- Dairy-Free Adaptation: Use dairy-free cream cheese (Kite Hill or Violife work well) and a plant-based butter substitute. The texture will be slightly softer, so chill for at least 6 hours before cutting.
- Spice It Up: Add 1/4 teaspoon of cayenne pepper or chipotle powder to the filling for a subtle heat that pairs beautifully with the sweet pumpkin. My husband loves this version.
- Chocolate Twist: Melt 1/2 cup of dark chocolate chips and drizzle it over the top after baking. The chocolate and pumpkin combination is surprisingly good — think pumpkin chocolate chip cookies in bar form.
- Nutty Crunch: Add 1/2 cup of chopped pecans or walnuts to the crust mixture before pressing it into the pan. Toast them first for extra flavor.
- No-Bake Option: For a no-bake version, use a pre-made graham cracker crust and mix the filling without eggs. Use 2 tablespoons of cornstarch to help it set. Chill for 6 hours minimum. This version is softer but still delicious.
My personal favorite variation is the spicy one with a caramel drizzle. I made it for a fall potluck and someone asked if I was secretly a professional pastry chef. I laughed and told them about the time I forgot the sugar.
Serving & Storage Suggestions
These bars are versatile enough for any occasion. Here is how I serve and store them:
Serving: Serve cold or at room temperature. I prefer them straight from the fridge — the filling is firmer and the crust stays crunchy. For a prettier presentation, let them sit at room temperature for 15 minutes before serving. Top with a dollop of whipped cream, a drizzle of caramel sauce, and a sprinkle of cinnamon. They pair beautifully with coffee, hot apple cider, or a glass of cold milk.
Storage: Store leftover bars in an airtight container in the refrigerator for up to 5 days. Place parchment paper between layers to prevent sticking. These bars actually taste better on day two — the flavors have time to meld and deepen.
Freezing: These freeze beautifully. Wrap individual bars in plastic wrap, then place them in a freezer-safe bag or container. They keep for up to 3 months. To thaw, transfer to the refrigerator overnight or let sit at room temperature for 30 minutes. Do not microwave — it makes the crust soggy.
Reheating: I do not recommend reheating these bars. They are meant to be served cold or at room temperature. If you want a warm dessert, try my pumpkin bread pudding instead.
Nutritional Information & Benefits
Here are the approximate nutritional values per bar (based on 16 servings):
- Calories: 285
- Total Fat: 18g
- Saturated Fat: 10g
- Cholesterol: 75mg
- Sodium: 220mg
- Total Carbohydrates: 28g
- Dietary Fiber: 1g
- Sugars: 20g
- Protein: 5g
Pumpkin is packed with vitamin A, which supports eye health and immune function. It is also a good source of fiber and antioxidants. The cream cheese provides calcium and protein, making these bars a slightly more balanced dessert option than a plain cookie or cake.
These bars are vegetarian-friendly. For gluten-free or dairy-free options, see the variations section above. Please note that gingersnaps may contain wheat, so check labels if you have allergies.
Conclusion
These Kid-Approved Pumpkin Cheesecake Bars with Gingersnap Crust have become my go-to fall dessert for a reason. They are simple enough for a Tuesday night, impressive enough for a holiday table, and affordable enough for a family on a budget. The gingersnap crust adds a warmth that plain graham crackers just cannot match, and the creamy pumpkin filling is perfectly balanced — not too sweet, not too tangy, just right.
I love this recipe because it reminds me that you do not need fancy ingredients or hours of time to make something truly special. Sometimes the best recipes come from a moment of panic and a willingness to just try. My son still talks about that bake sale, and now he asks for these bars every fall. That is the kind of recipe worth keeping.
I would love to hear how these turn out for you! Drop a comment below and let me know if your family loved them as much as mine does. Share your variations, your successes, your happy accidents. And if you take a photo, tag me — I want to see your beautiful bars.
Happy baking, friends. You have got this.
Frequently Asked Questions
Can I use fresh pumpkin instead of canned?
Yes, you can use fresh pumpkin puree. Roast a small sugar pumpkin at 400°F (200°C) until tender, then scoop out the flesh and puree it in a food processor. Drain any excess liquid through a cheesecloth or fine mesh strainer — fresh pumpkin can be watery, which affects the texture of the bars.
Why did my cheesecake bars crack on top?
Cracks usually happen from overmixing the filling or overbaking. Mix just until each ingredient is incorporated, and remove the bars from the oven when the center still jiggles slightly. Cracks are purely cosmetic and do not affect the taste. You can cover them with whipped cream or caramel sauce, and nobody will ever know.
Can I make these bars ahead of time?
Absolutely! These bars are perfect for making ahead. Prepare them up to 2 days in advance and store them in the refrigerator. The flavors actually improve after a day of resting. You can also freeze them for up to 3 months — just wrap each bar individually and thaw in the fridge when you are ready to serve.
What if I cannot find gingersnap cookies?
Graham crackers make an excellent substitute. Crush 2 cups of graham cracker crumbs and add 1/2 teaspoon of ground ginger, 1/4 teaspoon of ground cloves, and 1/4 teaspoon of allspice to mimic the gingersnap flavor. Proceed with the recipe as written. The crust will be slightly sweeter but still delicious.
How do I get clean, neat cuts on my bars?
Chill the bars for at least 4 hours, preferably overnight. Use a sharp knife and run it under hot water, then wipe it dry before each cut. Clean the blade between cuts to prevent the filling from smearing. If the knife starts to drag, rinse it in hot water again. This takes a little extra time but gives you beautiful, professional-looking squares.
Pin This Recipe!
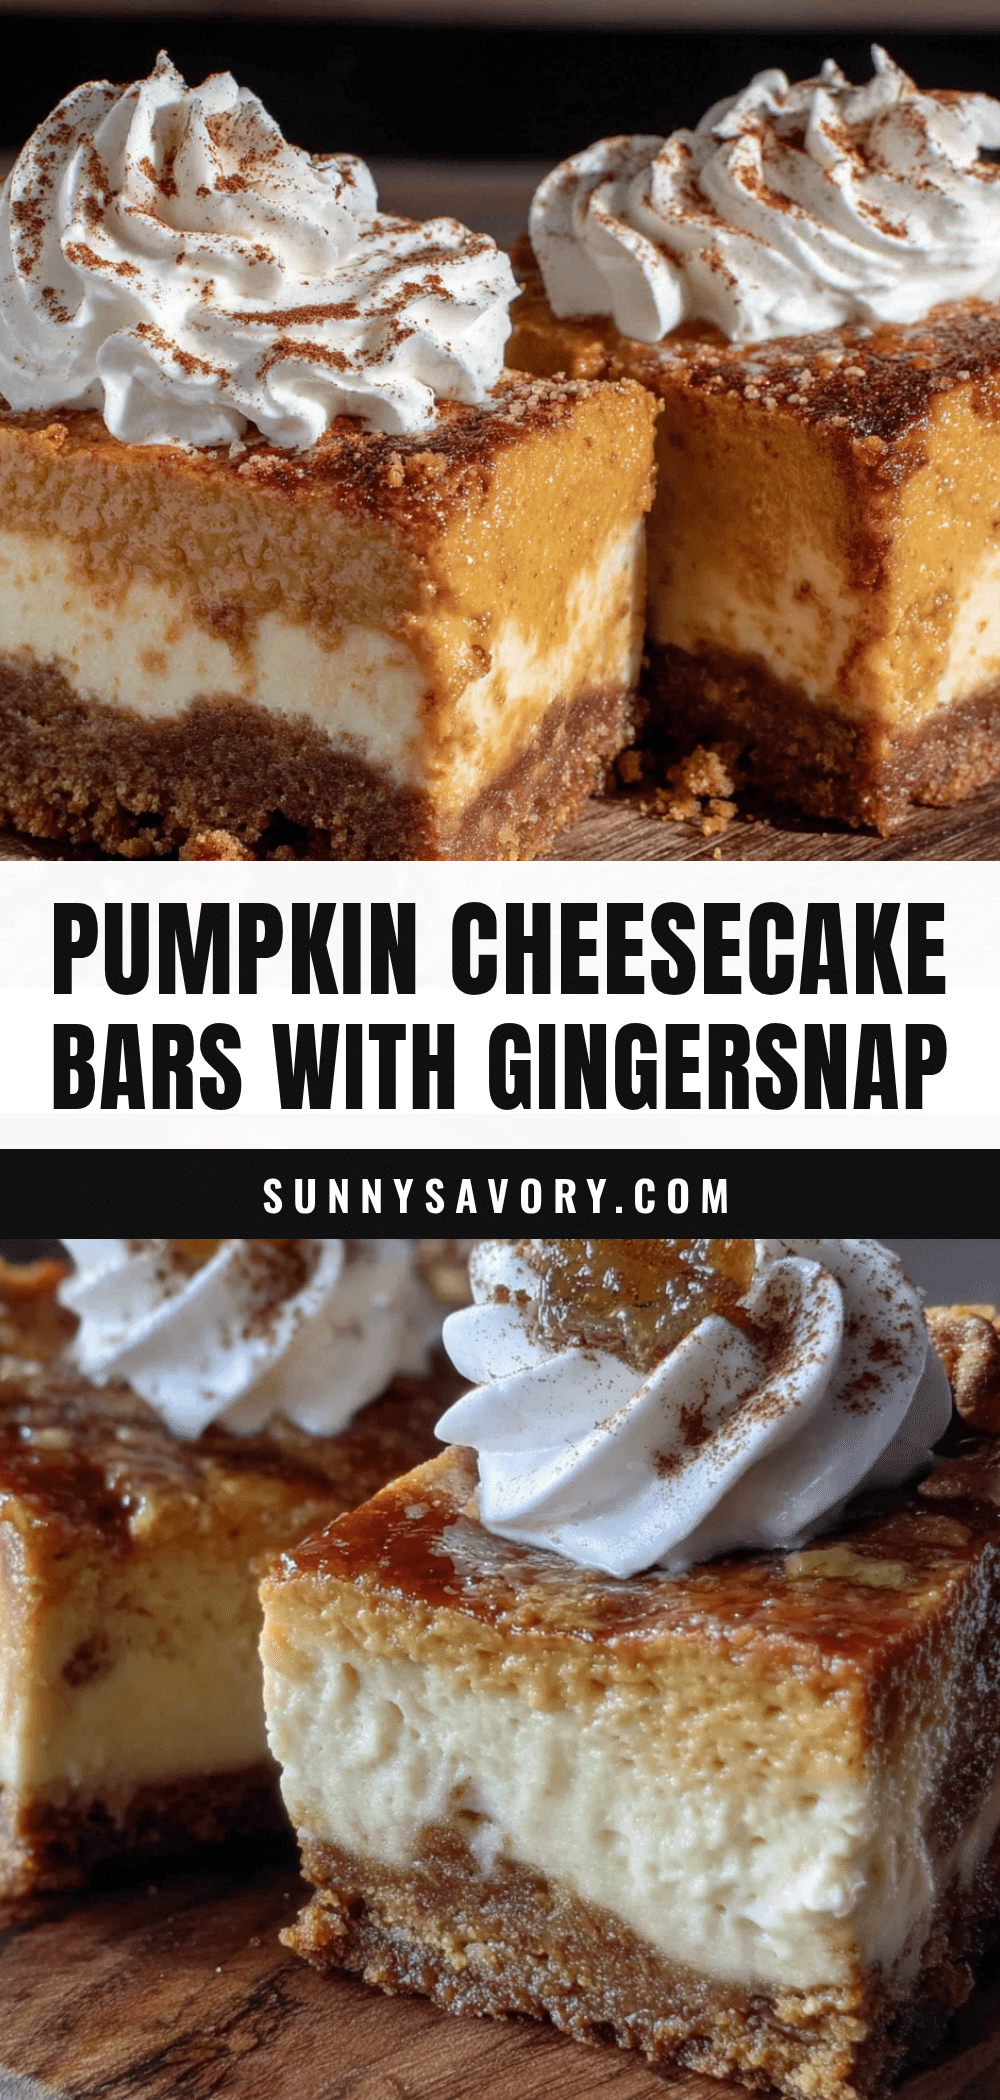
Easy Kid-Approved Pumpkin Cheesecake Bars
These Kid-Approved Pumpkin Cheesecake Bars with Gingersnap Crust are a quick and easy fall dessert made with simple ingredients. Perfect for bake sales, family dinners, or holiday tables, they feature a warm, spicy gingersnap crust and a creamy pumpkin cheesecake filling that’s perfectly balanced.
- Prep Time: 20 minutes
- Cook Time: 35-40 minutes
- Total Time: 4 hours 55 minutes (includes chilling)
- Yield: 16 servings 1x
- Category: Dessert
- Cuisine: American
Ingredients
- 2 cups (about 200g) gingersnap cookie crumbs
- 1/4 cup (50g) granulated sugar
- 6 tablespoons (85g) unsalted butter, melted
- 1/4 teaspoon salt (optional)
- 16 ounces (450g) cream cheese, softened to room temperature
- 3/4 cup (150g) granulated sugar
- 1 cup (245g) pumpkin puree
- 2 large eggs, room temperature
- 1 teaspoon vanilla extract
- 1 teaspoon pumpkin pie spice
- 1/2 teaspoon ground cinnamon
- 1/4 teaspoon salt
- 1/2 cup (120ml) heavy cream (for topping, optional)
- 1 tablespoon powdered sugar (for topping, optional)
- 1/2 teaspoon vanilla extract (for topping, optional)
- Caramel sauce for drizzling (optional)
Instructions
- Preheat your oven to 350°F (175°C). Line your 9×9 inch baking pan with parchment paper, leaving some overhang on two sides.
- Make the crust: If using whole gingersnaps, crush them in a food processor until you have fine crumbs. In a medium bowl, combine the gingersnap crumbs, sugar, and salt. Pour in the melted butter and stir until every crumb is moistened. Press this mixture firmly into the bottom of your prepared pan.
- Bake the crust for 10 minutes. Remove from the oven and let it cool slightly while you make the filling. Keep the oven on.
- Make the filling: In a large bowl, beat the softened cream cheese with an electric mixer until smooth and creamy — about 2 minutes. Scrape down the sides of the bowl. Add the sugar and beat until combined, another minute. Add the pumpkin puree and mix until smooth.
- Add the eggs one at a time, beating on low speed after each addition until just combined. Add the vanilla extract, pumpkin pie spice, cinnamon, and salt. Mix on low until everything is incorporated.
- Pour the pumpkin cheesecake filling over the pre-baked crust. Use a spatula to spread it evenly to the edges. Give the pan a gentle tap on the counter to release any air bubbles.
- Bake for 35-40 minutes. The edges should look set and slightly puffed, but the center should still jiggle slightly when you gently shake the pan.
- Place the pan on a cooling rack and let it cool to room temperature — about 1 hour. Then transfer to the refrigerator and chill for at least 4 hours, or overnight.
- Once fully chilled, use the parchment paper handles to lift the entire block out of the pan. Place on a cutting board and use a sharp knife to cut into squares. Wipe the knife clean between cuts for the neatest edges. Serve cold or at room temperature.
- Optional: Before serving, whip the heavy cream with powdered sugar and vanilla extract until soft peaks form. Top each bar with a dollop of whipped cream and a drizzle of caramel sauce.
Notes
Use full-fat cream cheese for best texture. Room temperature ingredients are important to avoid lumps. Do not overmix the filling to prevent cracks. Chilling for at least 4 hours is essential for clean slices. For gluten-free, use gluten-free gingersnaps. For dairy-free, use dairy-free cream cheese and plant-based butter. Bars can be frozen for up to 3 months.
Nutrition
- Serving Size: 1 bar
- Calories: 285
- Sugar: 20
- Sodium: 220
- Fat: 18
- Saturated Fat: 10
- Carbohydrates: 28
- Fiber: 1
- Protein: 5
Keywords: pumpkin cheesecake bars, gingersnap crust, fall dessert, bake sale recipe, easy pumpkin dessert, kid-friendly dessert



