Love this? Save it for later!
Share the inspiration with your friends
I was standing in the middle of a parking lot last November—arms full of grocery bags, keys somewhere in the bottomless pit of my purse—when a whiff of sage and something sweet hit me from a nearby café vent. And just like that, I was seven years old, sitting cross-legged on the cold linoleum floor of my aunt Rita’s tiny kitchen, watching her pull a steaming pan of stuffing muffins from the oven. She’d let me press the bread cubes into the greased muffin tins with my small, clumsy fingers, and I remember thinking how strange it was that she trusted me with something so important.
She’s been gone almost ten years now, and I still can’t get that smell out of my head. It’s funny, you know—how a scent can unlock a whole room in your memory that you forgot existed. The worn wooden spoon she always used, the crack in the corner of her yellow mixing bowl, the way she’d hum off-key while she worked. I’ve tried recreating that stuffing more times than I care to admit. Some attempts were disasters. One year I forgot the celery entirely and ended up with what I can only describe as soggy bread pudding. But this version? This one finally feels right.
Maybe you’ve been there—chasing a taste from your past that you can almost but not quite hold onto. That’s what these Thanksgiving stuffing muffins are for me. They’re not just a side dish. They’re the closest I’ve gotten to sitting on that kitchen floor again, watching Rita work her magic. Honestly, I think she’d approve of these. She’d probably say they’re even better than hers, and then she’d wink, because that’s exactly the kind of thing she’d say.
Why You’ll Love This Recipe
Let me tell you why these stuffing muffins have become the non-negotiable star of my Thanksgiving table. I’ve tested this recipe across four different holidays, two different ovens, and one memorable year when I accidentally used stale cornbread instead of sourdough. Through every trial, these little golden domes have delivered.
- Perfect for Hosting: When you’re managing a full Thanksgiving spread, the last thing you need is a stuffing dish that requires last-minute attention. These muffins bake up beautifully ahead of time and reheat like a dream. Pop them back in the oven while the turkey rests, and nobody will ever know they weren’t fresh out of the oven.
- Individual Servings = Zero Fights: You know that awkward moment when someone tries to scoop stuffing from the dish and it turns into a crumbly mess? Not with these. Each muffin is its own perfect portion. Your guests grab one (or two—I won’t judge) and move on. No drama, no broken serving spoons.
- Crispy Edges, Tender Center: This is the texture combo that stuffing dreams are made of. The muffin tin creates these gorgeous, golden-brown edges that are almost caramelized, while the inside stays soft and savory. It’s like the best parts of traditional stuffing, but better.
- Crowd-Pleaser Guaranteed: I’ve served these to picky kids, vegetarian relatives, and my uncle who swears he doesn’t like stuffing. Every single one of them came back for seconds. There’s something about the muffin shape that makes people smile—it’s familiar, fun, and somehow less intimidating than a big casserole dish.
- Simple Ingredients: No fancy grocery trips here. You probably have everything in your pantry already. Bread, onions, celery, herbs, broth, eggs. That’s it. The magic is in how you put them together.
This isn’t just another stuffing recipe. It’s the one that lets you actually sit down and enjoy your own Thanksgiving dinner instead of hovering over the oven. And honestly? That’s the real gift.
What Ingredients You Will Need
This recipe uses simple, honest ingredients that come together to create something truly special. I’ve tested each one multiple times, and I’m sharing my best notes so you get perfect results every single time.
- 1 large loaf (about 16 ounces) day-old sourdough bread, cut into ½-inch cubes — Sourdough is my non-negotiable here. It has enough structure to hold up to the broth without turning into mush, and that subtle tanginess balances the savory herbs beautifully. If you can’t find sourdough, a good-quality French bread or ciabatta works too. Just make sure it’s stale—fresh bread will give you soggy muffins. I buy my bread two days ahead and leave it out on the counter, cut side up.
- 4 tablespoons unsalted butter, plus more for greasing the muffin tins — Butter is the soul of good stuffing. I use unsalted so I can control the salt level myself. If you only have salted butter on hand, just reduce the added salt by a quarter teaspoon. And please, don’t skimp on greasing the tins—these muffins need to release easily.
- 1 large yellow onion, finely diced (about 1½ cups) — Yellow onions have the perfect balance of sweetness and bite. Dice them small—about ¼-inch pieces—so they melt into the stuffing rather than giving you big crunchy chunks. If you’re in a hurry, you can use a food processor, but pulse gently. You want diced, not pureed.
- 3 celery ribs, finely diced (about 1 cup) — Celery adds that essential crunch and freshness. Look for firm, bright green stalks without any browning. I always include the leaves too—they’re packed with flavor. Dice them the same size as the onions for even cooking.
- 2 teaspoons fresh sage, finely chopped — Fresh sage is non-negotiable. The dried stuff just doesn’t have the same aromatic punch. I grow sage in my garden specifically for this recipe, but most grocery stores carry it in the fresh herb section. Rub the leaves between your fingers before chopping—you should smell that earthy, slightly peppery aroma immediately.
- 1 teaspoon fresh thyme leaves — Thyme adds a subtle, almost floral note that rounds out the sage. Run your fingers down the stem to strip the leaves easily. No need to chop them—they’re small enough as they are.
- 1 teaspoon fresh rosemary, finely minced — Rosemary is potent, so a little goes a long way. Make sure you mince it very fine—nobody wants to bite into a pine needle situation. I recommend using only the tender top leaves, not the woody stems.
- 1½ cups low-sodium chicken or vegetable broth — Low-sodium is key here because the bread absorbs the liquid and concentrates the salt. I prefer Swanson’s low-sodium chicken broth for its clean flavor, but any good-quality brand works. For a vegetarian version, use Imagine’s vegetable broth—it’s rich without being overpowering.
- 2 large eggs, lightly beaten — Eggs are the binder that holds these muffins together. Make sure they’re at room temperature so they incorporate smoothly. If you forgot to take them out of the fridge, place them in a bowl of warm water for five minutes.
- 1 teaspoon kosher salt — I use Diamond Crystal kosher salt. If you’re using table salt, reduce to ¾ teaspoon. If you’re using Morton’s kosher, use ¾ teaspoon as well—it’s denser than Diamond Crystal.
- ½ teaspoon freshly ground black pepper — Freshly ground makes a real difference here. Pre-ground pepper can taste flat and dusty. Take the extra ten seconds to crack it yourself.
- Optional: ½ cup dried cranberries or chopped pecans — I love adding these for texture and a pop of sweetness. The cranberries plump up during baking and the pecans get toasty. If you’re feeding a crowd with varied tastes, you can leave them out and serve them on the side as a garnish.
Equipment Needed
You don’t need a professional kitchen to nail these stuffing muffins. Here’s what I use and what you can substitute if needed.
- 12-cup standard muffin tin — This is essential. I’ve tried making these in a mini muffin tin and they dried out too quickly. A standard size gives you the perfect ratio of crispy edge to tender center. I use the Wilton non-stick muffin pan and it’s never let me down.
- Large skillet or sauté pan — You need something wide enough to cook down the onions and celery without crowding them. A 12-inch skillet works perfectly. If you only have a smaller pan, cook the vegetables in batches.
- Large mixing bowl — Big enough to toss everything together without spilling. I use my grandmother’s old ceramic bowl, but any large bowl will do.
- Sharp chef’s knife and cutting board — A dull knife makes dicing onions and celery a miserable experience. Take the time to sharpen yours, or invest in a decent one. It makes the whole process faster and safer.
- Flexible spatula or wooden spoon — For folding the ingredients together without crushing the bread cubes. A silicone spatula is gentle and easy to scrape the bowl clean.
- Cooling rack — Letting the muffins cool in the pan for five minutes, then transferring them to a rack, keeps the bottoms from getting soggy. If you don’t have a cooling rack, carefully tip them out onto a clean kitchen towel.
That’s it. No stand mixer, no fancy gadgets. Just good basic tools and a little patience.
Preparation Method
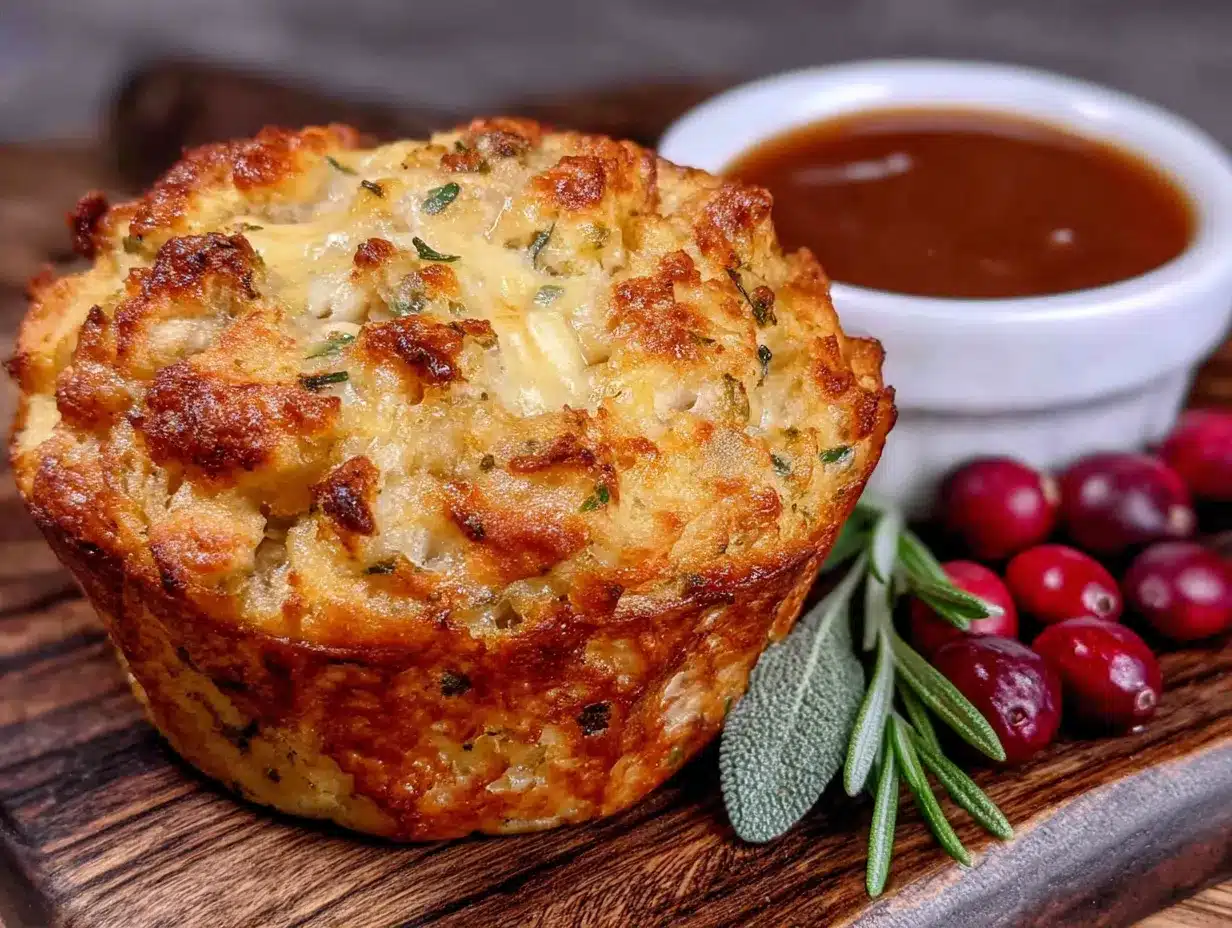
Alright, let’s get cooking. I’ve broken this down into clear steps with all the little details I’ve learned through trial and error. Follow these exactly, and you’ll have perfect stuffing muffins every time.
Step 1: Prepare the Bread
If your bread isn’t already stale, cut it into ½-inch cubes and spread them on a baking sheet. Leave them out on the counter overnight, uncovered. If you’re in a hurry, toast them in a 300°F oven for about 10 minutes, stirring once halfway through. You want them dry but not browned—just enough that they’re crisp on the outside but still have a little give. Don’t skip this step. Fresh bread will absorb too much liquid and turn your stuffing into a dense, gluey mess. I learned this the hard way my first Thanksgiving on my own.
Step 2: Sauté the Aromatics
Preheat your oven to 375°F. Grease your muffin tin generously with butter—don’t just spray it, really get in there with a paper towel and coat every nook and cranny. In a large skillet, melt the 4 tablespoons of butter over medium heat. Add the diced onion and celery. Cook them slowly, stirring occasionally, for about 8 to 10 minutes. You want them soft and translucent, not browned. If they start to color, turn the heat down. The goal here is to sweat them gently so they release their sweetness without any bitterness. When they’re soft, add the sage, thyme, and rosemary. Cook for one more minute until the herbs are fragrant. Remove from heat and let cool slightly.
Step 3: Combine the Ingredients
In your large mixing bowl, combine the dried bread cubes and the sautéed vegetable mixture. Toss gently with your hands or a spatula to distribute everything evenly. In a separate small bowl or measuring cup, whisk together the chicken broth, beaten eggs, kosher salt, and black pepper. Pour this mixture over the bread and vegetables. Now comes the important part: fold everything together gently. Use a light hand—you want the liquid to coat the bread cubes without breaking them apart. Let the mixture sit for about 5 minutes. This gives the bread time to absorb the liquid. The mixture should look moist but not soupy. If it seems dry, add a tablespoon more broth. If it seems too wet, add a handful more bread cubes.
Step 4: Fill the Muffin Tin
Scoop the stuffing mixture into the prepared muffin tin. I use a ⅓-cup measuring cup or a large cookie scoop for even portions. Pack each muffin cup firmly but not compressed—you want the mixture to hold together without being dense. Mound it slightly above the rim of the pan; the muffins will puff up a bit as they bake, then settle. If you’re adding dried cranberries or pecans, press a few into the top of each muffin now.
Step 5: Bake to Golden Perfection
Place the muffin tin on the center rack of your preheated oven. Bake for 25 to 30 minutes, rotating the pan halfway through. You’re looking for deep golden-brown tops and edges that are crispy to the touch. The internal temperature should reach 165°F if you want to be precise. The smell in your kitchen right now is going to be absolutely intoxicating—that’s the sage and butter working their magic.
Step 6: Rest and Release
Let the muffins cool in the pan for exactly 5 minutes. This is crucial—if you try to remove them too soon, they’ll fall apart. After 5 minutes, run a thin knife or offset spatula around the edges of each muffin to loosen them. Gently lift them out and transfer to a cooling rack. If any stick, let them cool another minute and try again. Serve warm or at room temperature.
Cooking Tips & Techniques
I’ve made this recipe more times than I can count, and I’ve collected a few hard-won lessons along the way. Let me save you some trouble.
Don’t Overmix. I know it’s tempting to really work the mixture together, but overmixing breaks down the bread cubes and gives you a dense, pasty texture. Fold gently, just until everything is combined. You should still see distinct bread pieces.
Watch Your Oven Temperature. Every oven runs a little differently. My old rental apartment oven ran hot by about 25 degrees, and I burned two batches before I figured it out. If your muffins are browning too quickly on top but aren’t cooked through, tent them loosely with foil for the last 10 minutes of baking.
Make-Ahead Magic. This is my favorite hosting hack. You can assemble the stuffing mixture completely—up to filling the muffin tin—the day before. Cover the pan tightly with plastic wrap and refrigerate. The next day, let it sit on the counter for 20 minutes while the oven preheats, then bake as directed. The flavors actually meld together even more overnight.
Double Batch Strategy. If you’re hosting a big crowd, make a double batch. These muffins freeze beautifully (more on that below), and having extras on hand means you can pull them out for unexpected guests or lazy winter dinners. I always make at least 24.
The Toothpick Test. Unlike cake, you don’t want a clean toothpick here. Insert a toothpick into the center of a muffin—it should come out with a few moist crumbs clinging to it. If it’s wet, bake another 3 to 5 minutes.
Variations & Adaptations
One of the best things about this recipe is how easily it adapts to different tastes and dietary needs. Here are some variations I’ve tried and loved.
Gluten-Free Version: Swap the sourdough for your favorite gluten-free bread. I’ve had great results with Schar’s gluten-free artisan bread. Just make sure it’s stale and sturdy—some gluten-free breads are too soft and will turn to mush. Add an extra tablespoon of broth to compensate for the drier texture.
Vegetarian and Vegan: Use vegetable broth instead of chicken broth, and substitute the eggs with a flax egg (1 tablespoon ground flaxseed mixed with 3 tablespoons water per egg, let sit for 5 minutes). Use vegan butter or olive oil in place of regular butter. The texture will be slightly less firm, but the flavor is still fantastic.
Sausage and Apple Stuffing Muffins: Brown ½ pound of your favorite breakfast sausage in the skillet before cooking the vegetables. Remove the sausage and set aside, then proceed with the recipe. Add one peeled, diced Granny Smith apple along with the herbs. Fold the cooked sausage back in at the end. This version is my husband’s absolute favorite—it’s hearty enough to be a main dish.
Herb Swap: Not a fan of sage? No problem. Use equal amounts of fresh parsley, tarragon, or even dill. Each herb gives the stuffing a completely different personality. Tarragon adds a subtle licorice note that pairs beautifully with chicken or fish.
Spicy Kick: Add ½ teaspoon of red pepper flakes along with the herbs, or fold in a diced jalapeño (seeds removed) with the onions. The heat cuts through the richness of the butter and broth beautifully.
Serving & Storage Suggestions
These muffins are incredibly versatile when it comes to serving. Here’s how I handle them from the table to the fridge.
Serving: I like to serve these warm, arranged on a large wooden board or a white platter so the golden tops really pop. Garnish with a few fresh sage leaves and a sprinkle of flaky sea salt right before serving. They’re perfect alongside roasted turkey, chicken, or even a simple roast pork loin. For a vegetarian Thanksgiving, serve them with mushroom gravy and roasted root vegetables. The leftovers are fantastic the next day—split one open, toast it in a skillet, and top with a fried egg for breakfast.
Storage: Store any leftover muffins in an airtight container in the refrigerator for up to 4 days. To reheat, place them on a baking sheet in a 350°F oven for about 10 minutes, or until heated through and crispy again. The microwave works in a pinch, but it will soften the crispy edges—still delicious, just different.
Freezing: These muffins freeze like champions. Let them cool completely, then place them on a baking sheet in the freezer for an hour (this flash-freezes them so they don’t stick together). Transfer to a freezer-safe bag or container. They’ll keep for up to 3 months. To reheat from frozen, bake at 350°F for 20 to 25 minutes, no need to thaw first. The edges get just as crispy as the day you made them.
Flavor Development: Here’s a secret—these muffins actually taste better the next day. The flavors have time to meld and deepen. If you can, make them a day ahead and reheat them. Your guests will never know, and you’ll have one less thing to stress about on the big day.
Nutritional Information & Benefits
I’m not a nutritionist, but I’ve done my research and I want to give you a realistic picture of what’s in these muffins. One standard stuffing muffin (without optional add-ins) contains approximately:
- Calories: 220
- Fat: 9g
- Carbohydrates: 28g
- Fiber: 2g
- Protein: 6g
- Sodium: 480mg
These numbers are estimates and will vary based on the specific brands and bread you use. The good news is that this recipe is packed with real, whole ingredients. The onions and celery provide fiber and antioxidants, the fresh herbs are anti-inflammatory powerhouses, and the eggs add high-quality protein. Compared to many traditional stuffing recipes that call for heavy cream or excessive butter, this version is relatively light while still being incredibly satisfying.
If you’re watching your sodium, use no-salt-added broth and reduce the added salt to ½ teaspoon. For a lower-carb option, use a low-carb bread like the one from Sola or Aldi’s L’Oven Fresh. Just keep in mind that the texture will be different—low-carb breads tend to be denser and more absorbent.
Conclusion
Every time I pull a batch of these stuffing muffins out of the oven, I think of my aunt Rita. I think of her yellow mixing bowl and her off-key humming and the way she trusted me with that important job of pressing bread cubes into the tins. And I think about how food has this amazing power to connect us—to people we’ve lost, to memories we thought we’d forgotten, to the simple joy of sharing a meal with people we love.
These muffins aren’t just a side dish. They’re a way to bring a little bit of that kitchen-floor magic into your own Thanksgiving. They’re a way to actually enjoy the holiday instead of stressing over the stove. And honestly? They’re just really, really good.
I’d love to hear how they turn out for you. Did you add cranberries? Try the sausage version? Forget the celery like I did that one year? Drop a comment below and let me know. And if you make these for your own Thanksgiving, tag me in your photos—I want to see your golden, crispy, beautiful creation. Happy cooking, friend.
Frequently Asked Questions
Can I make these stuffing muffins ahead of time?
Absolutely. You can assemble the mixture and fill the muffin tin up to 24 hours in advance. Just cover and refrigerate. Bake as directed, adding about 5 minutes to the baking time since you’re starting from cold. They’re also fantastic fully baked and reheated.
Can I use dried herbs instead of fresh?
You can, but the flavor won’t be as bright. If you’re substituting, use about 1 teaspoon of dried sage, ½ teaspoon dried thyme, and ½ teaspoon dried rosemary. Rub the dried herbs between your palms before adding to release their oils. Fresh really is worth it for this recipe, though.
Why did my stuffing muffins turn out soggy?
This usually happens for one of two reasons: your bread wasn’t stale enough, or you added too much liquid. Make sure your bread cubes are thoroughly dried before you start. If the mixture looks soupy after sitting for 5 minutes, add a handful more bread cubes to soak up the excess.
Can I make these in a mini muffin tin?
You can, but you’ll need to adjust the baking time. Mini muffins will bake in about 12 to 15 minutes. Keep a close eye on them—they go from golden to overdone very quickly. The texture will be a bit different since there’s less room for that soft, tender center.
What’s the best way to reheat frozen stuffing muffins?
From frozen, bake them in a 350°F oven for 20 to 25 minutes. No need to thaw. If you want extra crispy edges, you can pop them under the broiler for the last minute or two. Just watch them closely so they don’t burn.
Pin This Recipe!
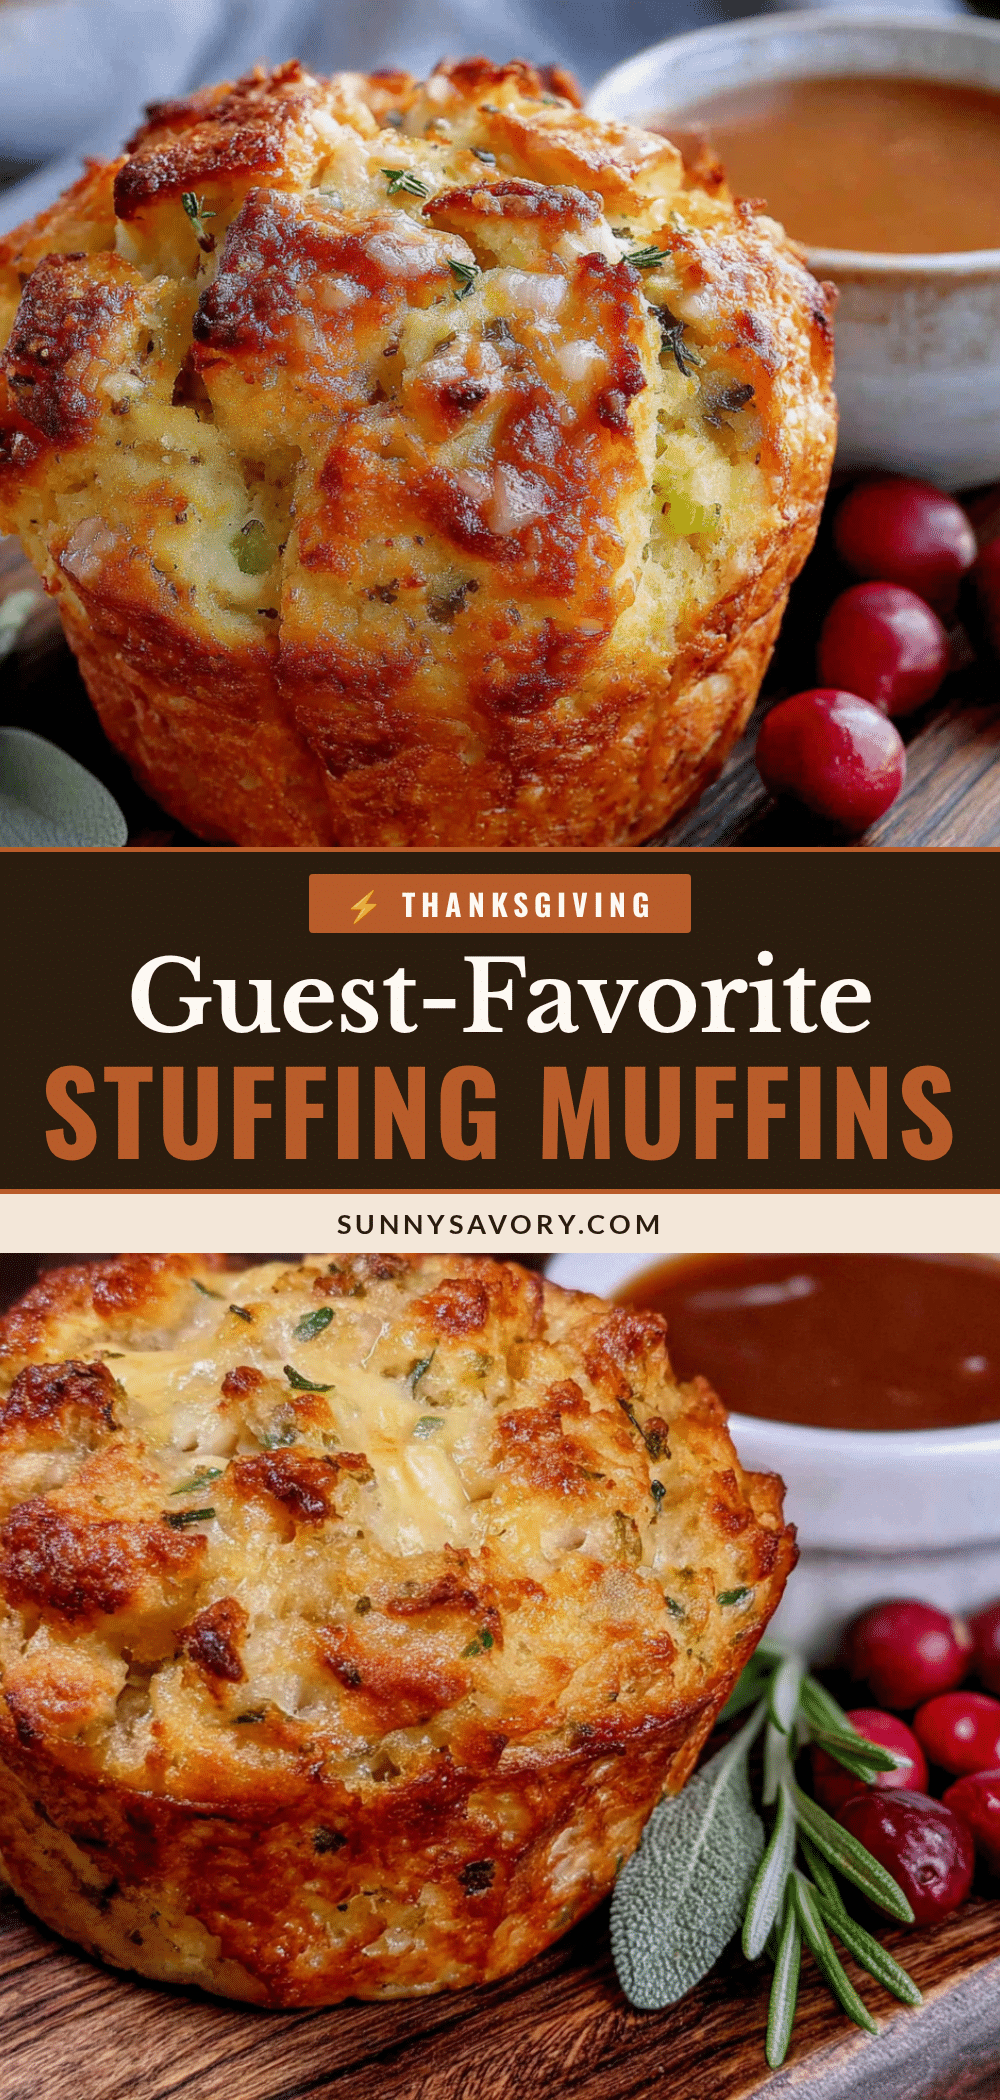
Best Thanksgiving Stuffing Muffins: Easy Guest-Favorite Recipe

These individual stuffing muffins feature crispy golden edges and a tender, savory center. Made with simple ingredients like sourdough bread, fresh herbs, and aromatics, they are perfect for hosting and reheat beautifully.
- Prep Time: 20 minutes
- Cook Time: 30 minutes
- Total Time: 50 minutes
- Yield: 12 servings 1x
- Category: Side Dish
- Cuisine: American
Ingredients
- 1 large loaf (about 16 ounces) day-old sourdough bread, cut into ½-inch cubes
- 4 tablespoons unsalted butter, plus more for greasing the muffin tins
- 1 large yellow onion, finely diced (about 1½ cups)
- 3 celery ribs, finely diced (about 1 cup)
- 2 teaspoons fresh sage, finely chopped
- 1 teaspoon fresh thyme leaves
- 1 teaspoon fresh rosemary, finely minced
- 1½ cups low-sodium chicken or vegetable broth
- 2 large eggs, lightly beaten
- 1 teaspoon kosher salt
- ½ teaspoon freshly ground black pepper
- Optional: ½ cup dried cranberries or chopped pecans
Instructions
- Prepare the bread: If bread isn’t stale, cut into ½-inch cubes and spread on a baking sheet. Leave out overnight, or toast in a 300°F oven for about 10 minutes until dry but not browned.
- Preheat oven to 375°F. Generously grease a 12-cup standard muffin tin with butter.
- In a large skillet, melt 4 tablespoons butter over medium heat. Add diced onion and celery. Cook, stirring occasionally, for 8-10 minutes until soft and translucent. Add sage, thyme, and rosemary; cook 1 minute more until fragrant. Remove from heat and let cool slightly.
- In a large mixing bowl, combine dried bread cubes and sautéed vegetable mixture. Toss gently to distribute.
- In a small bowl, whisk together broth, beaten eggs, salt, and pepper. Pour over bread mixture and fold gently until combined. Let sit for 5 minutes to absorb liquid. Mixture should be moist but not soupy.
- Scoop stuffing mixture into prepared muffin tin, packing firmly but not compressed. Mound slightly above the rim. If using, press a few cranberries or pecans into the top of each muffin.
- Bake on center rack for 25-30 minutes, rotating pan halfway through, until deep golden brown and crispy on edges. Internal temperature should reach 165°F.
- Let muffins cool in pan for exactly 5 minutes. Run a thin knife around edges to loosen, then transfer to a cooling rack. Serve warm or at room temperature.
Notes
For make-ahead: assemble and fill muffin tin up to 24 hours in advance, cover and refrigerate. Bake as directed, adding about 5 minutes. These muffins freeze well for up to 3 months. Reheat from frozen at 350°F for 20-25 minutes.
Nutrition
- Serving Size: 1 muffin
- Calories: 220
- Sugar: 3
- Sodium: 480
- Fat: 9
- Saturated Fat: 4
- Carbohydrates: 28
- Fiber: 2
- Protein: 6
Keywords: stuffing muffins, Thanksgiving stuffing, sourdough stuffing, individual stuffing, holiday side dish, make-ahead stuffing



