Love this? Save it for later!
Share the inspiration with your friends
Last December, I was at my local farmers market, fumbling with a bag of apples that kept trying to escape, when the woman at the next stall laughed and handed me a napkin with a cookie on it. “You look like you could use one,” she said. Her name was Marta, and she had been selling her peppermint bark for years. But that day, she had a tray of these crinkle cookies sitting next to her cash box—white chocolate studded, dusted with powdered sugar, smelling like a holiday card. I took a bite right there, and honestly, the world got a little quieter for a second. Marta just nodded like she knew exactly what had happened.
I asked for the recipe, and she shrugged and started talking. She told me about her grandmother in Poland who made something similar for Christmas Eve, though she used whatever chocolate was on sale. Marta adapted it over the years, adding white chocolate because her kids “refused to eat dark things.” I made my own version that same week, and let me tell you—my kitchen smelled like a bakery and a candy cane had a baby. I burned the first batch because I got distracted by a phone call, but the second batch? Pure magic.
These fudgy white chocolate peppermint crinkle cookies are now my go-to for holiday cookie swaps, lazy Sunday baking, and moments when I need something sweet that feels a little fancy without being complicated. Maybe you have a similar story—a recipe that arrived through a conversation, not a cookbook. That is exactly what this one is. And I keep making them because they taste like that moment at the market: unexpected, generous, and exactly what you needed.
Why You’ll Love This Recipe
I have tested this recipe at least seven times, and each time I learned something new. The first time, I used too much peppermint extract and my cookies tasted like toothpaste. The second time, I forgot to chill the dough and ended up with flat, sad discs. But now? I have it dialed in. This is the version that works every single time.
Here is why these cookies will become your new favorite:
- Quick & Easy: Comes together in under 30 minutes of active time, plus a chill in the fridge. Perfect for busy evenings when you need something sweet fast.
- Simple Ingredients: No weird specialty items. Butter, sugar, eggs, flour, cocoa powder, white chocolate chips, and peppermint extract. You probably have most of these already.
- Perfect for the Holidays: These cookies look stunning on a cookie platter, make great gifts, and the peppermint-white chocolate combo screams “Christmas” without being overwhelming.
- Crowd-Pleaser: I brought them to a work party and three people asked for the recipe before I even sat down. Kids love them. Adults love them. Even my neighbor who “doesn’t do sweets” ate three.
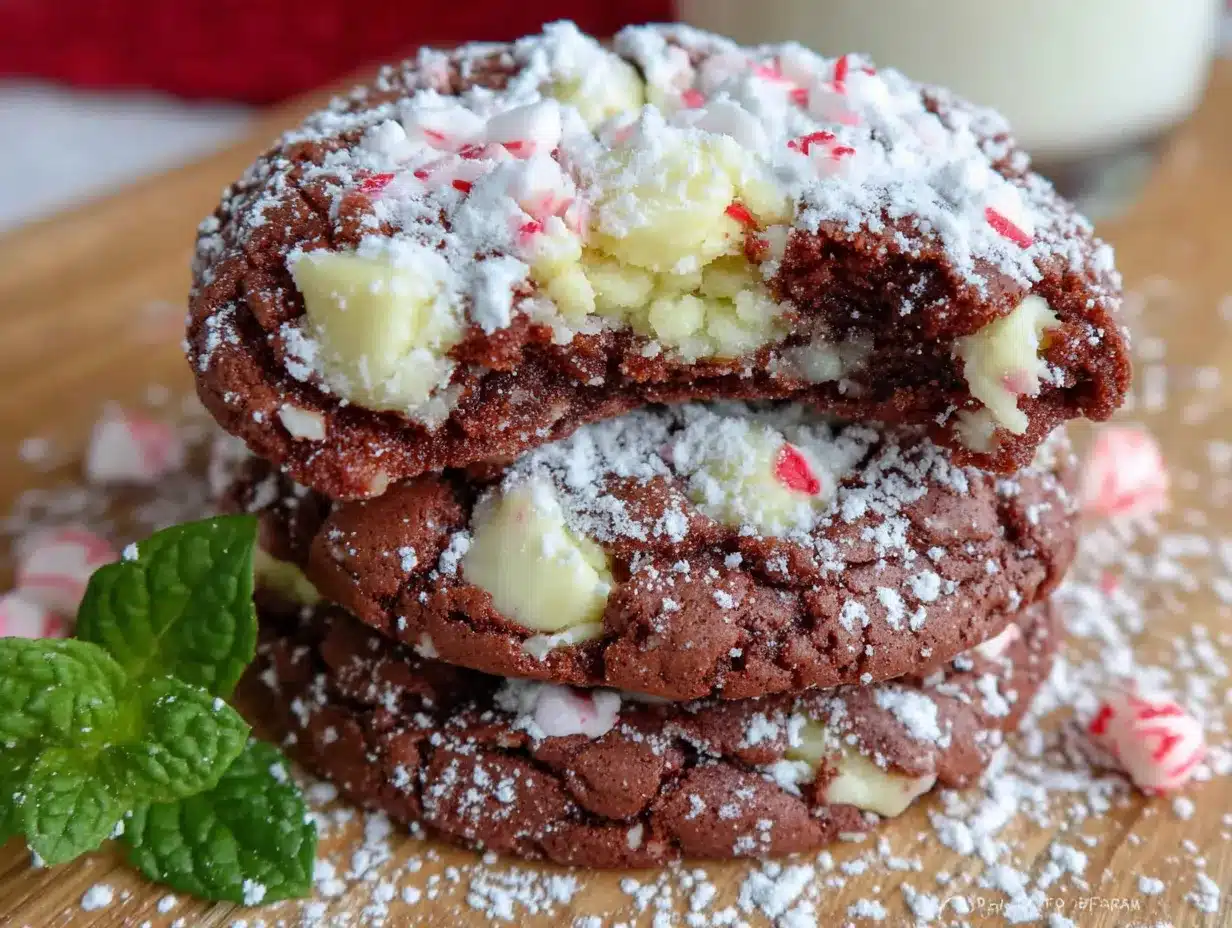
- Unbelievably Delicious: The outside is slightly crisp and crinkly, but the inside stays soft and fudgy. The white chocolate adds little pockets of sweetness, and the peppermint gives it that cool, fresh finish.
What makes this recipe different from others is the technique. I use a combination of melted butter and a touch of corn syrup to keep the centers extra fudgy without making them greasy. Plus, I crush the peppermint into fine bits rather than leaving big chunks, so you get that flavor in every single bite without breaking a tooth. This is not just another crinkle cookie—it is the one you will make year after year.
Honestly, this recipe makes me close my eyes after the first bite every single time. It is comfort food reimagined—healthier than a candy bar, faster than a complicated pastry, but with the same soul-soothing satisfaction. Perfect for impressing guests without stress, or turning a simple Tuesday into something memorable.
What Ingredients You Will Need
This recipe uses simple, wholesome ingredients to deliver bold flavor and satisfying texture without the fuss. Most of these are pantry staples, and the few special ones are easy to find at any grocery store.
For the Cookie Dough
- 1/2 cup (113g) unsalted butter, melted and slightly cooled (I use Land O Lakes for consistent results)
- 3/4 cup (150g) granulated sugar
- 1/4 cup (50g) packed light brown sugar (adds moisture and a hint of caramel flavor)
- 1 large egg, room temperature
- 1 teaspoon vanilla extract
- 1/2 teaspoon peppermint extract (do not use more—trust me on this)
- 1 cup (120g) all-purpose flour, spooned and leveled
- 1/3 cup (30g) unsweetened cocoa powder (I prefer Ghirardelli for rich color)
- 1/2 teaspoon baking soda
- 1/4 teaspoon salt
- 1 cup (175g) white chocolate chips (Ghirardelli or Guittard work best)
- 1/2 cup (75g) crushed peppermint candies (about 8-10 candy canes, crushed fine)
For Rolling
- 1/2 cup (60g) powdered sugar, for coating
Ingredient Tips: For the peppermint candies, I buy a bag of starlight mints or candy canes after Christmas when they are on clearance. Crush them in a zip-top bag with a rolling pin—the kids love helping with this part. If you want a more intense peppermint flavor, you can add an extra 1/4 teaspoon of extract, but I find the crushed candies give enough punch without being medicinal.
Substitution Guidance: You can use dairy-free butter and vegan white chocolate chips for a dairy-free version. If you are gluten-sensitive, swap the all-purpose flour with a 1:1 gluten-free baking flour blend. For a lower-sugar option, use a monk fruit sweetener blend in place of the granulated sugar, though the texture will be slightly less tender.
I recommend using good-quality white chocolate chips here. The cheap ones tend to melt into puddles instead of staying in little chunks. Guittard is my go-to because they hold their shape during baking and taste buttery, not waxy.
Equipment Needed
You do not need fancy equipment for these cookies, which is part of their charm. Here is what you will need:
- Mixing bowls: One large, one medium. I use glass or stainless steel.
- Electric mixer: Hand mixer or stand mixer with paddle attachment. You can do this by hand with a whisk, but your arm will get tired.
- Baking sheets: Two rimmed baking sheets, lined with parchment paper or silicone baking mats. I prefer parchment for easier cleanup.
- Cooling rack: Wire rack for cooling cookies completely.
- Zip-top bag and rolling pin: For crushing peppermint candies. Or a food processor if you want finer bits.
- Cookie scoop: A 1.5-tablespoon scoop makes consistent cookies. If you do not have one, use two spoons.
- Small bowl: For the powdered sugar coating.
If you do not have a stand mixer, do not worry. I made these for years with just a hand mixer and a rubber spatula. The key is to not overmix the dough once you add the flour, so hand mixing actually works great for that final step.
For the baking sheets, I use Nordic Ware because they are heavy-duty and do not warp in the oven. But honestly, any baking sheet will work as long as it is not dark nonstick, which can cause the bottoms to brown too fast.
Preparation Method
Take your time with these steps. The dough needs to chill, so plan ahead. But the active work is quick—about 20 minutes of mixing, then patience.
- Melt the butter: In a large microwave-safe bowl, melt the butter in 30-second bursts until just melted. Let it cool for 5 minutes. You do not want it hot—just warm enough to still be liquid. Hot butter will scramble the egg.
- Mix the sugars: Add the granulated sugar and brown sugar to the melted butter. Whisk vigorously for about 1 minute until the mixture looks like wet sand and smells amazing. It should be slightly grainy but well combined.
- Add the wet ingredients: Crack the egg into the bowl and add the vanilla extract and peppermint extract. Whisk until smooth and glossy, about 30 seconds. The mixture will look a little lighter in color. If it looks separated, keep whisking—it will come together.
- Combine the dry ingredients: In a separate medium bowl, whisk together the flour, cocoa powder, baking soda, and salt. Make sure there are no lumps. I sift mine if the cocoa powder looks clumpy.
- Mix wet and dry: Gradually add the dry ingredients to the wet mixture, stirring with a rubber spatula or wooden spoon. Mix just until no streaks of flour remain. Overmixing at this stage will make the cookies tough. Stop as soon as it comes together.
- Fold in the mix-ins: Gently fold in the white chocolate chips and crushed peppermint candies. Use a light hand here—you want the goodies distributed evenly without crushing them further.
- Chill the dough: Cover the bowl with plastic wrap and refrigerate for at least 2 hours, or up to 24 hours. This is non-negotiable. Chilled dough holds its shape better and gives you that signature crinkle look. I have skipped this step before and ended up with flat cookies that spread into each other. Do not be like me.
- Preheat and prep: When you are ready to bake, preheat your oven to 350°F (175°C). Line two baking sheets with parchment paper. Place the powdered sugar in a small bowl.
- Shape the cookies: Using a cookie scoop or two spoons, portion out 1.5-tablespoon-sized balls of dough. Roll each ball between your palms until smooth. The dough will be slightly sticky—this is normal. Drop each ball into the powdered sugar and roll to coat generously. Make sure every surface is covered; the sugar creates the crinkle effect as the cookies spread.
- Bake: Place the coated dough balls on the prepared baking sheets, spacing them about 2 inches apart. Bake for 10-12 minutes. The cookies will look puffy and cracked when done. The edges should be set but the centers will still look soft. Do not overbake—they continue cooking on the hot sheet after you pull them out. My sweet spot is 11 minutes.
- Cool: Let the cookies cool on the baking sheet for 5 minutes. They will be fragile when hot, so do not try to move them immediately. After 5 minutes, transfer them to a wire rack to cool completely. The crinkles will deepen as they cool.
Sensory cues: When you pull the cookies out, they should smell like a candy cane and chocolate had a party. The tops will have a beautiful web of cracks, showing the dark chocolate dough underneath the white powdered sugar. The white chocolate chips will be slightly melted and gooey. If you press gently on a cookie, the center should feel soft but not raw.
Cooking Tips & Techniques
I learned most of these the hard way—through burnt bottoms and flat discs. Let me save you the trouble.
Chill the dough thoroughly. I cannot stress this enough. The first time I made these, I was impatient and only chilled the dough for 30 minutes. The cookies spread into giant puddles that merged together on the sheet. They tasted fine, but they looked like a crime scene. Two hours is the minimum. Overnight is better. The cold butter solidifies and prevents excessive spreading.
Use a cookie scoop for consistency. When I use a scoop, every cookie is the same size and bakes evenly. When I eyeball it, some are underbaked and some are overbaked. It is worth the extra step. Plus, it makes the dough balls uniform, which means they all need the same amount of chilling time.
Do not skimp on the powdered sugar coating. Roll each ball generously. If you see any dark spots of dough peeking through, add more sugar. The thick coating is what creates those beautiful crinkles as the cookie expands in the oven. I usually use about half a cup of powdered sugar total, but sometimes I need a little more.
Watch the baking time closely. Every oven runs differently. My old oven ran hot and these cookies were done at 9 minutes. My current oven needs 11. Start checking at 9 minutes. The cookies are done when the edges are set and the tops look cracked and puffy. If you wait until the centers look fully set, they will be overbaked and dry.
Crush the peppermint fine. Big chunks of candy can be hard to bite into and can even chip a tooth. I put my candy canes in a zip-top bag, cover with a kitchen towel, and smash with a rolling pin until the pieces are about the size of sprinkles. Some powder is fine—that adds flavor too.
Room temperature egg matters. Cold eggs can seize the butter mixture and make the dough lumpy. If you forgot to take the egg out ahead of time, place it in a bowl of warm water for 5 minutes. Problem solved.
One more thing—do not use mint extract instead of peppermint extract. They are different. Mint extract has a grassy, herbal note, while peppermint is sharp and candy-like. Stick with peppermint for that classic holiday flavor.
Variations & Adaptations
These cookies are forgiving, and I have tried several variations over the years. Here are my favorites:
Dark Chocolate Peppermint Crinkles: Replace the white chocolate chips with dark chocolate chips or chunks. The bitterness of dark chocolate pairs beautifully with the cool peppermint. I did this for a friend who “doesn’t do white chocolate,” and she ate half the batch before admitting she liked them.
Gluten-Free Version: Substitute the all-purpose flour with a 1:1 gluten-free baking flour blend that contains xanthan gum. I have used King Arthur Measure for Measure with great results. The texture is slightly more tender, but the crinkle effect still works perfectly.
Double Peppermint: For peppermint fanatics, add 1/4 teaspoon more peppermint extract and use crushed starlight mints instead of candy canes for a stronger punch. I made these for a holiday party and one guest said they tasted “like Christmas in a cookie.” High praise.
Vegan Adaptation: Use 1/2 cup melted coconut oil instead of butter, a flax egg (1 tablespoon ground flaxseed + 3 tablespoons water), and vegan white chocolate chips. The texture is slightly different—more cakey than fudgy—but still delicious. I tested this for a friend with dairy allergies and it passed the “can I have another?” test.
Spiced Holiday Crinkles: Add 1/2 teaspoon cinnamon and 1/4 teaspoon nutmeg to the dry ingredients for a chai-inspired twist. The warm spices play nicely with the peppermint and white chocolate. This is my go-to for fall baking before the holidays officially start.
You can also swap the white chocolate for butterscotch chips or even chopped dark chocolate. Each variation gives a different personality to the cookie, but the fudgy texture stays the same.
Serving & Storage Suggestions
These cookies are best served at room temperature, about 30 minutes after they come off the cooling rack. The centers are still soft and fudgy, and the white chocolate chips have set but are not hard. If you serve them warm, the white chocolate will be gooey—which is also fantastic, but they are messier.
For presentation, I arrange them on a white platter with a few sprigs of fresh rosemary or pine branches around the edges. The green against the white powdered sugar and dark chocolate looks stunning. For a cookie exchange, I stack them in a clear cellophane bag tied with a red ribbon. They make great gifts.
These cookies pair beautifully with a cup of hot cocoa, a peppermint mocha, or a simple glass of cold milk. For an adult twist, try them with a dark stout beer or a glass of port. The bitterness balances the sweetness.
Storage: Store the cookies in an airtight container at room temperature for up to 5 days. Place a slice of bread in the container to keep them soft—the bread absorbs excess air and releases moisture. Replace the bread slice every other day. I have kept them this way for a full week and they were still delicious.
Freezing: You can freeze the baked cookies for up to 3 months. Layer them between sheets of parchment paper in a freezer-safe container. Thaw at room temperature for about 30 minutes before serving. Alternatively, freeze the unbaked dough balls on a baking sheet, then transfer to a zip-top bag. Bake directly from frozen, adding 2-3 minutes to the baking time. This is my secret for last-minute holiday guests.
The flavors actually develop over time. Day-old cookies taste more peppermint-forward, and the texture becomes slightly chewier. I actually prefer them on day two. But honestly, they rarely last that long in my house.
Nutritional Information & Benefits
Here is the estimated nutritional breakdown for one cookie (based on 24 cookies per batch):
- Calories: 165
- Total Fat: 8g
- Saturated Fat: 5g
- Carbohydrates: 22g
- Sugar: 16g
- Protein: 2g
- Fiber: 1g
- Sodium: 75mg
These numbers are estimates and will vary based on your specific ingredients and portion sizes.
While these are definitely a treat, the cocoa powder provides antioxidants called flavonoids, which support heart health. Peppermint has been shown to aid digestion and can help soothe an upset stomach—though I am not sure that justifies eating a whole batch in one sitting. The white chocolate contains calcium from the milk solids, but honestly, we are eating these for joy, not nutrition.
For dietary considerations: This recipe contains gluten, dairy, and eggs. See the variations section for gluten-free and vegan adaptations. The cookies are nut-free as written, making them safe for school events.
My personal take? Life is short. Have a cookie. Balance it out with a salad for lunch. That is my philosophy.
Conclusion
These fudgy white chocolate peppermint crinkle cookies are everything I want in a holiday treat—beautiful, delicious, and surprisingly easy to make. They look like you spent hours in the kitchen, but the dough comes together in minutes and the hardest part is waiting for it to chill.
I love that this recipe came from a conversation at a farmers market, not a glossy cookbook or a famous blog. It reminds me that the best recipes are the ones shared between people, adapted to fit our own kitchens and families. Marta’s grandmother would probably not recognize my version, but I think she would approve.
Make these for your next cookie swap, your family gathering, or just for a quiet night when you need something sweet. Customize them however you like—more peppermint, different chocolate, a pinch of spice. They are your cookies now.
I would love to hear how they turn out. Drop a comment below and let me know if you tried a variation, or tag me in your photos. Happy baking, friends. May your kitchen smell like peppermint and chocolate, and may your cookies always crinkle beautifully.
Frequently Asked Questions
Can I use mint extract instead of peppermint extract?
No, they are different. Mint extract has a grassy, herbal flavor, while peppermint extract is sharp and candy-like. For the classic holiday cookie taste, stick with peppermint extract.
Why did my cookies spread too much?
Most likely the dough was not chilled enough. Chill the dough for at least 2 hours, or overnight. Also, make sure your butter was not too warm when you mixed it, and that you measured the flour correctly using the spoon-and-level method.
Can I freeze the dough?
Yes! Roll the dough into balls and freeze them on a baking sheet. Once frozen, transfer to a zip-top bag. Bake from frozen, adding 2-3 minutes to the baking time. This is perfect for last-minute cookie emergencies.
How do I get the crinkle effect to show better?
Roll the dough balls generously in powdered sugar. Make sure every surface is completely coated. The sugar creates the cracks as the cookie expands in the oven. Also, do not skip the chilling step—cold dough spreads slower, which gives the cracks time to form.
Can I make these cookies without white chocolate?
Absolutely. You can substitute dark chocolate chips, butterscotch chips, or even chopped nuts. The cookie base itself does not rely on the white chocolate, so feel free to customize based on what you have on hand.
Pin This Recipe!

Best Fudgy White Chocolate Peppermint Crinkle Cookies

These fudgy white chocolate peppermint crinkle cookies are soft, chewy, and perfectly festive. Made with simple ingredients, they come together quickly and are ideal for holiday cookie swaps or cozy baking days.
- Prep Time: 20 minutes
- Cook Time: 11 minutes
- Total Time: 2 hours 31 minutes (includes chilling)
- Yield: 24 cookies 1x
- Category: Dessert
- Cuisine: American
Ingredients
- 1/2 cup (113g) unsalted butter, melted and slightly cooled
- 3/4 cup (150g) granulated sugar
- 1/4 cup (50g) packed light brown sugar
- 1 large egg, room temperature
- 1 teaspoon vanilla extract
- 1/2 teaspoon peppermint extract
- 1 cup (120g) all-purpose flour, spooned and leveled
- 1/3 cup (30g) unsweetened cocoa powder
- 1/2 teaspoon baking soda
- 1/4 teaspoon salt
- 1 cup (175g) white chocolate chips
- 1/2 cup (75g) crushed peppermint candies (about 8–10 candy canes)
- 1/2 cup (60g) powdered sugar, for coating
Instructions
- Melt the butter in a large microwave-safe bowl in 30-second bursts until just melted. Let cool for 5 minutes.
- Add granulated sugar and brown sugar to the melted butter. Whisk vigorously for about 1 minute until the mixture looks like wet sand.
- Add the egg, vanilla extract, and peppermint extract. Whisk until smooth and glossy, about 30 seconds.
- In a separate medium bowl, whisk together the flour, cocoa powder, baking soda, and salt.
- Gradually add the dry ingredients to the wet mixture, stirring with a rubber spatula until just combined. Do not overmix.
- Gently fold in the white chocolate chips and crushed peppermint candies.
- Cover the bowl with plastic wrap and refrigerate for at least 2 hours, or up to 24 hours.
- When ready to bake, preheat oven to 350°F (175°C). Line two baking sheets with parchment paper. Place powdered sugar in a small bowl.
- Using a cookie scoop or two spoons, portion out 1.5-tablespoon-sized balls of dough. Roll each ball between your palms until smooth.
- Drop each ball into the powdered sugar and roll to coat generously, covering every surface.
- Place the coated dough balls on the prepared baking sheets, spacing them about 2 inches apart.
- Bake for 10-12 minutes. The cookies will look puffy and cracked when done. Edges should be set but centers still soft.
- Let the cookies cool on the baking sheet for 5 minutes, then transfer to a wire rack to cool completely.
Notes
Chill the dough for at least 2 hours to prevent spreading. Roll dough balls generously in powdered sugar for the best crinkle effect. Do not overbake; cookies continue cooking on the hot sheet. Use peppermint extract, not mint extract. Crush peppermint candies fine to avoid hard chunks. For best results, use room temperature egg and good-quality white chocolate chips.
Nutrition
- Serving Size: 1 cookie
- Calories: 165
- Sugar: 16
- Sodium: 75
- Fat: 8
- Saturated Fat: 5
- Carbohydrates: 22
- Fiber: 1
- Protein: 2
Keywords: peppermint crinkle cookies, white chocolate cookies, fudgy cookies, holiday cookies, Christmas cookies, crinkle cookies



