Love this? Save it for later!
Share the inspiration with your friends
I wasn’t expecting baking advice from my accountant, but there I was, sitting in his cluttered office in mid-December, watching him pull a crumpled piece of paper from his desk drawer. The paper had a greasy stain on one corner and looked like it had been folded and refolded a hundred times. “My grandmother used to make these for the church bazaar every year,” he said, sliding it across the desk. “She called them her little Christmas trees.” I glanced at the scribbled notes—some measurements were in pinches and handfuls—and honestly, I was skeptical. This was the same man who’d just spent twenty minutes explaining tax deductions. But something about the way his voice softened when he talked about his grandmother made me tuck that paper into my coat pocket.
That weekend, I stood in my kitchen, flour dusting my counter, staring at his grandmother’s recipe. The instructions were, let’s say, open to interpretation. “Bake until they look right” and “add chocolate until it feels like enough” aren’t exactly precise. My first batch came out looking more like sad little blobs than Christmas trees. I mean, I’d be lying if I said I didn’t consider giving up and ordering pizza. But I kept thinking about that accountant’s face—the way he smiled remembering those bazaar tables lined with treats.
So I tried again. And again. I tweaked, tested, and turned those vague notes into something I could actually share without apologizing. These Festive Christmas Tree Brownie Cake Pops are the result of that stubborn week in my kitchen. They’re fudgy, chocolatey, and shaped like little trees that even a non-baker (like me, honestly) can pull off. Maybe you’ve been there—staring at a Pinterest-perfect dessert and thinking there’s no way. Trust me, if I can make these work, you absolutely can too.
Why You’ll Love This Recipe
After testing this recipe about seven times (my neighbors were very happy that December), I can tell you exactly why these cake pops earn a permanent spot on your holiday baking list. They solve the two biggest problems with holiday desserts: they look impressive without requiring professional skills, and they taste like actual brownies, not dry cake crumbs held together by frosting.
- Foolproof for Beginners : No special cake pop machine needed. If you can make brownies from a box, you can make these. The process is forgiving, and I’ve included every little trick I learned the hard way.
- Make-Ahead Friendly : You can prep the brownie base two days in advance. This is a lifesaver when you’re juggling holiday parties, gift wrapping, and that annual cookie exchange.
- Kid-Approved and Adult-Worthy : My niece called them “the best things I’ve ever eaten” (high praise from a seven-year-old), and my coworker asked for the recipe before she’d finished her first bite.
- Completely Customizable : You can keep them classic or go wild with sprinkles, drizzles, or even edible glitter. Each batch can look totally different.
- Perfect for Holiday Gifting : They travel well, look adorable arranged in a gift box, and feel way more special than store-bought treats.
What makes these different from every other cake pop recipe out there? It’s the brownie base. Most cake pops use crumbled cake mixed with frosting, which can taste overly sweet and artificial. These start with a fudgy brownie that’s already rich and moist on its own. You barely need any binder, so the chocolate flavor stays front and center. It’s the kind of dessert that makes people close their eyes after the first bite—and honestly, that’s my favorite kind of recipe to share.
What Ingredients You Will Need
This recipe uses straightforward ingredients, most of which you probably already have in your pantry. The magic happens when you combine them the right way, so let me walk you through what each ingredient does and share a few tips I’ve picked up along the way.
For the Brownie Base
- 1 box (18.4 oz) fudge brownie mix : I prefer Ghirardelli or Duncan Hines for the richest flavor. The fudge variety works better than the “original” because it’s denser and holds together nicely.
- 2 large eggs : Room temperature eggs mix more evenly. If you forgot to take them out early, place them in a bowl of warm water for five minutes.
- 1/2 cup vegetable oil : You can substitute melted coconut oil, but vegetable oil gives the most consistent texture.
- 1/4 cup water : Just tap water is fine. Don’t substitute milk here—it can make the brownies too tender and they’ll fall apart when you shape them.
For Binding and Shaping
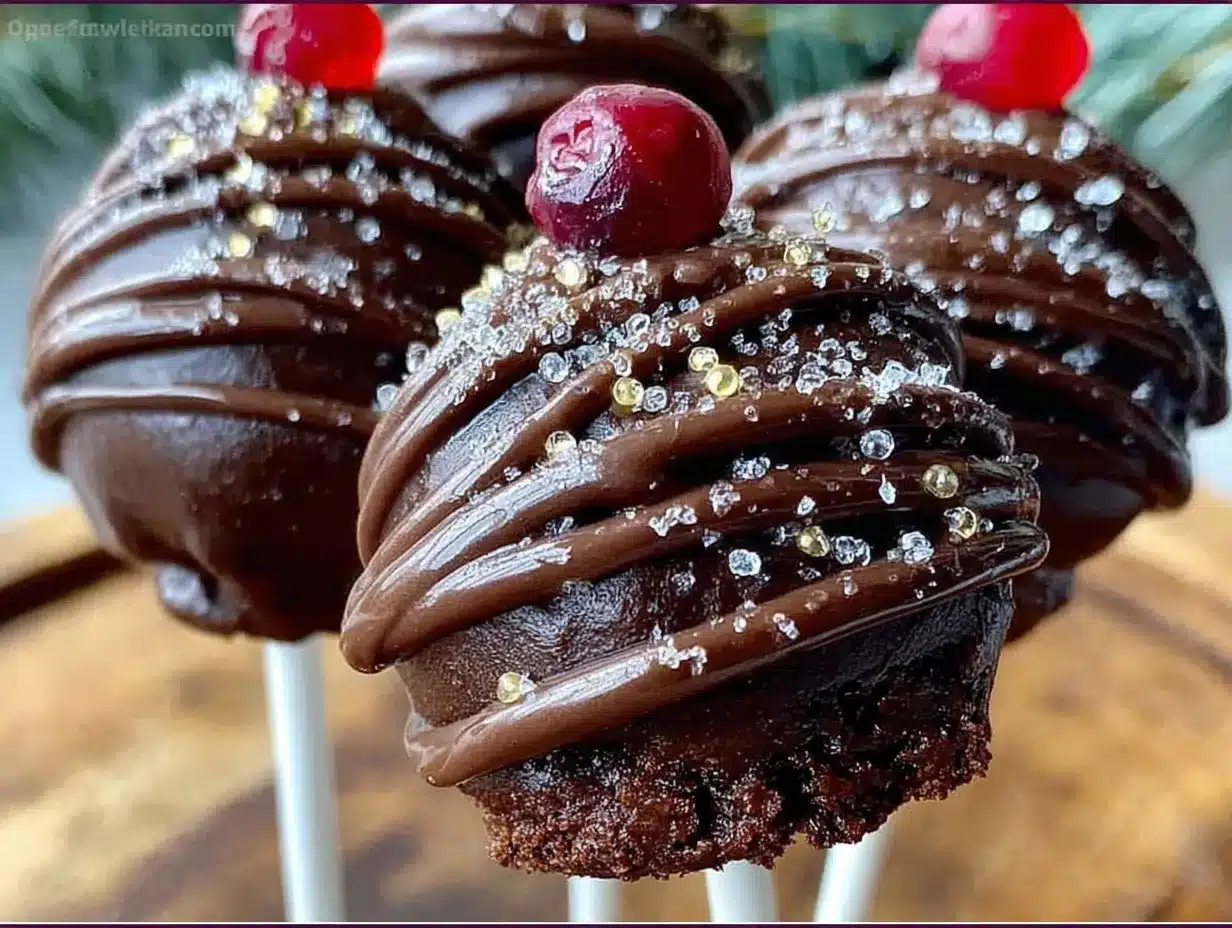
- 2 tablespoons cream cheese, softened : This is the secret ingredient. It binds the crumbled brownies without making them gummy. Use full-fat cream cheese for best results. Low-fat versions have more water and can make the mixture sticky.
- 1 tablespoon unsalted butter, softened : Adds richness and helps the mixture hold its shape. Let it sit on the counter until it’s soft enough to leave a fingerprint when pressed.
- 1/4 cup powdered sugar : Just enough to balance the dark chocolate flavor. Sift it first to avoid lumps.
For the Coating and Decoration
- 12 ounces green candy melts : Wilton brand melts smoothly and has a nice green color. If you use a different brand, check the melting instructions on the package—they can vary.
- 1 tablespoon coconut oil or shortening : This thins the candy melts for a smoother coating. Don’t skip it unless you want thick, lumpy cake pops.
- Mini chocolate chips or brown sprinkles : These become the “tree trunk” or decorative ornaments on your trees. I prefer mini chocolate chips because they look like tiny tree trunks.
- Yellow star sprinkles or star-shaped candies : For the top of each tree. You can find these at craft stores or online during the holiday season.
- White icing or melted white chocolate : For drizzling on top to look like snow. A small piping bag or even a zip-top bag with the corner snipped works perfectly.
For Assembly
- Lollipop sticks : 6-inch sticks are ideal. You can find them at craft stores or baking supply shops.
- A styrofoam block or cake pop stand : For drying the coated cake pops upright. A cardboard box with holes poked in it works in a pinch.
One quick note about substitutions: if you want to make these gluten-free, use a gluten-free brownie mix. The rest of the ingredients are naturally gluten-free. For a dairy-free version, use dairy-free cream cheese and butter alternatives, though the texture will be slightly less firm.
Equipment Needed
You don’t need a fancy kitchen to make these cake pops. Here’s what you’ll actually use:
- 9×9 inch baking pan : A metal pan works better than glass for even baking. If you only have glass, reduce the oven temperature by 25 degrees.
- Large mixing bowl : For crumbling the brownies and mixing the binder.
- Electric hand mixer or stand mixer : You can mix by hand, but a mixer makes the brownie mixture much smoother. I’ve done both, and the mixer version is noticeably easier to shape.
- Small microwave-safe bowl : For melting the candy coating. Glass bowls work best because they heat evenly.
- Baking sheet lined with parchment paper : For placing the shaped cake pops before coating.
- Lollipop sticks : As mentioned above, 6-inch sticks are standard.
- Styrofoam block or drying stand : Essential for letting the coating set without smudging. A flower arranging foam block from the craft store costs about three dollars and works perfectly.
- Piping bag or zip-top bag : For the decorative drizzle. You can also use a toothpick for finer details.
If you don’t have a cake pop stand, don’t rush out to buy one. I used a cardboard box with holes poked in the top for my first few batches. It wasn’t pretty, but it worked. The key is having something that holds the sticks upright while the coating hardens.
Preparation Method
Let me walk you through this step by step. I’ve included all the little details I wish someone had told me before I started making cake pops.
- Preheat your oven to 350°F (175°C) . Grease your 9×9 inch pan lightly with butter or non-stick spray. Don’t overdo it—too much grease can make the edges of the brownies too crispy.
- Prepare the brownie batter according to the package directions. For a fudgier texture, use one egg instead of two and reduce the oil to 1/3 cup. I’ve tested both versions, and the fudgier option holds together better for cake pops.
- Bake the brownies for about 22-25 minutes. Here’s the tricky part: you want them slightly underbaked. A toothpick inserted in the center should come out with a few moist crumbs, not clean. Overbaked brownies will be too dry to shape. Let them cool completely in the pan—this takes about an hour. Don’t rush this step, or the mixture will be too sticky to work with.
- Crumble the cooled brownies into a large bowl. Use your hands or a fork to break them into fine crumbs. There shouldn’t be any large chunks. This takes about five minutes and is honestly the most satisfying part of the process.
- Add the binder ingredients : softened cream cheese, softened butter, and sifted powdered sugar. Mix with an electric mixer on low speed until the mixture comes together. It should feel like slightly damp sand and hold together when you squeeze a handful. If it’s too dry, add another teaspoon of softened cream cheese. If it’s too sticky, add a tablespoon more powdered sugar.
- Shape the mixture into tree cones . Scoop about 2 tablespoons of the mixture and roll it into a ball first, then shape it into a cone by pressing one end against a flat surface and tapering the other end with your fingers. Each cone should be about 1.5 inches tall. Place them on a parchment-lined baking sheet. You should get about 18-20 cones from one batch.
- Chill the shaped cones in the refrigerator for at least 30 minutes. This is non-negotiable. Cold cake pops hold their shape when you dip them in the warm coating. If you skip this step, the cones will fall apart in the melted candy.
- Melt the green candy melts in a microwave-safe bowl. Heat in 30-second intervals, stirring after each, until smooth. Add the coconut oil or shortening and stir until combined. The mixture should be thin enough to coat the back of a spoon. If it’s too thick, add another half teaspoon of oil.
- Dip the tip of each lollipop stick into the melted candy, then insert it about halfway into the bottom (flat end) of a chilled cone. This “glue” step helps the stick stay in place. Let the sticks set for five minutes before dipping.
- Dip each cake pop into the melted green coating. Hold it at an angle and rotate slowly to cover the entire cone. Gently tap the stick on the edge of the bowl to let excess coating drip off. Don’t shake it—you’ll fling coating everywhere. I learned this the hard way.
- Immediately add decorations while the coating is still wet. Press a mini chocolate chip or brown sprinkle into the bottom for the tree trunk. Add a yellow star sprinkle to the top. If you want ornaments, press a few colored sprinkles into the sides.
- Place the coated cake pops into your styrofoam block or drying stand. Let them set completely at room temperature—about 30 minutes. Don’t refrigerate them to speed this up, or the coating might crack.
- Add the snow drizzle once the coating is fully set. Melt a small amount of white icing or white chocolate and drizzle it over the trees using a piping bag or a zip-top bag with a tiny corner snipped off. Let this set for another 15 minutes.
One thing I want to emphasize: if your coating starts getting too thick while you’re working, microwave it for 10 seconds and stir. It should stay smooth and dippable throughout the process.
Cooking Tips & Techniques
I’ve made more cake pops than I care to count, and I’ve messed up just about every step at least once. Here’s what I learned so you don’t have to repeat my mistakes.
The biggest issue with cake pops is cracking. This happens when your cake pop is too cold and hits warm coating. If your cones have been in the fridge for more than an hour, let them sit on the counter for five minutes before dipping. The coating should be warm, not hot. If it’s too hot, it will melt the cake pop from the inside out.
Thin coating is your friend. If your candy melts are too thick, the coating will be clumpy and heavy. That’s where the coconut oil comes in. Add it gradually and stir well. The coating should flow like warm honey. If it’s still thick after adding the oil, you can add a few drops of vegetable oil, but go slowly—too much oil will prevent the coating from setting properly.
Work in small batches. Don’t try to dip all 20 cake pops at once. The coating will start to thicken as it cools, and you’ll end up with uneven coverage. Melt half the candy melts, dip 8-10 cake pops, then melt the rest for the remaining batch. It takes a few extra minutes but makes a noticeable difference.
Let the coating set completely before the drizzle. I once got impatient and added the white drizzle too early. It sank into the green coating and turned into a murky mess. Wait until the green coating is completely hard to the touch—about 30 minutes at room temperature.
If a cake pop falls off the stick (and it will happen), don’t panic. Set it aside, let it come to room temperature, reshape it, rechill it, and try again. You can also just eat the mistakes. Honestly, the broken ones taste just as good.
Variations & Adaptations
One of the best things about this recipe is how easy it is to adapt. Here are a few variations I’ve tried and loved:
White Chocolate Christmas Trees : Use white candy melts instead of green and add a few drops of green food coloring. This gives you a lighter, more pastel tree. Top with silver or gold star sprinkles for an elegant look.
Peppermint Crunch Trees : Crush a few candy canes and sprinkle the pieces over the wet coating before it sets. The peppermint adds a festive crunch that pairs beautifully with the chocolate brownie base. Just be careful not to add too much—a light sprinkle is plenty.
Gluten-Free Version : Use a gluten-free brownie mix. I’ve tested this with King Arthur Flour’s gluten-free mix, and it worked beautifully. The texture is slightly more delicate, so handle the cones gently when dipping.
Dairy-Free Version : Substitute the cream cheese with dairy-free cream cheese (I like Kite Hill) and use vegan butter. The mixture will be slightly softer, so chill the cones for an extra 15 minutes before dipping.
Chocolate Drizzle Trees : Instead of the white snow drizzle, melt dark chocolate and drizzle it over the green coating. The contrast between dark chocolate and green is striking, and it adds another layer of chocolate flavor.
I once made a batch with a friend who insisted on adding orange zest to the brownie mixture. I was skeptical, but honestly? The orange-chocolate combination was incredible. Don’t be afraid to experiment—the worst that happens is you end up with an extra batch of cake pops to eat yourself.
Serving & Storage Suggestions
These cake pops are best served at room temperature. The coating stays firm, and the brownie center is perfectly soft. If you’ve refrigerated them, let them sit on the counter for about 15 minutes before serving.
For presentation, I like to arrange them in a small vase or mason jar filled with white sugar or fake snow. They look like a tiny forest of Christmas trees. You can also stand them in a styrofoam block covered with festive wrapping paper. If you’re bringing them to a party, place them in a single layer in a shallow box with parchment paper between layers.
Storage instructions: Store the cake pops in an airtight container in the refrigerator for up to one week. Place them in a single layer, or separate layers with parchment paper. Don’t stack them too high, or the sticks might break.
Freezer instructions: You can freeze the uncoated brownie cones for up to three months. Wrap them tightly in plastic wrap, then place them in a freezer bag. When you’re ready to use them, thaw them in the refrigerator overnight, then proceed with the dipping and decorating. The coated cake pops can also be frozen, but the coating might develop condensation when thawed. If you freeze the finished pops, let them thaw in the refrigerator, still sealed in their container, to minimize moisture.
The flavors actually deepen after a day or two in the fridge. The brownie center becomes even more fudgy, and the coating sets into a perfect snap. Honestly, I think they’re even better on day two.
Nutritional Information & Benefits
Let’s be real: these are a treat, not a health food. But here’s the estimated breakdown per cake pop (based on 20 pops):
- Calories : Approximately 180-200
- Fat : 10-12g
- Carbohydrates : 24-28g
- Sugar : 18-20g
- Protein : 2-3g
The brownie base provides a small amount of iron from the cocoa powder, and the dark chocolate in the coating offers some antioxidants. The portion size is naturally controlled since each cake pop is a single serving. That’s one of the things I love about cake pops—they satisfy your sweet tooth without the temptation of going back for a second slice of cake.
For those with dietary restrictions, this recipe can be adapted for gluten-free and dairy-free diets as mentioned above. The candy melts are typically dairy-free, but always check the label if you’re serving someone with a severe allergy. The main allergens here are wheat, dairy, and soy (from the chocolate), so keep that in mind when sharing with guests.
Conclusion
I still think about my accountant’s grandmother whenever I make these cake pops. There’s something special about a recipe that gets passed down and then passed along. These Festive Christmas Tree Brownie Cake Pops are more than just a cute holiday dessert—they’re the kind of treat that makes people stop and smile. They’re forgiving enough for beginners, impressive enough for parties, and delicious enough that you’ll want to make them every single December.
I’d love to hear how yours turn out. Did you add your own twist? Did your kids help with the decorating? Did you, like me, eat at least three before they made it to the stand? Drop a comment below and let me know. And if you share them on social media, tag me—I always love seeing your creations. Happy baking, and here’s to a holiday season full of chocolate, sprinkles, and happy accidents.
Frequently Asked Questions
Can I use homemade brownies instead of a box mix?
Absolutely. Use your favorite fudgy brownie recipe, but make sure it’s slightly underbaked so it stays moist enough to shape. Homemade brownies might need a little extra cream cheese to bind properly, so start with the recommended amount and add more if needed.
Why did my cake pops crack when I dipped them?
Cracking usually happens when the cake pop is too cold and the coating is too hot. Let your chilled cones sit at room temperature for 5 minutes before dipping, and make sure the melted coating is warm but not hot. If it’s uncomfortable to touch, let it cool for a minute.
Can I make these ahead for a Christmas party?
Yes! You can prepare the brownie cones up to two days in advance and store them in the refrigerator. Dip and decorate them the day before your party. They’ll stay fresh in an airtight container in the fridge for up to a week.
How do I get the coating smooth and even?
The key is thin coating and gentle tapping. Add enough coconut oil to make the melted candy melts flow like warm honey. When you dip, hold the cake pop at an angle and rotate slowly. Tap the stick gently on the edge of the bowl to let excess drip off—don’t shake or spin it.
My cake pops fell off the sticks. What went wrong?
This usually happens when the cake pop is too heavy for the stick or the stick isn’t inserted deep enough. Make sure you insert the stick about halfway into the cone. Also, dip the tip of the stick in melted coating before inserting it—this acts as glue. If your cones are too large, make them smaller next time, about 1.5 inches tall.
Pin This Recipe!
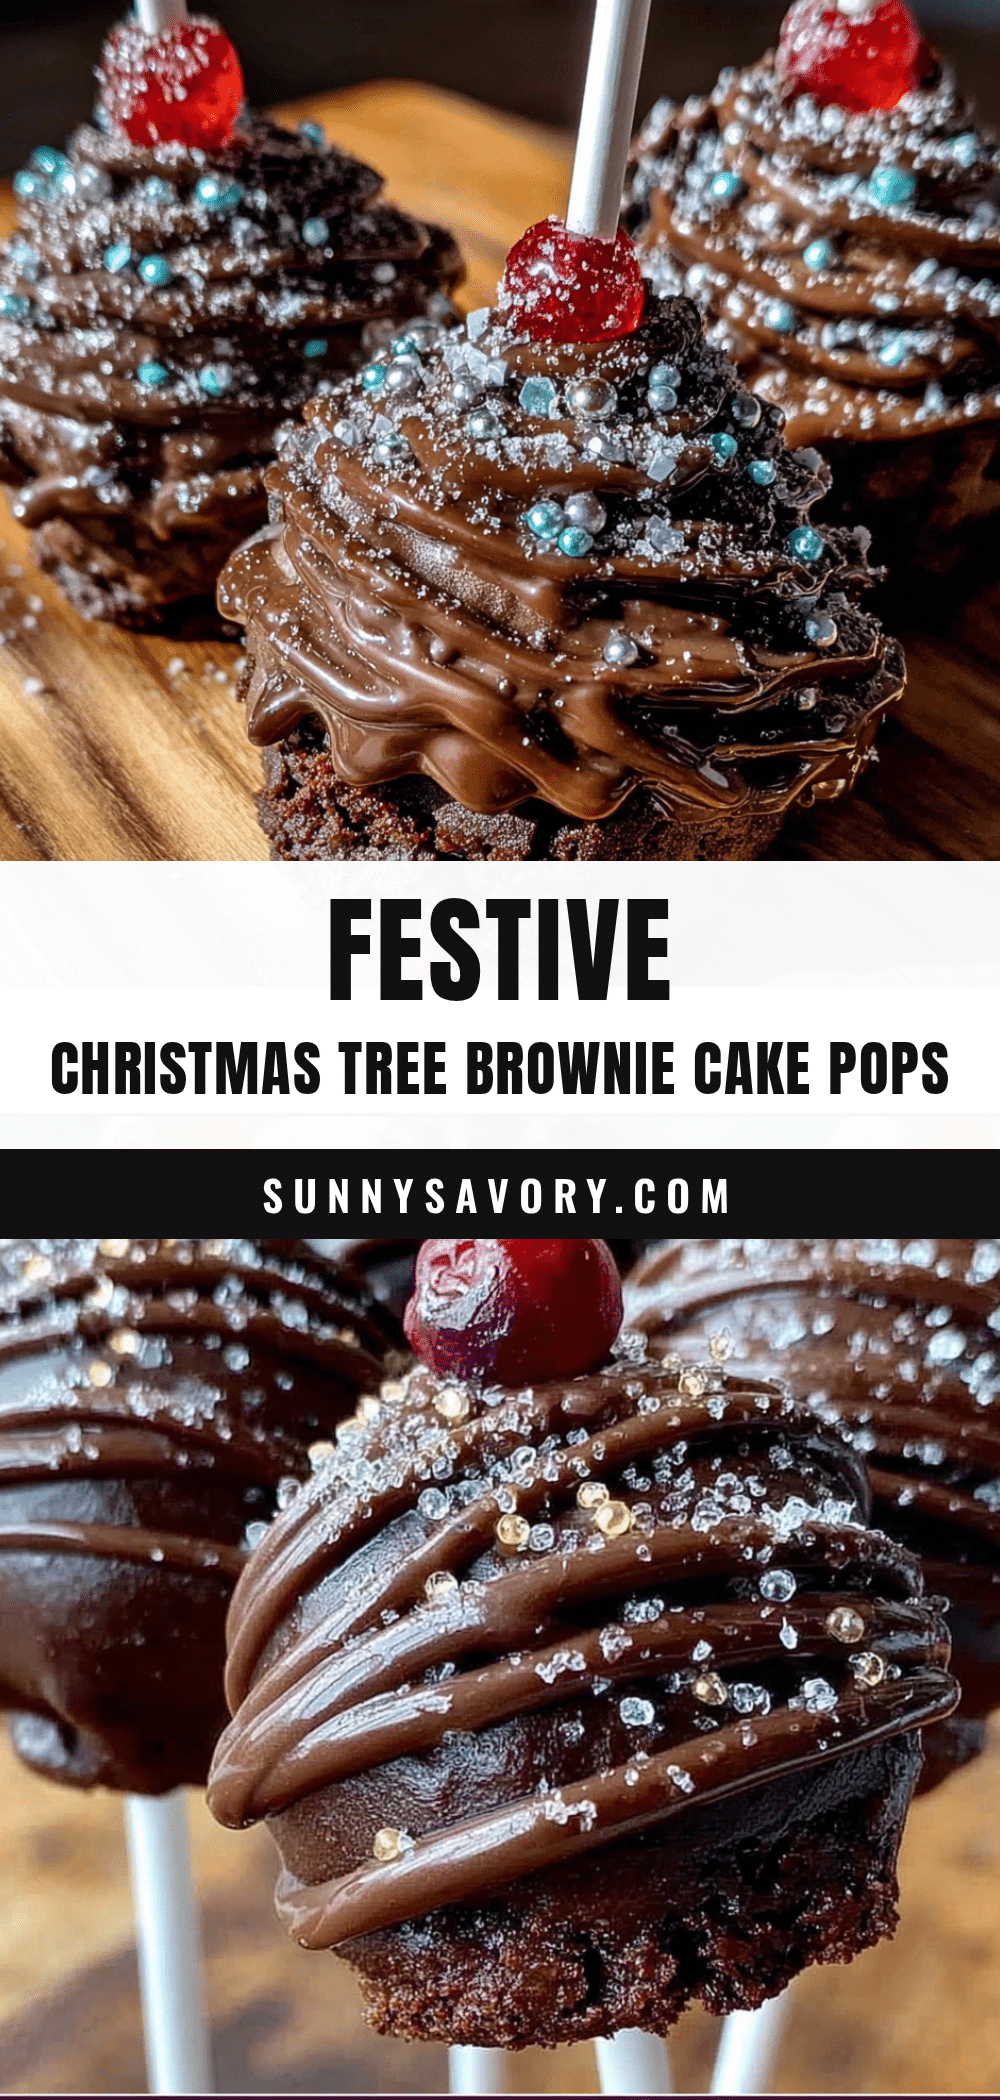
Easy Festive Christmas Tree Brownie Cake Pops
These fudgy, chocolatey cake pops shaped like Christmas trees are perfect for holiday baking. They look impressive without requiring professional skills and taste like actual brownies, not dry cake crumbs.
- Prep Time: 30 minutes
- Cook Time: 25 minutes
- Total Time: 1 hour 55 minutes
- Yield: 18-20 cake pops 1x
- Category: Dessert
- Cuisine: American
Ingredients
- 1 box (18.4 oz) fudge brownie mix
- 2 large eggs, room temperature
- 1/2 cup vegetable oil
- 1/4 cup water
- 2 tablespoons cream cheese, softened
- 1 tablespoon unsalted butter, softened
- 1/4 cup powdered sugar, sifted
- 12 ounces green candy melts
- 1 tablespoon coconut oil or shortening
- Mini chocolate chips or brown sprinkles
- Yellow star sprinkles or star-shaped candies
- White icing or melted white chocolate
- Lollipop sticks (6-inch)
- Styrofoam block or cake pop stand
Instructions
- Preheat your oven to 350°F (175°C). Grease a 9×9 inch pan lightly with butter or non-stick spray.
- Prepare the brownie batter according to the package directions. For a fudgier texture, use one egg instead of two and reduce the oil to 1/3 cup.
- Bake the brownies for about 22-25 minutes, until slightly underbaked (a toothpick inserted in the center should come out with a few moist crumbs). Let cool completely in the pan.
- Crumble the cooled brownies into a large bowl using your hands or a fork until no large chunks remain.
- Add softened cream cheese, softened butter, and sifted powdered sugar. Mix with an electric mixer on low speed until the mixture comes together like slightly damp sand.
- Shape the mixture into tree cones: scoop about 2 tablespoons, roll into a ball, then shape into a cone by pressing one end against a flat surface and tapering the other end. Place on a parchment-lined baking sheet. You should get about 18-20 cones.
- Chill the shaped cones in the refrigerator for at least 30 minutes.
- Melt the green candy melts in a microwave-safe bowl in 30-second intervals, stirring after each, until smooth. Add coconut oil or shortening and stir until combined.
- Dip the tip of each lollipop stick into the melted candy, then insert it about halfway into the bottom (flat end) of a chilled cone. Let set for five minutes.
- Dip each cake pop into the melted green coating, holding at an angle and rotating slowly. Gently tap the stick on the edge of the bowl to let excess coating drip off.
- Immediately add decorations: press a mini chocolate chip or brown sprinkle into the bottom for the tree trunk, add a yellow star sprinkle to the top, and press colored sprinkles into the sides for ornaments.
- Place the coated cake pops into a styrofoam block or drying stand. Let set completely at room temperature for about 30 minutes.
- Once the coating is fully set, melt white icing or white chocolate and drizzle over the trees using a piping bag or zip-top bag with a tiny corner snipped off. Let set for another 15 minutes.
Notes
For best results, slightly underbake the brownies. Chill the shaped cones for at least 30 minutes before dipping. If coating gets too thick, microwave for 10 seconds and stir. Let coating set completely before adding drizzle to prevent it from sinking in.
Nutrition
- Serving Size: 1 cake pop
- Calories: 190
- Sugar: 19
- Sodium: 120
- Fat: 11
- Saturated Fat: 4
- Carbohydrates: 26
- Fiber: 1
- Protein: 2.5
Keywords: Christmas tree cake pops, brownie cake pops, holiday dessert, easy cake pops, festive treats



