Love this? Save it for later!
Share the inspiration with your friends
I had claimed for years that I didn’t like stuffed mushrooms. It wasn’t even a strong opinion, honestly—more of a quiet, stubborn refusal. The texture always felt a little too slippery, and the fillings were often this dense, breadcrumb-heavy paste that seemed to forget it was supposed to be food. “Just not my thing,” I’d say, waving them away at parties. Then came a Tuesday afternoon in late January, the kind where the sky is that cold, washed-out grey and the only thing on the calendar was the playoff game that night. I was testing out a batch of buffalo chicken dip for the occasion—my go-to, the one everyone fights over—and I had a carton of mushrooms sitting in the fridge, bought on a whim for a salad I never got around to making. That’s when it happened. I looked at the dip, I looked at the mushrooms, and I thought, What if I just…
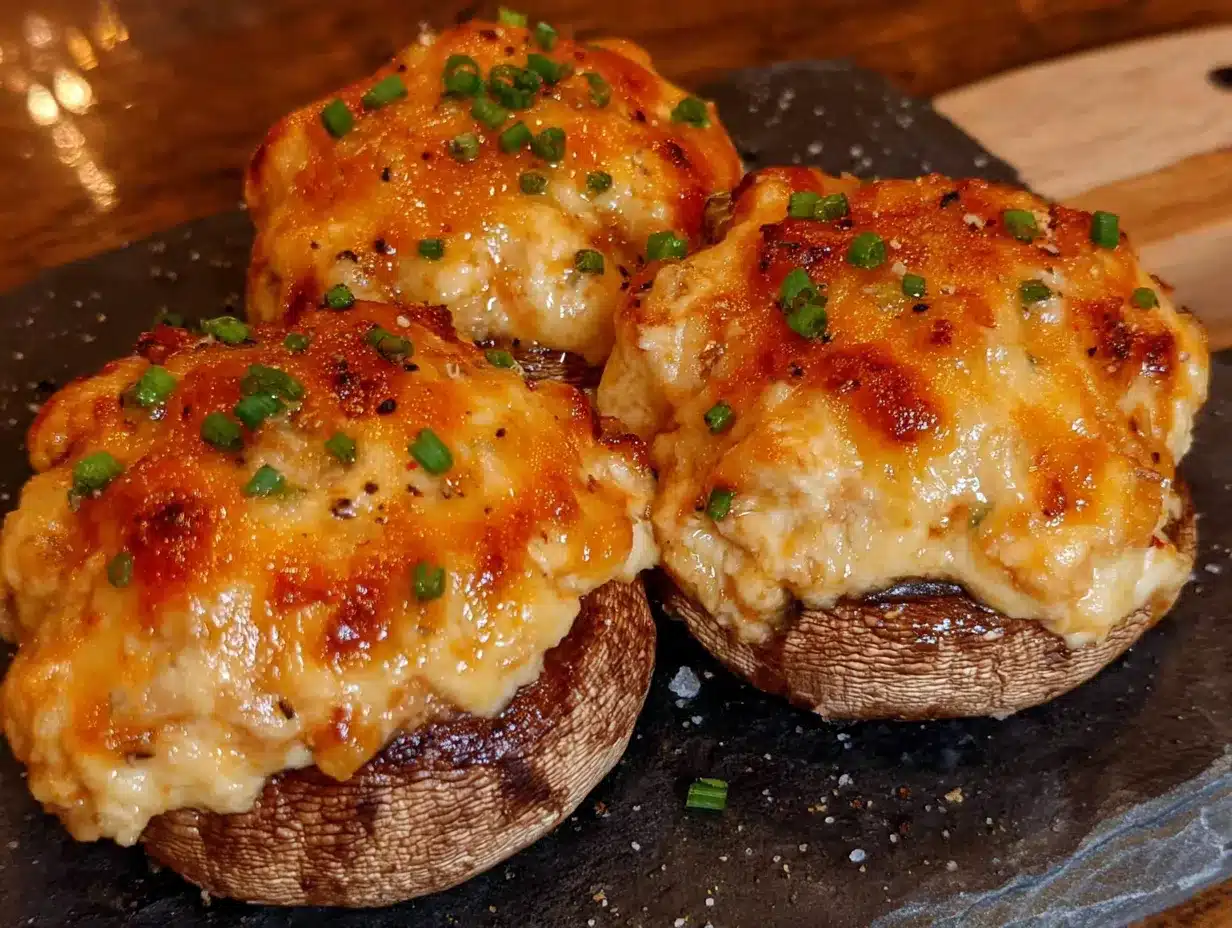
I scooped the filling into a few caps, baked them out of pure curiosity, and then I found my husband standing at the kitchen island, silently eating them straight off the pan. No plate. No napkin. Just a man and his mushroom. I didn’t say a word. I just watched him grab another, and another, and I knew I had accidentally stumbled onto something. This wasn’t just another appetizer. This was the perfect game day food—the spicy, creamy, cheesy soul of buffalo chicken dip packed into a tender, earthy mushroom cap that you can eat in two bites. No chips required. No double-dipping drama. Just pure, messy, delicious chaos on a platter. And honestly? Let me tell you, if you think you don’t like stuffed mushrooms, you might just need to meet these.
Why You’ll Love This Recipe
I’ve tested this recipe about seven times now—through three different brands of cream cheese, two different hot sauce intensities, and one memorable batch where I forgot the chicken entirely (it was still good, just… sad). So trust me when I say this version is the one. Here’s why it works:
- Quick & Easy: From start to finish, you’re looking at about 35 minutes. No marinating, no complicated techniques—just mix, stuff, and bake. Perfect for that pre-game rush when you’re also trying to find the remote.
- Simple Ingredients: You probably have most of this in your kitchen right now. Cream cheese, hot sauce, shredded chicken, cheddar, blue cheese—nothing that requires a specialty grocery run.
- Perfect for Game Day: These are made for the big game. They’re handheld, they’re spicy, and they disappear faster than the halftime show. Plus, they keep well in a warm oven if the game goes into overtime.
- Crowd-Pleaser: I’ve served these to people who “don’t like mushrooms” and watched them go back for thirds. The filling is so bold and creamy that even mushroom skeptics get converted.
- Unbelievably Delicious: The contrast between the tender mushroom cap and the rich, tangy buffalo filling is next-level. It’s comfort food that actually feels a little bit fancy, but without any of the stress.
What makes this recipe different from the rest? It’s the balance. I spent a lot of time figuring out the right ratio of cream cheese to hot sauce so the filling is creamy without being runny, and spicy without being punishing. The mushrooms are pre-baked just enough to soften them, so they don’t release too much water and turn the filling into soup. It’s a small step, but it makes all the difference. This isn’t just another version—it’s the version I’d serve to anyone who says they don’t like stuffed mushrooms. And then I’d watch them prove themselves wrong.
What Ingredients You Will Need
This recipe uses simple, honest ingredients to deliver that classic buffalo chicken dip experience, but in a completely new form. The mushrooms act as the perfect little vessels—earthy, tender, and just sturdy enough to hold all that creamy, spicy goodness. Here’s what you’ll need:
- For the Mushrooms:
- 24 large white button mushrooms or cremini mushrooms (about 1.5 pounds), stems removed and reserved (cremini have a bit more flavor, but white mushrooms work great too)
- 1 tablespoon olive oil (for brushing the caps before baking)
- Salt and black pepper, to taste
- For the Buffalo Chicken Dip Filling:
- 8 ounces cream cheese, softened to room temperature (I use Philadelphia—it gives the creamiest texture)
- 1/2 cup sour cream (full-fat works best here for richness; Greek yogurt can be swapped in, but the filling will be a little tangier)
- 1/3 cup buffalo hot sauce (I recommend Frank’s RedHot Original—it’s the gold standard for a reason)
- 1 1/2 cups cooked, shredded chicken (rotisserie chicken is my go-to for convenience, but leftover grilled chicken or even canned chicken, drained well, works in a pinch)
- 1/2 cup shredded sharp cheddar cheese (plus extra for sprinkling on top)
- 1/4 cup crumbled blue cheese (optional, but highly recommended for that authentic buffalo wing flavor; if you’re not a blue cheese fan, skip it or use ranch seasoning instead)
- 1/4 cup finely chopped green onions (white and light green parts only, plus extra for garnish)
- 1/2 teaspoon garlic powder
- 1/4 teaspoon onion powder
- 1/4 teaspoon smoked paprika (adds a subtle smokiness that plays beautifully with the buffalo sauce)
Ingredient Tips: For the mushrooms, look for caps that are roughly the same size so they bake evenly. Avoid mushrooms that are already open or slimy—they’ll be too watery. If you’re using pre-shredded cheese, that’s fine, but freshly shredded melts more smoothly. And please, don’t skip the blue cheese. I know it’s divisive, but even a small amount adds that funky, tangy depth that makes buffalo chicken dip taste like the real thing. If you absolutely can’t do blue cheese, crumbled feta is a surprisingly good substitute.
Equipment Needed
You don’t need a lot of fancy gear for this recipe, which is part of why I love it. Here’s what you’ll need:
- Baking Sheet: A rimmed baking sheet works best to catch any filling that might bubble over. Line it with parchment paper or aluminum foil for easier cleanup.
- Mixing Bowls: One medium bowl for the filling, and a small bowl for the olive oil.
- Pastry Brush: For brushing the mushroom caps with oil. If you don’t have one, you can use a paper towel dipped in oil—just be gentle so you don’t tear the mushrooms.
- Small Spoon or Butter Knife: For stuffing the mushrooms. I find a small spoon works best, but a butter knife helps you really pack the filling in.
- Cheese Grater: If you’re shredding your own cheese (which I recommend), a box grater does the job quickly.
- Cutting Board and Knife: For chopping the green onions and any other prep.
Honestly, I’ve made these with just a baking sheet and a spoon before, and they turned out great. The only thing I’d say is non-negotiable is the pastry brush—it really helps you get an even coating of oil on the mushrooms, which keeps them from drying out. If you’re on a budget, skip the fancy stuff and just use what you have. These mushrooms are forgiving.
Preparation Method
Let’s get into it. This is the fun part. I’ve broken it down into clear steps, and I’ve added some notes along the way from my own trial-and-error sessions. Trust me on the pre-baking step—it’s the secret to avoiding watery mushrooms.
- Preheat your oven to 375°F (190°C). While it’s heating, line a rimmed baking sheet with parchment paper or foil. This makes cleanup so much easier, and trust me, the filling will bubble over on some of them.
- Prepare the mushrooms. Gently wipe the mushrooms clean with a damp paper towel—don’t rinse them under water, they’ll soak it up like sponges. Remove the stems by gently twisting them off. You can chop the stems finely and add them to the filling if you want (I usually do), or save them for stock. Place the caps on the baking sheet, cavity-side up.
- Pre-bake the mushroom caps. Brush the caps lightly with olive oil and season with a tiny pinch of salt and pepper. Bake for 5 minutes. This step is crucial—it starts the cooking process and helps the mushrooms release some of their moisture before the filling goes in. You’ll see a little liquid pool in the cavities; just carefully tilt the sheet to drain it off, or blot it with a paper towel. Don’t skip this, I’m begging you. I did once, and the filling turned into a soupy mess.
- Make the filling. While the mushrooms are pre-baking, combine the softened cream cheese and sour cream in a medium bowl. Mix until smooth and fully combined. I use a fork for this, but a spatula works too. Add the buffalo hot sauce and mix again. The mixture should be creamy and a uniform pale orange color.
- Add the chicken and cheese. Fold in the shredded chicken, shredded cheddar, crumbled blue cheese (if using), chopped green onions, garlic powder, onion powder, and smoked paprika. Stir until everything is evenly distributed. Taste the filling—yes, raw, it’s safe since the chicken is already cooked. If you want more heat, add another tablespoon of hot sauce. If you want it creamier, add another ounce of cream cheese. Adjust it to your liking.
- Stuff the mushrooms. Using a small spoon or your fingers (clean hands work great here), generously fill each mushroom cap with the buffalo chicken mixture. Really pack it in, mounding it slightly on top. The filling will settle as it bakes, so don’t be shy. Sprinkle a little extra shredded cheddar on top of each one for that melty, golden crust.
- Bake. Place the stuffed mushrooms back in the oven and bake for 15-18 minutes, or until the filling is hot and bubbly and the cheese on top is melted and lightly golden. The mushrooms should be tender but still hold their shape—you don’t want them collapsing.
- Garnish and serve. Let the mushrooms rest on the baking sheet for 2-3 minutes—they’ll be molten hot straight out of the oven. Transfer to a serving platter and sprinkle with extra chopped green onions and a drizzle of ranch or blue cheese dressing if you’re feeling extra. Serve warm.
Cooking Tips & Techniques
I’ve made a lot of mistakes in the kitchen, and I’m happy to share them so you don’t have to. Here are the things I’ve learned the hard way about these stuffed mushrooms:
Don’t overbake the mushrooms. The first time I made these, I got distracted by a particularly exciting play and left them in for an extra five minutes. The mushrooms came out shriveled and sad, and the filling was dry. Keep an eye on them after the 15-minute mark. They’re done when the cheese is melted and the filling is bubbling around the edges.
Drain the pre-baked mushrooms well. I mentioned this above, but it’s worth repeating. Mushrooms are basically little water balloons. If you don’t give them a head start in the oven, that water will seep into your filling and make it runny. After pre-baking, I like to use a paper towel to gently blot the inside of each cap. It takes an extra minute, but it’s worth it.
Use room temperature cream cheese. This is one of those small things that makes a big difference. Cold cream cheese is lumpy and hard to mix. Let it sit on the counter for 30 minutes before you start, or if you’re in a rush, microwave it in 10-second bursts until it’s soft. The filling will be much smoother.
Multitask like a pro. While the mushrooms are pre-baking, make the filling. While the stuffed mushrooms are baking, clean up your workspace and set out your serving platter. This recipe moves fast, and having everything ready makes it feel effortless.
Keep them warm for the game. If you’re making these for a party, you can keep them warm in a 200°F (93°C) oven for up to 30 minutes. Just cover the baking sheet loosely with foil so they don’t dry out. They’re still delicious after sitting out for a bit, but the texture is best within the first hour.
Variations & Adaptations
One of the best things about this recipe is how easy it is to tweak. Here are some variations I’ve tried and loved:
- Vegetarian Version: Skip the chicken and double up on the black beans or add finely chopped cauliflower that’s been roasted until tender. The texture is different, but the flavor is still amazing. I made this for a friend who’s vegetarian, and she asked for the recipe before she even finished eating.
- Keto/Low-Carb Friendly: These are already pretty low-carb, but if you want to reduce the carbs further, use full-fat cream cheese and sour cream, and skip the blue cheese crumbles (they have a tiny bit of carbs). The mushrooms themselves are very low-carb, so this is a great option for game day without the guilt.
- Spicy Buffalo Ranch: Add a tablespoon of ranch seasoning mix to the filling for a tangy, herby twist. This is my husband’s favorite version. It tones down the heat a little and adds a cool, creamy flavor that’s incredibly addictive.
- Smoked Gouda Swap: Replace the cheddar with smoked gouda for a deeper, smokier flavor. It pairs beautifully with the buffalo sauce and gives the filling a slightly different, almost barbecue-like vibe. I tried this on a whim one Sunday and now it’s my second go-to.
- Air Fryer Method: If you’re short on time or want extra crispy edges, you can make these in the air fryer. Preheat to 375°F (190°C), arrange the stuffed mushrooms in a single layer in the basket (you may need to work in batches), and cook for 8-10 minutes, until the filling is hot and the cheese is bubbly. No need to pre-bake the mushrooms in the air fryer—the circulating air does the work.
Serving & Storage Suggestions
These mushrooms are best served warm, right out of the oven, when the filling is still gooey and the cheese is stretchy. I like to arrange them on a large platter, sprinkle with extra green onions, and serve with small bowls of ranch dressing and blue cheese dressing for dipping. They’re perfect as a standalone appetizer, but they also pair beautifully with other game day favorites like crispy chicken wings or a fresh veggie platter.
For storage, let any leftovers cool completely, then transfer them to an airtight container. They’ll keep in the refrigerator for up to 3 days. To reheat, place them on a baking sheet in a 350°F (175°C) oven for about 10 minutes, or until warmed through. The microwave works in a pinch, but the mushrooms will be a bit softer. I don’t recommend freezing these—the texture of the mushrooms changes too much after thawing, and the filling can become watery.
One thing I love about these is that the flavors actually get a little better after a day in the fridge. The buffalo sauce mellows out, and the cream cheese absorbs more of the spices. So if you’re planning ahead, you can stuff the mushrooms a day in advance, keep them covered in the fridge, and bake them right before the game. Just add an extra 2-3 minutes to the baking time since they’ll be cold.
Nutritional Information & Benefits
Per serving (about 4 stuffed mushrooms, based on 6 servings total):
- Calories: 320
- Fat: 24g
- Carbohydrates: 5g
- Fiber: 1g
- Protein: 18g
These numbers are estimates and will vary based on the exact ingredients you use, but they give you a good idea of what you’re working with. The mushrooms themselves are low in calories and a good source of B vitamins and selenium, which supports immune function. The chicken adds lean protein, and the cream cheese and sour cream provide calcium and a little bit of vitamin A. Obviously, this isn’t a health food—it’s game day food—but it’s not as indulgent as you might think. Plus, you’re getting a serving of vegetables (the mushrooms!) in a way that actually feels like a treat.
If you’re watching your sodium, use a low-sodium hot sauce and reduce the added salt. The blue cheese and cheddar also add a fair amount of salt, so taste the filling before you season it with extra salt. I usually don’t add any salt to the filling at all, because the hot sauce and cheese are salty enough.
Conclusion
So there you have it—the stuffed mushroom recipe that turned a skeptic into a believer. These Game Day Buffalo Chicken Dip Stuffed Mushrooms are everything you want in an appetizer: bold, creamy, spicy, and satisfying, all wrapped up in a tender little mushroom cap that feels surprisingly elegant. They’re the kind of recipe that makes you look like you spent hours in the kitchen, when really, you just mixed a few things together and let the oven do the work.
I love this recipe because it’s proof that you don’t have to follow the rules. You don’t have to serve buffalo chicken dip with chips. You don’t have to be a stuffed mushroom person. Sometimes the best dishes come from ignoring what you think you know and just trying something weird. And honestly, that’s my favorite kind of cooking—the kind that surprises you.
I’d love to hear how these turn out for you. Did you add extra hot sauce? Try the smoked gouda version? Did you serve them to someone who claimed they didn’t like mushrooms? Drop a comment below and let me know. And if you’re looking for more game day inspiration, don’t miss our crispy baked chicken wings or this easy seven-layer dip—they’re both crowd favorites that pair perfectly with these mushrooms. Happy cooking, and go team!
Frequently Asked Questions
Can I make these ahead of time?
Absolutely. You can assemble the stuffed mushrooms up to 24 hours in advance. Store them covered in the refrigerator, and bake them directly from the fridge, adding 2-3 minutes to the baking time. This is actually my preferred method for game day—less stress, more snacking.
Can I use a different type of mushroom?
Yes, but the size and texture matter. Large white button mushrooms or cremini mushrooms work best because they’re sturdy and have a nice, mild flavor. You can use baby bella mushrooms, which are just cremini, or even portobello caps cut into quarters. Avoid shiitake or oyster mushrooms—they’re too delicate and will fall apart.
How do I make this less spicy?
Easy—use a mild hot sauce or reduce the amount. You can also substitute half the hot sauce with a creamy ranch dressing or sour cream to tone down the heat while keeping the flavor. My kids love these with a mild buffalo sauce and a little extra cream cheese.
Can I use canned chicken?
You can, but I recommend draining it really well and patting it dry with paper towels. Canned chicken has a lot of extra moisture, which can make the filling watery. If you’re in a pinch, it works, but rotisserie chicken or leftover grilled chicken gives a much better texture and flavor.
How do I keep the mushrooms from getting soggy?
The pre-baking step is your best friend here. Baking the empty mushroom caps for 5 minutes helps them release moisture before the filling goes in. Also, make sure your filling isn’t too wet—if it seems runny, add a little more shredded cheese or a tablespoon of breadcrumbs to absorb the extra liquid.
Pin This Recipe!

Best Easy Game Day Buffalo Chicken Dip Stuffed Mushrooms Recipe

These Game Day Buffalo Chicken Dip Stuffed Mushrooms are the perfect appetizer: spicy, creamy, and cheesy buffalo chicken dip packed into tender mushroom caps. Quick and easy to make, they’re a crowd-pleaser that will convert even mushroom skeptics.
- Prep Time: 15 minutes
- Cook Time: 20 minutes
- Total Time: 35 minutes
- Yield: 6 servings 1x
- Category: Appetizer
- Cuisine: American
Ingredients
- 24 large white button mushrooms or cremini mushrooms (about 1.5 pounds), stems removed and reserved
- 1 tablespoon olive oil
- Salt and black pepper, to taste
- 8 ounces cream cheese, softened to room temperature
- 1/2 cup sour cream
- 1/3 cup buffalo hot sauce (recommended: Frank’s RedHot Original)
- 1 1/2 cups cooked, shredded chicken (rotisserie chicken recommended)
- 1/2 cup shredded sharp cheddar cheese, plus extra for topping
- 1/4 cup crumbled blue cheese (optional)
- 1/4 cup finely chopped green onions (white and light green parts only), plus extra for garnish
- 1/2 teaspoon garlic powder
- 1/4 teaspoon onion powder
- 1/4 teaspoon smoked paprika
Instructions
- Preheat your oven to 375°F (190°C). Line a rimmed baking sheet with parchment paper or foil.
- Gently wipe the mushrooms clean with a damp paper towel. Remove the stems by gently twisting them off. Place the caps on the baking sheet, cavity-side up.
- Brush the caps lightly with olive oil and season with a tiny pinch of salt and pepper. Bake for 5 minutes. Carefully tilt the sheet to drain any liquid from the cavities, or blot with a paper towel.
- While the mushrooms are pre-baking, combine the softened cream cheese and sour cream in a medium bowl. Mix until smooth. Add the buffalo hot sauce and mix again until uniform.
- Fold in the shredded chicken, shredded cheddar, crumbled blue cheese (if using), chopped green onions, garlic powder, onion powder, and smoked paprika. Stir until evenly distributed. Taste and adjust seasoning if desired.
- Using a small spoon or your fingers, generously fill each mushroom cap with the buffalo chicken mixture, mounding slightly on top. Sprinkle extra shredded cheddar on top of each.
- Bake for 15-18 minutes, or until the filling is hot and bubbly and the cheese on top is melted and lightly golden.
- Let the mushrooms rest on the baking sheet for 2-3 minutes. Transfer to a serving platter and sprinkle with extra chopped green onions. Serve warm.
Notes
Pre-baking the mushroom caps is crucial to avoid watery filling. Use room temperature cream cheese for a smoother filling. For a vegetarian version, skip the chicken and double up on black beans or add finely chopped roasted cauliflower. For a keto/low-carb option, use full-fat cream cheese and sour cream. Leftovers can be stored in an airtight container in the refrigerator for up to 3 days; reheat in a 350°F oven for about 10 minutes. Do not freeze.
Nutrition
- Serving Size: 4 stuffed mushrooms
- Calories: 320
- Sugar: 2
- Sodium: 680
- Fat: 24
- Saturated Fat: 12
- Carbohydrates: 5
- Fiber: 1
- Protein: 18
Keywords: buffalo chicken dip, stuffed mushrooms, game day appetizer, buffalo chicken, mushroom appetizer, easy appetizer, party food