Love this? Save it for later!
Share the inspiration with your friends
It was 10:47 PM on a random Tuesday, and I had this ridiculous, almost embarrassing craving for a gingerbread cookie. Not the kind you hang on a tree and accidentally break a tooth on, you know? I wanted one that was soft. Chewy. The kind that bends before it breaks. The problem was, every gingerbread recipe I had ever tried turned out like a graham cracker that had been left in the sun—dry, hard, and just… disappointing. I had a sleeping house, a half-empty jar of molasses from a previous baking disaster, and a stubborn refusal to go to bed until I got this right.
I didn’t have any fancy pastry flour or a stand mixer that could handle a stiff dough. What I had was a tired brain, a wooden spoon, and this wild idea to use a little bit of brown sugar alongside the molasses for extra moisture. I also had a single orange sitting in the fruit bowl, looking at me like it had a secret. Honestly, I was so tired of the same old cookie, I just went for it. I threw in the zest, made a quick glaze, and prayed the kids wouldn’t wake up from the sound of me muttering at the oven. When I pulled them out, they were puffy, cracked on top, and smelled like a holiday hug. I let one cool for exactly 37 seconds before testing it—and let me tell you, that first bite was a victory dance in my kitchen. It was the soft, spiced, happy cookie I had been chasing for years. Maybe you’ve been there, staring at a recipe that just doesn’t work, wondering if you’re the problem. You’re not. The recipe was the problem. So I fixed it. And now I’m never going back.
Why You’ll Love This Recipe
Let’s be real for a second. I’ve tested this recipe about seven times in the last month, and each time, my kids have eaten the entire batch before I could even think about taking a photo for the blog. That’s the sign of a winner in my house. Here’s why these cookies are about to become your new go-to.
- Quick & Easy : From start to finish, you’re looking at about 30 minutes of active work. The dough comes together in one bowl with a wooden spoon. No chilling required, which is a game changer for impatient bakers (and impatient kids).
- Simple Ingredients : You probably have almost everything in your pantry right now. Molasses, butter, flour, spices, and an orange. No weird specialty items that cost ten bucks and sit in your cupboard for two years.
- Perfect for Family Baking : These cookies are forgiving. If your kid accidentally dumps in a little extra flour or gets distracted and over-mixes, they still turn out great. They’re a low-stress, high-reward project for a rainy afternoon.
- Crowd-Pleaser : I brought these to a school bake sale and they sold out in the first fifteen minutes. One mom came back to ask if I had any hidden in my car. They’re soft enough for toddlers and spiced enough for adults.
- Unbelievably Delicious : The orange glaze is the secret weapon here. It cuts through the deep, dark molasses flavor with a bright, zesty pop. It’s the kind of combo that makes you close your eyes after the first bite. Honestly, it’s comfort food reimagined—faster, cheaper, and with the same soul-soothing satisfaction.
What makes this recipe different? It’s the ratio. Most gingerbread cookies have too much flour or not enough fat, which makes them dry. This version uses a precise balance of butter and brown sugar to keep the crumb tender and chewy, even days later. It’s not just another version—it’s my best version, and I only say that after messing up a lot of cookies to get here.
What Ingredients You Will Need
This recipe uses simple, wholesome ingredients to deliver bold flavor and a satisfyingly soft texture without the fuss. Everything here is a pantry staple, which makes it perfect for those late-night cravings or surprise school events. Let’s break down what you need and why each one matters.
For the Cookies
- Unsalted butter, softened – ½ cup (113g). I always use unsalted so I can control the salt level. Let it sit out for about 30 minutes before starting, or microwave it for 10 seconds if you forgot like I usually do.
- Brown sugar, packed – ½ cup (100g). Light or dark works, but dark brown sugar adds a deeper molasses note. This is the secret to the chewy texture—it retains moisture better than white sugar.
- Large egg – 1, at room temperature. If your egg is cold, just place it in a bowl of warm water for 5 minutes. A cold egg can seize the butter and make the dough lumpy.
- Molasses – ½ cup (170g). Use unsulphured molasses, not blackstrap. Blackstrap is too bitter and will ruin the cookie. I prefer Grandma’s brand or Brer Rabbit mild flavor.
- All-purpose flour – 2 ¼ cups (280g). Spoon and level your flour—don’t scoop straight from the bag or you’ll end up with dry cookies. If you scoop, you might add an extra 30g of flour without realizing it.
- Baking soda – 1 teaspoon. This helps the cookies spread and get those nice crackly tops.
- Ground ginger – 1 ½ teaspoons. Freshly ground if you have it, but the jarred stuff works fine. This is the star spice, so don’t skimp.
- Ground cinnamon – 1 teaspoon. Adds warmth and sweetness.
- Ground cloves – ¼ teaspoon. A little goes a long way. Too much and your cookies will taste like a holiday candle.
- Salt – ½ teaspoon. Balances the sweetness and enhances the spices.
For the Orange Glaze
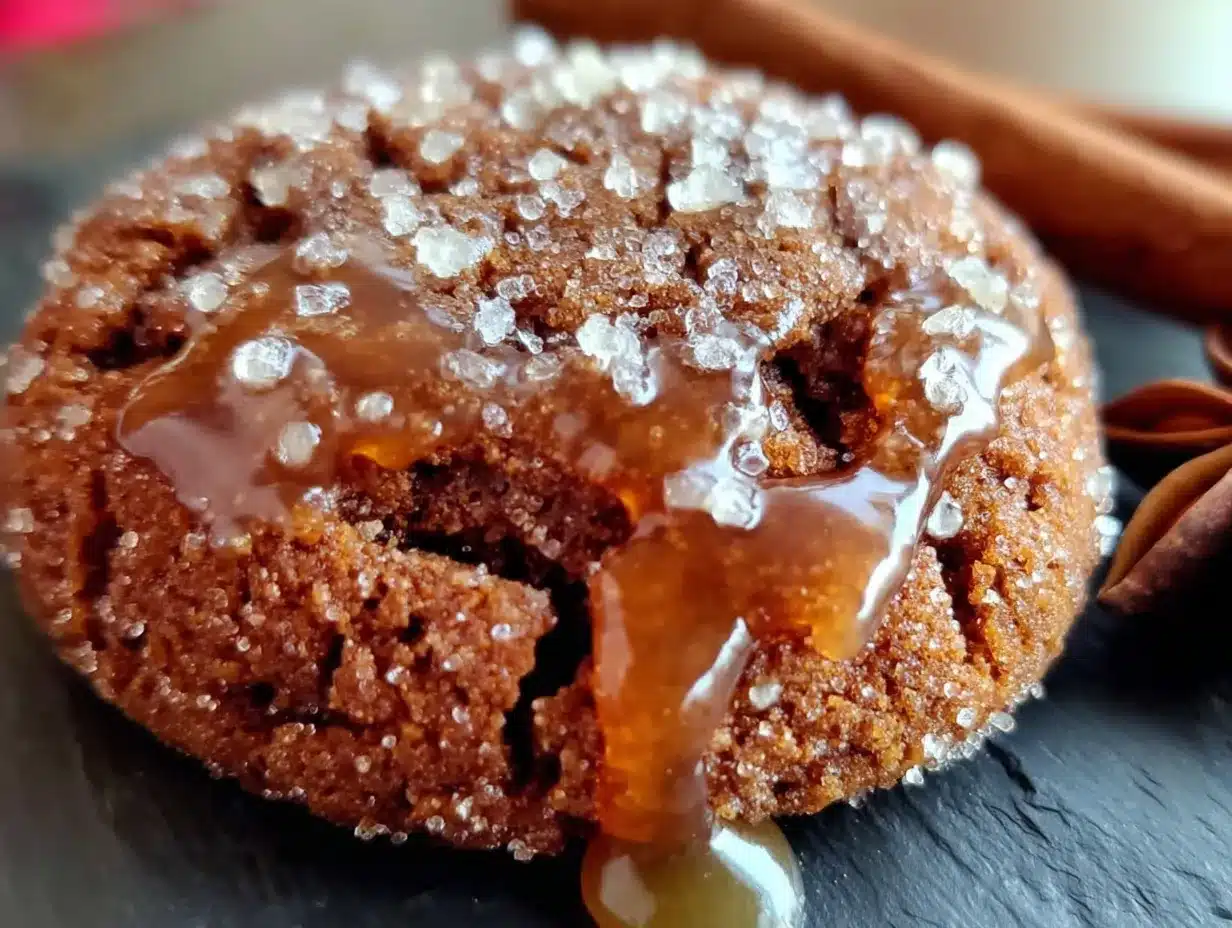
- Powdered sugar – 1 cup (120g). Sift it if you want a super smooth glaze, but I’m usually too lazy and it still turns out fine.
- Fresh orange juice – 2 to 3 tablespoons. Squeeze it straight from the orange you zested. Bottled juice just doesn’t have the same bright flavor.
- Orange zest – 1 teaspoon, from the same orange. Don’t skip this—it’s where the real orange flavor lives.
Substitution tip: If you need a dairy-free version, swap the butter for a high-quality vegan butter stick (not the spreadable kind in a tub). For a gluten-free option, use a 1:1 gluten-free flour blend that contains xanthan gum. The texture will be slightly different but still delicious. I’ve tested it with Bob’s Red Mill 1:1 and it worked great.
Equipment Needed
You don’t need a fancy bakery setup for these cookies, which is one of the reasons I love this recipe so much. Here’s what you’ll need:
- Large mixing bowl – A good-sized ceramic or glass bowl works perfectly. I use my grandmother’s old Pyrex bowl, and it’s never let me down.
- Wooden spoon or silicone spatula – For creaming the butter and sugar together. A hand mixer works too, but honestly, the wooden spoon gives you more control and less cleanup.
- Measuring cups and spoons – Accurate measurements matter here, especially for the flour and molasses. For molasses, spray your measuring cup with a little non-stick spray first—it slides right out.
- Baking sheets – Two standard half-sheet pans. If you only have one, let it cool completely between batches or the dough will spread too much on a hot pan.
- Parchment paper or silicone baking mat – Parchment is cheaper and disposable; silicone mats are reusable and non-stick. I use parchment because I’m lazy about washing things.
- Cooling rack – Essential for letting the glaze set properly. If you don’t have one, you can use a clean dish towel spread flat on the counter.
- Small whisk or fork – For mixing the glaze. A fork works in a pinch.
- Zester or microplane – For getting that fine orange zest. A box grater works too, but you’ll get bigger pieces.
Budget-friendly tip: You don’t need a stand mixer. A bowl and a spoon are all you need. I’ve made these cookies more times than I can count with just my hands and a cheap silicone spatula from the dollar store.
Preparation Method
Alright, let’s get to the good part. This method is broken down into simple steps so you can follow along without any stress. I’ve added some personal notes and sensory cues so you know exactly what to look for.
- Preheat your oven to 350°F (175°C). Line two baking sheets with parchment paper. Do this first so the oven is hot and ready when your dough is done. A cold oven will mess with the spread of the cookies.
- Cream the butter and brown sugar. In your large mixing bowl, beat the softened butter and brown sugar together with a wooden spoon until they’re light and fluffy. This takes about 2 to 3 minutes. You’re looking for a color change—it should go from pale yellow to a warm, sandy beige. The mixture should look like wet sand and smell sweet and buttery. If it looks greasy or separated, your butter was too soft. Just keep mixing; it will come together.
- Add the egg and molasses. Crack the egg into the bowl and pour in the molasses. Stir until everything is well combined. The mixture will look a little curdled at this point—don’t panic. That’s normal. It should be a dark, glossy brown and smell deeply of molasses. If it smells sour or weird, your molasses might be old. Trust your nose.
- Whisk the dry ingredients together. In a separate small bowl, whisk together the flour, baking soda, ginger, cinnamon, cloves, and salt. This ensures the spices are evenly distributed. If you skip this step, you might get a pocket of pure ginger in one cookie and none in another. I learned this the hard way.
- Combine wet and dry. Gradually add the dry ingredients to the wet mixture, stirring with your wooden spoon. Don’t dump it all in at once—add it in three additions, mixing just until the flour disappears. The dough will be very stiff. Like, “is this even a dough?” stiff. That’s exactly what you want. It should be slightly tacky to the touch but not sticky. If it sticks to your fingers, add one more tablespoon of flour.
- Scoop the cookies. Use a 1.5 tablespoon cookie scoop or just a regular spoon to portion out the dough. Roll each portion into a ball between your palms. Place them on the prepared baking sheets about 2 inches apart. They will spread, but not a ton. I usually fit 12 per sheet.
- Bake. Bake for 10 to 12 minutes. The cookies will look puffy and cracked on top. The edges should be set but the centers will still look slightly soft and underdone. That’s the secret to chewy cookies—don’t overbake them. If you wait until they look fully done, they’ll be hard. Trust the 10-minute mark and check them. They should smell like a Christmas bakery at this point.
- Cool on the sheet. Let the cookies cool on the baking sheet for exactly 5 minutes. This is crucial. If you try to move them right away, they’ll fall apart. After 5 minutes, transfer them to a cooling rack to cool completely. The bottoms should be golden brown and the tops should be crackled and slightly domed.
- Make the glaze. While the cookies are cooling, whisk together the powdered sugar, 2 tablespoons of orange juice, and the orange zest in a small bowl. Start with 2 tablespoons of juice. If the glaze is too thick to drizzle, add the third tablespoon. It should be thick but pourable—like school glue, but tastier. If it’s too thin, add a little more powdered sugar.
- Glaze the cookies. Drizzle the glaze over the cooled cookies using a spoon or a piping bag (or a zip-top bag with the corner snipped off). Let the glaze set for about 15 minutes. If you can’t wait that long, I don’t blame you. Eat one warm with a glass of milk. You deserve it.
Cooking Tips & Techniques
I’ve made enough mistakes with gingerbread cookies to fill a small book. Here are the things I wish someone had told me before I started:
Don’t overmix the dough. I know it’s tempting to keep stirring until it’s perfectly smooth, but overmixing develops the gluten and makes the cookies tough. Stop mixing as soon as the flour disappears. A few streaks are fine. The dough will be stiff, and that’s a good thing. If your dough is sticky, you either added too much molasses or not enough flour. Add flour one tablespoon at a time until it’s manageable.
Chill the dough if you have time. I said you don’t need to chill it, and you don’t. But if you have 30 minutes to spare, chilling the dough makes the cookies thicker and chewier. It also deepens the spice flavor. I’ve done it both ways, and chilled dough gives you a slightly prettier cookie. Unchilled gives you a more rustic, flat cookie with a softer center. Both are delicious, so do what works for your schedule.
Use a cookie scoop for even baking. If your cookies are different sizes, they’ll bake at different rates. A scoop ensures every cookie is the same size, so they all come out perfect. I use a 1.5-tablespoon scoop and it’s the best $8 I ever spent.
Watch the molasses measurement. Molasses is thick and sticky, and it’s easy to accidentally add too much. Spray your measuring cup with non-stick spray, or measure it by weight if you have a scale. 170 grams is the sweet spot. Too much molasses will make the cookies spread into flat, sticky puddles. Too little will make them dry. I’ve done both, and neither is fun.
Let the glaze set completely before stacking. I once stacked glazed cookies on top of each other too soon and ended up with a sticky, orange-smeared mess. Wait the full 15 minutes, or even 20 if your kitchen is warm. If you’re in a hurry, pop them in the fridge for 5 minutes.
Variations & Adaptations
One of the best things about this recipe is how flexible it is. Here are some ways to make it your own, depending on what you have or who you’re feeding.
Spice it up or tone it down. If your kids are sensitive to spice, reduce the ginger to 1 teaspoon and skip the cloves entirely. The cinnamon will still give you that warm holiday flavor without the kick. On the flip side, if you’re an adult who loves a spicy cookie, add ¼ teaspoon of black pepper or a pinch of cayenne. It sounds weird, but it adds a warmth that’s incredible with the orange glaze.
Make it dairy-free or vegan. Swap the butter for a vegan butter stick (like Earth Balance or Miyoko’s). For a vegan version, replace the egg with a flax egg (1 tablespoon ground flaxseed mixed with 3 tablespoons water, let sit for 5 minutes). The texture will be slightly less tender, but still very good. I tested this for a friend’s birthday party and nobody noticed the difference.
Change the glaze. Not an orange fan? Use lemon juice and zest instead for a bright, tangy twist. Or skip the citrus entirely and make a simple vanilla glaze with milk and vanilla extract. For a grown-up version, add a teaspoon of bourbon or dark rum to the glaze. It’s subtle but adds a lovely depth.
Add mix-ins. Fold in ½ cup of white chocolate chips or chopped crystallized ginger for extra texture. I once added mini chocolate chips and my kids lost their minds. It made the cookies look a little messy, but the taste was incredible.
Make sandwich cookies. Bake the cookies slightly flatter (press them down with a glass before baking) and sandwich two together with a cream cheese frosting or a scoop of vanilla ice cream. It’s a dessert that feels fancy but takes almost no extra effort.
Serving & Storage Suggestions
These cookies are best served at room temperature with a cold glass of milk or a hot cup of coffee. The combination of the soft, spiced cookie and the bright, sweet glaze is honestly perfect on its own, but here are a few ways to make them feel even more special.
For a party platter: Arrange the cookies on a large wooden board with fresh orange slices, a few sprigs of rosemary, and some dark chocolate chunks. The colors are gorgeous and it makes for a stunning presentation without any extra work.
Storage: Store the cookies in an airtight container at room temperature for up to 5 days. Place a piece of bread in the container—it sounds weird, but the bread absorbs excess moisture and keeps the cookies soft. Change the bread every other day. Do not refrigerate them, or they’ll dry out. If you need to store them longer, freeze them without the glaze.
Freezing instructions: Bake the cookies, let them cool completely, and place them in a single layer in a freezer-safe bag or container. They’ll keep for up to 3 months. When you’re ready to serve, thaw them at room temperature and make the glaze fresh. Do not freeze the glazed cookies—the glaze will get sticky and weird.
Reheating: If you want that just-baked warmth, pop a cookie in the microwave for 10 seconds. It softens the cookie and makes the glaze slightly gooey. For a bigger batch, warm them in a 300°F oven for 3 to 4 minutes.
Flavor development: Honestly, these cookies taste even better on day two. The spices mellow and meld together, and the molasses flavor deepens. If you can resist eating them all on day one, you’ll be rewarded.
Nutritional Information & Benefits
I’m not a nutritionist, but I can tell you that these cookies are a treat, not a health food. That said, they do have some redeeming qualities. Here’s an approximate breakdown per cookie (based on 24 cookies):
| Nutrient | Amount |
|---|---|
| Calories | 145 |
| Total Fat | 5g |
| Saturated Fat | 3g |
| Carbohydrates | 24g |
| Sugar | 15g |
| Protein | 2g |
| Fiber | 0.5g |
| Sodium | 95mg |
Health highlights: Molasses is a good source of iron, calcium, and magnesium. One tablespoon of molasses provides about 20% of your daily iron needs. The ginger in this recipe is known for its anti-inflammatory properties and can help with digestion. The orange zest provides a small amount of vitamin C. Are these cookies going to replace your multivitamin? No. But they’re not empty calories either.
Dietary considerations: This recipe contains gluten, dairy, and eggs. For gluten-free and dairy-free adaptations, see the variations section above. These cookies are nut-free as written, making them a safe option for school bake sales or parties.
Conclusion
These chewy molasses gingerbread cookies with orange glaze are the recipe I wish I had when I was a new baker, standing in my kitchen at 11 PM, wondering why every cookie recipe let me down. They’re forgiving, they’re fast, and they taste like the holidays without requiring a whole day in the kitchen. The orange glaze is the little touch that makes them feel special, but honestly, they’re just as good plain if you’re in a hurry.
I really hope you give these a try. Don’t be afraid to customize them—swap the citrus, play with the spices, or add some chocolate chips. The best recipes are the ones that become yours. And if you make them, I’d love to hear about it. Leave a comment below, tag me in your photos, or tell me how your kids reacted. Did they eat them all before the glaze set? Because that’s exactly what happened in my house, and honestly, I took it as a compliment.
Happy baking, friend. You’ve got this.
Frequently Asked Questions
Can I use blackstrap molasses instead of regular molasses?
I don’t recommend it. Blackstrap molasses is much more bitter and less sweet than regular unsulphured molasses. It will make your cookies taste dark and almost burnt. Stick with mild or fancy molasses for the best flavor. If you only have blackstrap, use only ⅓ cup and add an extra 2 tablespoons of brown sugar to balance the bitterness.
Why did my cookies turn out hard?
You probably overbaked them. Remember, they should look slightly underdone when you pull them out of the oven. They continue to cook on the hot baking sheet for the 5 minutes you let them cool. If you wait until they look fully set, they’ll be hard. Also, check your flour measurement—too much flour will dry them out. Spoon and level next time.
Can I make the dough ahead of time?
Yes! You can make the dough up to 3 days in advance and keep it in the fridge. Let it sit at room temperature for about 10 minutes before scooping, because cold dough is very stiff. You can also freeze the dough balls for up to 3 months. Just scoop them onto a baking sheet, freeze until solid, then transfer to a bag. Bake from frozen, adding 2 minutes to the bake time.
Can I skip the orange glaze?
Absolutely. The cookies are delicious on their own. If you want a simpler option, just dust them with powdered sugar while they’re still warm. Or leave them plain—they’re still soft, chewy, and full of spice flavor. The glaze is just a fun bonus that adds a bright, citrusy pop.
How do I make these cookies vegan?
Swap the butter for a vegan butter stick, and replace the egg with a flax egg (1 tablespoon ground flaxseed mixed with 3 tablespoons water, let sit for 5 minutes). Use a vegan powdered sugar for the glaze (some brands use bone char in processing). The texture will be slightly less tender, but still chewy and delicious. I’ve tested this version and it works great.
Pin This Recipe!
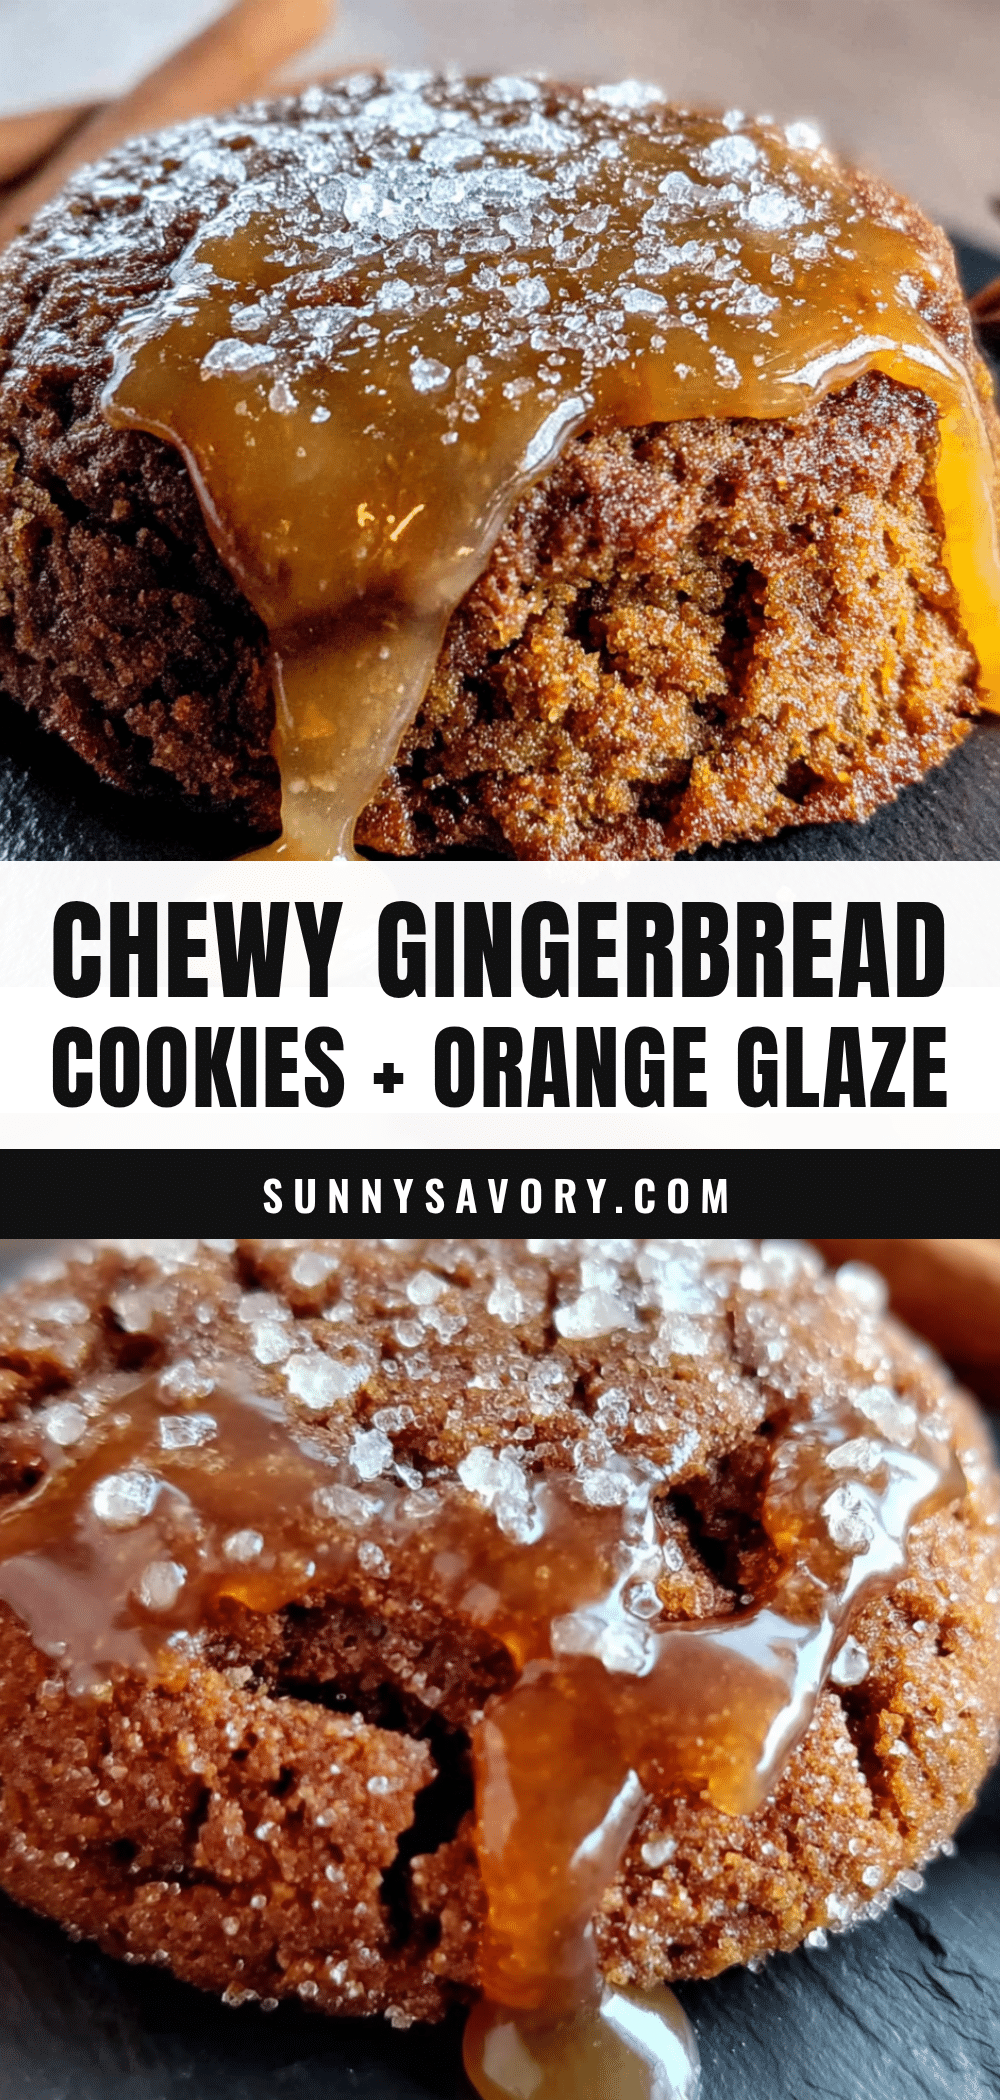
Best Kid-Approved Chewy Gingerbread Cookies with Orange Glaze
Soft, chewy gingerbread cookies with a bright orange glaze that are quick and easy to make, perfect for family baking and holiday treats.
- Prep Time: 15 minutes
- Cook Time: 12 minutes
- Total Time: 27 minutes
- Yield: 24 servings 1x
- Category: Dessert
- Cuisine: American
Ingredients
- ½ cup (113g) unsalted butter, softened
- ½ cup (100g) brown sugar, packed
- 1 large egg, at room temperature
- ½ cup (170g) unsulphured molasses
- 2 ¼ cups (280g) all-purpose flour
- 1 teaspoon baking soda
- 1 ½ teaspoons ground ginger
- 1 teaspoon ground cinnamon
- ¼ teaspoon ground cloves
- ½ teaspoon salt
- 1 cup (120g) powdered sugar
- 2 to 3 tablespoons fresh orange juice
- 1 teaspoon orange zest
Instructions
- Preheat your oven to 350°F (175°C). Line two baking sheets with parchment paper.
- In a large mixing bowl, cream the softened butter and brown sugar together with a wooden spoon until light and fluffy, about 2 to 3 minutes.
- Add the egg and molasses, stirring until well combined. The mixture may look curdled.
- In a separate small bowl, whisk together the flour, baking soda, ginger, cinnamon, cloves, and salt.
- Gradually add the dry ingredients to the wet mixture in three additions, stirring just until the flour disappears. The dough will be stiff.
- Scoop the dough using a 1.5 tablespoon cookie scoop or spoon, roll into balls, and place on prepared baking sheets about 2 inches apart.
- Bake for 10 to 12 minutes. The cookies should look puffy and cracked on top with edges set but centers still soft.
- Let the cookies cool on the baking sheet for exactly 5 minutes, then transfer to a cooling rack to cool completely.
- While cookies cool, whisk together powdered sugar, 2 tablespoons orange juice, and orange zest. Add more juice if needed to reach a thick but pourable consistency.
- Drizzle the glaze over cooled cookies and let set for about 15 minutes.
Notes
For best results, do not overbake; cookies should look slightly underdone when removed from oven. Chilling the dough for 30 minutes can make cookies thicker and chewier. Use a cookie scoop for even baking. Let glaze set completely before stacking.
Nutrition
- Serving Size: 1 cookie
- Calories: 145
- Sugar: 15
- Sodium: 95
- Fat: 5
- Saturated Fat: 3
- Carbohydrates: 24
- Fiber: 0.5
- Protein: 2
Keywords: gingerbread cookies, chewy gingerbread, orange glaze, soft gingerbread, holiday cookies, kid-friendly cookies



