Love this? Save it for later!
Share the inspiration with your friends
The woman at the community garden gave me a funny look when I asked if she ever made anything sweet with the rosemary she grew. She didn’t say anything at first, just kept snipping a few sprigs and tucking them into her basket. Then she laughed, this warm, crinkly-eyed laugh, and said, “Oh honey, you haven’t lived until you’ve had a Christmas dip that tastes like a tree.” I thought she was joking. She wasn’t.
A few weeks later, she showed up at my door with a small container of something that looked like frosting but smelled like a winter forest. She’d made it for her grandkids, she said, because they were “too picky for fruitcake” but loved anything they could scoop up with a cookie. That first bite was a surprise—creamy, sweet, with this subtle hint of pine that somehow worked perfectly. I mean, honestly, I was skeptical at first. But there I was, standing in my doorway, eating dip with a spoon like it was nobody’s business.
I’ve been making my own version ever since, tweaking it here and there until it felt like mine. The original was a little too sweet for me, so I dialed back the sugar and added a pinch of salt to balance things out. This Cozy Christmas Tree Cake Dip with Vanilla Wafers is the result of that kitchen friendship—a recipe that started as a neighborly gesture and turned into a holiday tradition I actually look forward to. Maybe you’ve been there, where a recipe arrives not through a cookbook but through a conversation. Those are always the best ones, aren’t they?
Why You’ll Love This Recipe
Let me tell you why this dip has become my go-to for holiday gatherings. I’ve tested it at three different parties now, and every single time, someone asks for the recipe before the bowl is even empty.
- Quick & Easy: You can throw this together in under 10 minutes. No baking, no complicated steps, no waiting around. It’s perfect for those moments when guests show up early and you need something impressive fast.
- Simple Ingredients: You probably already have most of these in your pantry. No fancy grocery store runs required—just cream cheese, a few pantry staples, and some vanilla wafers for dipping.
- Perfect for Christmas Parties: This dip brings the whole “Christmas tree” vibe without any of the fuss. It’s festive, fun, and completely irresistible at any holiday gathering.
- Crowd-Pleaser: Kids love it because it tastes like a dessert, and adults love it because it tastes like nostalgia. I’ve watched people hover around the bowl like it’s the main attraction.
- Unbelievably Delicious: The combination of creamy, sweet, and that subtle pine flavor is next-level comfort food. It’s the kind of dip that makes you close your eyes after the first bite.
What makes this recipe different from others you might find online? It’s the balance. I’ve spent time perfecting the ratio of cream cheese to marshmallow creme so it’s not too heavy, and I’ve added just enough of that Christmas tree extract to feel festive without tasting like a candle. This isn’t just another dessert dip—it’s my best version, tested and approved by a room full of honest friends who weren’t afraid to tell me if something was off.
This recipe is comfort food reimagined—faster, simpler, but with the same soul-soothing satisfaction that makes you feel like everything’s going to be okay. Perfect for impressing guests without stress, or turning a simple evening into something memorable.
What Ingredients You Will Need
This recipe uses simple, wholesome ingredients to deliver bold flavor and satisfying texture without the fuss. Most of these are pantry staples, which makes this dip perfect for last-minute holiday cravings.
- 8 ounces cream cheese, softened to room temperature (I recommend Philadelphia brand for the creamiest texture—trust me on this one)
- 1/2 cup unsalted butter, softened (leave it out on the counter for about an hour before starting)
- 1 1/2 cups powdered sugar, sifted (sifting prevents lumps, and nobody wants lumpy dip)
- 1 teaspoon vanilla extract (use pure vanilla extract if you have it—the flavor difference is noticeable)
- 1/2 teaspoon Christmas tree extract (also called pine or spruce extract; you can find it online or at specialty baking stores)
- 3-4 drops green food coloring (gel coloring works best for a vibrant shade without thinning the dip)
- 1 cup marshmallow creme (Fluff brand is my go-to, but any brand works fine)
- 1/4 cup Christmas sprinkles (look for ones with little trees, stars, or red and green mix)
- 1 box vanilla wafers (Nilla Wafers are classic, but store brands work great too)
- Optional: 1/4 teaspoon salt (adds balance and keeps the sweetness in check)
When selecting your cream cheese, look for blocks rather than the spreadable tub version—it gives a better texture for dips. For the Christmas tree extract, I’ve tried a few brands and prefer LorAnn Oils for their consistent flavor. If you can’t find it, you can substitute with a tiny drop of peppermint extract plus a drop of orange extract for a similar festive feel, though the flavor will be different.
For the vanilla wafers, you can also use shortbread cookies, ginger snaps, or even pretzel sticks for a salty-sweet contrast. If you’re serving this to a crowd with dietary restrictions, use dairy-free cream cheese and butter alternatives—just make sure they’re softened properly.
Equipment Needed
You don’t need much for this recipe, which is part of its charm. Here’s what you’ll want on hand:
- Electric hand mixer or stand mixer (a whisk and strong arm work in a pinch, but the mixer makes it fluffier)
- Large mixing bowl
- Spatula for scraping down the sides
- Sifter or fine-mesh strainer for the powdered sugar
- Serving bowl (a shallow, wide bowl works best for dipping)
- Small cookie scoop or spoon for portioning sprinkles
If you don’t have an electric mixer, you can absolutely do this by hand—just make sure your cream cheese and butter are extra soft. I’ve done it both ways, and honestly, the hand-mixed version has a slightly more rustic texture that some people prefer. My grandmother always made her dips by hand, and she swore it tasted better because “you put love into every stir.” I’m not sure the science backs that up, but I’m not about to argue with her.
Preparation Method

Follow these steps, and you’ll have a dip that looks like it came from a fancy bakery—even though it took you less than 15 minutes.
- Soften your cream cheese and butter. Take them out of the fridge at least 45 minutes before you start. If you’re in a hurry, cut them into small cubes and let them sit for 20 minutes. They should be soft enough that you can press a finger into them without resistance.
- Beat the cream cheese and butter together. In a large mixing bowl, combine the softened cream cheese and butter. Beat on medium speed for about 2 minutes until the mixture is smooth, fluffy, and completely combined. Scrape down the sides of the bowl with your spatula halfway through. You want no streaks of butter or cream cheese—just a uniform, pale yellow cream.
- Add the powdered sugar. Sift the powdered sugar into the bowl to avoid lumps. Beat on low speed at first to prevent a sugar cloud from exploding everywhere (I learned this the hard way—my kitchen looked like a snow globe). Then increase to medium speed and beat for another 1-2 minutes until the mixture is thick and smooth.
- Mix in the extracts and coloring. Add the vanilla extract and Christmas tree extract. Then add 3 drops of green food coloring. Beat on low speed until the color is evenly distributed. If you want a deeper green, add one more drop at a time until you’re happy with the shade. Remember, it will look slightly lighter once you add the marshmallow creme, so aim for a shade that’s a touch darker than your final goal.
- Fold in the marshmallow creme. Add the marshmallow creme and gently fold it in with your spatula. Don’t overmix—you want to keep some air in there for a light, fluffy texture. Fold just until you see no white streaks remaining. The dip should look like a creamy, pale green cloud at this point.
- Add sprinkles. Reserve about a tablespoon of sprinkles for garnish, then fold the rest into the dip. Use gentle strokes so the sprinkles don’t bleed their color into the dip. I’ve made the mistake of overmixing before, and my dip turned a weird gray-green. Not cute.
- Chill (optional but recommended). Transfer the dip to your serving bowl, cover with plastic wrap, and refrigerate for at least 30 minutes. This helps the flavors meld together and gives the dip a firmer texture that’s easier to scoop. If you’re serving it immediately, it will still be delicious, just a bit softer.
- Garnish and serve. Just before serving, top with the reserved sprinkles and arrange your vanilla wafers around the bowl. You can also add a few mini Christmas trees or star-shaped cookies for extra festive flair.
Cooking Tips & Techniques
I’ve made this dip more times than I care to admit, and I’ve learned a few things along the way. Here are my best tips for getting it right every time.
Temperature matters more than you think. Cold cream cheese creates lumps that no amount of beating will fully fix. I once tried to rush the process and ended up with a dip that looked like cottage cheese. Not the vibe. Let everything come to room temperature—it makes a huge difference in the final texture.
Go easy on the Christmas tree extract. This stuff is potent. I learned this the hard way when I added a full teaspoon to a test batch and ended up with dip that tasted like a pine-scented candle. Start with 1/4 teaspoon, taste it, and add more if needed. You want a subtle hint, not a forest in your mouth.
Use gel food coloring. Liquid food coloring can thin out your dip and make it runny. Gel colors give you a vibrant shade without changing the consistency. I’ve tried both, and gel is hands-down the better choice for this recipe.
Don’t skip the sifting. I know, it’s an extra step and an extra dirty bowl. But powdered sugar has a tendency to clump, and those clumps will show up in your final dip as little white specks. Sifting takes 30 seconds and saves you from a lumpy disaster.
Make it ahead of time. This dip actually tastes better after it’s had a few hours to chill in the fridge. The flavors meld together, and the texture firms up perfectly. I usually make it the night before a party and just pull it out 15 minutes before serving to let it soften slightly.
Variations & Adaptations
One of the best things about this recipe is how easily it adapts to different tastes and dietary needs. Here are some variations I’ve tried and loved.
Dairy-Free Version: Use dairy-free cream cheese and butter alternatives. I’ve had good results with Kite Hill brand cream cheese and Miyoko’s vegan butter. The texture is slightly less creamy, but the flavor is still fantastic. Just make sure to soften them properly before mixing.
Peppermint Twist: Swap the Christmas tree extract for 1/2 teaspoon peppermint extract and add crushed candy canes instead of sprinkles. The result is a cool, minty dip that pairs beautifully with chocolate wafers. I made this version for a friend’s holiday party, and it disappeared faster than the main course.
Chocolate Lover’s Version: Add 1/4 cup unsweetened cocoa powder along with the powdered sugar, and use chocolate wafers for dipping. The chocolate and pine flavors work surprisingly well together—think of it like a chocolate forest cake in dip form.
Low-Sugar Option: Use a sugar substitute like Swerve or monk fruit sweetener in place of the powdered sugar. The texture will be slightly different, but the dip will still be delicious. I’ve tested this for a friend who’s watching her sugar intake, and she said it was “dangerously good.”
Spiced Version: Add 1/2 teaspoon cinnamon and a pinch of nutmeg along with the extracts. The warm spices complement the Christmas tree flavor and make the dip feel even cozier. This is my personal favorite for cold winter nights.
Serving & Storage Suggestions
This dip is best served chilled or at room temperature, depending on your preference. I like to take it out of the fridge about 15 minutes before serving so it softens slightly and becomes easier to scoop.
For presentation, I use a shallow white bowl that lets the green color pop. Arrange the vanilla wafers in a circle around the bowl, or place them on a separate platter for a more organized look. You can also add pretzel sticks, graham crackers, or fresh fruit like apple slices and strawberries for dipping variety.
This dip pairs beautifully with hot cocoa, mulled wine, or a cozy cup of spiced tea. If you’re serving it at a party, set it up near the drinks station—people will naturally gravitate toward it while they’re mingling.
For storage, keep the dip in an airtight container in the refrigerator for up to 5 days. The flavors actually deepen over time, so day-old dip is often even better than fresh. Just give it a quick stir before serving to redistribute the sprinkles.
You can freeze this dip for up to 2 months, though the texture will be slightly softer after thawing. To freeze, place it in a freezer-safe container, press a layer of plastic wrap directly onto the surface to prevent ice crystals, and seal tightly. Thaw overnight in the refrigerator and stir well before serving.
If you’re making this for a party, I recommend garnishing with fresh sprinkles just before serving—the ones you mixed in will have softened slightly, and the fresh ones add a nice crunch.
Nutritional Information & Benefits
While this is definitely a treat, there are a few redeeming qualities worth mentioning. Here’s the estimated nutritional breakdown per serving (about 2 tablespoons of dip, not including wafers):
| Nutrient | Amount per Serving |
|---|---|
| Calories | 120 |
| Total Fat | 7g |
| Saturated Fat | 4g |
| Carbohydrates | 14g |
| Sugar | 12g |
| Protein | 1g |
This recipe contains dairy and gluten (from the vanilla wafers). For a gluten-free option, use gluten-free cookies or fresh fruit for dipping. The cream cheese provides a small amount of calcium and protein, and if you’re using the dairy-free version, you’ll get some beneficial fats from the plant-based ingredients.
I’m not going to pretend this is health food—it’s a holiday treat, and that’s okay. But I find that making it at home means I can control the quality of the ingredients and avoid the preservatives and artificial flavors you’d find in store-bought versions. Plus, there’s something good for the soul about sharing food you made with your own hands.
Conclusion
This Cozy Christmas Tree Cake Dip with Vanilla Wafers has become a staple in my holiday rotation, and I honestly can’t imagine a Christmas season without it. It’s the kind of recipe that feels like a hug—simple, warm, and full of good memories.
I love that it started as a conversation with a neighbor and turned into something I look forward to making every year. That’s the magic of cooking, isn’t it? A recipe travels from one kitchen to another, picking up little changes along the way, until it becomes part of someone else’s story.
I’d love to hear how this dip turns out for you. Did you try one of the variations? Did your guests go crazy for it? Drop a comment below and let me know—I read every single one, and your feedback helps me create better recipes for you. And if you snap a photo, tag me on Pinterest so I can see your beautiful creation!
Here’s to cozy nights, good food, and the people we share it with. Happy holidays, friends!
Frequently Asked Questions
Can I make this dip ahead of time?
Absolutely! In fact, I recommend it. Make the dip up to 3 days in advance and store it in an airtight container in the refrigerator. Just give it a good stir before serving and add fresh sprinkles on top for the best presentation.
Can I use a different cookie for dipping?
Of course! Vanilla wafers are classic, but this dip works beautifully with shortbread cookies, ginger snaps, graham crackers, pretzels, or even fresh fruit like apple slices and strawberries. Get creative with what you have on hand.
What if I can’t find Christmas tree extract?
No worries! You can substitute with 1/4 teaspoon peppermint extract for a minty version, or simply use extra vanilla extract and focus on the green color and sprinkles for the festive feel. The dip will still be delicious.
How do I make this dip less sweet?
Reduce the powdered sugar to 1 cup and add an extra pinch of salt to balance the sweetness. You can also use a sugar substitute like monk fruit sweetener for a lower-sugar version.
Can I double this recipe for a large party?
Yes, this recipe doubles beautifully. Just make sure your mixing bowl is large enough to accommodate the increased volume, and give yourself a few extra minutes of beating time to ensure everything is well combined.
Pin This Recipe!
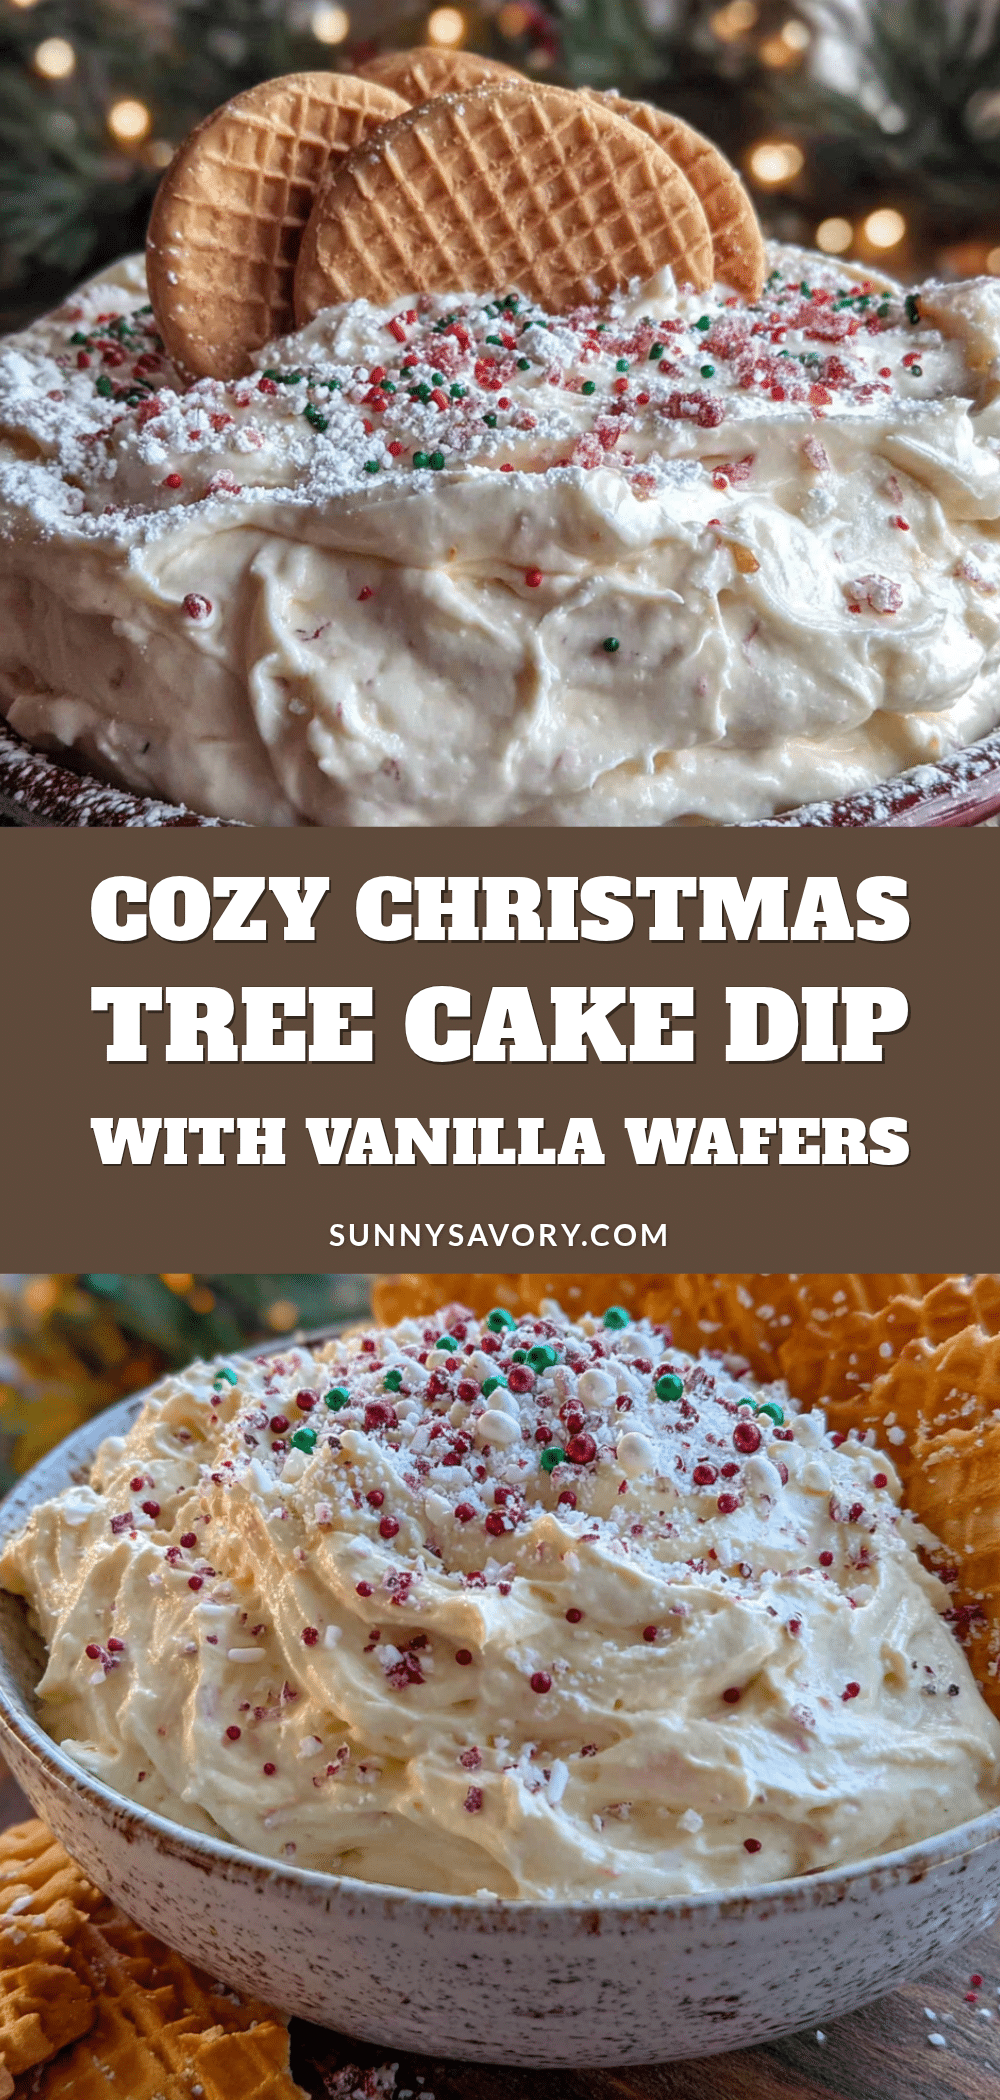
Cozy Christmas Tree Cake Dip with Vanilla Wafers

A creamy, sweet dip with a subtle hint of pine flavor, perfect for holiday gatherings. Quick to make with simple ingredients, this festive treat is a crowd-pleaser that tastes like a Christmas tree in dessert form.
- Prep Time: 10 minutes
- Cook Time: 0 minutes
- Total Time: 40 minutes (including 30 minutes chilling)
- Yield: 8 servings 1x
- Category: Dessert
- Cuisine: American
Ingredients
- 8 ounces cream cheese, softened to room temperature
- 1/2 cup unsalted butter, softened
- 1 1/2 cups powdered sugar, sifted
- 1 teaspoon vanilla extract
- 1/2 teaspoon Christmas tree extract (also called pine or spruce extract)
- 3–4 drops green food coloring (gel coloring works best)
- 1 cup marshmallow creme
- 1/4 cup Christmas sprinkles
- 1 box vanilla wafers
- Optional: 1/4 teaspoon salt
Instructions
- Soften your cream cheese and butter. Take them out of the fridge at least 45 minutes before starting. If in a hurry, cut into small cubes and let sit for 20 minutes until soft enough to press a finger into without resistance.
- Beat the cream cheese and butter together. In a large mixing bowl, combine the softened cream cheese and butter. Beat on medium speed for about 2 minutes until smooth, fluffy, and completely combined. Scrape down the sides of the bowl halfway through.
- Add the powdered sugar. Sift the powdered sugar into the bowl to avoid lumps. Beat on low speed at first to prevent a sugar cloud, then increase to medium speed and beat for another 1-2 minutes until thick and smooth.
- Mix in the extracts and coloring. Add the vanilla extract and Christmas tree extract, then add 3 drops of green food coloring. Beat on low speed until evenly distributed. Add more coloring drop by drop if a deeper green is desired.
- Fold in the marshmallow creme. Add the marshmallow creme and gently fold it in with a spatula. Do not overmix—fold just until no white streaks remain. The dip should look like a creamy, pale green cloud.
- Add sprinkles. Reserve about a tablespoon of sprinkles for garnish, then fold the rest into the dip using gentle strokes to prevent color bleeding.
- Chill (optional but recommended). Transfer the dip to a serving bowl, cover with plastic wrap, and refrigerate for at least 30 minutes to meld flavors and firm up texture.
- Garnish and serve. Just before serving, top with reserved sprinkles and arrange vanilla wafers around the bowl. Add mini Christmas trees or star-shaped cookies for extra flair.
Notes
Temperature matters: ensure cream cheese and butter are at room temperature for a smooth texture. Go easy on the Christmas tree extract—start with 1/4 teaspoon and adjust to taste. Use gel food coloring to avoid thinning the dip. Sift powdered sugar to prevent lumps. The dip tastes better after chilling for a few hours or overnight. For a dairy-free version, use dairy-free cream cheese and butter alternatives. For a peppermint twist, swap Christmas tree extract for 1/2 teaspoon peppermint extract and add crushed candy canes.
Nutrition
- Serving Size: 2 tablespoons of dip
- Calories: 120
- Sugar: 12
- Sodium: 85
- Fat: 7
- Saturated Fat: 4
- Carbohydrates: 14
- Protein: 1
Keywords: Christmas dip, tree cake dip, holiday dessert, vanilla wafers, no-bake dessert, festive dip, cream cheese dip



