Love this? Save it for later!
Share the inspiration with your friends
It was 11:47 PM on a rainy Tuesday in early December, and I had a very specific craving for something that tasted like Christmas morning but required absolutely zero oven time. I didn’t have the energy for a full-blown baking project, but I had a carton of eggnog left over from a party, a package of graham crackers that were about to expire, and the wild idea that maybe—just maybe—I could whip up something that felt fancy without the fuss. Honestly, I was tired. My kitchen was a mess from dinner, and I was wearing pajamas that had seen better days. But that craving? It wasn’t going anywhere.
So I grabbed a bowl, crushed those crackers with my hands because the food processor was dirty, and started mixing. I didn’t measure perfectly. I spilled a little nutmeg on the counter and licked it off my finger. Somewhere around midnight, I tasted the filling and let out a little gasp—it was actually good. Like, dangerously good. The kind of good that makes you stand in your dimly lit kitchen, spoon in hand, questioning why you don’t make pie at midnight more often. And when I topped it with a cloud of meringue and hit it with a kitchen torch I’d forgotten I owned? Let me tell you, the rain outside didn’t matter anymore.
That’s how this cozy no-bake eggnog pie with toasted meringue was born. It wasn’t planned, it wasn’t pretty, and honestly, I wasn’t even sure it would set properly. But it did. And now, every time December rolls around, I find myself staying up just a little later, making this pie for anyone who’ll eat it. Maybe you’ve been there—standing in front of your fridge at night, wanting something warm and nostalgic but too tired to bake. This one’s for you.
Why You’ll Love This Recipe
This isn’t just another holiday pie. I’ve tested this recipe six times over the past two years, tweaking the ratios, trying different crusts, and even messing up a batch so badly it turned into eggnog soup (don’t ask). What I landed on is a foolproof, no-bake dessert that delivers all the cozy flavors of Christmas without turning on your oven. Here’s why it works:
- Quick & Easy: You need about 20 minutes of active prep time. The hardest part is waiting for it to chill.
- Simple Ingredients: Everything you need is probably already in your holiday pantry—eggnog, cream cheese, whipped cream, and graham crackers.
- Perfect for Holiday Gatherings: This pie is a showstopper on any Christmas table, but it’s also easy enough for a quiet night in.
- Crowd-Pleaser: I’ve served this to kids, grandparents, and my picky cousin who “doesn’t like pie.” All of them asked for seconds.
- Unbelievably Delicious: The filling is silky, rich, and spiced just right. The toasted meringue adds a dramatic finish that feels like pure magic.
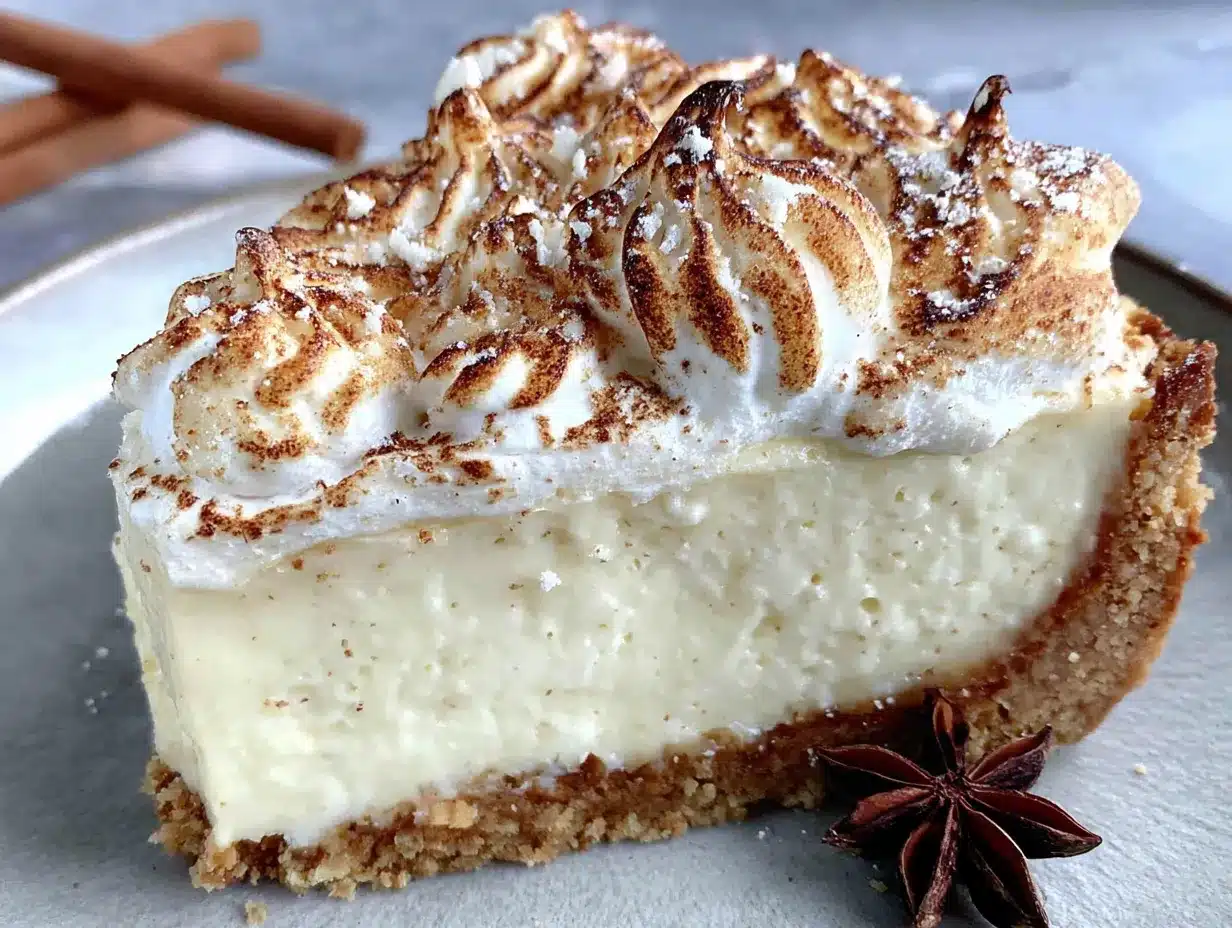
What makes this recipe different from the rest? It’s the cream cheese. Most eggnog pies use pudding mix or gelatin, which can taste artificial. By blending cream cheese with real eggnog and a touch of nutmeg, you get a filling that’s luxuriously creamy with a natural, authentic flavor. And the meringue? It’s not just for looks. That toasted top adds a subtle caramelized sweetness that balances the spiced filling perfectly. This isn’t just a good eggnog pie—it’s the one that’ll make you close your eyes after the first bite.
What Ingredients You Will Need
This recipe uses simple, wholesome ingredients that come together to create something truly special. You don’t need any fancy extracts or hard-to-find spices. Just good, honest ingredients that do their job beautifully.
For the Crust
- 1 ½ cups graham cracker crumbs (about 12 full sheets, crushed finely)
- ¼ cup granulated sugar
- 6 tablespoons unsalted butter, melted (I prefer Kerrygold for its rich flavor)
- ¼ teaspoon ground nutmeg (freshly grated if you have it—it makes a difference)
For the Filling
- 8 ounces cream cheese, softened (full-fat is best for texture; Philadelphia is my go-to)
- ½ cup granulated sugar
- 1 ½ cups store-bought or homemade eggnog (use a good quality brand like Hood or Organic Valley)
- 1 teaspoon vanilla extract
- ½ teaspoon ground nutmeg (plus extra for garnish)
- ¼ teaspoon ground cinnamon
- 1 cup heavy whipping cream
- 2 tablespoons powdered sugar
For the Toasted Meringue
- 3 large egg whites (room temperature)
- ¾ cup granulated sugar
- ¼ teaspoon cream of tartar
- ½ teaspoon vanilla extract
Ingredient Tips: If you’re using store-bought eggnog, look for one that’s thick and creamy—not watery. I’ve tried this with light eggnog and it works, but the filling won’t be as luscious. For the meringue, fresh eggs are non-negotiable. Older egg whites don’t whip up as well. And please, for the love of all things cozy, use freshly grated nutmeg if you can. It’s one of those small upgrades that makes your kitchen smell like a Christmas dream.
Substitution Guidance: Need a gluten-free option? Use gluten-free graham crackers or crushed ginger snaps. Dairy-free? Swap the cream cheese for a plant-based version and use coconut cream instead of heavy cream. The meringue is naturally dairy-free, so you’re good there. Just know that the texture will be slightly different—still delicious, but a bit less firm.
Equipment Needed
You don’t need a professional pastry kitchen to pull this off. Here’s what you’ll need:
- 9-inch pie dish (glass or ceramic works best)
- Mixing bowls (at least 2—one large, one medium)
- Electric hand mixer or stand mixer (you can whisk by hand for the crust, but the meringue needs power)
- Rubber spatula
- Measuring cups and spoons
- Kitchen torch (for toasting the meringue—this is the fun part)
- Plastic wrap
If you don’t have a kitchen torch, don’t worry. You can place the pie under your oven’s broiler for 1-2 minutes to toast the meringue. Just keep a close eye on it—it burns fast. I learned that the hard way on my second attempt. Let’s just say my kitchen smelled like burnt sugar for two days.
I’ve tried making this with a store-bought graham cracker crust, and honestly? It works in a pinch. But the homemade crust is so much better. It’s sturdier, more flavorful, and doesn’t get soggy. Plus, pressing it into the dish with your fingers is oddly satisfying. Trust me on this one.
Preparation Method
Let’s make some pie. Take your time with each step—this is the kind of recipe that rewards patience.
Step 1: Make the Crust
In a medium bowl, combine the graham cracker crumbs, ¼ cup sugar, and ¼ teaspoon nutmeg. Pour in the melted butter and stir with a fork until the mixture looks like wet sand. It should hold together when you squeeze a handful. Press this mixture firmly into the bottom and up the sides of your 9-inch pie dish. Use the bottom of a measuring cup to really pack it down—this prevents crumbling later. Pop it in the fridge to set while you make the filling.
Step 2: Whip the Cream
In a large bowl, combine the heavy cream and powdered sugar. Beat with an electric mixer on medium-high speed until stiff peaks form. This takes about 3-4 minutes. You’re looking for clouds that hold their shape when you lift the beaters. Set this aside in the fridge while you work on the rest.
Step 3: Make the Filling Base
In another large bowl, beat the softened cream cheese with ½ cup sugar until smooth and fluffy—about 2 minutes. Scrape down the sides of the bowl. Add the eggnog, vanilla, ½ teaspoon nutmeg, and cinnamon. Beat on low speed until just combined. Don’t overmix here, or the filling can become thin.
Step 4: Fold It All Together
Take your whipped cream out of the fridge. Gently fold it into the eggnog mixture using a rubber spatula. Use a slow, sweeping motion—fold from the bottom up, rotating the bowl as you go. You want to keep as much air in the cream as possible. Stop when no white streaks remain. The filling should be thick, silky, and smell like Christmas in a bowl.
Step 5: Assemble and Chill
Pour the filling into your chilled crust. Smooth the top with the spatula. Cover loosely with plastic wrap and refrigerate for at least 6 hours, but overnight is better. I know it’s hard to wait, but this is where the magic happens. The filling needs time to set into that perfect sliceable texture.
Step 6: Make the Meringue
About 30 minutes before serving, make your meringue. In a clean, dry bowl (wipe it with vinegar if there’s any grease), beat the egg whites and cream of tartar on medium speed until frothy. Gradually add the ¾ cup sugar, a tablespoon at a time, while beating on high speed. Continue until the meringue is glossy and holds stiff peaks—about 5-7 minutes. Beat in the vanilla.
Step 7: Toast and Serve
Spread the meringue over the chilled pie, making sure it touches the crust edges to seal it. Use the back of a spoon to create peaks and swirls. Now for the fun part: use your kitchen torch to toast the meringue until golden brown. If using the broiler, place the pie on the top rack for 1-2 minutes. Watch it like a hawk. Let the pie rest for 5 minutes before slicing.
Cooking Tips & Techniques
I’ve made this pie enough times to know where things can go wrong. Here’s what I’ve learned:
Don’t skip the cream cheese softening. Cold cream cheese creates lumps that won’t smooth out. Leave it on the counter for 30 minutes before starting. I once tried to microwave it to speed things up and ended up with partially melted cream cheese. The filling was grainy. Learn from my mistakes.
The meringue is all about patience. If your egg whites won’t stiffen, it’s usually because there’s a tiny bit of yolk or grease in the bowl. Separate your eggs carefully, and make sure your bowl is spotless. I keep a separate bowl for separating eggs just for this reason.
Timing matters. I like to make the crust and filling the night before, then do the meringue right before serving. This way, the pie is fully set, and the meringue is fresh and fluffy. If you top the pie too early, the meringue can weep and deflate.
For consistent slices, use a sharp knife dipped in hot water. Wipe it clean between cuts. This gives you those beautiful, clean slices that look like they came from a bakery.
One more thing—if your filling seems too soft after chilling, don’t panic. It might be that your eggnog was thinner than expected. Next time, add an extra tablespoon of powdered sugar to the whipped cream to stabilize it. For now, just serve it in bowls with extra meringue. Nobody will complain.
Variations & Adaptations
This pie is incredibly versatile. Here are some ways to make it your own:
- Boozy Eggnog Pie: Add 2 tablespoons of dark rum or bourbon to the filling along with the vanilla. It adds a lovely warmth without being overpowering. Just know that alcohol can slightly soften the set, so chill it overnight.
- Gingerbread Crust: Swap the graham crackers for crushed ginger snaps. The spicy-sweet flavor pairs beautifully with eggnog. I did this for a Christmas party last year and it was gone in 20 minutes.
- Chocolate Eggnog Pie: Melt 4 ounces of semi-sweet chocolate and swirl it into the filling before adding the whipped cream. You’ll get these gorgeous ribbons of chocolate throughout. It’s decadent but not too heavy.
- Dairy-Free Version: Use dairy-free cream cheese, coconut cream (chilled and whipped), and a plant-based eggnog. The texture will be slightly softer, but the flavor is still amazing. I’d recommend chilling it for a full 8 hours.
- Spiced Variation: Add ¼ teaspoon of ground cloves and a pinch of cardamom to the filling. It gives the pie a chai-like warmth that’s perfect for cold winter nights.
My personal favorite variation? The gingerbread crust with a splash of bourbon in the filling. It’s like Christmas in a pie plate. I stumbled on this combo when I ran out of graham crackers and had a box of ginger snaps from a holiday baking project. Sometimes the best recipes come from happy accidents.
Serving & Storage Suggestions
This pie is best served cold, right out of the fridge, with the meringue freshly toasted. The contrast between the chilled, creamy filling and the warm, toasted topping is pure magic. I like to slice it and serve it on chilled plates with a light dusting of nutmeg on top.
What to serve with it: A cup of hot coffee or spiced chai is perfect. If you’re feeling extra indulgent, drizzle a little caramel sauce over each slice. For a lighter option, serve with fresh berries—the tartness cuts through the richness beautifully.
Storage: Cover any leftover pie loosely with plastic wrap and store it in the refrigerator for up to 3 days. The meringue will soften over time, but it’s still delicious. I actually love the way the flavors meld after a day or two—the spices get deeper and more complex.
Freezing: You can freeze the pie (without the meringue) for up to 1 month. Wrap it tightly in plastic wrap and then foil. When you’re ready to serve, thaw it overnight in the fridge, then make the meringue fresh. This is a great make-ahead option for busy holiday weeks.
Reheating: If you’ve stored leftovers with meringue, just use your kitchen torch to refresh the top. Or pop slices under the broiler for 30 seconds. The filling stays cold while the meringue gets that toasty finish again.
Nutritional Information & Benefits
Let’s be real—this is a treat. But that doesn’t mean it can’t have some redeeming qualities. Here’s a rough estimate per slice (based on 8 servings):
- Calories: ~420
- Fat: 28g
- Carbohydrates: 38g
- Protein: 7g
- Sugar: 30g
Health Highlights: Eggnog is a good source of calcium and vitamin D, thanks to the milk and eggs. The nutmeg and cinnamon in this recipe are anti-inflammatory spices that add flavor without extra sugar. And the meringue? It’s mostly egg whites and sugar, so it’s lower in fat than a traditional whipped cream topping.
Dietary Considerations: This recipe contains dairy, eggs, and gluten. For a gluten-free version, use gluten-free graham crackers. For a dairy-free version, follow the substitutions mentioned earlier. The meringue is naturally dairy-free and gluten-free.
I’m not here to tell you this is health food. But I do believe that food made with love and shared with people you care about is good for the soul. And honestly, a slice of this pie on a cold December night? That’s self-care in dessert form.
Conclusion
This cozy no-bake eggnog pie with toasted meringue is the kind of recipe that feels special without the stress. It’s rich, creamy, spiced just right, and topped with a cloud of toasted meringue that makes everyone at the table say “wow.” Whether you’re making it for a holiday dinner party or just because it’s Tuesday and you need something warm and sweet, this pie delivers.
I love that this recipe lets me feel like a fancy pastry chef even when I’m wearing pajamas and listening to Christmas music in November. It’s forgiving, adaptable, and absolutely delicious. And the best part? You don’t have to turn on your oven. That’s a win in my book.
So go ahead—make this pie your own. Add a little bourbon, swap the crust, pile on extra meringue. Whatever feels right. And when you take that first bite, I hope it makes you feel as cozy and content as it makes me. If you try it, I’d love to hear how it turned out. Drop a comment below or tag me in your photos—I’m always here for good food and good company.
Frequently Asked Questions
Can I use light eggnog in this recipe?
Yes, you can use light eggnog, but the filling will be slightly less rich and may take a bit longer to set. I recommend chilling it for a full 8 hours to ensure it firms up properly.
Why did my meringue turn out runny?
Runny meringue usually means the egg whites weren’t beaten long enough, or there was a trace of fat in the bowl. Make sure your bowl and beaters are completely clean, and beat until stiff peaks form—about 5-7 minutes.
Can I make this pie ahead of time?
Absolutely! You can make the crust and filling up to 2 days in advance. Just hold off on the meringue until right before serving. The meringue is best when it’s freshly made and toasted.
What if I don’t have a kitchen torch?
No problem! You can toast the meringue under your oven’s broiler. Place the pie on the top rack and broil for 1-2 minutes, watching closely so it doesn’t burn. Every broiler is different, so keep an eye on it.
How do I get clean slices of this pie?
Use a sharp knife dipped in hot water. Wipe the blade clean between each slice. This helps you cut through the meringue and filling without dragging or crumbling. For the best results, chill the pie for at least 6 hours before slicing.
Pin This Recipe!
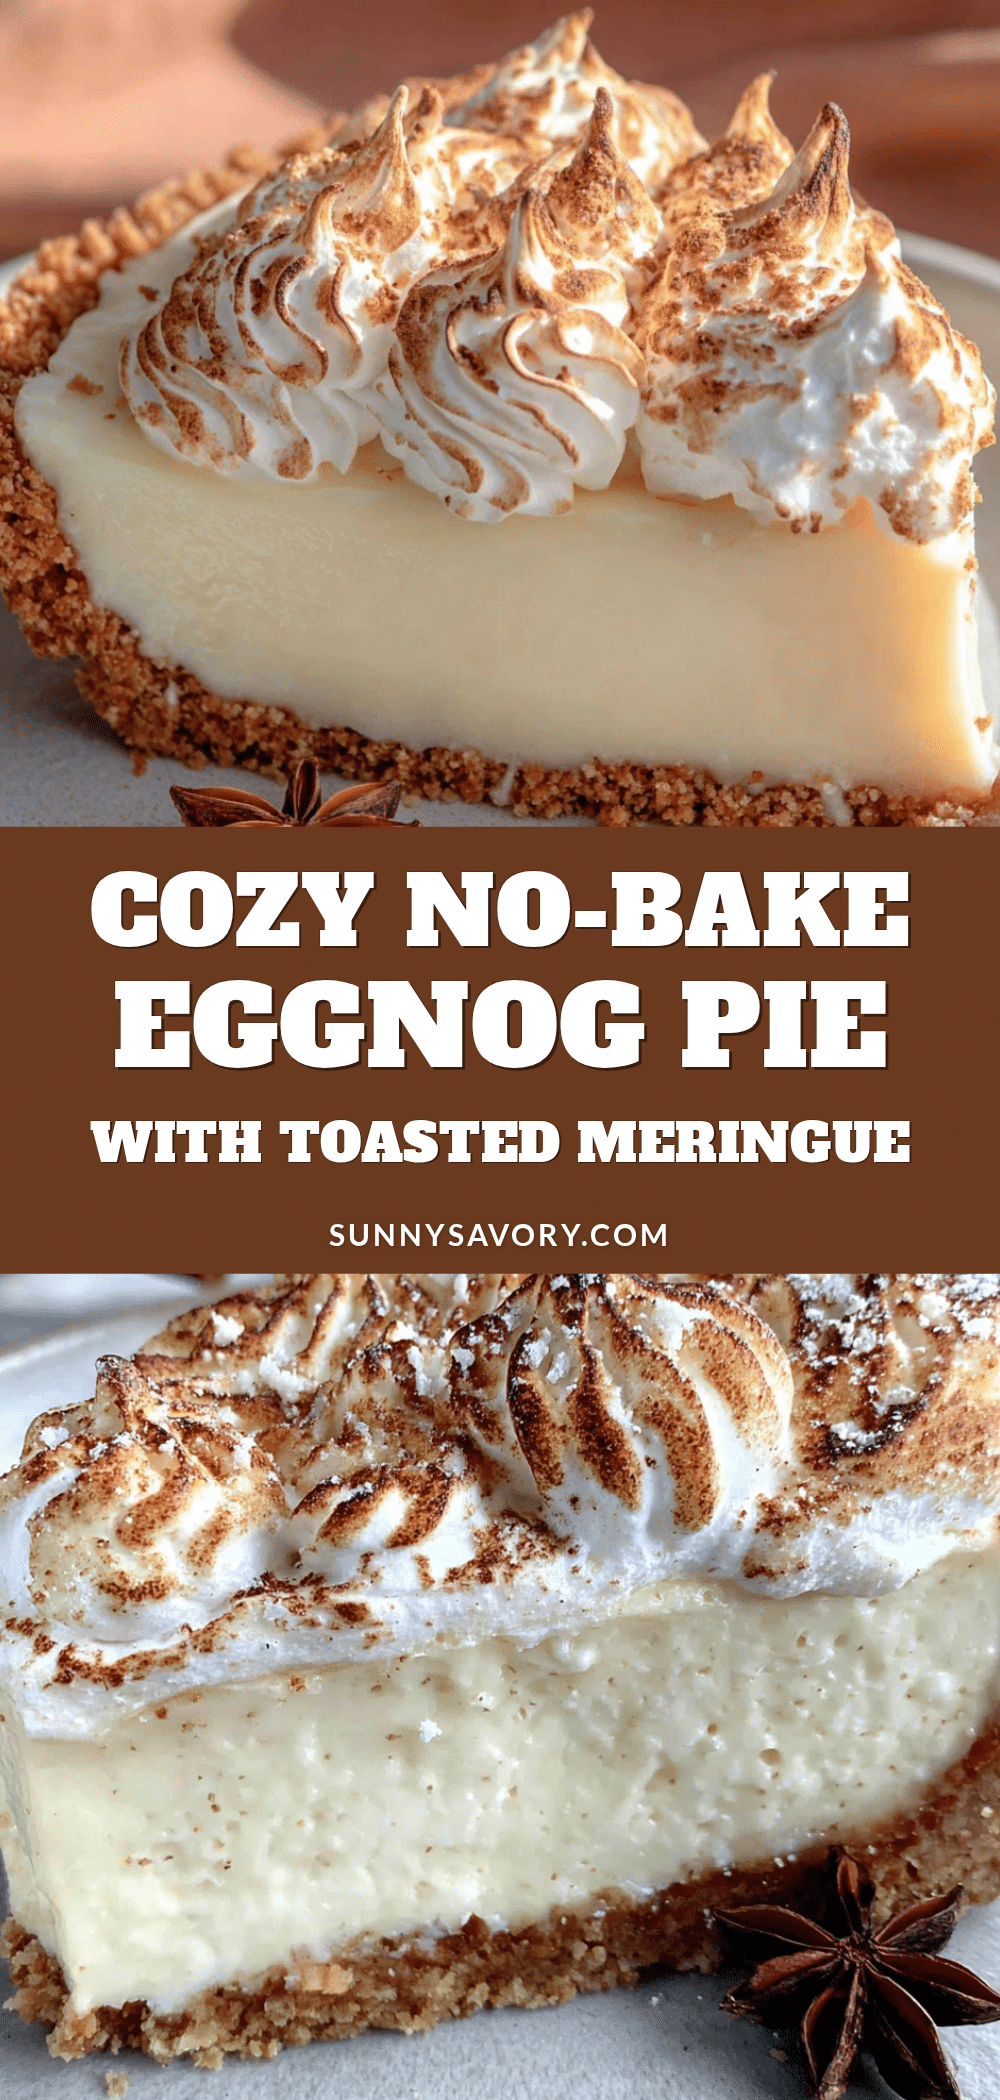
Cozy No-Bake Eggnog Pie with Perfect Toasted Meringue

A rich, creamy no-bake eggnog pie with a spiced graham cracker crust and a cloud of toasted meringue. Perfect for holiday gatherings or a cozy night in, this easy dessert delivers all the flavors of Christmas without turning on the oven.
- Prep Time: 20 minutes
- Cook Time: 0 minutes
- Total Time: 6 hours 20 minutes (includes chilling)
- Yield: 8 servings 1x
- Category: Dessert
- Cuisine: American
Ingredients
- 1 ½ cups graham cracker crumbs (about 12 full sheets, crushed finely)
- ¼ cup granulated sugar
- 6 tablespoons unsalted butter, melted
- ¼ teaspoon ground nutmeg (freshly grated if possible)
- 8 ounces cream cheese, softened
- ½ cup granulated sugar
- 1 ½ cups store-bought or homemade eggnog
- 1 teaspoon vanilla extract
- ½ teaspoon ground nutmeg
- ¼ teaspoon ground cinnamon
- 1 cup heavy whipping cream
- 2 tablespoons powdered sugar
- 3 large egg whites (room temperature)
- ¾ cup granulated sugar
- ¼ teaspoon cream of tartar
- ½ teaspoon vanilla extract
Instructions
- Make the crust: In a medium bowl, combine graham cracker crumbs, ¼ cup sugar, and ¼ teaspoon nutmeg. Pour in melted butter and stir with a fork until mixture looks like wet sand. Press firmly into the bottom and up the sides of a 9-inch pie dish. Refrigerate while making the filling.
- Whip the cream: In a large bowl, combine heavy cream and powdered sugar. Beat with an electric mixer on medium-high speed until stiff peaks form, about 3-4 minutes. Set aside in the fridge.
- Make the filling base: In another large bowl, beat softened cream cheese with ½ cup sugar until smooth and fluffy, about 2 minutes. Add eggnog, vanilla, ½ teaspoon nutmeg, and cinnamon. Beat on low speed until just combined.
- Fold it all together: Gently fold the whipped cream into the eggnog mixture using a rubber spatula until no white streaks remain.
- Assemble and chill: Pour filling into chilled crust. Smooth the top, cover loosely with plastic wrap, and refrigerate for at least 6 hours or overnight.
- Make the meringue: About 30 minutes before serving, beat egg whites and cream of tartar on medium speed until frothy. Gradually add ¾ cup sugar, a tablespoon at a time, while beating on high speed until glossy and stiff peaks form, about 5-7 minutes. Beat in vanilla.
- Toast and serve: Spread meringue over chilled pie, sealing edges. Use a kitchen torch to toast until golden brown, or broil on top rack for 1-2 minutes. Let rest 5 minutes before slicing.
Notes
For best results, chill the pie overnight. If using a broiler instead of a torch, watch closely to prevent burning. For a gluten-free version, use gluten-free graham crackers. For dairy-free, use plant-based cream cheese and coconut cream.
Nutrition
- Serving Size: 1 slice
- Calories: 420
- Sugar: 30
- Sodium: 320
- Fat: 28
- Saturated Fat: 16
- Carbohydrates: 38
- Fiber: 1
- Protein: 7
Keywords: no-bake pie, eggnog pie, holiday dessert, Christmas pie, meringue pie, easy dessert



