Love this? Save it for later!
Share the inspiration with your friends
My neighbor asked why I couldn’t just slice the oranges thin and bake them low and slow. I started to explain why that wouldn’t work—then stopped. Honestly, I had no real reason. I’d been following some complicated recipe blog method for years, soaking slices in simple syrup and flipping them every ten minutes like a nervous parent. And here she was, a woman who bakes cookies from boxed mix, suggesting something so simple it almost hurt my pride.
But that’s the thing about cooking, right? Sometimes the people who don’t overthink it end up being the smartest ones in the kitchen. I tried her method that same Tuesday afternoon, feeling a little sheepish as I arranged the orange rounds on a parchment-lined sheet. I set the oven to 200°F, walked away to fold laundry, and honestly forgot about them for a while. When I pulled them out, they were perfect—translucent at the edges, deeply fragrant, and exactly what I’d been chasing for years.
I’ve been making these easy oven-dried orange slices for garnish ever since that day. They’ve shown up on holiday cocktail glasses, atop winter cakes, and even strung into a makeshift garland that made my kitchen smell like a Christmas market. The best part? They require almost zero effort. You don’t need a dehydrator, a candy thermometer, or any special equipment. Just oranges, an oven, and a little patience. If you’ve been overcomplicating garnishes like I was, let me tell you—this is the method that finally stuck.
Why You’ll Love This Recipe
These easy oven-dried orange slices are the kind of garnish that makes people think you tried way harder than you actually did. And honestly, that’s my favorite kind of cooking trick. Here’s why this recipe works so well for busy weeknights or last-minute holiday prep:
- Quick & Easy: Active prep time is about 5 minutes. The oven does the rest. You can slice and forget.
- Simple Ingredients: One ingredient. Oranges. That’s it. No sugar syrup, no preservatives, no fancy tools.
- Perfect for Any Occasion: Cocktail parties, holiday baking, homemade gifts, or just making your kitchen smell amazing.
- Crowd-Pleaser: Everyone asks how you got them so perfect. It’s a humble brag waiting to happen.
- Unbelievably Delicious: The flavor concentrates beautifully—sweet, tangy, and intensely orange. They’re chewy-crisp and absolutely addictive.
What makes this recipe different from every other dried orange tutorial out there? It’s the temperature. Most guides tell you to bake at 250°F or higher, which risks burning the edges before the centers dry out. I use 200°F—low and slow—which gives you that gorgeous, even translucence without any bitter char. It’s a small tweak that makes a massive difference. This isn’t just another version; it’s the version that actually works on the first try.
These slices have this way of making everything feel special. A simple glass of water becomes a spa drink. A plain pound cake looks bakery-worthy. And when you tie them with twine as gifts? Forget it. People lose their minds. It’s comfort food for the eyes—simple, beautiful, and deeply satisfying to make.
What Ingredients You Will Need
This recipe uses exactly one ingredient, but the quality matters more than you’d think. Since there’s nothing to hide behind, the flavor of your oranges will be the star of the show.
- Oranges: 2-3 medium oranges (naval, blood, or cara cara all work beautifully). Look for firm, heavy fruit with smooth skin—that means they’re juicier and more flavorful. Organic is ideal here since you’re eating the peel. I’ve tried this with both organic and conventional, and the organic ones definitely taste cleaner and less waxy. If you can only find conventional, scrub them well under warm water before slicing.
That’s seriously it. No sugar. No oil. No complicated marinades. The oranges do all the work. I will say that thinner-skinned varieties like blood oranges tend to dry faster and look stunning with their deep ruby color. Navel oranges are the most reliable for even drying and are what I use 90% of the time. Cara cara oranges have this subtle floral sweetness that’s incredible if you can find them in season.
If you want to get fancy, you can add a light dusting of powdered sugar or a brush of honey before baking, but I honestly prefer them plain. The natural sugars concentrate as they dry, and you get this pure, bright orange flavor that pairs with anything. For a savory twist, try a pinch of flaky sea salt or smoked paprika before baking—it’s weirdly good on cheese boards.
One thing I learned the hard way: don’t use oranges that are too ripe or soft. They’ll release too much juice and end up mushy instead of chewy. Firm, fresh oranges with tight skin are your best bet. If you’re shopping at a farmers’ market, ask for the ones that feel heavy for their size—that’s the sweet spot.
Equipment Needed
You don’t need much for these easy oven-dried orange slices, which is exactly why I love this recipe. Here’s what you’ll need:
- Sharp Chef’s Knife or Mandoline: A sharp knife is non-negotiable. Dull blades crush the citrus flesh and create uneven slices. A mandoline makes this even easier and gives you perfectly uniform thickness every time. I use a Benriner mandoline for most of my slicing—it’s affordable and incredibly consistent. If you’re using a knife, go for a 8-inch chef’s knife and keep it sharp.
- Cutting Board: Any stable board works. I prefer a large wooden board because it doesn’t slip, but plastic is fine too.
- Baking Sheet: A rimmed baking sheet catches any juice that leaks out during drying. I use a half-sheet pan for most batches.
- Parchment Paper or Silicone Baking Mat: Parchment paper makes cleanup effortless and prevents sticking. Silicone mats work too, but I’ve found parchment gives slightly better air circulation underneath the slices.
- Paper Towels: For blotting the slices before baking. This step removes excess moisture and speeds up drying time.
- Cooling Rack (Optional): Placing the slices on a wire rack set inside the baking sheet allows air to circulate underneath, cutting drying time by about 15-20 minutes.
That’s it. No dehydrator, no special gadgets. If you have an oven and a knife, you’re ready to go.
Preparation Method
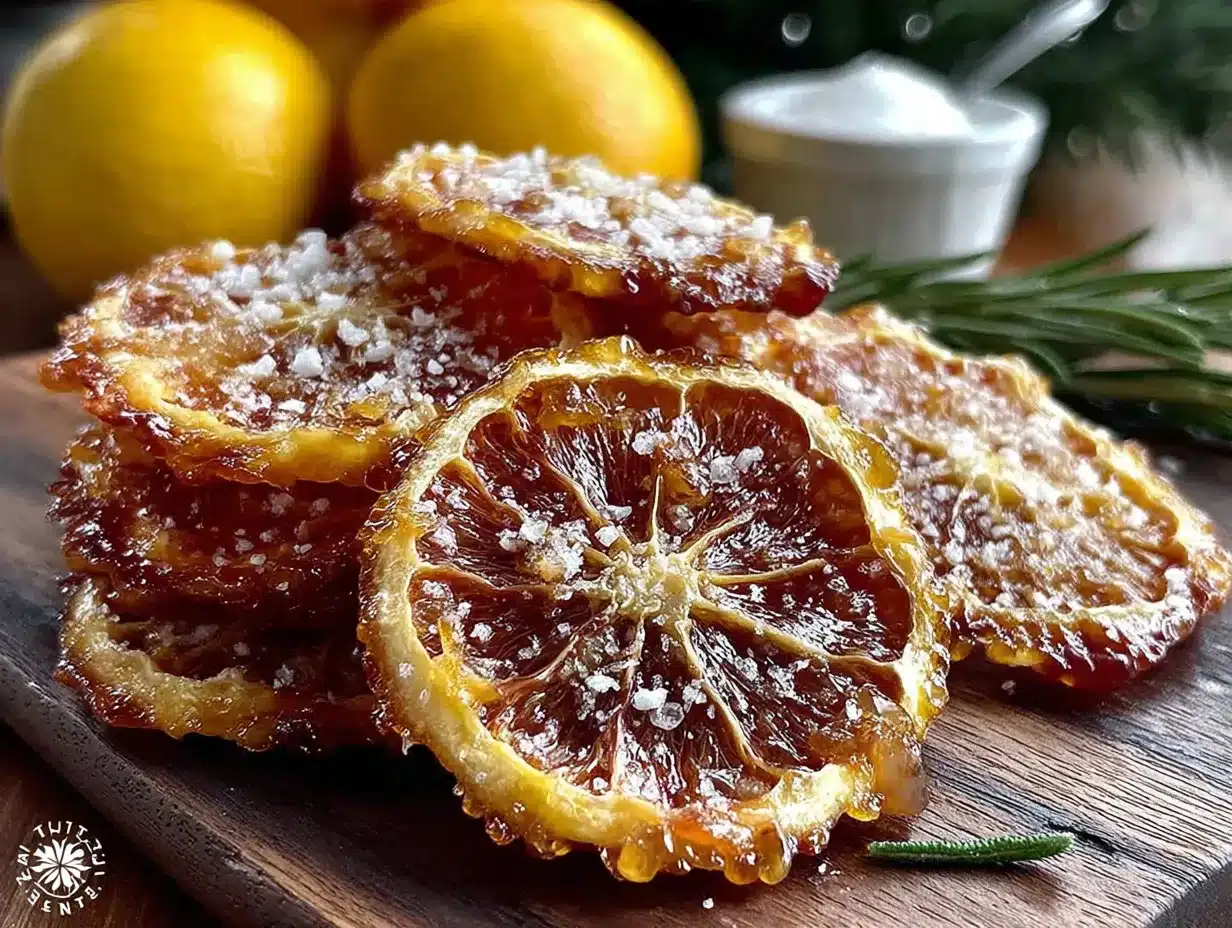
Making these easy oven-dried orange slices is almost embarrassingly simple. But there are a few details that separate perfect slices from sad, burnt discs. Let me walk you through it step by step.
- Preheat your oven to 200°F (93°C). This is the sweet spot—low enough to dry without burning, high enough to get the job done in a reasonable time. Don’t be tempted to crank it up. I’ve tried 225°F and ended up with brown edges and raw centers. Trust the low-and-slow method.
- Wash and dry your oranges thoroughly. If you’re using conventional oranges, scrub them with a vegetable brush under warm water to remove any wax or residue. Pat them completely dry with a clean towel. Any moisture on the skin can cause steaming instead of drying.
- Slice the oranges evenly, about 1/4-inch (6mm) thick. This is the most important step. Too thin and they’ll burn. Too thick and they’ll take forever to dry. I aim for the thickness of a standard nickel. Use a sharp knife and slice with confidence—hesitation creates uneven cuts. If you’re using a mandoline, set it to 6mm and work carefully. Watch your fingers! I have a scar on my left thumb from getting too cocky with a mandoline.
- Blot the slices with paper towels. Lay the slices in a single layer on a clean kitchen towel or paper towels. Gently press another towel on top to absorb excess juice. This step reduces drying time by at least 30 minutes and prevents sticky messes. Don’t squeeze—just blot.
- Arrange the slices on a parchment-lined baking sheet. Place them in a single layer with a little space between each slice. Overlapping means uneven drying. If you’re using a wire rack, place it on the baking sheet and arrange the slices on the rack. This allows hot air to circulate underneath and speeds things up.
- Bake for 2.5 to 3 hours, flipping halfway through. After about 90 minutes, use a spatula to flip each slice. This ensures even drying on both sides. The slices are done when they feel dry to the touch but still slightly pliable. They should not be crispy or brittle—they’ll continue to firm up as they cool.
- Let them cool completely on the baking sheet. As they cool, they’ll become firmer and slightly translucent. Don’t rush this step. If you try to move them while they’re still warm, they might tear or stick.
- Check for doneness. A properly dried slice should bend slightly without cracking. If it feels leathery or sticky, pop it back in the oven for another 15-20 minutes. If it’s brittle and snapping, it’s overdone—but still usable for decoration.
One thing I always tell people: don’t walk away completely. Set a timer for the flip, and check on them periodically. Every oven runs differently, and humidity levels affect drying time. On a rainy day, mine take closer to 3.5 hours. On a dry winter day, they’re done in 2 hours flat.
Cooking Tips & Techniques
After making dozens of batches of these easy oven-dried orange slices, I’ve collected a few hard-won lessons. Here are the tips that actually matter:
Uniform thickness is everything. I cannot stress this enough. Slices that vary in thickness will dry at different rates. Thin parts burn; thick parts stay soggy. Use a mandoline if you have one, or take your time with a sharp knife. I once ruined a whole batch because I was rushing and ended up with slices ranging from 1/8-inch to 1/2-inch. It was a sad, uneven mess.
Blot, blot, blot. The more surface moisture you remove before baking, the faster and more evenly they dry. I lay the slices on a clean kitchen towel, cover them with another towel, and gently press down. It makes a noticeable difference.
Rotate your baking sheet halfway through. Most ovens have hot spots. Rotating the sheet front to back at the flip ensures even drying. I learned this after noticing that the slices on the back left corner were always done 20 minutes before the rest.
Don’t overcrowd the pan. Give each slice room to breathe. If they’re touching, they’ll steam instead of dry. Use two baking sheets if you need to—just rotate them between racks halfway through.
Let them cool before storing. Trapping warm slices in a container creates condensation, which makes them soft and sticky. Cool them completely on the baking sheet before moving to storage. I once rushed this step and ended up with a sad, clumpy mess the next morning.
Embrace imperfection. Not every slice will be picture-perfect, and that’s okay. The slightly wonky ones taste just as good and are perfect for snacking while you arrange the pretty ones on a cake.
Variations & Adaptations
One of the best things about these easy oven-dried orange slices is how adaptable they are. Here are some variations I’ve tried and loved:
Citrus Medley: Mix it up with lemons, limes, or grapefruits. Lemon slices are gorgeous in cocktails and tea. Limes add a bright green pop to summer drinks. Grapefruit slices are stunning on brunch tables. Just note that thinner-skinned citrus like lemons may dry a bit faster, so check them at the 2-hour mark.
Spiced Orange Slices: Before baking, lightly brush the slices with a mixture of honey and warm water, then sprinkle with cinnamon, cloves, or star anise powder. This creates a holiday-spiced version that’s incredible in mulled wine or as edible tree ornaments.
Sugar-Dusted Slices: For a sweeter finish, sprinkle the slices with granulated or powdered sugar before baking. The sugar caramelizes slightly and creates a lovely crystalline look. This version is perfect for decorating cakes or cookies.
Savory Version: Try a light dusting of flaky sea salt and smoked paprika before baking. These savory slices are amazing on cheese boards, in salads, or as a garnish for roasted pork or chicken. The salt balances the sweetness beautifully.
Dried Orange Peel Strips: Instead of rounds, use a vegetable peeler to create long strips of orange peel (without the white pith). Dry them the same way—they take about half the time and are perfect for infusing cocktails or teas.
Dehydrator Method: If you have a dehydrator, set it to 135°F and dry for 6-8 hours. The results are even more consistent than oven-drying, and you can do larger batches at once.
Serving & Storage Suggestions
These easy oven-dried orange slices are incredibly versatile. Here’s how to use and store them:
Serving Ideas: Float them in cocktails like Old Fashioneds, mulled wine, or sparkling water. Use them as cake toppers, cupcake decorations, or garnishes for pies and tarts. Thread them onto twine for a rustic garland. Add them to gift bags with homemade granola or tea. They’re also delicious eaten straight as a chewy, tangy snack—my kids call them “orange candy.”
Storage: Store completely cooled slices in an airtight container at room temperature. They’ll keep for up to 2 weeks. For longer storage, place them in a zip-top bag in the freezer for up to 3 months. They thaw perfectly and retain their color and flavor. Just don’t refrigerate them—the moisture in the fridge can make them soft.
Re-crisping: If your slices lose their crispness over time, pop them in a 200°F oven for 10-15 minutes. They’ll firm right back up. I do this before every holiday party to make sure they look their best.
Flavor Development: Interestingly, the flavor of dried orange slices mellows and deepens over the first few days. They’re good right out of the oven, but they’re even better after a day or two in the jar. The oils in the peel continue to infuse the fruit, creating a more complex, rounded flavor.
Gift Idea: Layer dried citrus slices in a clear glass jar with a ribbon and a tag that says “Slice into cocktails or tea.” It’s a beautiful, homemade gift that costs pennies to make but looks incredibly thoughtful.
Nutritional Information & Benefits
These easy oven-dried orange slices are a surprisingly healthy garnish option. Since there’s no added sugar, they’re simply concentrated fruit with all the natural goodness intact.
Estimated per slice (based on 12 slices from 2 medium oranges):
- Calories: 15-20
- Carbohydrates: 4g
- Fiber: 1g
- Sugar: 3g (natural)
- Vitamin C: 15% of daily value
- Potassium: 2% of daily value
Health Benefits: Oranges are packed with vitamin C, which supports immune function and skin health. The peel contains flavonoids like hesperidin, which have anti-inflammatory properties. Drying concentrates these nutrients, so you get a nice little boost from even a small serving. Plus, the fiber in the peel aids digestion—something you don’t get from orange juice.
Dietary Considerations: This recipe is naturally gluten-free, vegan, dairy-free, and paleo-friendly. It contains no common allergens. If you’re watching sugar intake, remember that drying concentrates natural sugars, so the slices are sweeter than fresh oranges. But they’re still a far healthier option than candy or artificial garnishes.
Personal Note: I love that these slices let me enjoy citrus year-round, even when fresh oranges aren’t at their peak. They’re a simple way to add brightness and nutrition to winter meals without relying on processed ingredients.
Conclusion
These easy oven-dried orange slices have become my go-to garnish for everything from holiday cocktails to weekday desserts. They’re proof that the simplest methods often produce the most beautiful results. My neighbor was right—sometimes the best cooking advice comes from the people who aren’t trying to impress anyone with technique. They just know what works.
I hope you’ll give these a try, whether you’re dressing up a birthday cake, adding flair to a dinner party, or just wanting your kitchen to smell amazing. Feel free to experiment with different citrus, spices, or serving ideas. That’s the beauty of a recipe this simple—it’s a starting point, not a rulebook.
If you make these, I’d love to hear about it. Drop a comment below and tell me how you used them, or share a photo on Pinterest with your own twist. Happy drying, friends—you’ve got this.
Frequently Asked Questions
Can I use a higher temperature to speed up drying?
I don’t recommend it. Temperatures above 225°F tend to brown the edges before the centers dry out. You end up with burnt-looking slices that still feel sticky in the middle. 200°F is the sweet spot—it takes longer, but the results are consistently beautiful.
Do I need to peel the oranges first?
No! The peel is what makes these slices so beautiful and flavorful. It holds the shape during drying and contains aromatic oils that concentrate as they bake. Just make sure to wash the oranges thoroughly before slicing.
Why are my orange slices still sticky after 3 hours?
Several factors can cause this: your slices might be too thick (aim for 1/4-inch), your oven might run cool (check with an oven thermometer), or the humidity in your kitchen might be high. Try flipping them, lowering the temperature slightly, and giving them another 30 minutes. If they’re still sticky, they might need up to 4 hours total.
Can I dry orange slices in an air fryer?
Yes, but it’s trickier. Set your air fryer to the lowest temperature (usually 180°F) and dry for 1-2 hours, checking every 20 minutes. The air circulation is stronger, so they can burn quickly. I prefer the oven for more consistent results, but the air fryer works in a pinch.
How do I know when they’re done drying?
The slices should feel dry to the touch but still slightly pliable—like soft leather. They should not be crispy or brittle. As they cool, they’ll firm up a bit more. If they crack when you bend them, they’re overdone. If they feel sticky or wet, they need more time.
Pin This Recipe!

Easy Oven-Dried Orange Slices Perfect for Garnish

These easy oven-dried orange slices are the perfect garnish for cocktails, cakes, and more. With just one ingredient and minimal effort, you can create beautiful, flavorful slices that impress every time.
- Prep Time: 5 minutes
- Cook Time: 2.5 to 3 hours
- Total Time: 2 hours 35 minutes to 3 hours 5 minutes
- Yield: 12 slices 1x
- Category: Garnish
- Cuisine: American
Ingredients
- 2–3 medium oranges (navel, blood, or cara cara)
Instructions
- Preheat your oven to 200°F (93°C).
- Wash and dry your oranges thoroughly. If using conventional oranges, scrub them with a vegetable brush under warm water to remove any wax or residue. Pat them completely dry with a clean towel.
- Slice the oranges evenly, about 1/4-inch (6mm) thick. Use a sharp knife or mandoline for uniform slices.
- Blot the slices with paper towels to remove excess moisture. Lay the slices in a single layer on a clean kitchen towel or paper towels, then gently press another towel on top to absorb excess juice.
- Arrange the slices in a single layer on a parchment-lined baking sheet, leaving a little space between each slice. For faster drying, place a wire rack on the baking sheet and arrange slices on the rack.
- Bake for 2.5 to 3 hours, flipping halfway through. After about 90 minutes, use a spatula to flip each slice. The slices are done when they feel dry to the touch but still slightly pliable.
- Let them cool completely on the baking sheet. They will become firmer and slightly translucent as they cool.
- Check for doneness: a properly dried slice should bend slightly without cracking. If it feels leathery or sticky, bake for another 15-20 minutes.
Notes
Uniform thickness is key for even drying. Blotting slices before baking reduces drying time. Rotate the baking sheet halfway through for even results. Store in an airtight container at room temperature for up to 2 weeks, or freeze for up to 3 months. Re-crisp in a 200°F oven for 10-15 minutes if needed.
Nutrition
- Serving Size: 1 slice
- Calories: 1520
- Sugar: 3
- Carbohydrates: 4
- Fiber: 1
Keywords: dried orange slices, oven-dried oranges, citrus garnish, easy garnish, homemade garnish, orange slices for cocktails



