Love this? Save it for later!
Share the inspiration with your friends
There used to be a tiny bakery tucked between a laundromat and a shoe repair shop on Main Street. It was the kind of place where the floorboards creaked and the coffee was always just a little bit burnt. They made this banana loaf that was honestly unforgettable — moist, tender, with a crumb that practically melted on your tongue. When they closed their doors three years ago, I won’t lie, I felt a little lost. I mean, where else was I supposed to get that perfect slice of comfort? After a dozen tries — some too dry, some that fell apart, one that I swear tasted like soap — I finally cracked the code. This kid-approved one-bowl banana loaf with brown butter glaze is the exact recreation of that memory. And let me tell you, it was worth every single failed batch.
You know that feeling when you take a bite of something and it just transports you? That’s what this loaf does. It’s not just a recipe; it’s a little slice of nostalgia that you can bake in your own kitchen. I remember the first time I got it right — my youngest walked into the kitchen, sniffed the air, and said, “Mama, that smells like the best day ever.” And honestly, that’s all the validation I needed. This banana loaf is the one I keep coming back to, the one that makes me look forward to those spotty bananas on the counter. It’s simple, it’s forgiving, and it’s absolutely packed with flavor.
Why You’ll Love This Recipe
Let’s be real — finding a recipe that pleases everyone at the table can feel like a small miracle. This one-bowl banana loaf is that miracle. It’s the kind of recipe that makes you look like a rockstar without actually having to work that hard. Here’s why it works so well for busy families:
- Quick & Easy: Everything comes together in one bowl, no stand mixer required. From start to oven in under 15 minutes — that’s a win on a school night.
- Simple Ingredients: You probably have everything you need in your pantry right now. Overripe bananas? Check. Butter? Check. Flour, sugar, eggs? You get the idea.
- Perfect for Lunchboxes & Snack Time: This loaf is sturdy enough to pack in a lunchbox without falling apart, but tender enough to feel like a treat. It’s the best of both worlds.
- Crowd-Pleaser: My kids devour it. My neighbor’s kids devour it. Even my picky nephew who “doesn’t like bananas” asked for seconds. I’m not kidding.
- Unbelievably Delicious: The brown butter glaze is the secret weapon here. It adds a nutty, caramel-like depth that takes a simple banana loaf to something you’d find in a fancy coffee shop.
What makes this recipe different from the rest? It’s the technique — browning the butter first gives the loaf a richness that plain butter just can’t match. Plus, the one-bowl method means less cleanup, which honestly is a win for any parent. This isn’t just another banana bread recipe; it’s the one you’ll come back to again and again. It’s comfort food reimagined — faster, easier, but with the same soul-soothing satisfaction that makes you close your eyes after the first bite.
What Ingredients You Will Need
This recipe uses simple, wholesome ingredients to deliver bold flavor and satisfying texture without the fuss. Most of these are pantry staples, so you’re probably already halfway there.
- Unsalted butter (1/2 cup, or 1 stick): We’re browning this, so unsalted is key to control the salt level. I recommend using a good-quality butter like Kerrygold for the best flavor — it browns beautifully.
- Overripe bananas (3 medium, mashed): The spottier, the better. Really black bananas are perfect here. They’re sweeter and easier to mash, which means less sugar needed later.
- Granulated sugar (3/4 cup): Just enough to sweeten the loaf without overpowering the banana flavor. You can reduce this to 1/2 cup if your bananas are very ripe.
- Large egg (1, room temperature): Room temperature eggs blend more evenly into the batter. If you forget to take one out, just place it in a bowl of warm water for 5 minutes.
- Vanilla extract (1 teaspoon): Pure vanilla extract makes a difference here. The imitation stuff can taste a little flat.
- All-purpose flour (1 1/2 cups): Spoon and level your flour — don’t scoop directly from the bag or you’ll end up with a dry loaf.
- Baking soda (1 teaspoon): This is the leavening agent that gives the loaf its rise. Make sure it’s fresh — test it by dropping a little into vinegar; it should fizz.
- Salt (1/2 teaspoon): Just a pinch to balance the sweetness and enhance the banana and brown butter flavors.
- For the Brown Butter Glaze:
- Unsalted butter (2 tablespoons): We’ll brown this separately for the glaze.
- Powdered sugar (1 cup, sifted): Sifting prevents lumps in the glaze. Trust me on this one.
- Milk (2-3 tablespoons): Whole milk gives the creamiest glaze, but 2% works fine too. Add it gradually until you reach your desired consistency.
- Vanilla extract (1/2 teaspoon): A little extra vanilla in the glaze ties everything together.
Ingredient Tips: For the best texture, make sure your bananas are truly overripe — we’re talking brown spots covering at least half the peel. If your bananas aren’t ripe enough, you can place them on a baking sheet in a 300°F oven for 15-20 minutes until the skins turn black. Let them cool before mashing. Also, I’ve tested this with both all-purpose and whole wheat pastry flour, and the whole wheat version works well if you want a slightly nuttier flavor.
Equipment Needed
You don’t need a fancy kitchen to make this loaf. Here’s what you’ll need:
- Large mixing bowl: Any large bowl will do. I prefer a glass or ceramic bowl because it doesn’t retain heat, which is helpful when mixing in the browned butter.
- Whisk or wooden spoon: A whisk works great for the wet ingredients, but a sturdy wooden spoon is perfect for folding in the flour.
- 9×5-inch loaf pan: This is the standard size. If you use an 8×4-inch pan, you’ll need to bake it a little longer — about 5-10 extra minutes.
- Parchment paper: Lining the pan makes removal a breeze. You can also grease the pan well with butter and a dusting of flour.
- Small saucepan: For browning the butter. A light-colored pan is best so you can see the butter change color.
- Cooling rack: Essential for even cooling. If you don’t have one, you can use the inverted loaf pan to prop up one end.
- Measuring cups and spoons: For accuracy. I’ve learned the hard way that eyeballing baking soda leads to disaster.
Budget-Friendly Tip: You don’t need a stand mixer or hand mixer for this recipe. Everything comes together with a bowl and a spoon, which means less equipment to wash and less money spent on gadgets.
Preparation Method
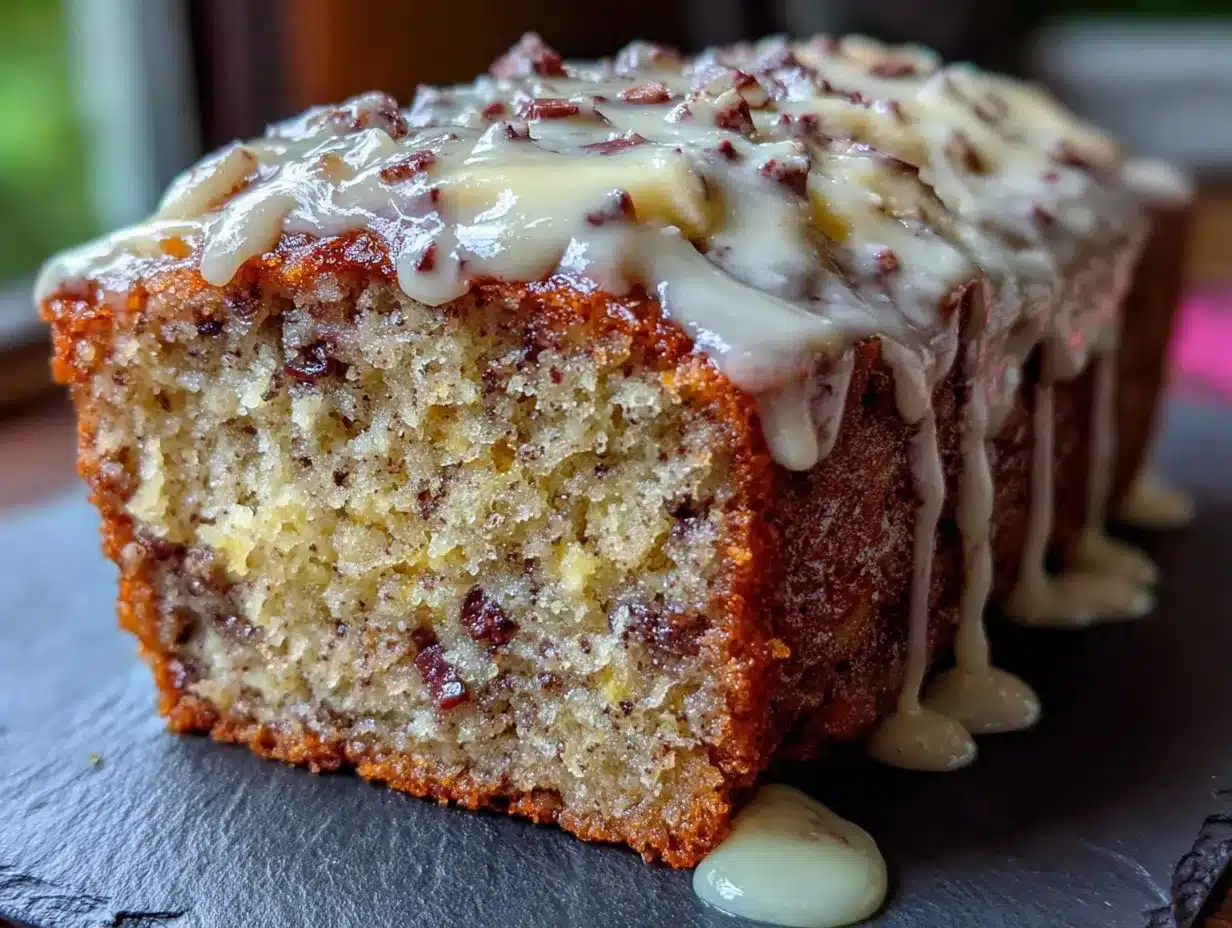
Let’s get baking! This method is broken down into simple steps so you can follow along easily.
- Preheat your oven to 350°F (175°C). Line a 9×5-inch loaf pan with parchment paper, leaving some overhang on the long sides for easy lifting. Set it aside.
- Brown the butter for the loaf. In a small saucepan over medium heat, melt the 1/2 cup of unsalted butter. Stir it constantly with a whisk or spatula. The butter will foam, then start to turn golden. Watch carefully — once you see brown specks forming at the bottom and it smells nutty, remove it from the heat immediately. This takes about 5-7 minutes. Pour the browned butter into a heatproof bowl to stop the cooking process. Let it cool for 5 minutes.
- Mash the bananas. In your large mixing bowl, mash the 3 overripe bananas with a fork until mostly smooth. A few small lumps are perfectly fine — they add texture to the finished loaf.
- Mix the wet ingredients. To the mashed bananas, add the granulated sugar, the cooled browned butter, the room temperature egg, and the vanilla extract. Whisk everything together until well combined and smooth. The mixture will look glossy and smell incredible.
- Add the dry ingredients. Sprinkle the all-purpose flour, baking soda, and salt over the wet mixture. Use a rubber spatula or wooden spoon to fold everything together gently. Stir just until no streaks of flour remain — overmixing will make the loaf tough. The batter will be thick and slightly lumpy. That’s okay.
- Pour the batter into the prepared loaf pan. Use the spatula to spread it evenly into the corners. Give the pan a gentle tap on the counter to release any air bubbles.
- Bake for 50-60 minutes. Place the pan on the middle rack of your preheated oven. Bake until a toothpick inserted into the center comes out clean or with a few moist crumbs. The top should be golden brown and cracked. If the top is browning too quickly (after about 40 minutes), tent the pan loosely with aluminum foil.
- Cool the loaf in the pan for 10 minutes. Then lift it out using the parchment paper overhang and transfer it to a cooling rack. Let it cool completely before glazing — about 1 hour. If you glaze it while it’s warm, the glaze will just melt right off.
- Make the brown butter glaze. While the loaf is cooling, make the glaze. In the same small saucepan (no need to wash it), melt the 2 tablespoons of unsalted butter over medium heat. Brown it again, just like before, until it’s golden and nutty. Remove from heat.
- Whisk the glaze together. In a small bowl, combine the sifted powdered sugar, the browned butter, 2 tablespoons of milk, and the vanilla extract. Whisk until smooth. If the glaze is too thick, add the remaining tablespoon of milk, one teaspoon at a time, until it reaches a pourable consistency.
- Drizzle the glaze over the cooled loaf. Use a spoon to drizzle it back and forth across the top. Let the glaze set for about 15 minutes before slicing. The glaze will harden slightly, creating a beautiful, crackly crust.
Troubleshooting Tip: If your loaf sinks in the middle, it might be underbaked. Always test with a toothpick — if it comes out wet, give it another 5 minutes. Also, make sure your baking soda is fresh. Old baking soda won’t give you the rise you need.
Cooking Tips & Techniques
I’ve made this loaf more times than I can count, and I’ve learned a few things along the way. Here are my best tips to ensure success:
- Don’t skip browning the butter. I know it’s an extra step, but it’s what makes this loaf special. The nutty flavor from the browned butter is irreplaceable. Just watch it closely — burned butter is bitter and will ruin the loaf.
- Measure your flour correctly. Scooping flour directly from the bag packs it down, leading to a dry, dense loaf. Instead, spoon the flour into your measuring cup and level it off with a knife. This is one of those small details that makes a big difference.
- Let the loaf cool completely. I know it’s tempting to slice into it while it’s warm, but the loaf needs time to set. If you cut it too soon, it will crumble and fall apart. Patience is a virtue here, I promise.
- Use an oven thermometer. Ovens can be off by 25°F or more. An inexpensive oven thermometer ensures you’re baking at the right temperature. I learned this the hard way after a batch came out burnt on the outside and raw in the middle.
- Room temperature ingredients matter. Cold eggs and cold butter don’t mix as well into the batter. Take your egg out of the fridge 30 minutes before you start baking. If you forget, place it in a bowl of warm water for 5 minutes.
What I Learned the Hard Way: The first time I made this, I used melted butter instead of browned butter. The loaf was good, but it lacked that deep, caramel-like flavor. The second time, I burned the butter — it was black and smelled awful. I had to start over. Now I always keep my eye on the pan and remove it from the heat the second I see brown specks.
Variations & Adaptations
This recipe is wonderfully adaptable. Here are a few ways to make it your own:
- Chocolate Chip Banana Loaf: Fold in 1/2 cup of semi-sweet chocolate chips after adding the flour. The chocolate pairs beautifully with the brown butter and banana. My kids go crazy for this version.
- Gluten-Free Option: Substitute the all-purpose flour with a 1:1 gluten-free baking flour blend. I’ve tested this with Bob’s Red Mill 1:1 Baking Flour, and it works perfectly. Just be sure not to overmix.
- Nutty Banana Loaf: Add 1/2 cup of toasted walnuts or pecans to the batter. Toast them first in a dry skillet over medium heat for 3-4 minutes to bring out their flavor. This adds a lovely crunch.
- Dairy-Free Version: Use a plant-based butter like Miyoko’s for both the loaf and the glaze. Use oat milk or almond milk in the glaze. The flavor will be slightly different, but still delicious.
- Spiced Banana Loaf: Add 1 teaspoon of ground cinnamon and 1/4 teaspoon of ground nutmeg to the flour mixture. This gives the loaf a warm, cozy flavor that’s perfect for fall.
Personal Variation: I once added a handful of shredded coconut to the batter, and it was a hit. The coconut added a subtle chewiness that complemented the soft crumb. Just be sure to use unsweetened coconut so it doesn’t make the loaf too sweet.
Serving & Storage Suggestions
This banana loaf is delicious at any temperature, but I have a few favorite ways to serve it:
- Warm with a pat of butter: Slice a piece, toast it lightly, and spread a little butter on top. The combination of the warm loaf, the melted butter, and the crackly glaze is pure heaven.
- With a cup of coffee or tea: This loaf is the perfect companion for your morning coffee or an afternoon tea break. The sweetness of the glaze balances the bitterness of the coffee beautifully.
- As a lunchbox treat: Slice the loaf and pack it in lunchboxes. It stays moist for days, so it’s perfect for school lunches. My kids love it with a side of apple slices.
Storage Instructions:
- At room temperature: Store the loaf in an airtight container at room temperature for up to 4 days. The glaze will stay intact if you keep it covered.
- In the refrigerator: You can refrigerate the loaf for up to a week, but the texture will be slightly denser. Let it come to room temperature before serving for the best flavor.
- In the freezer: This loaf freezes beautifully. Wrap the cooled, unglazed loaf tightly in plastic wrap, then in aluminum foil. Freeze for up to 3 months. When you’re ready to serve, thaw it overnight in the refrigerator, then make the glaze fresh and drizzle it over the top.
Reheating Tip: To revive a slice, pop it in the microwave for 10-15 seconds, or toast it in a toaster oven at 350°F for 5 minutes. The glaze will get slightly melty, which is honestly the best way to eat it.
Nutritional Information & Benefits
Here’s the estimated nutritional breakdown for one slice (based on 10 slices per loaf):
| Nutrient | Amount Per Slice |
|---|---|
| Calories | 285 |
| Total Fat | 14g |
| Saturated Fat | 8g |
| Cholesterol | 55mg |
| Sodium | 210mg |
| Total Carbohydrates | 38g |
| Dietary Fiber | 1.5g |
| Sugars | 22g |
| Protein | 3g |
Health Benefits: Bananas are a great source of potassium, which supports heart health and muscle function. They also provide vitamin B6 and vitamin C. The brown butter adds a small amount of vitamin A. While this is definitely a treat, using whole ingredients means you’re getting some nutritional value with every bite.
Dietary Considerations: This recipe is not gluten-free or dairy-free as written, but see the variations section for easy substitutions. It does contain eggs and dairy, so it’s not suitable for a vegan diet without modifications.
Conclusion
This kid-approved one-bowl banana loaf with brown butter glaze is more than just a recipe — it’s a little piece of joy that you can bake on a rainy afternoon or a busy Tuesday. It’s the kind of loaf that makes your kitchen smell like a bakery and your family feel loved. I’ve made it for birthdays, school bake sales, and random weeknights when we just needed something sweet. Every single time, it disappears within hours.
I hope you give it a try and make it your own. Maybe you’ll add chocolate chips, or a sprinkle of sea salt on top of the glaze. Maybe you’ll double the batch and freeze one for later. Whatever you do, I’d love to hear about it. Drop a comment below and let me know how it turned out — did your kids love it? Did you try a fun variation? Share your photos and tag me, too. Happy baking, friend. You’ve got this.
Frequently Asked Questions
Can I use frozen bananas for this recipe?
Absolutely! Frozen bananas are actually perfect for banana bread. Thaw them completely, then drain off any excess liquid before mashing. The texture will be softer, but the flavor is even more concentrated.
Why did my banana loaf sink in the middle?
This usually happens when the loaf is underbaked or the oven temperature is too low. Make sure your oven is properly preheated to 350°F and test the loaf with a toothpick before taking it out. Also, check that your baking soda is fresh — old baking soda loses its leavening power.
Can I make this recipe without the glaze?
Of course! The loaf is delicious on its own. If you skip the glaze, you can reduce the sugar in the loaf by a tablespoon or two. The loaf will be slightly less sweet, but still moist and flavorful.
How do I know when the butter is properly browned?
Watch for the butter to turn a golden amber color with brown specks at the bottom of the pan. It will also smell nutty and fragrant. Remove it from the heat immediately — it can go from browned to burned in seconds.
Can I use a different pan size?
Yes, but you’ll need to adjust the baking time. For an 8×4-inch pan, bake for 55-65 minutes. For mini loaf pans, bake for 25-30 minutes. For a muffin tin, bake for 18-22 minutes. Always test with a toothpick to be sure.
Pin This Recipe!
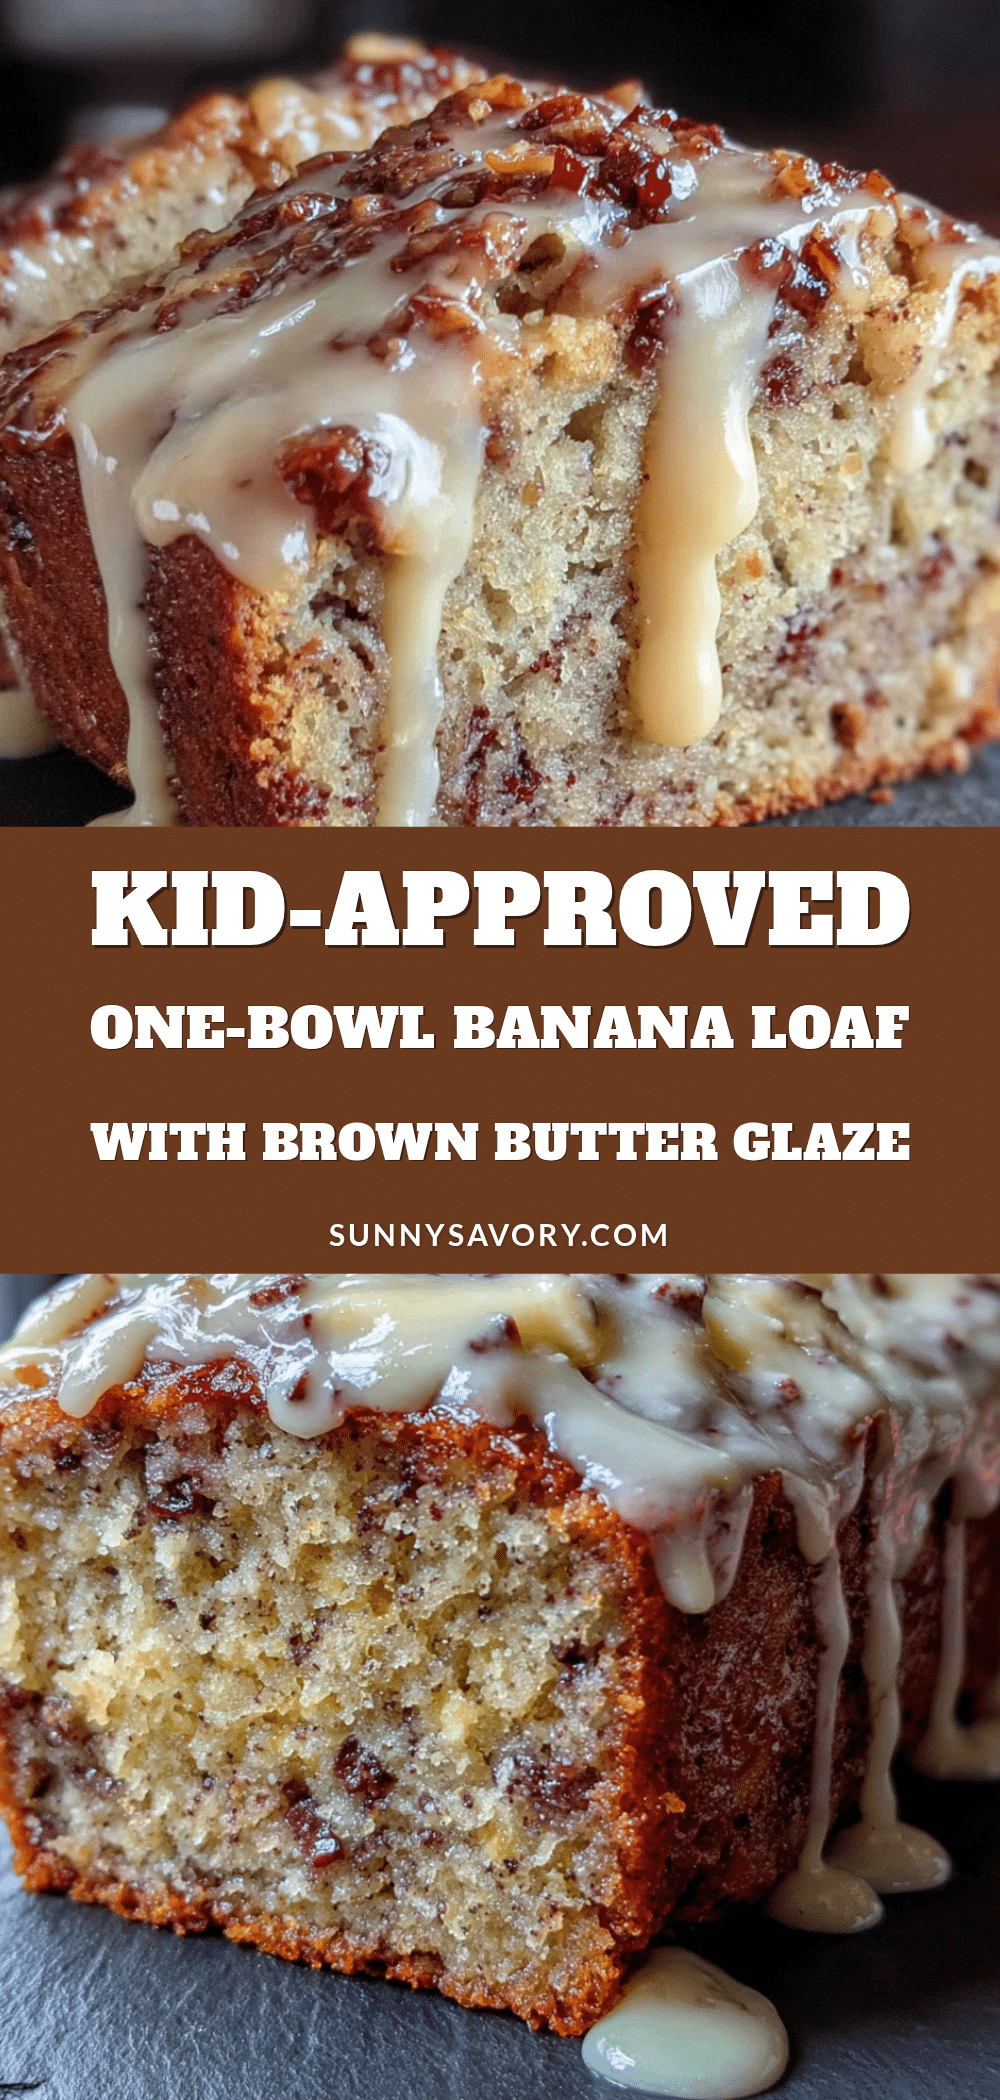
Kid-Approved One-Bowl Banana Loaf with Brown Butter Glaze
A moist, tender banana loaf with a nutty brown butter glaze that tastes just like the one from a beloved local bakery. This one-bowl recipe is quick, easy, and perfect for lunchboxes or snack time.
- Prep Time: 15 minutes
- Cook Time: 55 minutes
- Total Time: 1 hour 10 minutes
- Yield: 10 servings 1x
- Category: Dessert
- Cuisine: American
Ingredients
- 1/2 cup (1 stick) unsalted butter, for the loaf
- 3 medium overripe bananas, mashed
- 3/4 cup granulated sugar
- 1 large egg, room temperature
- 1 teaspoon vanilla extract
- 1 1/2 cups all-purpose flour
- 1 teaspoon baking soda
- 1/2 teaspoon salt
- 2 tablespoons unsalted butter, for the glaze
- 1 cup powdered sugar, sifted
- 2–3 tablespoons milk
- 1/2 teaspoon vanilla extract
Instructions
- Preheat oven to 350°F (175°C). Line a 9×5-inch loaf pan with parchment paper, leaving overhang on the long sides.
- In a small saucepan over medium heat, brown 1/2 cup unsalted butter: stir constantly until it turns golden with brown specks and smells nutty (about 5-7 minutes). Remove from heat and pour into a heatproof bowl to cool for 5 minutes.
- In a large mixing bowl, mash the bananas with a fork until mostly smooth.
- Add granulated sugar, cooled browned butter, room temperature egg, and 1 teaspoon vanilla extract to the bananas. Whisk until well combined and smooth.
- Sprinkle flour, baking soda, and salt over the wet mixture. Fold gently with a rubber spatula or wooden spoon until just combined (do not overmix). Batter will be thick and slightly lumpy.
- Pour batter into prepared loaf pan and spread evenly. Tap pan gently on the counter to release air bubbles.
- Bake for 50-60 minutes, until a toothpick inserted in the center comes out clean or with a few moist crumbs. If top browns too quickly, tent with foil after 40 minutes.
- Cool loaf in pan for 10 minutes, then lift out using parchment and transfer to a cooling rack. Cool completely (about 1 hour) before glazing.
- For the glaze: In the same saucepan, brown 2 tablespoons unsalted butter over medium heat until golden and nutty. Remove from heat.
- In a small bowl, whisk together sifted powdered sugar, browned butter, 2 tablespoons milk, and 1/2 teaspoon vanilla extract until smooth. Add remaining milk if needed for pourable consistency.
- Drizzle glaze over cooled loaf. Let set for 15 minutes before slicing.
Notes
For best results, use overripe bananas with brown spots. Brown the butter carefully to avoid burning. Let loaf cool completely before glazing to prevent glaze from melting off. Store in an airtight container at room temperature for up to 4 days, or freeze unglazed for up to 3 months.
Nutrition
- Serving Size: 1 slice
- Calories: 285
- Sugar: 22
- Sodium: 210
- Fat: 14
- Saturated Fat: 8
- Carbohydrates: 38
- Fiber: 1.5
- Protein: 3
Keywords: banana loaf, banana bread, brown butter glaze, one-bowl recipe, kid-friendly, easy banana bread



