Love this? Save it for later!
Share the inspiration with your friends
My neighbor across the hall, a quiet guy named Dave who mostly kept to himself, asked me one Sunday afternoon why I couldn’t just braise the brisket in the same pan I used for the onions. I started to explain why that wouldn’t work—something about acidity and cooking times and the science of it all—then stopped. Honestly, I had no good reason. I just always did it the way my grandmother had, with separate pans and extra cleanup. So I shrugged and said, “You know what, let’s try it your way.”
That was three winters ago, and I haven’t gone back since. The whole thing felt wrong at first, dumping those deeply caramelized onions right into the pot with the raw meat. I kept thinking I’d ruined dinner. But the smell that filled my apartment that afternoon—sweet, savory, impossibly rich—told me otherwise. When I pulled that pot out of the oven, the brisket was so tender it practically fell apart when I looked at it. Dave got the first slice, and I think he knew I was eating my words right along with that meat.
This recipe is the result of that happy accident, the one where the student taught the teacher something real. It’s braised brisket with caramelized onions, but it’s also a reminder that sometimes the simplest approach wins. Maybe you’ve been there, stubbornly clinging to a method just because it’s how you learned. I get it. But this version—one pot, patient heat, and a whole lot of onion—changed the way I cook. It’s become the meal I make when I need to feed people I love, without a lot of fuss or fancy equipment. Just good food that tastes like it took all day, even if the secret is that it practically made itself.
Why You’ll Love This Recipe
This isn’t just another brisket recipe. It’s the one that makes your kitchen smell like Sunday dinner at three in the afternoon, the one where the leftovers are maybe even better than the first meal. Here’s why it works so well for real families on real budgets.
- Budget-Friendly Cut, Premium Results: Brisket is one of the most affordable cuts of beef, and slow braising transforms it into something that tastes like a splurge. You’re getting maximum flavor for minimum dollars.
- One-Pot Wonder: No separate pans for the onions, no transferring meat mid-cook. Everything happens in one Dutch oven, which means less cleanup and more time at the table.
- Picky Eater Approved: The long, slow cooking breaks down the meat until it’s fork-tender and practically melts in your mouth. The onions cook down into something sweet and mild that even kids who “don’t like onions” will eat without complaint. Trust me on this—I’ve tested it.
- Leftovers That Reheat Beautifully: This is the kind of dish that tastes better the next day. The flavors meld overnight, and the meat stays moist and tender when reheated. Perfect for busy weeknights when you need dinner in ten minutes.
- Company-Worthy Without the Stress: You can make this a day ahead, reheat it gently, and serve it like you spent hours fussing. Nobody needs to know you were folding laundry while it braised.
What makes this recipe different from the dozens of others out there is the caramelized onion method. Most recipes have you cook the onions separately or add them raw. By cooking them right in the pot with the brisket, they break down into this incredible, jammy sauce that coats every slice of meat. It’s not just a garnish—it’s the whole point. This is comfort food reimagined, simpler and more deeply flavored than anything you’d get at a restaurant. And honestly, it’s the kind of meal that makes you close your eyes after the first bite.
What Ingredients You Will Need
This recipe uses simple, honest ingredients to build layers of flavor without any fancy tricks. Most of these are pantry staples or easy to find at any grocery store. The magic is in how they come together.
For the Brisket
- 1 (4-5 pound) beef brisket, flat cut – Look for good marbling throughout. The fat keeps the meat moist during the long braise. I prefer the flat cut for even cooking, but the point cut works too if you don’t mind a little more fat to trim.
- 2 teaspoons kosher salt – Use Diamond Crystal if you can; it’s less salty by volume and gives you more control.
- 1 teaspoon black pepper, freshly ground – Freshly ground makes a real difference here. Don’t skip it.
- 2 tablespoons vegetable oil – Or any neutral oil with a high smoke point. Canola or avocado oil work great.
For the Caramelized Onions
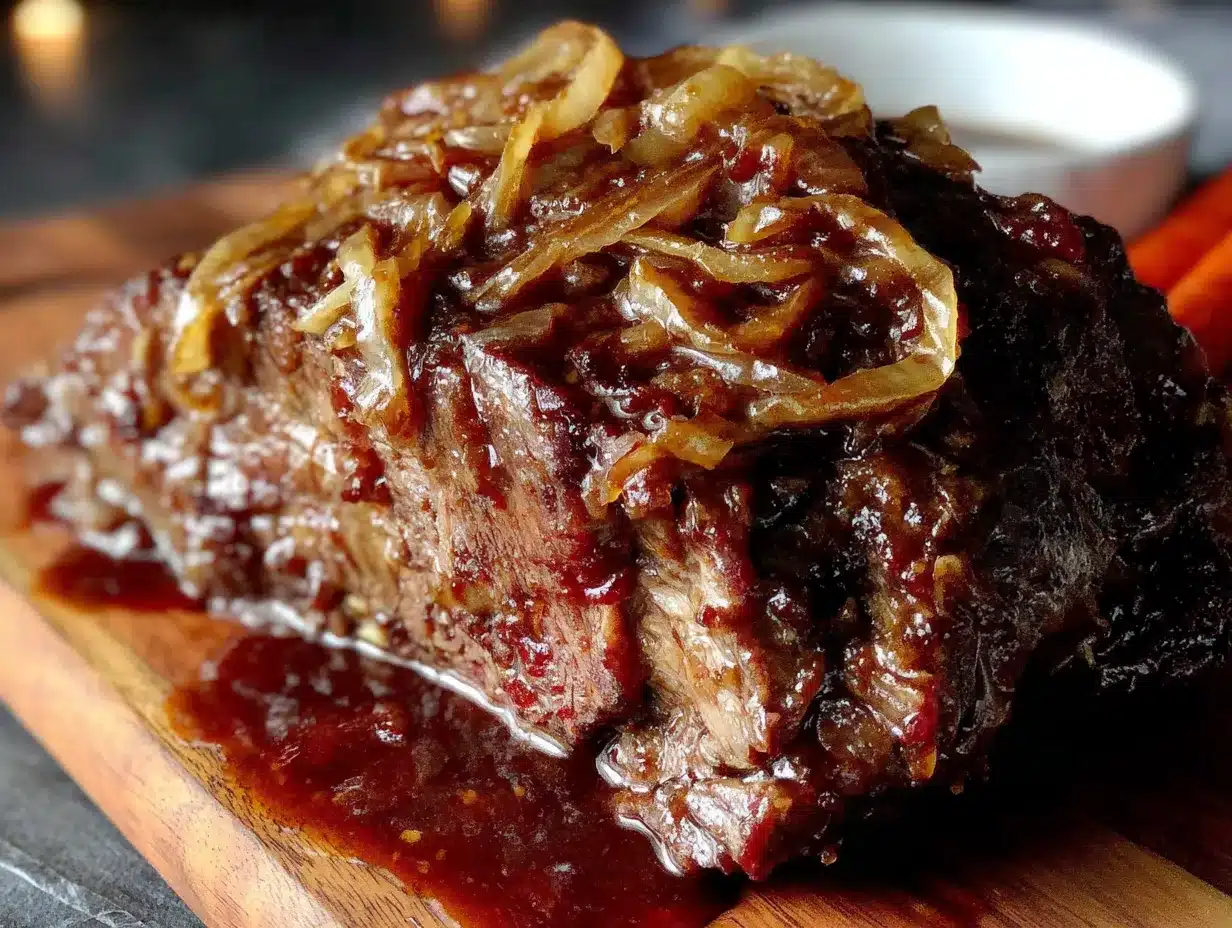
- 4 large yellow onions, thinly sliced – Yellow onions are the workhorse here. They break down beautifully and get sweet without turning bitter. Sweet onions like Vidalia work too, but yellow onions are more affordable and easier to find.
- 2 tablespoons unsalted butter – Adds richness that oil alone can’t match. If you’re dairy-free, use a good vegan butter or extra oil.
- 1 teaspoon brown sugar – Just a pinch to help the onions caramelize faster. Optional, but I’ve never regretted it.
- 1/2 teaspoon salt – Helps draw out moisture from the onions.
For the Braising Liquid
- 1 cup beef broth, low sodium – I recommend Swanson or Kitchen Basics for consistent flavor. Homemade is lovely if you have it, but store-bought works perfectly.
- 1/2 cup dry red wine – Something you’d actually drink, like a Cabernet or Merlot. If you don’t cook with wine, use another 1/2 cup of beef broth with a splash of balsamic vinegar for acidity.
- 2 tablespoons tomato paste – Adds depth and a subtle sweetness that balances the savory notes.
- 3 cloves garlic, minced – Fresh garlic is non-negotiable here. The jarred stuff just doesn’t deliver the same punch.
- 2 sprigs fresh thyme – Or 1 teaspoon dried thyme. Fresh is prettier, but dried works fine in a long braise.
- 2 bay leaves – Remove these before serving. They’re not meant to be eaten.
For Finishing (Optional but Recommended)
- 1 tablespoon all-purpose flour or cornstarch – For thickening the sauce at the end if you want it more like a gravy.
- 1 tablespoon cold water – To make a slurry with the flour or cornstarch.
- Fresh parsley, chopped – For garnish. Makes it look pretty, but it’s optional.
Equipment Needed
You don’t need a lot of fancy gear for this recipe, which is part of why I love it. Here’s what you’ll need:
- Dutch oven or heavy-bottomed pot with a tight-fitting lid – A 6 to 7-quart enameled cast iron pot is ideal. Le Creuset is the gold standard, but Lodge makes an excellent affordable version that I’ve used for years. If you don’t have a Dutch oven, a deep roasting pan covered tightly with foil works in a pinch.
- Sharp chef’s knife – For slicing onions. A dull knife makes this job miserable. I use a Wüsthof, but any sharp knife will do.
- Cutting board – Preferably wood or plastic. Give yourself plenty of room for those onions.
- Tongs – For flipping the brisket during searing. Silicone-tipped ones won’t scratch your pot.
- Measuring cups and spoons – For accuracy. I’ve been cooking long enough to eyeball most things, but this recipe benefits from precision.
- Foil or parchment paper – For covering the brisket while it rests. Don’t skip the resting step.
One tip I learned the hard way: make sure your pot is oven-safe up to at least 350°F. Some cheaper pots have plastic handles that will melt. Ask me how I know.
Preparation Method
This recipe takes time, but most of it is hands-off. The actual work is maybe 30 minutes. The rest is letting the oven do its thing. Here’s how it all comes together.
- Prep the brisket (10 minutes): Pat the brisket dry with paper towels. This is important—moisture is the enemy of a good sear. Season generously on all sides with the kosher salt and black pepper. Let it sit at room temperature for 20-30 minutes while you prep the onions. Don’t rush this; the salt needs time to penetrate the meat.
- Caramelize the onions (25-30 minutes): Heat your Dutch oven over medium heat and add the butter. Once it’s melted and foaming, add the sliced onions, brown sugar, and 1/2 teaspoon salt. Stir to coat. Cook, stirring occasionally, for 25-30 minutes until the onions are deep golden brown and jammy. Don’t crank the heat to speed this up—you’ll burn them. Low and slow is the way. If they start sticking, add a tablespoon of water and scrape up the brown bits. That’s flavor.
- Sear the brisket (8-10 minutes): Push the caramelized onions to the edges of the pot. Add the vegetable oil to the center. Once it shimmers, carefully place the brisket in the pot, fat side down. Sear without moving for 4-5 minutes until a deep brown crust forms. Flip and repeat on the other side. Don’t crowd the pot; if your brisket is too big, cut it in half and sear in batches. A good sear is non-negotiable for deep flavor.
- Build the braising liquid (5 minutes): Remove the brisket to a plate. Add the minced garlic to the pot and cook for 30 seconds until fragrant. Stir in the tomato paste and cook for another minute, scraping up any browned bits from the bottom. Pour in the red wine and let it bubble for 2 minutes, reducing slightly. Add the beef broth, thyme sprigs, and bay leaves. Stir everything together, making sure to incorporate those caramelized onions into the liquid.
- Return the brisket and braise (3-4 hours): Place the brisket back in the pot, nestling it into the onion mixture. The liquid should come about halfway up the sides of the meat. If it doesn’t, add a little more broth or water. Bring the liquid to a gentle simmer on the stovetop. Cover the pot with the lid and transfer to a preheated 325°F oven. Braise for 3 to 4 hours, or until the brisket is fork-tender. Check at the 2-hour mark—if the liquid is reducing too much, add a splash of water. The meat should be submerged about a third of the way up.
- Rest and slice (20-30 minutes): Carefully remove the pot from the oven. Transfer the brisket to a cutting board and tent loosely with foil. Let it rest for at least 20 minutes. This is crucial—if you slice too soon, all those juices will run out and you’ll have dry meat. While the meat rests, skim any excess fat from the surface of the braising liquid. Remove the thyme sprigs and bay leaves.
- Finish the sauce (optional, 5 minutes): If you want a thicker gravy, make a slurry by whisking the flour or cornstarch with the cold water until smooth. Place the pot over medium heat and whisk in the slurry. Simmer for 2-3 minutes until the sauce thickens slightly. Taste and adjust seasoning with salt and pepper.
- Slice and serve: Slice the brisket against the grain into 1/2-inch thick slices. This is important—slicing with the grain gives you tough, stringy meat. Spoon the caramelized onion sauce generously over the slices. Garnish with fresh parsley if you’re feeling fancy.
Cooking Tips & Techniques
I’ve made this recipe more times than I can count, and I’ve messed it up plenty along the way. Here are the lessons I learned so you don’t have to.
Don’t rush the onions. The first time I made this, I tried to speed up the caramelization by cranking the heat. The onions burned on the outside and stayed raw on the inside. It was a disaster. Low to medium heat, patience, and occasional stirring are your friends. If you’re short on time, you can caramelize the onions a day ahead and keep them in the fridge.
Let the meat come to room temperature. I know it’s tempting to throw a cold brisket straight into the pot, but trust me on this. A cold brisket will cool down your pan and prevent a proper sear. Give it 20-30 minutes on the counter after seasoning. Your crust will be infinitely better.
Trim the fat cap, but not too much. Brisket has a thick fat cap on one side. Leave about 1/4 inch of fat on there. It renders during the long braise and keeps the meat moist. If you trim it all off, you’ll end up with dry brisket. I learned this the hard way when I was trying to be “healthy” and regretted every bite.
Check for doneness with a fork, not a timer. Brisket is done when you can insert a fork into the thickest part and it twists easily with almost no resistance. Ovens vary, and every brisket is different. Start checking at the 3-hour mark. If it’s not tender, give it another 30 minutes and check again.
Slice against the grain. This is the single most important tip for tender brisket. Look at the direction of the muscle fibers before you slice. Cut perpendicular to those lines. If you slice with the grain, you’ll be chewing for days. I still get this wrong sometimes when I’m distracted, and I always regret it.
Make it ahead. This brisket is actually better the next day. Cool it completely in the braising liquid, then refrigerate overnight. The next day, the fat solidifies on top and is easy to remove. Reheat gently in a 300°F oven for 20-30 minutes. The flavors are deeper, and the meat is somehow even more tender.
Variations & Adaptations
One of the best things about this recipe is how adaptable it is. Here are some ways to make it your own.
For a richer, deeper flavor: Add 2-3 sliced carrots and 2 celery stalks to the pot along with the onions. They’ll break down into the sauce and add natural sweetness. I do this when I want the sauce to be extra hearty without adding sugar.
Make it gluten-free: The recipe is naturally gluten-free if you skip the flour slurry at the end. Use cornstarch or arrowroot powder instead if you want a thicker sauce. Double-check your beef broth—some brands contain wheat. Pacific Foods and Imagine make good gluten-free options.
Swap the wine: If you don’t cook with alcohol, replace the red wine with an equal amount of beef broth plus 1 tablespoon of balsamic vinegar. The vinegar adds the acidity you’d get from wine without the alcohol. I’ve done this for friends who don’t drink, and nobody noticed the difference.
Go low and slow in a slow cooker: After searing the brisket and caramelizing the onions, transfer everything to a slow cooker. Cook on low for 8-10 hours or on high for 4-5 hours. The texture is slightly different—less concentrated flavor—but it’s still delicious. I do this in the summer when I don’t want to heat up the kitchen.
Add some heat: If your family likes spice, add 1-2 chipotle peppers in adobo sauce along with the garlic. The smoky heat pairs beautifully with the sweet caramelized onions. Start with one pepper and taste before adding more. I accidentally added three once, and my kids weren’t impressed.
Use a different cut of meat: This method works beautifully with chuck roast or bottom round. The cooking time will be shorter—about 2.5 to 3 hours for chuck roast. The texture is different, but the flavor is just as good. It’s a great option if brisket is hard to find or too expensive.
Serving & Storage Suggestions
This brisket is a meal on its own, but a few thoughtful sides turn it into something special. Here’s how I like to serve and store it.
Serving temperature and presentation: Serve the brisket warm, not piping hot. Let it rest after slicing for a few minutes so the juices redistribute. Arrange the slices on a platter and spoon the caramelized onion sauce over the top. A sprinkle of fresh parsley or thyme adds a pop of color. I like to serve it family-style, letting everyone help themselves.
What to serve with it: Mashed potatoes are the classic choice—the creamy texture soaks up that onion sauce perfectly. Buttered egg noodles, roasted carrots, or a simple green salad with vinaigrette also work well. For a low-carb option, serve it over cauliflower mash or alongside roasted Brussels sprouts. My family loves it with crusty bread to mop up every last drop of sauce.
Storage instructions: Cool the brisket completely in the braising liquid. Transfer to an airtight container and refrigerate for up to 4 days. The flavors will continue to develop, and the meat will become even more tender. I actually prefer the leftovers—they’re somehow better than the first meal.
Freezing instructions: This brisket freezes beautifully. Slice the cooled brisket and pack it in freezer-safe bags or containers with enough sauce to cover. Freeze for up to 3 months. Thaw overnight in the refrigerator before reheating.
Reheating tips: The best way to reheat is low and slow. Place the brisket and sauce in a covered baking dish and warm in a 300°F oven for 20-30 minutes. If you’re in a hurry, you can microwave individual portions, but the texture won’t be as good. Add a splash of beef broth or water if the sauce seems too thick.
How flavors develop: The first day, this brisket is delicious. The second day, it’s transcendent. The onions continue to meld with the beef, and the sauce gets richer and more complex. Don’t be afraid to make it a day ahead—your future self will thank you.
Nutritional Information & Benefits
This recipe is comfort food at its finest, but it also has some surprising nutritional benefits. Here’s the breakdown.
Estimated nutritional values per serving (based on 8 servings):
- Calories: 485
- Protein: 42g
- Fat: 28g
- Carbohydrates: 12g
- Fiber: 2g
- Sugar: 6g
- Sodium: 680mg
Health benefits of key ingredients: Beef brisket is an excellent source of high-quality protein, iron, and B vitamins, especially B12, which supports energy and brain function. Onions are packed with antioxidants and prebiotic fiber that supports gut health. Garlic adds immune-boosting compounds, and the small amount of red wine provides resveratrol, which has heart-healthy properties.
Dietary considerations: This recipe is naturally gluten-free (just skip the flour slurry or use cornstarch). It’s also low-carb and keto-friendly if you skip the brown sugar and serve it with low-carb sides. For dairy-free, use oil instead of butter for the onions. It’s not suitable for vegetarian or vegan diets, but you could try the method with a large portobello mushroom or seitan for a plant-based version.
Potential allergens: This recipe contains dairy (butter) and may contain gluten depending on your broth and thickening method. Always check labels if cooking for someone with allergies.
My personal perspective: I don’t pretend this is health food. It’s rich, indulgent, and meant to be enjoyed in moderation. But I feel good serving it to my family because I know exactly what’s in it—real ingredients, no preservatives, and a whole lot of love. That counts for something.
Conclusion
This braised brisket with caramelized onions is the kind of recipe that becomes a family tradition. It’s the meal you make when you want to feed people deeply, the one that fills your home with warmth and your belly with comfort. It’s affordable, forgiving, and endlessly adaptable—exactly what a busy home cook needs.
I love this recipe because it reminds me that sometimes the best cooking comes from letting go of control. That afternoon with Dave taught me to trust the process, to listen to good ideas even when they come from unexpected places, and to never underestimate the power of a slow-cooked onion. Every time I make this brisket, I think of him standing in my doorway, shrugging, asking why I couldn’t just keep it simple.
Now I want to hear from you. Have you tried braising brisket with caramelized onions? What’s your favorite way to serve it? Drop a comment below and let me know. And if you make this recipe, tag me in your photos—I love seeing your kitchen victories. Until next time, happy cooking, and remember: sometimes the best meals are the ones you almost didn’t make.
Frequently Asked Questions
Can I use a different cut of beef for this recipe?
Absolutely. Chuck roast or bottom round work beautifully with this method. The cooking time will be shorter—about 2.5 to 3 hours for chuck roast. Just look for a cut with good marbling for the best results.
Do I have to use wine in the braising liquid?
Not at all. If you don’t cook with alcohol, replace the red wine with an equal amount of beef broth plus 1 tablespoon of balsamic vinegar. The vinegar provides the acidity you need to balance the richness of the meat.
How do I know when the brisket is done?
The best test is the fork test. Insert a fork into the thickest part of the brisket. If it twists easily with almost no resistance, it’s done. Start checking at the 3-hour mark, but don’t be surprised if it needs closer to 4 hours.
Can I make this in a slow cooker instead of the oven?
Yes! After searing the brisket and caramelizing the onions on the stovetop, transfer everything to a slow cooker. Cook on low for 8-10 hours or on high for 4-5 hours. The flavor will be slightly less concentrated, but it’s still delicious.
How should I reheat leftover brisket without drying it out?
The best method is to reheat it low and slow. Place the brisket and sauce in a covered baking dish and warm in a 300°F oven for 20-30 minutes. Add a splash of beef broth or water if the sauce seems too thick. Avoid the microwave if you can—it tends to dry out the meat.
Pin This Recipe!
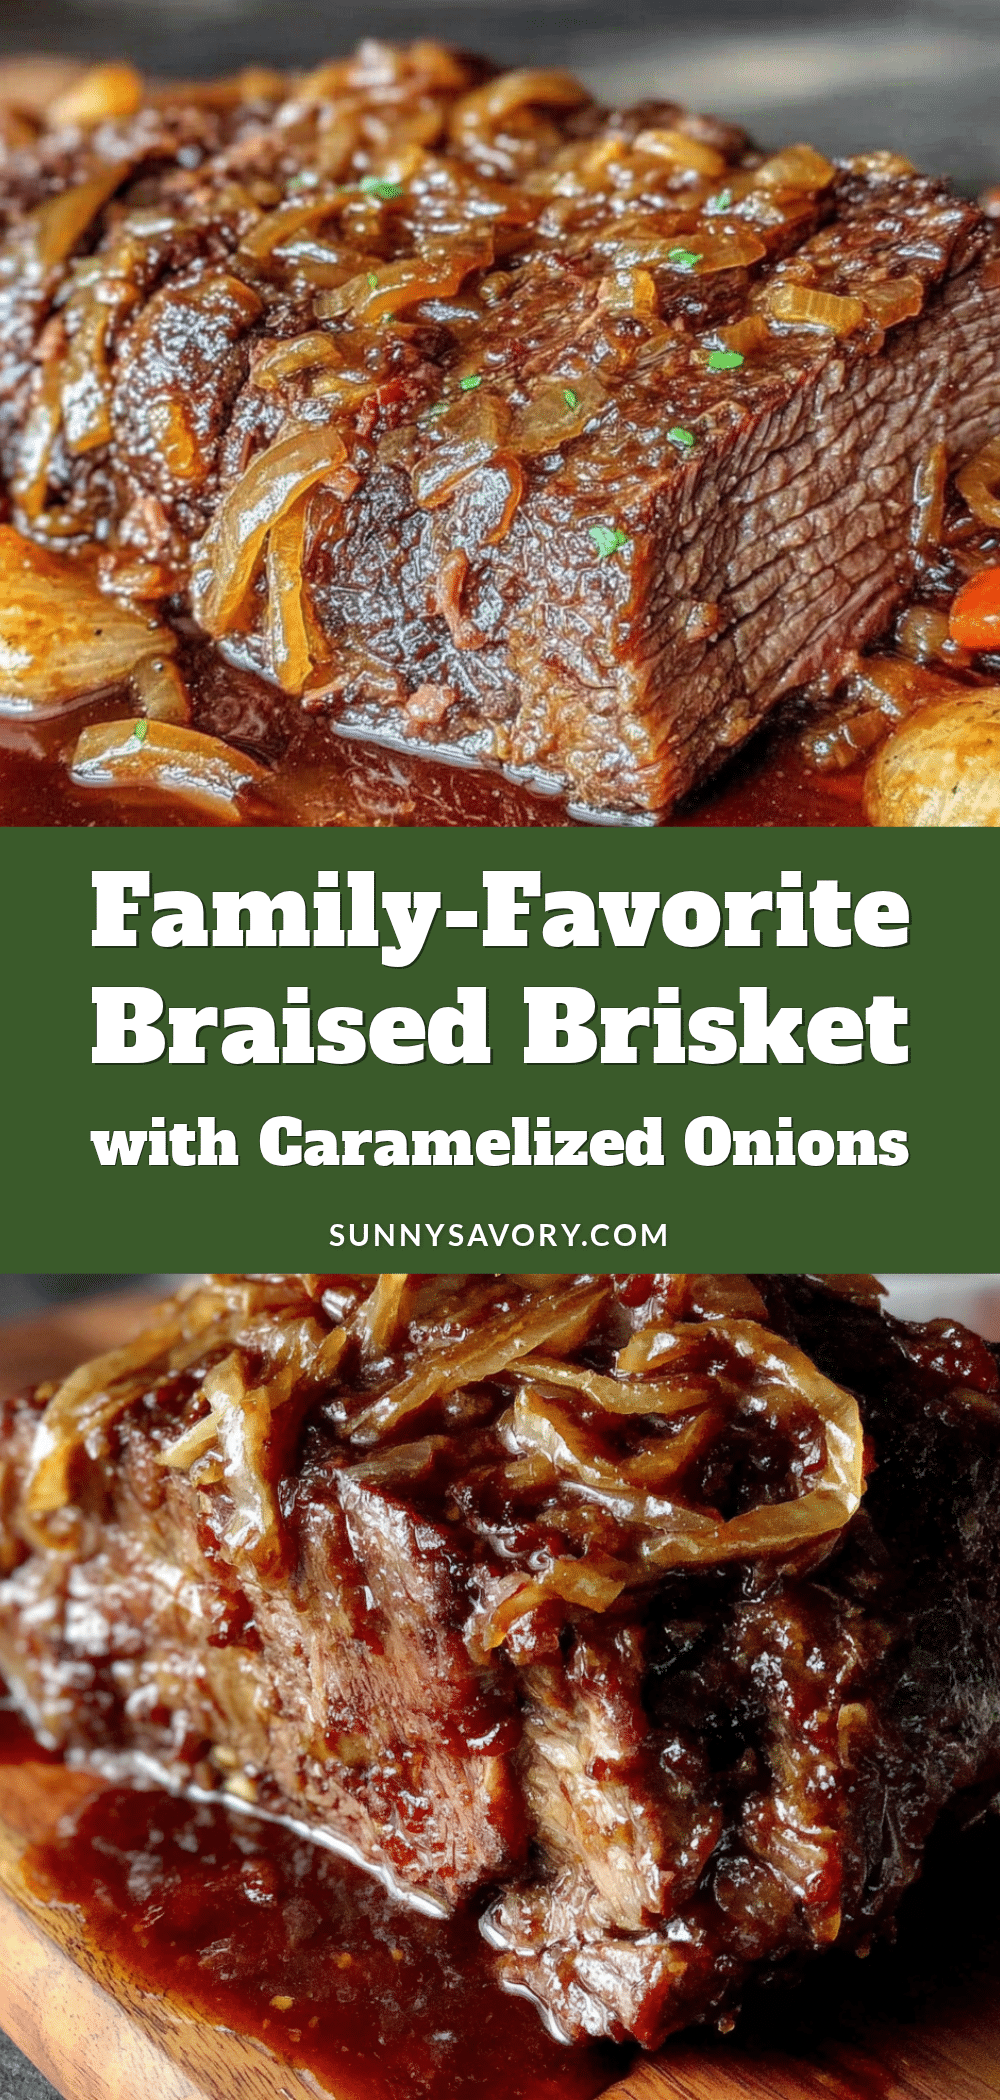
The Best Easy Braised Brisket with Caramelized Onions
This one-pot braised brisket with caramelized onions is a budget-friendly, deeply flavorful comfort food that transforms an affordable cut of beef into a tender, company-worthy meal. The secret is cooking the onions right in the pot with the meat, creating a jammy sauce that coats every slice.
- Prep Time: 30 minutes
- Cook Time: 3 hours 30 minutes
- Total Time: 4 hours
- Yield: 8 servings 1x
- Category: Main Course
- Cuisine: American
Ingredients
- 1 (4-5 pound) beef brisket, flat cut
- 2 teaspoons kosher salt
- 1 teaspoon black pepper, freshly ground
- 2 tablespoons vegetable oil
- 4 large yellow onions, thinly sliced
- 2 tablespoons unsalted butter
- 1 teaspoon brown sugar
- 1/2 teaspoon salt
- 1 cup beef broth, low sodium
- 1/2 cup dry red wine
- 2 tablespoons tomato paste
- 3 cloves garlic, minced
- 2 sprigs fresh thyme
- 2 bay leaves
- 1 tablespoon all-purpose flour or cornstarch (optional, for thickening)
- 1 tablespoon cold water (optional, for slurry)
- Fresh parsley, chopped (for garnish)
Instructions
- Prep the brisket: Pat the brisket dry with paper towels. Season generously on all sides with kosher salt and black pepper. Let sit at room temperature for 20-30 minutes.
- Caramelize the onions: Heat a Dutch oven over medium heat and add butter. Once melted and foaming, add sliced onions, brown sugar, and 1/2 teaspoon salt. Cook, stirring occasionally, for 25-30 minutes until deep golden brown and jammy.
- Sear the brisket: Push onions to the edges of the pot. Add vegetable oil to the center. Once shimmering, place brisket fat side down and sear without moving for 4-5 minutes until deep brown crust forms. Flip and repeat on the other side.
- Build the braising liquid: Remove brisket to a plate. Add minced garlic to the pot and cook for 30 seconds. Stir in tomato paste and cook for 1 minute, scraping up browned bits. Pour in red wine and let bubble for 2 minutes. Add beef broth, thyme sprigs, and bay leaves. Stir to combine.
- Return the brisket and braise: Place brisket back in the pot, nestling into the onion mixture. Liquid should come about halfway up the sides of the meat. Bring to a gentle simmer on the stovetop. Cover and transfer to a preheated 325°F oven. Braise for 3 to 4 hours until fork-tender.
- Rest and slice: Remove pot from oven. Transfer brisket to a cutting board and tent loosely with foil. Let rest for at least 20 minutes. Skim excess fat from braising liquid. Remove thyme sprigs and bay leaves.
- Finish the sauce (optional): If desired, make a slurry by whisking flour or cornstarch with cold water. Place pot over medium heat and whisk in slurry. Simmer for 2-3 minutes until thickened. Season with salt and pepper.
- Slice and serve: Slice brisket against the grain into 1/2-inch thick slices. Spoon caramelized onion sauce over slices. Garnish with fresh parsley if desired.
Notes
Don’t rush the onions; low and slow is key. Let the meat come to room temperature before searing. Trim the fat cap to about 1/4 inch. Check doneness with a fork—it should twist easily. Slice against the grain for tenderness. This brisket is even better the next day; cool in the braising liquid and refrigerate overnight.
Nutrition
- Serving Size: 1 serving (about 6-8
- Calories: 485
- Sugar: 6
- Sodium: 680
- Fat: 28
- Saturated Fat: 10
- Carbohydrates: 12
- Fiber: 2
- Protein: 42
Keywords: braised brisket, caramelized onions, one-pot meal, beef brisket, comfort food, slow-cooked, budget-friendly, gluten-free option



