Love this? Save it for later!
Share the inspiration with your friends
My neighbor, an older woman named Gloria who grows tomatoes in her front yard like some people grow petunias, watched me struggling with a box of instant yeast at the grocery store parking lot. I was trying to read the expiration date in the rain, and my three-year-old was having a meltdown because I wouldn’t buy the giant bag of gummy bears. Gloria just shook her head, smiled, and said, “Come over tomorrow. I’ll show you something better.”
I thought she was going to teach me some complicated, time-consuming method that required a degree in food science. Honestly, I was ready to say no. We were on a tight budget, and I didn’t need another kitchen project that would end in frustration and wasted flour. But Gloria insisted, and the next morning, I found myself standing in her sunny kitchen while she pulled out a jar of bubbling, foamy liquid that smelled like sour apples and warm bread. “This,” she said, “is my sourdough starter. It’s been alive longer than my youngest grandchild.”
That was three years ago, and that same starter is still going strong in my fridge. It has survived power outages, forgotten feedings, and even a move across town. And here is the thing I never expected — it is incredibly easy to make your own. You don’t need fancy equipment, expensive flour, or a perfectly controlled kitchen environment. You just need patience, a little bit of time each day, and maybe a willing helper in the form of a curious kid who wants to stir and watch bubbles form.
Maybe you have been there — staring at beautiful sourdough loaves online, thinking that kind of baking is reserved for people with more time and skill than you have. Let me tell you, it is not. This easy homemade sourdough starter takes seven days, costs pennies to maintain, and is honestly one of the most rewarding things you can do with your hands. Plus, it makes the best grilled cheese sandwiches you have ever had. I am not exaggerating.
Why You’ll Love This Recipe
I have made this starter dozens of times now, shared it with friends, and even taught a few neighborhood kids how to feed it during summer break. Here is why this particular method works so well for real families on real budgets.
- Kid-Friendly & Fun: My kids fight over who gets to stir the starter each morning. They love watching the bubbles form and asking if it is “alive” today. It is a simple science experiment that happens right on your counter.
- Budget-Friendly: You only need flour and water. No fancy organic heritage grains required. All-purpose flour works perfectly, and you likely already have it in your pantry.
- Simple Ingredients: Two ingredients. That is it. Flour and water. No yeast packets, no special starters, no complicated chemistry.
- Takes Just 5 Minutes a Day: The active work is minimal. Feed it, stir it, walk away. Perfect for busy mornings when you are already making breakfast and packing lunches.
- Zero Waste: The discard can be used for pancakes, crackers, or even pizza dough. Nothing goes to waste, which is a huge win for a budget-conscious kitchen.
- Unbelievably Satisfying: There is something deeply satisfying about creating something alive from just flour and water. It feels like magic, but it is just science and patience.
What makes this different from other starter tutorials? I have tested this method in a cold kitchen in January and a humid kitchen in July. I have used cheap store-brand flour and fancy bread flour. It works every single time. The secret is not perfection — it is consistency. And that is something any home cook can manage.
This is the kind of recipe that makes you feel like a real baker, even if you have never baked a loaf of bread in your life. It is forgiving, it is patient, and it rewards you with the most incredible flavor. Plus, your house will smell amazing. That alone is worth it.
What Ingredients You Will Need
This recipe uses the simplest ingredients imaginable. There is no long shopping list, no specialty items, and no expensive additions. You probably have everything you need right now.
- All-Purpose Flour: This is your workhorse. Regular all-purpose flour works wonderfully. I personally use Gold Medal or store brand — both work fine. Do not stress about buying expensive bread flour. Save that for later when you are baking loaves.
- Whole Wheat Flour (Optional but Recommended): For the first feeding only, using whole wheat flour gives your starter a nice boost of natural yeast and bacteria. It is not required, but it helps get things going faster. If you do not have it, just use all-purpose.
- Filtered or Tap Water: I use regular tap water that has sat out for a few hours to let the chlorine evaporate. If your water is heavily chlorinated, use bottled or filtered water. The temperature should be lukewarm — think bath water, not hot tea.
That is genuinely it. Two ingredients for the starter itself. You will also need a clean jar or container, but we will cover that in the equipment section.
Ingredient Selection Tips: Look for unbleached all-purpose flour if you can find it. The natural yeast in the flour is more active in unbleached varieties. But honestly, I have started starters with bleached flour and they worked fine. It just took an extra day or two to get going. Do not let perfect be the enemy of good — use what you have.
Substitution Guidance: If you are gluten-sensitive, you can use gluten-free all-purpose flour blends. The process works the same, though the texture will be different. Rye flour is another excellent option for a vigorous starter — it ferments quickly and produces a lovely tangy flavor. Just note that rye starters behave a bit differently and may need more frequent feedings.
Water Temperature Matters: Cold water slows down fermentation. Hot water kills the yeast. Aim for lukewarm water, around 70-75°F. If your kitchen is cold, use slightly warmer water. If it is hot, use cooler water. You are aiming for a cozy environment for the yeast to thrive.
Equipment Needed
You do not need a fancy setup for this. Here is what I use and recommend.
- A Glass Jar or Container: A quart-sized mason jar works perfectly. I use a wide-mouth jar because it is easier to stir and clean. Avoid metal containers, as the acidity of the starter can react with them over time. Plastic works in a pinch, but glass is best because you can see through it.
- A Kitchen Scale (Optional but Helpful): Weighing your flour and water is more accurate than measuring by volume. If you do not have a scale, use the spoon-and-level method for flour. A digital scale costs about $15 and is worth it if you plan to bake regularly.
- A Wooden or Silicone Spoon: Metal spoons are fine, but wooden or silicone ones are gentler on your jar. I use a small silicone spatula that reaches the bottom of the jar easily.
- A Kitchen Towel or Coffee Filter: You need to cover your jar loosely so air can flow but dust and bugs stay out. A clean kitchen towel secured with a rubber band works great. Coffee filters are also perfect because they let air circulate.
- A Rubber Band or Marker: Use this to mark the starting height of your starter on the jar. It is so satisfying to see how much it grows overnight.
Budget-Friendly Tip: Do not go out and buy special equipment. A clean pickle jar works. A chopstick works as a stirrer. A piece of cheesecloth or even a paper towel works as a cover. Use what you have.
Preparation Method
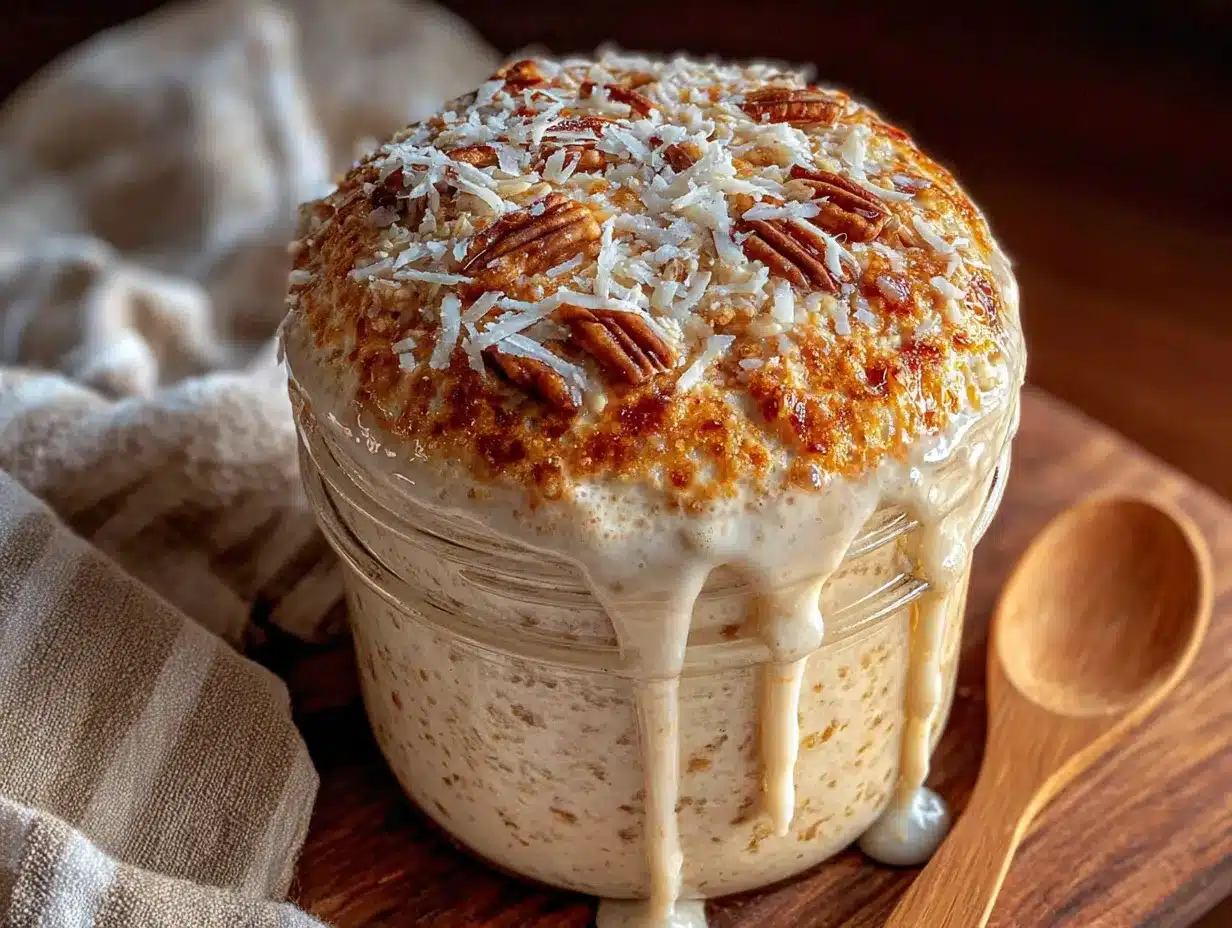
This is the fun part. I am going to walk you through each day, step by step. Remember, this is a living thing, and it will behave differently depending on your kitchen’s temperature and humidity. That is normal and okay.
Day 1: The Beginning
- Combine 1 cup (120g) of all-purpose flour and 1/2 cup (120ml) of lukewarm water in your clean jar. If you have whole wheat flour, use half whole wheat and half all-purpose for this first feeding.
- Stir vigorously until no dry flour remains. It should look like a thick, lumpy paste. Scrape down the sides of the jar with your spatula.
- Cover loosely with your towel or coffee filter and secure with a rubber band. Place the jar in a warm spot in your kitchen — on top of the refrigerator or near the stove works well.
- Mark the height of the mixture on the jar with your rubber band or marker.
- Leave it alone for 24 hours. You might see a few bubbles by the end of the day, or you might not. Both are normal.
Day 2: First Signs of Life
- Check your starter. It might have a layer of liquid on top (this is called “hooch” and is normal). It might smell a bit funky — like feet or old cheese. This is good! The bacteria are establishing themselves.
- Discard half of the starter. I know this feels wasteful, but it is necessary. You are removing waste products and giving the yeast fresh food. Save the discard in a separate container if you want to use it for pancakes later.
- Add 1 cup (120g) of fresh all-purpose flour and 1/2 cup (120ml) of lukewarm water. Stir well, scrape down the sides, and cover again.
- Mark the new height. You might see more bubbles today, or you might not. Do not worry if it seems quiet.
Day 3-4: The Quiet Period
- Repeat the feeding process: discard half, add fresh flour and water, stir, mark the height, and cover.
- During these days, your starter might seem inactive. It might not bubble much, and it might smell sour or even a bit like nail polish remover. This is normal. The yeast and bacteria are still figuring out their balance.
- Keep feeding it every 24 hours. Consistency is more important than activity at this stage.
- If you see a layer of liquid on top, that means your starter is hungry. It is fine — just stir it back in before discarding and feeding.
Day 5-6: The Awakening
- Around day five, you should start seeing consistent bubbles. The starter might double in size within 8-12 hours of feeding. It will smell more pleasant — like yogurt or sourdough bread.
- Continue feeding every 24 hours. If your starter is very active and doubles in less than 12 hours, you can switch to feeding twice a day (morning and evening).
- Your starter should be bubbly, airy, and have a pleasant sour aroma. It should smell like something you would want to eat.
Day 7: Ready to Bake
- On day seven, feed your starter as usual. This time, watch it closely. It should double in size within 4-6 hours after feeding. It should be full of bubbles, both large and small.
- To test if it is ready, drop a small spoonful of starter into a glass of water. If it floats, it is ready to use. If it sinks, give it another day or two of feedings.
- Congratulations! You have a mature sourdough starter. You can now use it to bake bread, or you can store it in the refrigerator and feed it once a week.
Personal Tip: I always feed my starter at the same time each day, usually right after breakfast. My kids know the routine now — they grab the jar, I measure the flour, and they stir. It has become a lovely little ritual that takes less than five minutes.
Cooking Tips & Techniques
I have made every mistake in the book with sourdough starter. Here is what I learned so you do not have to repeat my errors.
Temperature Matters More Than You Think: My first starter failed because I kept it in a drafty spot near the window. The yeast went dormant. Keep your starter in a warm, consistent spot. If your kitchen is cold, try placing the jar on top of the refrigerator or near the water heater. In winter, I sometimes wrap a towel around the jar for insulation.
Do Not Overfeed: I once fed my starter three times a day because I was excited. It got weak and watery. Stick to once a day during the initial week. More is not better — consistency is.
Trust Your Senses: Your nose knows. A healthy starter smells pleasantly sour, like yogurt or ripe fruit. If it smells like acetone or nail polish remover, it is hungry. If it smells rotten or like garbage, something went wrong and you should start over. But honestly, that rarely happens if you are feeding it regularly.
The Float Test Is Your Friend: Before you bake with your starter, always do the float test. Drop a spoonful into a glass of room-temperature water. If it floats, it is active and ready. If it sinks, give it another feeding and wait a few hours.
Discard Is Not Waste: Do not throw away your discard! Collect it in a separate container in the fridge and use it for sourdough pancakes, crackers, or even pizza dough. It adds incredible flavor to any baked good. My kids beg for sourdough pancakes on weekends.
Be Patient with Yourself: My second starter took ten days to become active, not seven. My third took only five. Every kitchen is different. Do not get discouraged if yours takes a little longer. You are not failing — your starter is just on its own schedule.
Variations & Adaptations
Once you have a healthy starter, the possibilities are endless. Here are some ways to adapt and customize.
Whole Grain Starter: Substitute half of the all-purpose flour with whole wheat, rye, or spelt flour during feedings. Whole grain starters are more vigorous and have a deeper, nuttier flavor. They also tend to be more forgiving if you miss a feeding.
Gluten-Free Starter: Use a gluten-free all-purpose flour blend that contains xanthan gum. The process is the same, but the starter will be thinner and less bubbly. It works beautifully for gluten-free sourdough bread. I have a friend who has maintained a gluten-free starter for two years now.
Herb & Garlic Infusion: Add a clove of garlic or a sprig of rosemary to your jar for a few hours before discarding. This infuses the starter with subtle flavor. Remove the herbs before feeding. This is wonderful for savory breads and focaccia.
Sweet Starter: Add a teaspoon of honey or maple syrup to your feeding once a week. This encourages yeast activity and adds a hint of sweetness. Perfect for cinnamon rolls or sourdough pancakes.
Dried Starter Backup: Spread a thin layer of active starter on parchment paper and let it dry completely. Crumble it into a bag and store it in a cool, dark place. This is your emergency backup in case your main starter dies. I have a bag in my pantry labeled “Emergency Sourdough” — it makes me feel very prepared.
Serving & Storage Suggestions
Once your starter is mature, you have two options: keep it on the counter for daily baking, or store it in the refrigerator for weekly use.
Counter Storage (Daily Baking): Feed your starter once a day at the same time. Keep it covered loosely. Use it when it is at its peak activity, usually 4-6 hours after feeding. This is ideal if you bake several times a week.
Refrigerator Storage (Weekly Baking): Feed your starter, let it sit at room temperature for 2 hours, then place it in the refrigerator. Feed it once a week. Before baking, take it out, feed it, and let it sit at room temperature for 8-12 hours until it is active again. This is perfect for busy families who bake on weekends.
Freezing Starter: You can freeze your starter for up to six months. Feed it, let it sit for an hour, then pour it into a freezer-safe bag. To revive, thaw it in the refrigerator overnight, then feed it at room temperature for a few days until it is active again.
Reheating and Using Cold Starter: Always bring refrigerated starter to room temperature before using it in a recipe. Cold starter will not be as active and can affect your baking times. Give it a feeding and let it sit out for a few hours before using.
Flavor Development Over Time: Your starter will continue to develop flavor as it ages. A month-old starter is good. A year-old starter is incredible. The sourness deepens, the aroma becomes more complex, and your bread will have that unmistakable tang that makes sourdough so special. My starter is three years old now, and it makes the best bread I have ever tasted.
Nutritional Information & Benefits
Sourdough bread made from a natural starter has several health benefits compared to commercially yeasted bread.
- Lower Glycemic Index: The fermentation process breaks down some of the carbohydrates, making sourdough bread easier on blood sugar levels. This is especially beneficial for those managing diabetes or insulin resistance.
- Improved Digestibility: The long fermentation breaks down gluten and phytic acid, making nutrients more available for absorption. Many people who are sensitive to commercial bread find they can tolerate sourdough.
- Natural Preservative: The acetic acid produced during fermentation acts as a natural preservative. Sourdough bread stays fresh longer than commercial bread — up to a week on the counter.
- Probiotic Potential: While most probiotics are killed during baking, the prebiotic fibers remain and support gut health. The fermentation process also creates beneficial compounds that support overall wellness.
Estimated Nutritional Values (per slice of sourdough bread): Approximately 120 calories, 3g protein, 23g carbohydrates, 0.5g fat, 1g fiber. Values vary based on flour type and hydration level.
Allergen Note: Traditional sourdough contains gluten. For a gluten-free option, use a gluten-free flour blend and maintain a separate gluten-free starter. Always label your jars clearly to avoid cross-contamination.
Conclusion
Making your own sourdough starter is one of those kitchen projects that feels intimidating until you actually do it. Then you wonder why you waited so long. It is simple, it is cheap, and it connects you to a tradition that is thousands of years old. Every time I feed my starter, I think about Gloria and her tomatoes and the rainy day she saved me from a box of instant yeast.
This is not about being a perfect baker or having the most beautiful bread on Instagram. It is about making something real with your hands, teaching your kids where food comes from, and creating a little bit of magic in your own kitchen. The first time you bake a loaf of bread from your own starter, you will understand. It is worth every single day of waiting.
I would love to hear how your starter turns out. Come back and tell me about it in the comments — how long did it take? What did it smell like? Did your kids get involved? And if you run into any trouble, just ask. I have been through it all, and I am happy to help. Happy baking, friend!
Frequently Asked Questions
Can I use bleached all-purpose flour for my starter?
Yes, you can. Bleached flour works fine, though it may take an extra day or two to become active. Unbleached flour is preferred because it contains more natural yeast, but do not let that stop you from using what you have on hand.
What if my starter smells like nail polish remover?
That smell means your starter is hungry. The bacteria are producing acetone as a byproduct of fermentation. Simply feed it as usual, and the smell should disappear within a day. If it persists, try feeding twice a day for a few days.
Can I skip a day of feeding?
During the first seven days, try not to skip feedings. The yeast and bacteria need consistent food to establish themselves. After your starter is mature, you can store it in the refrigerator and feed it once a week. If you must skip a day during the initial week, place the starter in the refrigerator and feed it as soon as you can.
Why is there liquid on top of my starter?
That liquid is called “hooch.” It is a sign that your starter is hungry and needs to be fed. Simply stir it back into the starter before discarding and feeding. A little hooch is normal, especially if you feed once a day. If there is a lot, consider feeding twice a day.
How do I know if my starter has gone bad?
A healthy starter smells pleasantly sour, like yogurt or ripe fruit. If it smells rotten, like garbage, or if you see mold (fuzzy spots in colors like pink, green, or black), discard it and start over. Mold is rare if you are feeding regularly and keeping your jar clean, but it can happen. When in doubt, throw it out and start fresh.
Pin This Recipe!

Easy Homemade Sourdough Starter in 7 Days
Learn how to make your own sourdough starter from scratch in just 7 days with only flour and water. This simple, budget-friendly method is perfect for beginners and yields a bubbly, active starter for baking delicious bread.
- Prep Time: 5 minutes per day
- Cook Time: 0 minutes
- Total Time: 7 days
- Yield: 1 cup of active starter 1x
- Category: Starter
- Cuisine: American
Ingredients
- 1 cup (120g) all-purpose flour (plus more for feedings)
- 1/2 cup (120ml) lukewarm water (plus more for feedings)
- 1/2 cup (60g) whole wheat flour (optional, for first feeding)
Instructions
- Day 1: Combine 1 cup (120g) all-purpose flour (or half whole wheat, half all-purpose) and 1/2 cup (120ml) lukewarm water in a clean jar. Stir until no dry flour remains. Cover loosely with a towel or coffee filter and place in a warm spot. Mark the height and leave for 24 hours.
- Day 2: Check for bubbles or liquid (hooch). Discard half the starter. Add 1 cup (120g) fresh all-purpose flour and 1/2 cup (120ml) lukewarm water. Stir, cover, and mark the new height.
- Day 3-4: Repeat the feeding process: discard half, add fresh flour and water, stir, mark height, and cover. The starter may seem inactive; this is normal.
- Day 5-6: Continue feeding every 24 hours. The starter should become bubbly and double in size within 8-12 hours. If very active, switch to feeding twice a day.
- Day 7: Feed the starter and watch for it to double in size within 4-6 hours. Perform the float test: drop a spoonful into water; if it floats, it’s ready to use. If not, continue feeding for another day or two.
Notes
Use unbleached all-purpose flour for best results. Keep the starter in a warm, consistent spot (70-75°F). If your kitchen is cold, place the jar on top of the refrigerator or near the water heater. Do not skip feedings during the first 7 days. Discard can be saved for pancakes or crackers.
Nutrition
- Serving Size: 1 slice of sourdough
- Calories: 120
- Fat: 0.5
- Carbohydrates: 23
- Fiber: 1
- Protein: 3
Keywords: sourdough starter, homemade starter, easy sourdough, 7-day starter, beginner sourdough, natural yeast



