Love this? Save it for later!
Share the inspiration with your friends
I was standing in the dairy aisle last Tuesday, staring at a box of cheddar crackers I had no business buying, when the smell hit me. Not a real smell, you know—a memory smell. The sharp, salty, almost artificial cheese powder scent of those orange crackers, and suddenly I was nine years old at my friend Danny’s house after school. His mom, Mrs. Kowalski, had this way of making after-school snacks that felt like a secret. She’d pull out a plastic bag, drop in a few chicken tender strips, and crush those crackers right there on the counter with a rolling pin. The sound—that crackling, crumbling noise—is what I remember most. Not the crunch of the finished tenders, but the destruction of the crackers themselves. It was loud and messy and she never seemed to care about the crumbs flying everywhere.
Danny moved away in sixth grade. I haven’t thought about Mrs. Kowalski in probably twenty years. But there I was, grown and grocery shopping, completely derailed by a box of crackers. I bought them, obviously. Took them home, stood in my own kitchen, and tried to remember. Was it butter she used? Egg wash? Did she season the crumbs at all? I couldn’t recall the specifics, only the feeling of biting into something impossibly crunchy on the outside and tender on the inside, with that unmistakable cheesy, salty flavor that no panko breadcrumb has ever come close to matching.
Honestly, I messed up the first batch. Used too much butter, and the coating slid right off. The second batch was better. The third? That was the one. The one where I closed my eyes after the first bite and there I was again—nine years old, sitting on a counter stool, swinging my legs, while Mrs. Kowalski told me to slow down and chew. Maybe you’ve had that feeling, where a recipe isn’t just food but a time machine. These Crispy Cheesy Baked Chicken Tenders are mine. And the best part? They come together in thirty minutes flat, no deep fryer required.
Why You’ll Love This Recipe
Let me tell you why these aren’t just another chicken tender recipe you’ll make once and forget. I’ve tested this more times than I care to admit, and here’s what makes it genuinely different:
- Quick & Easy: From prep to plate in under 30 minutes. That’s not a marketing claim—I timed it. These are perfect for those nights when you walk in the door at 6 PM and need dinner on the table before anyone starts asking what’s for dinner.
- Simple Ingredients: You likely have everything in your kitchen right now. Chicken, crackers, eggs, butter, and a few pantry seasonings. No specialty grocery runs, no obscure spices you’ll use once.
- Perfect for Weeknights & Game Days: These work for a quick family dinner, but they also disappear at parties. I’ve brought them to Super Bowl gatherings and watched grown adults hover around the tray.
- Crowd-Pleaser: Kids devour them. Adults pretend they’re being sophisticated while reaching for a third one. Even my picky-eating cousin—you know the type—asked for the recipe.
- Baked, Not Fried: You get all the crunch without the grease. No standing over a sputtering pan of hot oil, no lingering kitchen smell, and way less guilt when you inevitably eat six of them.
What makes these different from every other baked chicken tender recipe online? It’s the cracker coating, obviously. But it’s also the technique—getting that crust to actually stick and stay crunchy in the oven. I spent three batches figuring out the exact moisture balance so you don’t have to. These aren’t just another version. They’re the version that makes you close your eyes after that first bite and think, okay, that’s the one.
What Ingredients You Will Need
This recipe uses simple, wholesome ingredients that work together to create that signature crunch without any fuss. Most of these are pantry staples, which is exactly what you want on a busy night.
For the Chicken Tenders
- 1.5 lbs chicken breast tenders (or boneless skinless chicken breasts, cut into strips about 2 inches wide)—look for tenders that are relatively uniform in thickness so they cook evenly
- 2 large eggs, room temperature (cold eggs don’t adhere as well to the crackers)
- 1 tablespoon Dijon mustard (adds tang and helps the coating stick—trust me on this one)
- 1 teaspoon garlic powder
- 1/2 teaspoon paprika (smoked paprika works beautifully here if you have it)
- 1/2 teaspoon salt
- 1/4 teaspoon black pepper
For the Cheesy Cracker Coating
- 3 cups cheddar cheese crackers (I use Cheez-Its, but store brand works fine—just make sure they’re the original or extra cheesy variety)
- 1/4 cup grated Parmesan cheese (the real stuff, not the green can—it makes a difference in texture and flavor)
- 1/2 teaspoon onion powder
- 1/4 teaspoon cayenne pepper (optional, but I love the tiny kick—it doesn’t make them spicy, just more interesting)
For the Butter Mixture
- 3 tablespoons unsalted butter, melted (salted butter works too, just reduce the added salt slightly)
- 1 tablespoon olive oil (helps the browning and keeps the coating from getting soggy)
I recommend using Annie’s or Cheez-It brand crackers for the best flavor. The cheaper store brands tend to be less salty and the cheese flavor is milder, which means your tenders won’t have that same punch. If you’re gluten-free, look for gluten-free cheddar crackers—they work perfectly in this recipe. For a dairy-free option, use dairy-free cheddar-style crackers and skip the Parmesan (or use a dairy-free alternative).
Equipment Needed
- Baking sheet (rimmed, 13×18 inch or similar)—the rim matters because melted butter can drip
- Wire rack that fits inside your baking sheet (this is key for maximum crunch—the air circulates underneath)
- Food processor or rolling pin for crushing crackers (I’ve used both; the food processor is faster but the rolling pin method is oddly satisfying)
- Two shallow bowls for the egg mixture and the cracker coating
- Tongs for transferring chicken without making a mess
- Parchment paper or aluminum foil for easier cleanup
If you don’t have a wire rack, you can place the tenders directly on a greased baking sheet—just flip them halfway through cooking and they’ll still get pretty crunchy. A cooling rack from your baking collection works perfectly as a wire rack substitute. I bought my basic wire rack set for under ten dollars, and it’s one of the most used tools in my kitchen.
Preparation Method
- Preheat your oven to 400°F (200°C). Place a wire rack inside a rimmed baking sheet and spray it lightly with nonstick cooking spray. This step matters—don’t skip the spray or the tenders will stick.
- Crush the crackers. Add 3 cups of cheddar crackers to a food processor and pulse until you get fine crumbs—about 10-12 short pulses. You want a texture similar to panko breadcrumbs, not powder. If you’re using a rolling pin, place the crackers in a zip-top bag, remove the air, and crush them firmly. Aim for even crumbs, not chunks. Transfer to a shallow bowl and stir in the Parmesan, onion powder, and cayenne (if using).
- Make the egg wash. In another shallow bowl, whisk together 2 eggs, 1 tablespoon Dijon mustard, garlic powder, paprika, salt, and pepper until smooth. The mustard might seem weird here, but it helps the coating adhere and adds a subtle tang that balances the cheese.
- Whisk together the melted butter and olive oil in a small bowl. Set aside.
- Pat the chicken tenders dry with paper towels. This is important—wet chicken won’t hold the coating. If your tenders are uneven in thickness, place them between two pieces of plastic wrap and gently pound them to an even 1/2-inch thickness with a rolling pin or meat mallet.
- Set up your assembly line. Bowl 1: egg wash. Bowl 2: cracker coating. Have your baking sheet with the wire rack ready nearby.
- Coat each tender. Working one at a time, dip a chicken strip into the egg wash, letting the excess drip off. Then press it into the cracker mixture, coating all sides. Don’t just drop it in—really press the crumbs into the chicken. Place the coated tender on the wire rack. Repeat with all tenders.
- Drizzle with the butter mixture. Using a spoon or a small pastry brush, drizzle or brush the melted butter and oil mixture over the tops of the coated tenders. Don’t drown them—just a light, even coating. This is what gives you that golden, crunchy finish instead of a pale, dry crust.
- Bake for 12-15 minutes, until the coating is golden brown and the internal temperature of the chicken reaches 165°F (74°C). No need to flip them—the wire rack allows air to circulate underneath. If you don’t have a thermometer, cut into the thickest tender; the juices should run clear and the meat should be opaque all the way through.
- Let them rest for 2-3 minutes on the wire rack before serving. This lets the coating set so it stays crunchy instead of falling off when you bite into it.
Pro tip: If you’re making a double batch, don’t crowd the baking sheet. The tenders need space between them for the hot air to circulate. Overcrowding = steaming = soggy coating. Use two baking sheets if needed, and rotate them halfway through baking.
Cooking Tips & Techniques
I learned most of these the hard way, so you don’t have to. Here’s what I wish someone had told me before my first attempt:
Dry chicken is non-negotiable. I cannot stress this enough. If your chicken is even slightly wet, the coating will slide off in the oven like a bad toupee. Pat those tenders dry with paper towels and let them sit for a minute before dipping. This was the mistake that ruined my first batch.
Don’t skip the wire rack. I know it’s an extra thing to wash, but it makes the difference between crunchy tenders and tenders with a soggy bottom. The air needs to circulate underneath. If you don’t have one, flip the tenders carefully at the 8-minute mark using tongs.
Crush the crackers fresh. Pre-crushed cracker crumbs from a bag just don’t have the same texture. They’re too fine, too dusty. Freshly crushed crackers give you those irregular, jagged edges that get extra crispy in the oven. I’ve tried both—fresh wins every time.
Let the coated tenders rest for 5 minutes before baking. This is a trick I picked up from making fried chicken. Letting the coated chicken sit on the wire rack for a few minutes before drizzling with butter helps the egg wash and crumbs bond together. The coating adheres better and doesn’t fall off during baking.
Watch your oven temperature. Ovens run hot or cold—mine runs about 25 degrees hot, so I set it to 375°F and check early. If your tenders are browning too quickly on the outside but the chicken isn’t cooked through, tent them loosely with foil for the last few minutes.
Multitask smartly. While the oven preheats, crush your crackers. While the coated tenders rest, wash your dishes. This recipe moves fast, so having everything ready before you start dipping makes the process smooth instead of chaotic.
Variations & Adaptations
This recipe is flexible, and I’ve tried most of these variations myself. Here are some ways to make it your own:
Spicy Buffalo Version: Add 2 tablespoons of hot sauce to the egg wash and increase the cayenne to 1/2 teaspoon. Serve with ranch or blue cheese dressing for dipping. I made these for a football party and they were gone in fifteen minutes.
Gluten-Free Adaptation: Use gluten-free cheddar crackers (several brands make them) and ensure your mustard and seasonings are gluten-free. The texture is nearly identical—my gluten-sensitive friend couldn’t tell the difference.
Air Fryer Method: Preheat your air fryer to 375°F (190°C). Place the coated tenders in a single layer in the basket (don’t overcrowd), spray lightly with oil, and cook for 10-12 minutes, flipping halfway through. They come out even crunchier than the oven version, honestly.
Herb & Garlic Twist: Add 1 teaspoon dried Italian seasoning and 1/2 teaspoon dried parsley to the cracker crumbs. This gives the tenders a more sophisticated flavor profile—great for serving with marinara sauce as a chicken Parmesan-style meal.
Lighter Version: Skip the butter drizzle and just spray the tenders lightly with olive oil cooking spray. They won’t be quite as golden, but they’ll still be crunchy and have fewer calories. I do this when I’m being extra mindful about what I’m eating.
Cheese Lover’s Variation: Add 1/4 cup finely shredded sharp cheddar to the cracker crumbs. The extra cheese melts and creates these little crispy cheese bits on the outside of the tenders. Dangerous, honestly.
Serving & Storage Suggestions
Serving: Serve these tenders hot, straight from the oven. The crunch is at its absolute peak within the first ten minutes. Arrange them on a platter with dipping sauces—honey mustard, ranch, BBQ sauce, or a simple sriracha mayo (mix 3 tablespoons mayo with 1 teaspoon sriracha and a squeeze of lime).
They pair beautifully with a simple side salad, roasted vegetables, or my personal favorite—sweet potato fries. For a complete meal that feels like a restaurant dinner, serve them alongside creamy mac and cheese and steamed broccoli. The combination of crunchy, creamy, and fresh is unbeatable.
Storage: Leftover tenders keep in an airtight container in the refrigerator for up to 3 days. The coating will soften slightly, but they’re still delicious. To reheat, place them on a wire rack over a baking sheet and warm them in a 375°F oven for 5-7 minutes. Skip the microwave—it turns the coating into a sad, chewy mess.
Freezing: These freeze beautifully. Place the baked and cooled tenders on a baking sheet in a single layer and freeze for 1 hour, then transfer to a freezer-safe bag. They’ll keep for up to 2 months. Reheat directly from frozen in a 400°F oven for 12-15 minutes. The texture holds up surprisingly well—I often make a double batch just to freeze half for busy nights.
Make-Ahead Tip: You can coat the tenders up to 4 hours ahead and keep them on the wire rack in the refrigerator, uncovered. Let them sit at room temperature for 15 minutes before baking. This actually helps the coating adhere even better.
Nutritional Information & Benefits
Per serving (approximately 3-4 tenders, based on 4 servings):
- Calories: 385
- Protein: 38g
- Fat: 18g
- Carbohydrates: 18g
- Fiber: 1g
- Sugar: 2g
- Sodium: 620mg
These tenders pack a solid protein punch—about 38 grams per serving—which makes them genuinely satisfying. Chicken breast is lean, high in protein, and rich in B vitamins that support energy metabolism. The crackers add calcium from the cheese, and the Parmesan provides additional protein and calcium.
Compared to traditional fried chicken tenders, this baked version saves you roughly 150-200 calories and a significant amount of unhealthy fats per serving. You’re getting the crunch without the deep-fried oil absorption. For health-minded readers, this is comfort food that actually fits into a balanced eating plan—it’s not a “cheat meal,” it’s a smart choice that still feels indulgent.
Dietary Notes: Contains dairy, gluten, and eggs. For gluten-free, use certified gluten-free crackers. For dairy-free, use dairy-free crackers and skip the Parmesan. These are not suitable for vegan diets due to the chicken and eggs.
Conclusion
These Crispy Cheesy Baked Chicken Tenders are the kind of recipe that becomes a regular in your rotation—not because they’re fancy, but because they’re reliable. They work on busy Tuesday nights when you’re exhausted. They work when you’re hosting and want something that disappears from the platter. They work when you’re craving that childhood comfort food feeling but don’t want to deal with a greasy kitchen or a deep fryer.
The cracker coating gives them a personality that plain breadcrumbs just can’t match. It’s salty, cheesy, and impossibly crunchy. And knowing they’re baked instead of fried? That’s just a bonus that lets you enjoy them without the guilt.
I’d love to hear how yours turn out. Did you try a variation? Discover a new favorite dipping sauce? Burn the first batch like I did? Drop a comment below and let me know—I read every single one, and your stories are honestly my favorite part of running this blog. If you’re looking for another quick weeknight dinner that delivers on flavor without the fuss, you might also enjoy my one-pan lemon chicken and rice—it has that same no-stress, big-flavor energy.
Now go preheat your oven. Those crackers are waiting.
Frequently Asked Questions
Can I use chicken thighs instead of chicken breasts?
Absolutely. Boneless, skinless chicken thighs work great—they’re actually more forgiving because they stay juicier. Just adjust the baking time slightly, as thighs may need an extra 2-3 minutes to reach 165°F internally.
Why did my coating fall off in the oven?
This usually happens for one of three reasons: the chicken wasn’t patted dry before dipping, the egg wash was too thin (don’t skip the mustard—it helps), or the tenders were overcrowded on the baking sheet. Make sure there’s space between each tender for air to circulate.
Can I make these ahead of time for a party?
Yes! You can bake them up to 2 hours ahead and keep them warm in a 200°F oven on the wire rack. They’ll stay crunchy for about an hour. For longer storage, bake, cool, and reheat as directed above.
What’s the best way to crush crackers without a food processor?
Place the crackers in a sturdy zip-top bag, remove as much air as possible, and crush them with a rolling pin or the bottom of a heavy skillet. Go slowly and aim for even crumbs. A meat mallet also works in a pinch.
Can I use this coating for other foods?
Absolutely. This cracker coating is amazing on fish fillets, pork chops, onion rings, or even zucchini spears. Adjust the cooking time based on what you’re coating—fish cooks faster, pork may need a few extra minutes.
Pin This Recipe!

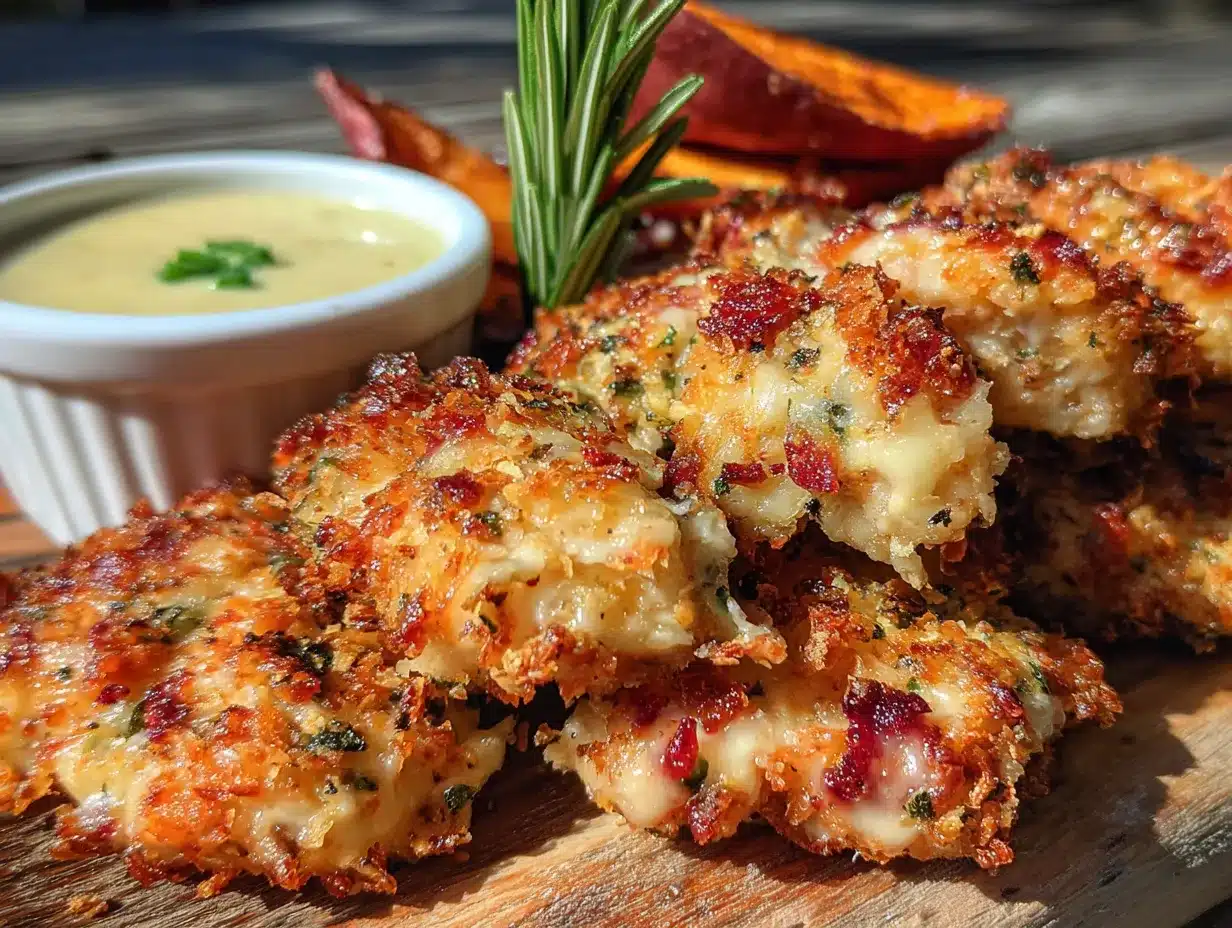
Crispy Cheesy Baked Chicken Tenders: Easy 30-Min Recipe

These baked chicken tenders are coated in crushed cheddar crackers for an impossibly crunchy, cheesy crust. Ready in under 30 minutes, they’re a quick weeknight dinner or crowd-pleasing appetizer that tastes like childhood comfort food without the grease of frying.
- Prep Time: 15 minutes
- Cook Time: 15 minutes
- Total Time: 30 minutes
- Yield: 4 servings 1x
- Category: Main Course
- Cuisine: American
Ingredients
- 1.5 lbs chicken breast tenders (or boneless skinless chicken breasts, cut into strips about 2 inches wide)
- 2 large eggs, room temperature
- 1 tablespoon Dijon mustard
- 1 teaspoon garlic powder
- 1/2 teaspoon paprika (smoked paprika works beautifully)
- 1/2 teaspoon salt
- 1/4 teaspoon black pepper
- 3 cups cheddar cheese crackers (such as Cheez-Its or Annie’s)
- 1/4 cup grated Parmesan cheese
- 1/2 teaspoon onion powder
- 1/4 teaspoon cayenne pepper (optional)
- 3 tablespoons unsalted butter, melted
- 1 tablespoon olive oil
Instructions
- Preheat your oven to 400°F (200°C). Place a wire rack inside a rimmed baking sheet and spray it lightly with nonstick cooking spray.
- Crush the crackers: Add 3 cups of cheddar crackers to a food processor and pulse until you get fine crumbs (about 10-12 short pulses). Alternatively, place crackers in a zip-top bag and crush with a rolling pin. Transfer to a shallow bowl and stir in the Parmesan, onion powder, and cayenne (if using).
- Make the egg wash: In another shallow bowl, whisk together 2 eggs, 1 tablespoon Dijon mustard, garlic powder, paprika, salt, and pepper until smooth.
- Whisk together the melted butter and olive oil in a small bowl. Set aside.
- Pat the chicken tenders dry with paper towels. If uneven, pound to an even 1/2-inch thickness.
- Set up your assembly line: Bowl 1: egg wash. Bowl 2: cracker coating. Have your baking sheet with the wire rack ready nearby.
- Coat each tender: Dip a chicken strip into the egg wash, letting excess drip off. Then press it into the cracker mixture, coating all sides. Place on the wire rack. Repeat with all tenders.
- Drizzle with the butter mixture: Using a spoon or pastry brush, lightly coat the tops of the tenders with the melted butter and oil mixture.
- Bake for 12-15 minutes, until the coating is golden brown and the internal temperature reaches 165°F (74°C). No need to flip.
- Let them rest for 2-3 minutes on the wire rack before serving.
Notes
Pat chicken dry for best coating adhesion. Use a wire rack for maximum crunch. Let coated tenders rest 5 minutes before baking to help coating bond. For a double batch, use two baking sheets and don’t overcrowd. Reheat leftovers on a wire rack in a 375°F oven for 5-7 minutes.
Nutrition
- Serving Size: 3-4 tenders
- Calories: 385
- Sugar: 2
- Sodium: 620
- Fat: 18
- Carbohydrates: 18
- Fiber: 1
- Protein: 38
Keywords: chicken tenders, baked chicken tenders, crispy chicken tenders, cheesy chicken tenders, easy chicken recipe, 30-minute meal, weeknight dinner, game day snack



