Love this? Save it for later!
Share the inspiration with your friends
It was 11:47 PM on a drizzly Thursday in early March, and I was hit with a very specific, almost irrational craving for something warm, cheesy, and deeply savory. I didn’t have the biscuit mix that a normal recipe would call for, but I had a block of extra-sharp cheddar, a tube of spicy breakfast sausage in the back of the fridge, and the impulsive idea that maybe, just maybe, I could figure this out from scratch. My hands were still a little damp from washing dishes, and the only clean bowl was the one I used for my morning oatmeal. Honestly, it felt a little reckless. But there’s something about the quiet of a late night that makes you trust your gut more than a recipe card. I just started crumbling sausage into a bowl, grating cheese until my knuckles got sore, and hoping for the best.
I won’t pretend the first batch was perfect. I added too much flour, and they came out a little dense—like savory hockey pucks with a good attitude. But the second batch? The one where I just let my hands guide the amount of butter and buttermilk? That was it. The golden-brown crust gave way to a tender, almost fluffy inside, with sharp pockets of melted cheddar and crumbles of perfectly seasoned sausage. I ate three right there at the counter, standing over the baking sheet in my pajamas, and I knew I had stumbled onto something worth keeping. These cozy sharp cheddar sausage balls are now my go-to for that exact feeling—when you need something fast, comforting, and just a little bit indulgent. Maybe you’ve been there, staring into your fridge at 11 PM, wondering what magic you can make with what you’ve got.
Why You’ll Love This Recipe
Let me tell you, I’ve tested this recipe more times than I care to admit. I’ve made them for Sunday brunches, for game-day snacking, and for those quiet Tuesday nights when only a cheesy, sausage-packed bite will do. After all those trials, here’s why this version stands out from the rest.
- Quick & Easy: From bowl to oven in under 15 minutes, with a total time of about 30 minutes. Perfect for busy weeknights or last-minute cravings.
- Simple Ingredients: No fancy grocery trips needed. You likely already have everything in your kitchen—flour, butter, milk, cheese, and sausage.
- Perfect for Any Occasion: Great for holiday mornings, potlucks, cozy dinners, or as a protein-packed snack. They’re versatile like that.
- Crowd-Pleaser: I’ve watched kids and adults alike polish off a whole batch in minutes. They’re seriously addictive.
- Unbelievably Delicious: The texture is what gets me every time—crispy on the outside, tender and fluffy on the inside, with those sharp, melty pockets of cheddar and savory sausage in every bite.
What makes this recipe different from the rest? It’s that balance. I’ve played with the flour-to-fat ratio until the dough is just right—not too dry, not too greasy. And using extra-sharp cheddar instead of mild makes a world of difference. It’s comfort food, reimagined: faster, simpler, but with the same soul-soothing satisfaction that makes you close your eyes after the first bite. Perfect for impressing guests without stress, or turning a simple meal into something memorable.
What Ingredients You Will Need
This recipe uses simple, wholesome ingredients to deliver bold flavor and satisfying texture without the fuss. Most of these are pantry staples, which is exactly what you want when a craving hits late at night.
- Sharp Cheddar Cheese, shredded (8 oz / 225g): Use extra-sharp for the most flavor. I prefer block cheese over pre-shredded because it melts better and doesn’t have anti-caking agents. (Adds that bold, tangy punch.)
- Ground Breakfast Sausage (1 lb / 450g): I like using a spicy or sage-flavored sausage for extra depth. You can use mild, but the seasoning really shines here. (Look for high-fat content—at least 20%—for moist sausage balls.)
- All-Purpose Flour (2 cups / 240g): This gives the structure. I’ve tried whole wheat, but it makes them too dense. Stick with AP for the best texture.
- Baking Powder (2 teaspoons / 8g): The leavening agent that gives them a nice lift. Make sure it’s fresh for the best rise.
- Salt (1/2 teaspoon / 3g): Just a pinch to balance the flavors. The cheese and sausage are already salty, so don’t overdo it.
- Black Pepper (1/4 teaspoon / 0.5g): Adds a subtle warmth. Freshly ground is always better.
- Unsalted Butter, cold and cubed (4 tablespoons / 56g): This is the secret to that tender, flaky texture. Keep it cold until you mix it in. (I use Kerrygold for its rich flavor.)
- Whole Milk (1/2 cup / 120ml): Adds moisture and helps bind the dough. You can use buttermilk for a tangier flavor, but whole milk works beautifully.
- Optional: Fresh Chives or Parsley, chopped (2 tablespoons): For a pop of color and freshness. Totally optional, but nice for presentation.
Equipment Needed
You don’t need a fancy kitchen to make these. Here’s what I use every time:
- Large Mixing Bowl: For combining the dry ingredients and mixing the dough. A wide bowl makes it easier to work.
- Box Grater or Food Processor: For shredding the cheese. A box grater works fine, but a food processor with a shredding disc speeds things up. (Pro tip: spray the grater with non-stick spray for easier cleanup.)
- Pastry Cutter or Two Forks: For cutting the cold butter into the flour. You can also use your fingertips, but work quickly so the butter doesn’t warm up.
- Baking Sheet: A standard 13×18-inch sheet pan works well. Line it with parchment paper for easy cleanup.
- Cookie Scoop or Tablespoon: For portioning the dough into uniform balls. A 1.5-tablespoon scoop is my go-to for consistent sizing.
- Cooling Rack: For letting them cool slightly after baking—keeps the bottoms from getting soggy.
Preparation Method
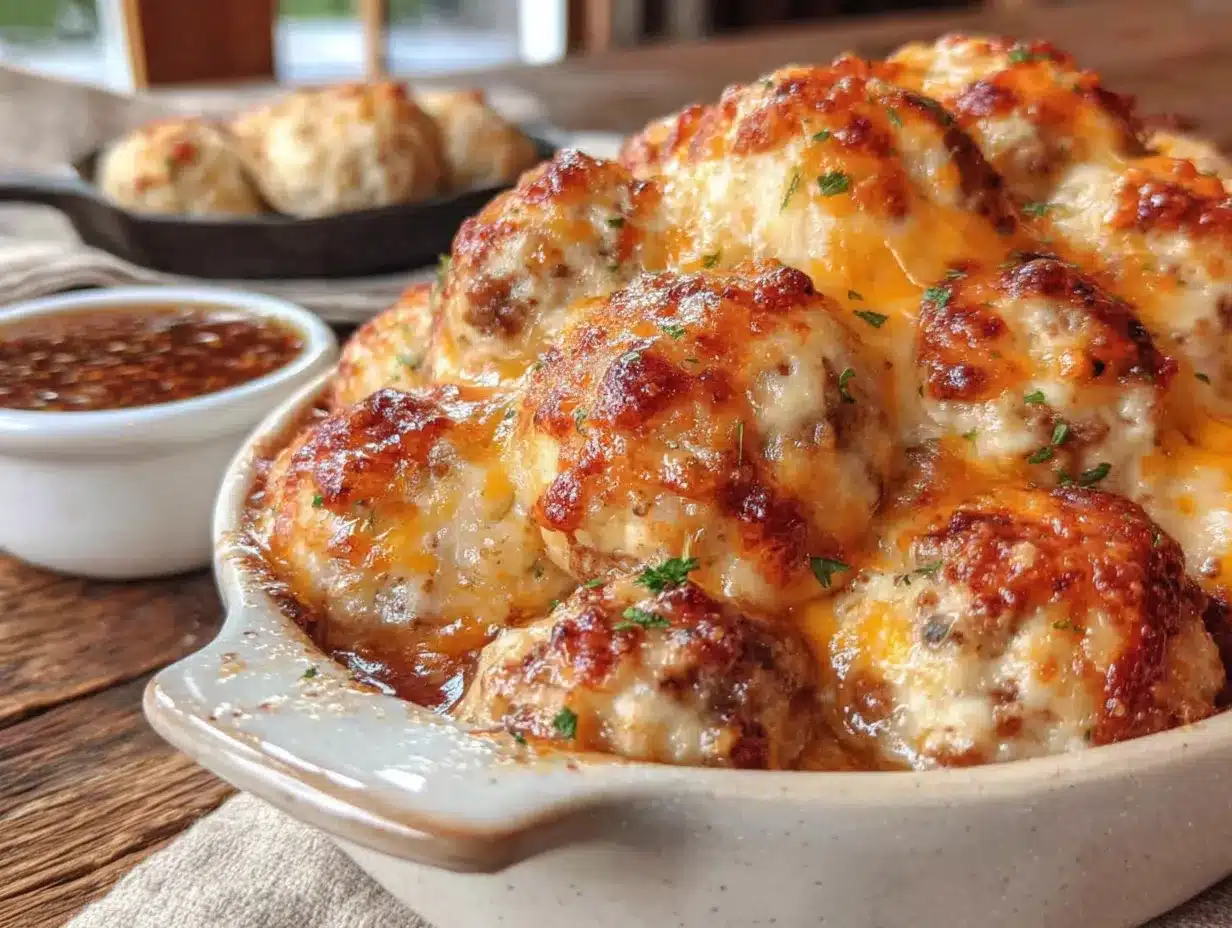
Alright, let’s get to the fun part. Here’s how I make these cozy sharp cheddar sausage balls, step by step.
- Preheat and Prep: Preheat your oven to 400°F (200°C). Line a baking sheet with parchment paper. This ensures even browning and makes cleanup a breeze.
- Cook the Sausage: In a skillet over medium heat, cook the ground sausage, breaking it into small crumbles as it browns. This takes about 5-7 minutes. Drain any excess fat (leave a little for flavor) and let it cool slightly. Sensory cue: You’ll smell the sage and pepper blooming—that’s the good stuff.
- Mix Dry Ingredients: In a large bowl, whisk together the flour, baking powder, salt, and black pepper. Make sure they’re well combined so the baking powder is evenly distributed.
- Cut in the Butter: Add the cold, cubed butter to the flour mixture. Using a pastry cutter or two forks, cut the butter into the flour until it resembles coarse meal with pea-sized butter pieces. Don’t overwork it—those little butter bits create flaky pockets.
- Add Cheese and Sausage: Stir in the shredded sharp cheddar and the cooled, crumbled sausage. Toss gently to coat everything in the flour mixture. Personal tip: I use my hands for this—it’s faster and you can feel if the cheese is evenly distributed.
- Add Milk and Form Dough: Pour in the milk and stir with a wooden spoon or your hands until a shaggy dough forms. It should come together but not be overly wet. If it’s too dry, add a tablespoon more milk. If it’s too sticky, add a tablespoon of flour.
- Portion the Dough: Using a cookie scoop or tablespoon, portion the dough into 1.5-inch balls (about 2 tablespoons each). Place them on the prepared baking sheet, spacing them about 2 inches apart. They don’t spread much, but a little room helps them brown evenly.
- Bake to Golden Perfection: Bake for 15-18 minutes, or until the tops are golden brown and the edges are crispy. Sensory cue: Your kitchen will smell like a cozy diner—savory, cheesy, irresistible.
- Cool Slightly and Serve: Let them cool on the baking sheet for 5 minutes, then transfer to a cooling rack. Serve warm—they’re best fresh out of the oven.
Cooking Tips & Techniques
I’ve made my fair share of mistakes with these, so let me save you some trouble. Here are the tips I’ve learned the hard way.
- Keep the Butter Cold: This is non-negotiable. Warm butter will make the dough greasy and the sausage balls dense. If your kitchen is warm, pop the flour-butter mixture in the fridge for 10 minutes before adding the cheese.
- Don’t Overmix the Dough: Overmixing develops gluten, which makes them tough. Stir just until the flour is incorporated—a few lumps are totally fine.
- Use a Cookie Scoop for Even Sizing: This ensures they all bake at the same rate. I once eyeballed it, and ended up with some burnt and some undercooked. Not my finest moment.
- Let the Sausage Cool: If you add hot sausage to the dough, it’ll melt the butter and cheese before they hit the oven. Let it cool for at least 10 minutes after cooking.
- Check for Doneness: The tops should be golden, and a toothpick inserted in the center should come out clean (or with a few moist crumbs). If they’re browning too fast, tent the baking sheet with foil for the last 5 minutes.
Variations & Adaptations
One of the best things about this recipe is how flexible it is. Here are a few ways I’ve tweaked it over the years.
- Gluten-Free Version: Swap the all-purpose flour with a 1:1 gluten-free baking blend. I’ve used Bob’s Red Mill with great results—just add an extra tablespoon of milk to compensate for the drier flour.
- Spicy Kick: Use hot Italian sausage instead of breakfast sausage, and add 1/4 teaspoon of cayenne pepper to the dry ingredients. My husband loves this version—it’s got a real warmth to it.
- Herb-Infused: Stir in 2 tablespoons of fresh chopped rosemary or thyme along with the cheese. It adds an earthy note that pairs beautifully with the sharp cheddar.
- Dairy-Free Adaptation: Use a plant-based butter stick (like Miyoko’s) and a dairy-free cheddar shred. I’ve tried this with Violife cheese, and while the texture is slightly different, the flavor is still fantastic.
- Air Fryer Method: Cook at 375°F (190°C) for 10-12 minutes, flipping halfway through. They get extra crispy on the outside—perfect if you’re short on time.
Serving & Storage Suggestions
These are best served warm, straight from the oven. The contrast between the crispy exterior and the tender, cheesy interior is pure magic. I like to serve them on a wooden board with a side of honey mustard or sriracha mayo for dipping.
For a full meal, I pair them with a simple green salad dressed with lemon vinaigrette or a bowl of tomato soup. They also make a fantastic addition to a brunch spread alongside scrambled eggs and fresh fruit.
Storage: Keep leftovers in an airtight container in the refrigerator for up to 4 days. To reheat, pop them in a 350°F (175°C) oven for 5-7 minutes, or in the air fryer at 350°F for 3-4 minutes. The microwave works in a pinch, but they’ll lose their crispiness.
Freezing: You can freeze the unbaked dough balls on a baking sheet until solid, then transfer to a freezer bag. Bake from frozen at 400°F (200°C) for 20-22 minutes. I always keep a batch in the freezer for emergencies—they’re a lifesaver on busy nights.
One thing I love is that the flavors actually deepen overnight. The second day, they’re even more savory and satisfying. Not that they usually last that long in my house!
Nutritional Information & Benefits
Here’s an approximate breakdown per sausage ball (based on 24 servings):
- Calories: 145
- Total Fat: 10g
- Saturated Fat: 5g
- Cholesterol: 35mg
- Sodium: 310mg
- Total Carbohydrates: 8g
- Dietary Fiber: 0g
- Sugars: 1g
- Protein: 7g
Sharp cheddar is a good source of calcium and protein, while the sausage adds iron and B vitamins. That said, this is an indulgent recipe—perfect for occasional enjoyment. If you’re watching your sodium, use a low-sodium sausage and reduce the added salt. For a lighter option, swap half the sausage with ground turkey (just add a tablespoon of olive oil for moisture).
These are also naturally low-carb if you use a keto-friendly flour blend, and they’re a great source of energy for busy mornings or post-workout snacks.
Conclusion
These cozy sharp cheddar sausage balls are more than just a recipe—they’re a little moment of comfort you can create anytime. Whether you’re making them for a holiday brunch, a game-day snack, or a quiet Tuesday night when you need something warm and satisfying, they never disappoint. I love how forgiving they are—you can tweak the cheese, the sausage, even the flour, and they still come out delicious.
I’d love to hear how yours turn out! Did you try a fun variation? Maybe you added a pinch of smoked paprika or used pepper jack cheese? Drop a comment below and share your twist. And if you’re looking for more cozy recipes, check out my easy cheesy biscuits for another quick comfort food fix. Happy cooking, friend—go make some memories in your kitchen tonight.
Frequently Asked Questions
Can I make these ahead of time?
Absolutely! You can prepare the dough, shape the balls, and refrigerate them on the baking sheet for up to 24 hours before baking. Just add an extra 2-3 minutes to the baking time if they’re cold from the fridge.
Can I use pre-shredded cheese?
You can, but I don’t recommend it. Pre-shredded cheese is coated with anti-caking agents that prevent it from melting smoothly. For the best texture and flavor, shred your own block cheese. It takes an extra minute but makes a noticeable difference.
Why did my sausage balls turn out dry?
This usually happens if you overbake them or use too much flour. Make sure to measure your flour correctly—spoon it into the measuring cup and level it off, don’t scoop directly. Also, check your oven temperature with an oven thermometer; some run hot.
Can I freeze the baked sausage balls?
Yes! Let them cool completely, then place them in a single layer on a baking sheet and freeze for 1 hour. Transfer to a freezer bag or airtight container. To reheat, bake at 350°F (175°C) for 10-12 minutes straight from the freezer.
What’s the best way to reheat them without drying them out?
I’ve found the air fryer works best—3-4 minutes at 350°F (175°C) gives them back their crispy exterior. If using an oven, cover them loosely with foil for the first 5 minutes, then uncover for the last 2-3 minutes to crisp up the tops.
Pin This Recipe!

Easy Sharp Cheddar Sausage Balls Recipe

These cozy sharp cheddar sausage balls are quick, easy, and made with simple ingredients. Perfect for brunch, game-day snacking, or a comforting weeknight treat, they feature a crispy exterior and tender, cheesy interior with savory sausage in every bite.
- Prep Time: 15 minutes
- Cook Time: 18 minutes
- Total Time: 33 minutes
- Yield: 24 servings 1x
- Category: Appetizer
- Cuisine: American
Ingredients
- 8 oz (225g) sharp cheddar cheese, shredded (extra-sharp recommended)
- 1 lb (450g) ground breakfast sausage (spicy or sage-flavored, at least 20% fat)
- 2 cups (240g) all-purpose flour
- 2 teaspoons (8g) baking powder
- 1/2 teaspoon (3g) salt
- 1/4 teaspoon (0.5g) black pepper
- 4 tablespoons (56g) unsalted butter, cold and cubed
- 1/2 cup (120ml) whole milk
- 2 tablespoons fresh chives or parsley, chopped (optional, for garnish)
Instructions
- Preheat your oven to 400°F (200°C). Line a baking sheet with parchment paper.
- In a skillet over medium heat, cook the ground sausage, breaking it into small crumbles as it browns, about 5-7 minutes. Drain excess fat (leave a little for flavor) and let cool slightly.
- In a large bowl, whisk together the flour, baking powder, salt, and black pepper until well combined.
- Add the cold, cubed butter to the flour mixture. Using a pastry cutter or two forks, cut the butter into the flour until it resembles coarse meal with pea-sized butter pieces. Do not overwork.
- Stir in the shredded sharp cheddar and cooled crumbled sausage. Toss gently to coat everything in the flour mixture.
- Pour in the milk and stir with a wooden spoon or your hands until a shaggy dough forms. It should come together but not be overly wet. If too dry, add a tablespoon more milk; if too sticky, add a tablespoon of flour.
- Using a cookie scoop or tablespoon, portion the dough into 1.5-inch balls (about 2 tablespoons each). Place them on the prepared baking sheet, spacing about 2 inches apart.
- Bake for 15-18 minutes, or until the tops are golden brown and the edges are crispy.
- Let cool on the baking sheet for 5 minutes, then transfer to a cooling rack. Serve warm.
Notes
Keep butter cold for flaky texture. Do not overmix dough. Let sausage cool before adding to dough. For best results, shred cheese from a block rather than using pre-shredded. Store leftovers in an airtight container in the refrigerator for up to 4 days. Reheat in a 350°F (175°C) oven for 5-7 minutes or in an air fryer at 350°F for 3-4 minutes. Unbaked dough balls can be frozen for up to 3 months; bake from frozen at 400°F (200°C) for 20-22 minutes.
Nutrition
- Serving Size: 1 sausage ball
- Calories: 145
- Sugar: 1
- Sodium: 310
- Fat: 10
- Saturated Fat: 5
- Carbohydrates: 8
- Protein: 7
Keywords: sausage balls, cheddar sausage balls, sharp cheddar, easy appetizer, game day snack, brunch recipe, comfort food



