Love this? Save it for later!
Share the inspiration with your friends
The neighborhood block party was in three hours and I’d completely forgotten about the sauce situation. Everyone else would be bringing their signature dishes — slow-cooked ribs, homemade pizzas from scratch, elaborate layered dips that looked like works of art. I had a block of cream cheese, some sad-looking garlic cloves, and about fifteen minutes before I needed to head over. My neighbor Marco had texted me a week ago saying “don’t forget the dipping sauce for the grilled veggies,” and I’d promptly filed that information into the black hole of my brain.
I stood in my kitchen, staring at the pantry like it owed me money. The aioli from the fancy market cost twelve bucks and had ingredients I couldn’t pronounce. Plus, I had this vague memory of someone telling me raw eggs were risky for outdoor parties in July heat. So there I was, frantically scrolling through my phone with flour-dusted fingers, when I stumbled on this creamy garlic aioli recipe that used no raw eggs. Honestly, I almost didn’t try it. It seemed too simple to be good. But desperation makes you do funny things.
I whisked everything together in about four minutes flat, tasted it, and let me tell you — I actually said “oh” out loud. It was that good. Rich, tangy, packed with garlic flavor, and somehow silky without a single raw egg in sight. I threw it in a bowl, ran to the party, and spent the whole evening watching people hover around the veggie platter like it was the main attraction. Someone asked if I’d made it from scratch. I shrugged like it was no big deal. But honestly? I was already planning to make a double batch for the next thing. Maybe you’ve been there — needing something impressive fast, with nothing but pantry staples and a prayer. This creamy garlic aioli is that recipe. It’s the one that saves you when you’ve got nothing else.
Why You’ll Love This Recipe
Let me just say this upfront — I’ve tested this creamy garlic aioli more times than I care to admit. I made it with different oils, different garlic quantities, different acids. I even tried it with a blender, a whisk, and a fork just to see if it mattered. (Spoiler: it does, but not in the way you’d think.) Here’s why this particular version won out every single time.
- Quick & Easy : This comes together in under five minutes. I’m not exaggerating. If you can whisk, you can make this creamy garlic aioli. No cooking, no waiting, no complicated techniques.
- Simple Ingredients : You probably have everything in your fridge and pantry right now. Mayonnaise, garlic, lemon juice, and a few seasonings. That’s it. No special trips to the store for fancy oils or hard-to-find ingredients.
- No Raw Eggs : This is the game-changer. Traditional aioli uses raw egg yolks, which means you’re rolling the dice on food safety. This version uses mayo as the base, so it’s completely safe for pregnant women, kids, elderly family members, or anyone with a compromised immune system.
- Perfect for Entertaining : Whether it’s a summer barbecue, game day spread, or holiday appetizer platter, this creamy garlic aioli is the condiment everyone gravitates toward. It pairs with everything from vegetables to fries to sandwiches.
- Unbelievably Delicious : I know it sounds like a humble sauce, but the flavor combination is honestly next-level. The garlic punches through, the lemon brightens everything up, and the creamy texture coats every bite perfectly.
What makes this creamy garlic aioli different from every other recipe out there? It’s the balance. Most versions either taste like straight garlic (ouch) or get lost in too much mayo. This one hits that sweet spot where the garlic is present but not aggressive, the acidity is bright but not sour, and the texture is thick enough to cling to food without being gloppy. I spent a solid week tweaking the ratios, and I’m telling you — this is it. This is the one.
There’s something about this creamy garlic aioli that makes people close their eyes after the first bite. I’ve seen it happen at three different parties now. It’s comfort food in sauce form — familiar, satisfying, and somehow better than you remembered. And the best part? You can feel good about eating it. No raw eggs, no weird additives, no guilt. Just pure, unapologetic deliciousness.
What Ingredients You Will Need
This creamy garlic aioli uses simple, everyday ingredients to deliver big flavor without any fuss. The beauty of this recipe is that everything is probably already in your kitchen, which makes it perfect for those last-minute cooking emergencies we all face.
- Mayonnaise — 1 cup (240 ml) — Use a good quality full-fat mayo. I personally recommend Hellmann’s or Duke’s for the best texture and flavor. Avoid Miracle Whip here — it’s too sweet and tangy for a proper aioli. If you’re dairy-free or vegan, use a plant-based mayo like Follow Your Heart or Vegenaise.
- Garlic — 4 to 6 cloves, minced or grated — This is where the magic happens. Fresh garlic is non-negotiable for this creamy garlic aioli. The jarred stuff has a flat, almost metallic taste that just doesn’t work. I prefer grating my garlic on a microplane because it creates a paste that distributes evenly. If you only have a garlic press, that works too — just make sure to scrape every bit out.
- Lemon Juice — 2 tablespoons (30 ml), freshly squeezed — Bottled lemon juice has a chemical aftertaste that ruins the brightness of this sauce. Roll a lemon on the counter before cutting it to get the most juice out. One medium lemon usually yields about 2 to 3 tablespoons.
- Dijon Mustard — 1 teaspoon (5 ml) — This adds a subtle tang and helps emulsify everything together. Grey Poupon is my go-to, but any smooth Dijon works. Don’t use yellow mustard — it’s too sharp and vinegary.
- Extra Virgin Olive Oil — 1 to 2 tablespoons (15 to 30 ml) — This gives the aioli that rich, fruity finish. Use a good quality olive oil here, but nothing too peppery or bitter. I like California Olive Ranch for a balanced flavor that doesn’t overpower the garlic.
- Salt — 1/4 teaspoon (1.5 grams) — Fine sea salt or kosher salt works best. Start with this amount and adjust to taste. Different brands of mayo have different salt levels, so trust your palate.
- Black Pepper — 1/8 teaspoon (0.5 grams) — Freshly ground black pepper adds a subtle warmth. Skip the pre-ground stuff — it’s worth the extra few seconds to grind it fresh.
- Optional: Fresh Herbs — 1 tablespoon chopped parsley, chives, or dill — This isn’t essential, but it adds a lovely freshness and makes the creamy garlic aioli look gorgeous. Add it right before serving for the best color and flavor.
I always use Hellmann’s mayo when I make this creamy garlic aioli for company. It has that perfect balance of tang and creaminess that makes the sauce feel luxurious without being heavy. If you’re watching your calories, you can use light mayo, but the texture will be slightly thinner. I’ve tested it, and honestly, it still tastes great — just don’t expect the same thick, spoon-coating consistency.
For the garlic, look for firm cloves without any green sprouts in the center. That green sprout is a sign the garlic is older, and it can be bitter. If you see one, just cut it out with the tip of your knife before mincing. This little step makes a big difference in the final flavor of your creamy garlic aioli.
Equipment Needed
The beauty of this creamy garlic aioli is that you don’t need any fancy equipment. I’ve made it in a pinch with nothing but a fork and a cereal bowl. But if you want the best results, here’s what I recommend.
- Mixing Bowl — Any medium-sized bowl works. I prefer a glass or ceramic bowl because they don’t retain odors. Stainless steel is fine too, but avoid plastic bowls — they can absorb garlic smell permanently.
- Whisk — A small wire whisk is ideal for getting that smooth, creamy texture. If you don’t have one, a fork works surprisingly well. Just be prepared to whisk a little longer.
- Microplane or Garlic Press — This is the one tool I’d actually recommend buying if you don’t have it. A microplane turns garlic into a paste that dissolves into the mayo, giving you garlic flavor in every single bite without any unpleasant chunks.
- Measuring Spoons — For accuracy. I’ve made this creamy garlic aioli enough times to eyeball it, but if you’re making it for the first time, measure everything.
- Rubber Spatula — Not essential, but helpful for scraping every last bit of aioli out of the bowl. Waste not, want not.
- Citrus Juicer or Reamer — A simple handheld reamer makes juicing lemons much easier. I have a wooden one that cost five dollars and it’s lasted me years.
- Airtight Container — For storing leftovers. A glass jar with a tight-fitting lid works perfectly. Mason jars are great for this.
If you’re making this creamy garlic aioli for a party, you can absolutely double or triple the recipe. Just use a larger bowl and give yourself an extra minute of whisking to make sure everything combines evenly. I’ve made a triple batch in a big mixing bowl with no issues.
Preparation Method
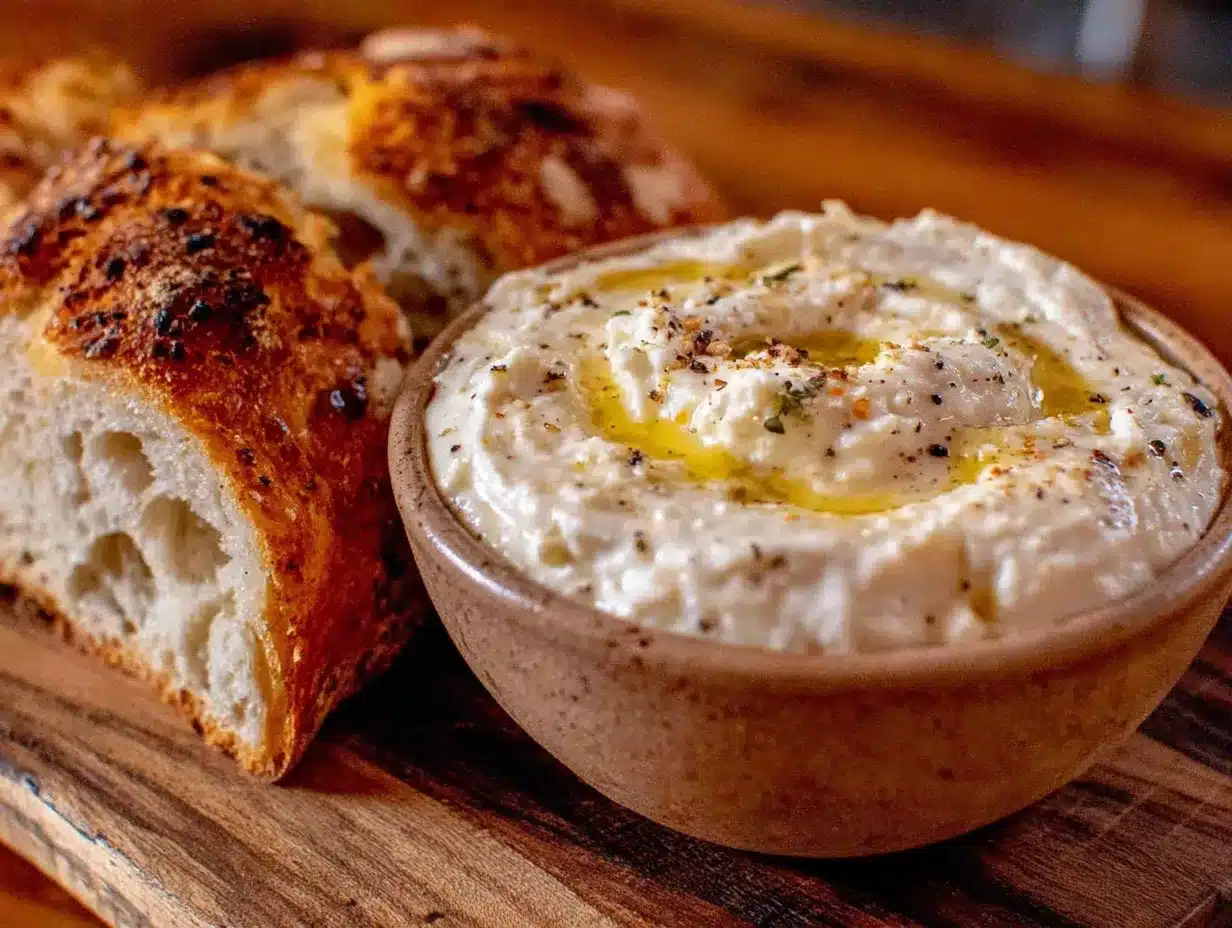
Making this creamy garlic aioli is almost embarrassingly simple. But don’t let the simplicity fool you — there are a few little tricks that make the difference between good and absolutely irresistible.
- Prepare the garlic — Start by peeling 4 to 6 cloves of garlic. To peel them easily, place the flat side of your chef’s knife on top of each clove and give it a gentle smack with your palm. The skin will loosen right up. Once peeled, mince the garlic finely, or better yet, grate it on a microplane. You want a paste, not chunks. This takes about 30 seconds and makes a huge difference in your creamy garlic aioli.
- Make the garlic paste — This is a step most recipes skip, but it matters. Sprinkle a tiny pinch of salt over your grated garlic and use the flat side of your knife to smear it against the cutting board. The salt acts as an abrasive, breaking down the garlic into a smooth paste. You’ll see it turn almost translucent. This releases the garlic’s natural oils and mellows out the sharpness. It takes maybe 20 seconds, and your creamy garlic aioli will thank you.
- Combine the base ingredients — In your mixing bowl, add 1 cup of mayonnaise, the garlic paste, 2 tablespoons of fresh lemon juice, and 1 teaspoon of Dijon mustard. Whisk everything together until smooth. Don’t worry if it looks a little thin at this point — it will thicken up.
- Add the olive oil — Drizzle in 1 to 2 tablespoons of extra virgin olive oil while whisking continuously. This emulsifies the oil into the mayo, creating a richer, more luxurious texture. Pour it slowly — if you dump it all in at once, it might separate. You’ll notice the creamy garlic aioli getting thicker and glossier as you whisk.
- Season and adjust — Add 1/4 teaspoon of salt and 1/8 teaspoon of black pepper. Whisk again, then taste. This is the most important step. Dip a clean spoon in and really pay attention. Does it need more lemon? More garlic? More salt? Trust your taste buds here. I usually end up adding another squeeze of lemon because I love the brightness.
- Rest the aioli — Here’s a trick I learned the hard way. Let your creamy garlic aioli sit at room temperature for 10 to 15 minutes before serving. This allows the garlic flavor to bloom and mellow simultaneously. If you taste it immediately after making it, the garlic will seem harsher than it actually is. Give it a few minutes, and the magic happens.
- Final whisk and serve — Give it one last whisk before transferring to a serving bowl. If you’re adding fresh herbs, fold them in now. The aioli should be thick enough to coat the back of a spoon but still soft and scoopable. If it’s too thick, whisk in a teaspoon of water or extra lemon juice. If it’s too thin, let it rest in the fridge for 15 minutes — it will firm up.
A few things to watch for during this process. If your creamy garlic aioli tastes bitter, you probably used too much olive oil or your garlic had green sprouts. If it’s too sharp, add a tiny pinch of sugar to balance it out. If it’s too thick, don’t panic — a splash of water or lemon juice thins it right up. I’ve made this recipe dozens of times, and I still adjust it every single time based on what I’m serving it with.
The texture should be smooth and luscious, almost like a thick yogurt. When you dip a fry in it, the aioli should cling to it without dripping everywhere. If it runs off, you need to whisk it a bit more or let it chill. If it’s too stiff to dip into, add a tiny bit more liquid.
Cooking Tips & Techniques
I’ve made this creamy garlic aioli so many times that I’ve collected a few hard-won lessons along the way. Some came from mistakes, some from happy accidents, and some from watching professional chefs work their magic.
Let the garlic rest after mincing. This is probably the single most important tip I can give you. Freshly minced garlic has an aggressive, almost burning sharpness. If you let it sit for 5 to 10 minutes after mincing (before adding it to anything), the harsh compounds start to mellow out while the garlicky flavor deepens. I learned this after making a batch of creamy garlic aioli that was so pungent it made my eyes water. Now I always mince the garlic first, then prep everything else while it rests.
Use room temperature ingredients. Cold mayo straight from the fridge doesn’t emulsify as well. Take it out 15 minutes before you start, or if you forgot, just whisk it a little longer. The texture will still be good, but room temperature gives you that silky, luxurious consistency that makes this creamy garlic aioli feel special.
Don’t over-whisk. I know that sounds counterintuitive, but if you whisk this aioli too vigorously or for too long, it can actually break and become thin. You want to whisk just until everything is combined and smooth. About 30 seconds of steady whisking is plenty. When I first started making this, I’d whisk it like I was trying to win a race, and the texture suffered every time.
Taste as you go. This is something professional chefs do instinctively, but home cooks often skip. Taste your creamy garlic aioli after adding each component. The lemon juice, salt, and pepper all need to be balanced. What tastes perfect to me might need more acid for you. Trust your own palate — it’s never wrong.
Make it ahead for better flavor. This creamy garlic aioli actually improves with time. The flavors meld and mellow overnight, creating a more cohesive sauce. I often make it the day before a party and store it in the fridge. Just give it a good stir before serving and let it sit at room temperature for 10 minutes to take the chill off.
One mistake I’ll never make again — using pre-minced garlic from a jar. I was in a hurry once and thought it would be fine. It wasn’t. The aioli had this weird, almost metallic aftertaste that ruined the whole thing. Fresh garlic only for this creamy garlic aioli. Trust me on this one.
Variations & Adaptations
This creamy garlic aioli is incredibly versatile, and I’ve played around with it more times than I can count. Here are some of my favorite variations that keep things interesting.
Roasted Garlic Aioli — This is probably my favorite variation. Roast a whole head of garlic by cutting off the top, drizzling with olive oil, wrapping in foil, and baking at 400°F for 40 minutes. Let it cool, then squeeze the soft cloves out and mash them into a paste. Use this instead of raw garlic. The result is a sweeter, nuttier, almost caramelized garlic flavor that’s incredibly mellow. This version takes more time, but it’s absolutely worth it for special occasions.
Spicy Chipotle Aioli — Add 1 to 2 teaspoons of adobo sauce from a can of chipotle peppers. Start with one teaspoon, taste, and add more if you want more heat. The smokiness of the chipotle pairs beautifully with the creamy garlic base. I love this version on tacos, burrito bowls, or even drizzled over roasted sweet potatoes.
Herb Garden Aioli — Fold in 2 tablespoons of finely chopped fresh herbs right before serving. I like a combination of parsley, chives, and dill, but basil and tarragon work beautifully too. This version is especially good in spring and summer when fresh herbs are abundant. It makes the creamy garlic aioli look gorgeous with little green specks throughout.
Lemon Herb Aioli — Increase the lemon juice to 3 tablespoons and add 1 teaspoon of lemon zest along with the herbs. The extra citrus brightness cuts through rich foods like fried fish or roasted potatoes. This is my go-to version for seafood dishes.
Dairy-Free Version — This creamy garlic aioli is naturally dairy-free since it uses mayo as a base. Just make sure your mayo is dairy-free (most are, but check the label). If you’re using a vegan mayo, the recipe works exactly the same way. I’ve tested it with Vegenaise and it turns out beautifully.
Low-Fat Option — Use light mayonnaise instead of full-fat. The texture will be slightly thinner, but the flavor is still excellent. You might need to add a tiny bit more mustard to help with emulsification. I’ve made this version for friends who are watching their calories, and nobody complained.
Serving & Storage Suggestions
This creamy garlic aioli is one of those sauces that makes everything better. I’ve served it with so many different dishes, and it never disappoints.
Serving Temperature — Serve this aioli slightly chilled or at room temperature. If it’s straight from the fridge, let it sit out for 10 to 15 minutes before serving. Cold temperatures mute the garlic and lemon flavors, so letting it warm up just a bit makes a huge difference. I always pull it out of the fridge when I start setting out the rest of the food.
What to Serve It With — The possibilities are honestly endless. It’s incredible with crispy french fries, roasted potatoes, or sweet potato wedges. Use it as a dip for fresh vegetables like carrot sticks, cucumber slices, bell pepper strips, and cherry tomatoes. Spread it on sandwiches, burgers, or wraps for an instant upgrade. Drizzle it over grilled chicken, fish, or shrimp. It’s also amazing on grain bowls, salads, or as a dressing for coleslaw. I’ve even used it as a spread for crackers with smoked salmon — absolutely divine.
Presentation Ideas — For parties, I like to serve this creamy garlic aioli in a small bowl with a drizzle of olive oil on top and a sprinkle of fresh herbs or cracked black pepper. A little edible flower or a lemon twist makes it look restaurant-worthy. If you’re serving it as part of a platter, put it in a small ramekin surrounded by the dipping items.
Storage Instructions — Store your creamy garlic aioli in an airtight container in the refrigerator. It will keep for up to 7 days, though honestly, it never lasts that long in my house. The garlic flavor will continue to mellow and meld over time, so day-old aioli actually tastes even better than fresh-made. Just give it a good stir before using.
Freezing — I don’t recommend freezing this aioli. The mayonnaise base can separate when thawed, leaving you with a grainy texture. If you need to make it far in advance, just keep it in the fridge for up to a week.
Reheating — There’s no need to reheat this creamy garlic aioli. Just take it out of the fridge 10 to 15 minutes before serving to take the chill off. If it seems too thick after refrigeration, whisk in a few drops of lemon juice or water to loosen it up.
Flavor Development — Here’s something interesting I’ve noticed. The day you make this aioli, the garlic is bold and punchy. By day two, it’s smoother and more integrated. By day three, everything has melded into this perfect harmony. So if you can plan ahead, making it a day or two before you need it is actually ideal.
Nutritional Information & Benefits
Let’s be real — this creamy garlic aioli isn’t a health food, but it’s certainly better for you than you might think. Here’s the breakdown for a standard 2-tablespoon serving.
| Nutrient | Amount Per Serving |
|---|---|
| Calories | 140 |
| Total Fat | 15g |
| Saturated Fat | 2.5g |
| Cholesterol | 10mg |
| Sodium | 180mg |
| Total Carbohydrates | 1g |
| Protein | 0g |
Health Benefits of Key Ingredients — Garlic is the star here, and it’s packed with health benefits. It contains allicin, a compound known for its anti-inflammatory and immune-boosting properties. Regular garlic consumption has been linked to lower blood pressure and improved heart health. Lemon juice provides vitamin C and antioxidants, while olive oil offers healthy monounsaturated fats that support heart health.
Dietary Considerations — This creamy garlic aioli is naturally gluten-free, dairy-free, and nut-free. It’s also low in carbohydrates, making it suitable for keto and low-carb diets. The no-raw-egg approach makes it safe for pregnant women, young children, elderly individuals, and anyone with a compromised immune system.
Potential Allergens — This recipe contains eggs (from the mayonnaise) and may contain mustard. If you have egg allergies, use a vegan mayonnaise. If you have mustard allergies, simply omit the Dijon mustard — the aioli will still taste great, just slightly less tangy.
My Personal Take — I love that this creamy garlic aioli lets me enjoy a rich, indulgent sauce without worrying about raw eggs or complicated ingredients. It’s one of those recipes that proves you don’t need to sacrifice flavor to eat well. A little goes a long way, so even a small serving adds so much joy to a meal.
Conclusion
This creamy garlic aioli has honestly become my secret weapon in the kitchen. It’s the sauce I make when I want to impress without stress, the condiment that turns a simple plate of vegetables into something people actually fight over, and the recipe I keep coming back to because it just works. Every single time.
What I love most about this creamy garlic aioli is how forgiving it is. You can adjust the garlic to your taste, swap in different herbs, make it spicy or mild — it always turns out delicious. It’s the kind of recipe that makes you look like you know what you’re doing in the kitchen, even when you’re just winging it. And honestly? That’s my favorite kind of recipe.
I’d love to hear how this turns out for you. Did you add extra lemon? Throw in some chipotle? Serve it with something unexpected? Drop a comment below and let me know — I read every single one. And if you make this creamy garlic aioli for your next gathering, tag me in your photos. There’s nothing that makes me happier than seeing this sauce on your table.
Go ahead, give it a try. You’ve got five minutes and a fridge full of possibilities. I promise you won’t regret it.
Frequently Asked Questions
Can I make this creamy garlic aioli vegan?
Absolutely! Just use a vegan mayonnaise like Vegenaise or Follow Your Heart. The recipe works exactly the same way, and the flavor is still fantastic. I’ve made it for vegan friends and they couldn’t tell the difference.
How long does this aioli last in the fridge?
Stored in an airtight container, this creamy garlic aioli will stay fresh for up to 7 days. The flavor actually gets better after a day or two as the garlic mellows and melds with the other ingredients. Just give it a good stir before using.
Why did my aioli turn out too thin?
This usually happens if you added too much olive oil or lemon juice, or if the mayo was too warm. To fix it, whisk in a little more mayonnaise a tablespoon at a time until it thickens up. Chilling it for 15 minutes also helps it firm up.
Can I use this aioli as a salad dressing?
Yes, but it’s quite thick for a dressing. Thin it out by whisking in 1 to 2 tablespoons of water, extra lemon juice, or a splash of milk until it reaches your desired consistency. It makes an amazing Caesar-style dressing for romaine lettuce.
Is it safe for pregnant women since there’s no raw egg?
Yes, this is one of the main advantages of this recipe. Since we’re using mayonnaise as the base instead of raw egg yolks, there’s no risk of salmonella. This creamy garlic aioli is completely safe for pregnant women, children, elderly individuals, and anyone with a weakened immune system.
Pin This Recipe!
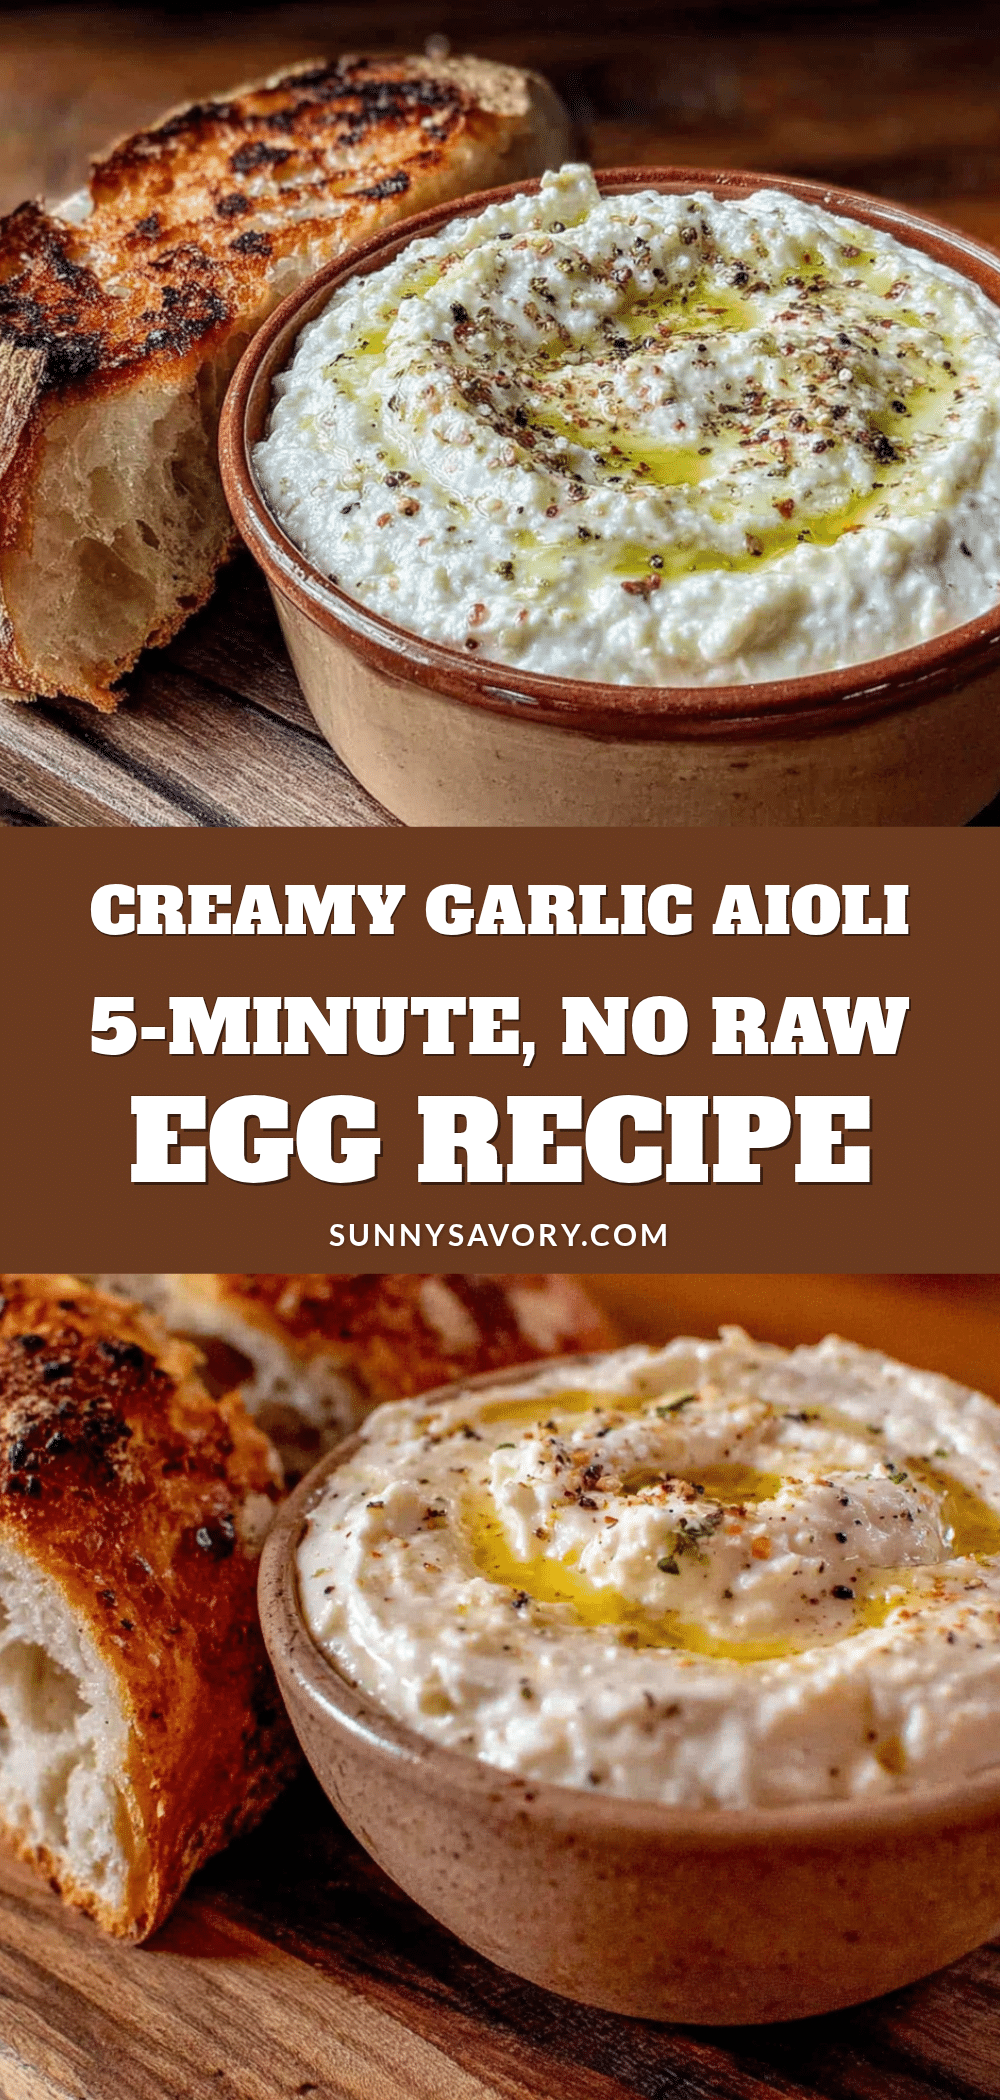
Creamy Garlic Aioli: 5-Minute No Raw Egg Recipe
This creamy garlic aioli comes together in under five minutes with simple pantry ingredients and no raw eggs. It’s the perfect dipping sauce for vegetables, fries, sandwiches, and more.
- Prep Time: 5 minutes
- Cook Time: 0 minutes
- Total Time: 5 minutes
- Yield: 8 servings 1x
- Category: Sauce
- Cuisine: Mediterranean
Ingredients
- 1 cup (240 ml) mayonnaise (full-fat recommended, e.g., Hellmann’s or Duke’s)
- 4 to 6 cloves garlic, minced or grated
- 2 tablespoons (30 ml) fresh lemon juice
- 1 teaspoon (5 ml) Dijon mustard
- 1 to 2 tablespoons (15 to 30 ml) extra virgin olive oil
- 1/4 teaspoon (1.5 g) fine sea salt or kosher salt
- 1/8 teaspoon (0.5 g) freshly ground black pepper
- 1 tablespoon chopped fresh herbs (parsley, chives, or dill) (optional)
Instructions
- Prepare the garlic: Peel 4 to 6 cloves of garlic. Place the flat side of a chef’s knife on each clove and gently smack to loosen the skin. Mince finely or grate on a microplane to create a paste.
- Make the garlic paste: Sprinkle a tiny pinch of salt over the grated garlic and use the flat side of your knife to smear it against the cutting board until it turns almost translucent.
- Combine the base ingredients: In a mixing bowl, add 1 cup mayonnaise, the garlic paste, 2 tablespoons fresh lemon juice, and 1 teaspoon Dijon mustard. Whisk until smooth.
- Add the olive oil: Drizzle in 1 to 2 tablespoons extra virgin olive oil while whisking continuously until emulsified and the aioli thickens.
- Season and adjust: Add 1/4 teaspoon salt and 1/8 teaspoon black pepper. Whisk again, then taste. Adjust with more lemon, garlic, or salt as needed.
- Rest the aioli: Let the aioli sit at room temperature for 10 to 15 minutes before serving to allow the garlic flavor to bloom and mellow.
- Final whisk and serve: Give one last whisk. If using fresh herbs, fold them in now. Transfer to a serving bowl. If too thick, whisk in a teaspoon of water or lemon juice. If too thin, refrigerate for 15 minutes to firm up.
Notes
Let the garlic rest after mincing for 5-10 minutes to mellow the sharpness. Use room temperature ingredients for best emulsification. The aioli improves with time; make it a day ahead for better flavor. If using pre-minced garlic from a jar, the flavor may be metallic. For a thinner consistency, whisk in water or extra lemon juice. For a thicker consistency, refrigerate for 15 minutes.
Nutrition
- Serving Size: 2 tablespoons
- Calories: 140
- Sodium: 180
- Fat: 15
- Saturated Fat: 2.5
- Carbohydrates: 1
Keywords: garlic aioli, no raw egg aioli, quick aioli, easy aioli, creamy garlic sauce, dipping sauce, party appetizer, 5-minute recipe



