Love this? Save it for later!
Share the inspiration with your friends
It was 11:47 PM on a drizzly Thursday in late October, and I had a bone to pick with my fridge. Not literally, but I did have a ham bone—picked clean from Sunday’s dinner, wrapped in foil, staring at me from the bottom shelf. I didn’t have the energy for a proper stock, and honestly, I wasn’t in the mood for anything complicated. But that bone, man. It felt like a challenge.
I had a bag of split peas in the pantry—the kind you buy for a project and then forget about for six months. And a sad, half-wilted onion. A couple of carrots that were starting to look a little philosophical about their existence. That was it. No celery (I used a handful of frozen chopped bell pepper instead, which, let me tell you, worked better than I expected). No fancy herbs. Just the bone, the peas, and a hunch that something good could happen if I let it simmer long enough.
Maybe you’ve been there—standing in your kitchen at a weird hour, too tired to follow a real recipe, but too stubborn to order takeout. That’s where this soup was born. It wasn’t planned. It wasn’t pretty. But when I finally sat down with a bowl at 1 AM, the rain tapping against the window, I knew I’d stumbled onto something worth keeping. This is that soup—cozy, old-fashioned, and honest. The kind that tastes like patience and a little bit of luck.
Why You’ll Love This Recipe
This isn’t just another split pea soup recipe. I’ve made a lot of mediocre versions over the years—some too watery, some pasty, some that tasted like nothing but green sadness. This one is different. It’s the one I keep coming back to, and here’s why:
- Rich, Smoky Flavor Without the Fuss: The ham bone does all the heavy lifting. You don’t need a dozen spices or a complicated broth. Just let it simmer, and the bone releases that deep, savory goodness that makes this soup taste like it’s been cooking all day—even if you started it at 11 PM.
- Pantry-Friendly Ingredients: Split peas, an onion, a couple of carrots, and a leftover ham bone. That’s it. No trips to the specialty store, no obscure ingredients you’ll never use again. This is the kind of recipe that saves you on a rainy Tuesday when the fridge looks sad.
- Perfect for Cozy Season: Whether it’s a chilly fall evening, a snowy winter afternoon, or a damp spring day that just won’t quit, this soup fits. It’s the culinary equivalent of wrapping yourself in a thick blanket.
- Freezer-Friendly and Meal-Prep Hero: This soup actually gets better after a day or two in the fridge. Make a big batch on Sunday, and you’ve got lunches for the week. Or freeze half for those days when you need comfort in a hurry.
- Naturally Hearty and Satisfying: No cream, no flour, no weird thickeners. The split peas break down on their own, creating a velvety texture that feels indulgent without being heavy. It’s the kind of meal that fills you up without weighing you down.
I’ve tested this recipe at least a dozen times, tweaking the water ratio, the simmer time, and the seasoning. What I’m sharing with you is the version that finally made me stop tweaking. It’s the one where I closed my eyes after the first bite and thought, yeah, that’s it.
What Ingredients You Will Need
This recipe uses simple, humble ingredients to create something that feels far greater than the sum of its parts. Most of these are probably already in your kitchen, which is exactly the point.
- 1 leftover ham bone (with some meat still attached, if possible): This is the soul of the soup. The bone adds collagen, smokiness, and depth that no store-bought broth can replicate. I prefer using a bone from a spiral-cut ham, but any ham bone will work. If you don’t have one, you can use a ham hock or even a couple of thick-cut ham steaks cut into chunks.
- 1 pound dried green split peas (about 2 cups): No need to soak them overnight—split peas cook relatively quickly. Just rinse them in a fine-mesh strainer and pick out any little stones or shriveled peas. I like the Goya brand for consistency, but any brand works fine.
- 1 large yellow onion, diced: Onion provides the aromatic base. Yellow onions are my go-to here because they’re mellow and sweet when cooked down. White onions work too, but they’re a bit sharper.
- 2 large carrots, peeled and diced: Carrots add a subtle sweetness that balances the savory ham. Dice them small—about ½-inch pieces—so they soften at the same rate as everything else.
- 2 celery stalks, diced (optional but recommended): Celery adds a grassy, slightly peppery note that rounds out the flavor. If you don’t have celery, a small diced bell pepper or even a parsnip makes a good substitute.
- 3 cloves garlic, minced: Garlic is non-negotiable in my book. It adds a warm, savory backbone. Use fresh garlic, not the pre-minced stuff from a jar—trust me on this.
- 6 cups low-sodium chicken broth (or water): I use chicken broth for extra flavor, but water works perfectly fine if you want to keep it simpler. If using water, you might want to add an extra pinch of salt at the end.
- 1 bay leaf: Just one. It adds a subtle herbal note that you won’t notice until it’s missing.
- ½ teaspoon dried thyme: Thyme and ham are a classic pairing. If you have fresh thyme, use 1 teaspoon of leaves, stripped from the stems.
- Salt and black pepper, to taste: Go easy on the salt at the beginning—the ham bone can be salty. You can always add more at the end.
- Optional: 1 tablespoon olive oil or butter for sautéing the vegetables. I use olive oil most of the time, but butter adds a nice richness if you’re feeling indulgent.
Ingredient Selection Tip: When buying split peas, look for bags that are sealed tightly and have no visible moisture. Stale peas take forever to soften. And if you’re using a ham bone from a leftover holiday meal, scrape off any excess glaze or seasoning before adding it to the pot—it can throw off the flavor balance.
Equipment Needed
You don’t need a fancy kitchen to make this soup. Here’s what you’ll need:
- A large heavy-bottomed pot or Dutch oven (5 to 6 quarts): This is the most important piece of equipment. A Dutch oven retains heat evenly, which is key for a long, gentle simmer. I use my old Le Creuset, but a Lodge enameled cast iron pot works just as well and costs a fraction of the price. If you don’t have a Dutch oven, any large soup pot with a thick bottom will do.
- A sharp chef’s knife: Dicing onions and carrots is much easier (and safer) with a sharp knife. I’m partial to my Victorinox Fibrox—it’s affordable and stays sharp for ages.
- A cutting board: Wood or plastic, doesn’t matter. Just make sure it’s stable.
- A wooden spoon or silicone spatula: For stirring. Metal spoons can scratch enameled pots.
- A fine-mesh strainer: For rinsing the split peas. You can also use a colander, but a fine-mesh strainer catches the tiny stones better.
- Measuring cups and spoons: Nothing fancy—just the basics.
- An immersion blender (optional but nice to have): If you like a creamier texture, you can blend part of the soup right in the pot. If you don’t have one, you can ladle a couple of cups into a regular blender, just be careful with the hot liquid.
Budget-Friendly Tip: Don’t have a Dutch oven? A stainless steel stockpot works fine. Just stir a little more often to prevent sticking on the bottom.
Preparation Method
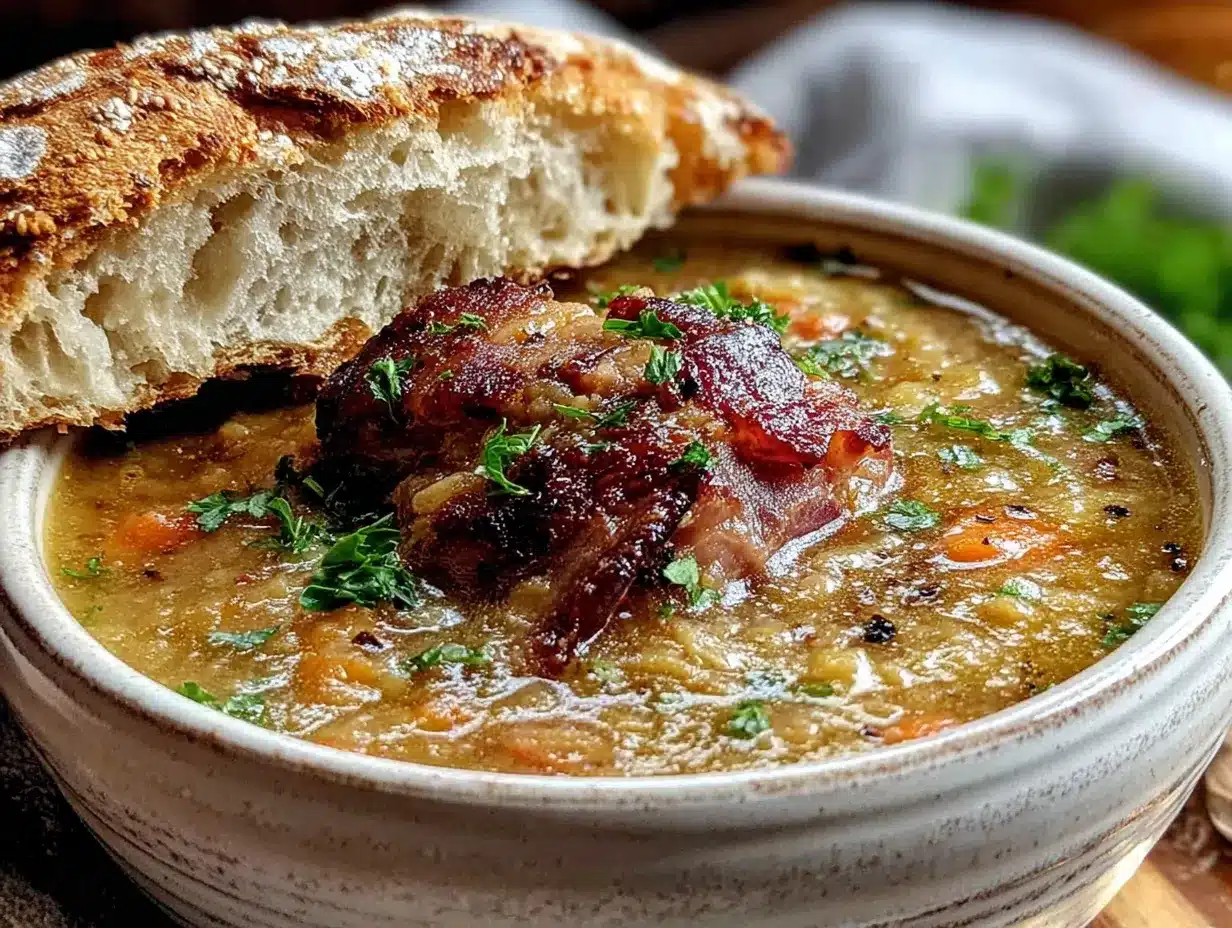
- Rinse the split peas (2 minutes): Place the split peas in a fine-mesh strainer and rinse them under cold running water. Pick through them quickly with your fingers to remove any tiny stones or shriveled peas. Set aside.
- Sauté the aromatics (8-10 minutes): Heat 1 tablespoon of olive oil or butter in your Dutch oven over medium heat. Add the diced onion, carrots, and celery. Cook, stirring occasionally, until the vegetables are softened and the onion is translucent—about 8 minutes. Don’t rush this step. The browning that happens here builds the foundation of flavor. Add the minced garlic and cook for another 30 seconds, until fragrant.
- Add the ham bone and peas (2 minutes): Nestle the ham bone into the pot, meaty side down if possible. Pour in the rinsed split peas. Give everything a stir so the peas get coated in the oily goodness from the vegetables.
- Add liquid and seasonings (1 minute): Pour in the 6 cups of chicken broth (or water). Add the bay leaf and dried thyme. Don’t add salt yet—the ham bone will release salt as it simmers, and you can adjust at the end.
- Bring to a boil, then simmer (5 minutes to boil, 60-90 minutes to simmer): Turn the heat to high and bring the soup to a rolling boil. Once it’s boiling, reduce the heat to low, cover the pot with the lid slightly ajar (to let a little steam escape), and let it simmer gently. Stir occasionally, especially after the first 30 minutes, to make sure the peas aren’t sticking to the bottom.
- Check for doneness (after 60 minutes): After an hour, the split peas should be breaking down and the soup should be thickening. The ham bone should be mostly bare. Use tongs to carefully remove the ham bone and place it on a cutting board. Let it cool for a few minutes, then pick off any remaining meat. Discard the bone, fat, and any gristly bits. Chop the meat into small pieces.
- Blend if desired (5 minutes): If you like a creamier soup, use an immersion blender to partially blend the soup right in the pot. I like to leave about half of it chunky for texture. If you don’t have an immersion blender, ladle about 2 cups of the soup into a regular blender, blend until smooth, and stir it back into the pot. Be careful—hot liquid expands in a blender, so only fill it halfway and hold the lid down with a towel.
- Return the meat to the pot (1 minute): Stir the chopped ham back into the soup. Let it simmer for another 5 minutes to heat through.
- Season and serve (2 minutes): Taste the soup. Add salt and black pepper as needed. Remember that the ham can be salty, so go slow. Remove the bay leaf. Ladle the soup into bowls and serve hot.
Sensory Cue: When the soup is ready, it should be thick enough to coat the back of a spoon. The color will be a deep, muted green. The aroma should be savory and comforting—like a kitchen that’s been busy all day, even if it’s only been an hour.
Cooking Tips & Techniques
I’ve made this soup at least twenty times, and I’ve learned a few things the hard way. Here are the tips that actually matter:
- Don’t skip the sauté: I know it’s tempting to just dump everything in the pot and walk away, but sautéing the vegetables first makes a real difference. It draws out their natural sugars and creates a deeper, more complex base. I once skipped this step when I was in a hurry, and the soup tasted flat. Never again.
- Watch the salt: Ham bones vary wildly in saltiness. Some are practically cured, others are mild. Always start with unsalted or low-sodium broth, and hold off on adding salt until the very end. You can’t take salt out once it’s in.
- Stir occasionally, especially toward the end: Split peas are starchy, and they love to stick to the bottom of the pot. Give the soup a good stir every 15-20 minutes during the last half hour of cooking. If it starts to look too thick, add a splash of water or broth.
- The bone is your best friend: Don’t rush the simmer. The longer the bone stays in the pot, the more collagen and flavor it releases. If you have time, let it simmer for a full 90 minutes. The soup will be richer and more velvety.
- Leftovers are better: I’m not kidding. This soup improves overnight as the flavors meld. Make it a day ahead if you can. The texture will be thicker, almost like a stew, and the flavor will be deeper. Just add a little water when reheating to loosen it up.
- Common mistake: over-blending: If you blend the entire soup, it can turn into baby food. I prefer to blend only half, leaving some texture. If you want a completely smooth soup, go for it, but keep an eye on the consistency and add a little extra liquid if needed.
Variations & Adaptations
This recipe is forgiving, and I’ve tried quite a few twists over the years. Here are some of my favorites:
- Vegetarian Version: Omit the ham bone entirely. Sauté an extra carrot and celery stalk, and add 1 teaspoon of smoked paprika and ½ teaspoon of liquid smoke to the pot along with the broth. The smoked paprika gives you that smoky depth without the meat. Use vegetable broth instead of chicken broth. It won’t be exactly the same, but it’s surprisingly good.
- Smoky Bacon Twist: If you don’t have a ham bone, cook 4 slices of thick-cut bacon in the pot before sautéing the vegetables. Remove the bacon, crumble it, and set it aside. Proceed with the recipe, using the bacon fat to sauté the aromatics. Stir the crumbled bacon back in at the end. It’s a different kind of smoky, but it works beautifully.
- Herb-Forward Version: Add a sprig of fresh rosemary and a couple of sprigs of fresh parsley along with the bay leaf. Remove them before blending. The rosemary adds a piney, aromatic note that pairs well with the ham.
- Spicy Kick: Add a pinch of red pepper flakes or a diced jalapeño (seeds removed) when you sauté the vegetables. It doesn’t make the soup spicy, just gives it a little warmth at the back of the throat.
- Slow Cooker Adaptation: Sauté the vegetables on the stovetop first, then transfer everything (including the ham bone) to a slow cooker. Cook on low for 8-10 hours or on high for 4-5 hours. Remove the bone, pick off the meat, and blend if desired. The slow cooker version is even more hands-off, though the texture is slightly less velvety.
I once made a version with a leftover spiral ham bone from Easter and added a splash of apple cider vinegar at the end. The acidity cut through the richness perfectly. It’s now my go-to variation when I want something a little brighter.
Serving & Storage Suggestions
This soup is a meal in itself, but the right accompaniments can make it feel special.
- Serving Temperature: Serve the soup piping hot. Let it cool for a couple of minutes after ladling—it’s thick enough to hold heat, and you don’t want to burn your tongue.
- Garnishes: A sprinkle of fresh parsley or chives adds a pop of color. A drizzle of olive oil or a pat of butter melted on top adds richness. A few croutons or a side of crusty bread for dipping is almost mandatory.
- Complementary Sides: A simple green salad with a tangy vinaigrette cuts through the soup’s richness. A grilled cheese sandwich (especially with sharp cheddar) is a classic pairing. Or just eat it with a spoon and call it dinner—I’ve done that plenty of times.
- Storage: Let the soup cool completely before transferring it to airtight containers. It will keep in the refrigerator for up to 5 days. The texture will thicken significantly as it sits—this is normal. When reheating, add a splash of water or broth to loosen it up.
- Freezing: This soup freezes beautifully. Portion it into freezer-safe containers or zip-top bags (lay them flat for easy stacking). It will keep for up to 3 months. Thaw overnight in the refrigerator before reheating. I like to freeze individual portions for quick lunches.
- Flavor Development: As I mentioned, this soup tastes even better on day two or three. The flavors continue to meld, and the texture becomes even creamier. Don’t be surprised if you find yourself looking forward to the leftovers more than the first serving.
Nutritional Information & Benefits
This soup is as nourishing as it is comforting. Here’s a rough estimate per serving (based on 8 servings):
- Calories: Approximately 280-320
- Protein: 18-22 grams (thanks to the split peas and ham)
- Fiber: 12-15 grams (split peas are a fiber powerhouse)
- Fat: 5-8 grams (depending on how much fat is on the ham bone)
- Carbohydrates: 35-40 grams
Health Benefits: Split peas are packed with soluble fiber, which helps regulate blood sugar and lower cholesterol. They’re also a good source of plant-based protein, iron, and folate. The carrots provide vitamin A for eye health, and the garlic has anti-inflammatory properties. This is the kind of meal that fills you up without the heavy feeling that comes from cream-based soups.
Dietary Considerations: This recipe is naturally dairy-free and gluten-free (just make sure your broth is certified gluten-free if needed). It’s also nut-free and egg-free. If you’re watching your sodium, use low-sodium broth and go easy on the added salt—the ham bone will still contribute some.
Personal Note: I love that this soup feels indulgent but is actually pretty good for you. It’s the kind of meal that makes you feel taken care of, like someone (even if that someone is you) put thought into what you’re eating.
Conclusion
This old-fashioned split pea soup with ham bone is proof that the best recipes don’t come from complicated techniques or exotic ingredients. They come from a quiet kitchen, a leftover bone, and a willingness to let simple things simmer into something special. It’s the soup I turn to when I need a hug in a bowl, when the weather outside matches the mood inside, or when I just want to use up every last bit of a good ham dinner.
I hope you make this soup your own. Maybe you’ll add a little extra thyme, or skip the celery, or let it simmer while you read a book. That’s the beauty of a recipe like this—it’s a starting point, not a rulebook. If you try it, I’d love to hear how it turns out. Leave a comment below, or tag me in your photos. And if you’ve got a ham bone waiting in your freezer? This is its moment.
Happy cooking, and stay cozy.
Frequently Asked Questions
Do I need to soak split peas before cooking?
No, that’s one of the best things about split peas. Unlike dried beans, they don’t require overnight soaking. Just rinse them well and pick out any debris. They’ll soften beautifully during the simmer.
Can I make this soup without a ham bone?
Absolutely. You can use a ham hock, a meaty ham shank, or even a couple of thick ham steaks cut into chunks. For a vegetarian version, use smoked paprika and liquid smoke to mimic that smoky flavor. It won’t be identical, but it’s still delicious.
Why is my split pea soup too thick?
This happens often, and it’s an easy fix. Split peas release a lot of starch as they cook, which thickens the soup. If it’s too thick for your liking, simply stir in extra broth or water until it reaches your desired consistency. Remember that the soup will thicken more as it cools.
Can I freeze split pea soup?
Yes, and it freezes very well. Let the soup cool completely, then transfer it to freezer-safe containers or zip-top bags. It will keep for up to 3 months. Thaw overnight in the refrigerator before reheating. You may need to add a splash of water when reheating, as freezing can thicken the texture.
How do I prevent the soup from sticking to the bottom of the pot?
Stir occasionally, especially during the last 30 minutes of cooking. Use a heavy-bottomed pot or Dutch oven, which distributes heat more evenly. If you notice the soup starting to stick, reduce the heat slightly and give it a good stir. A little sticking on the bottom is normal, but you don’t want it to burn.
Pin This Recipe!
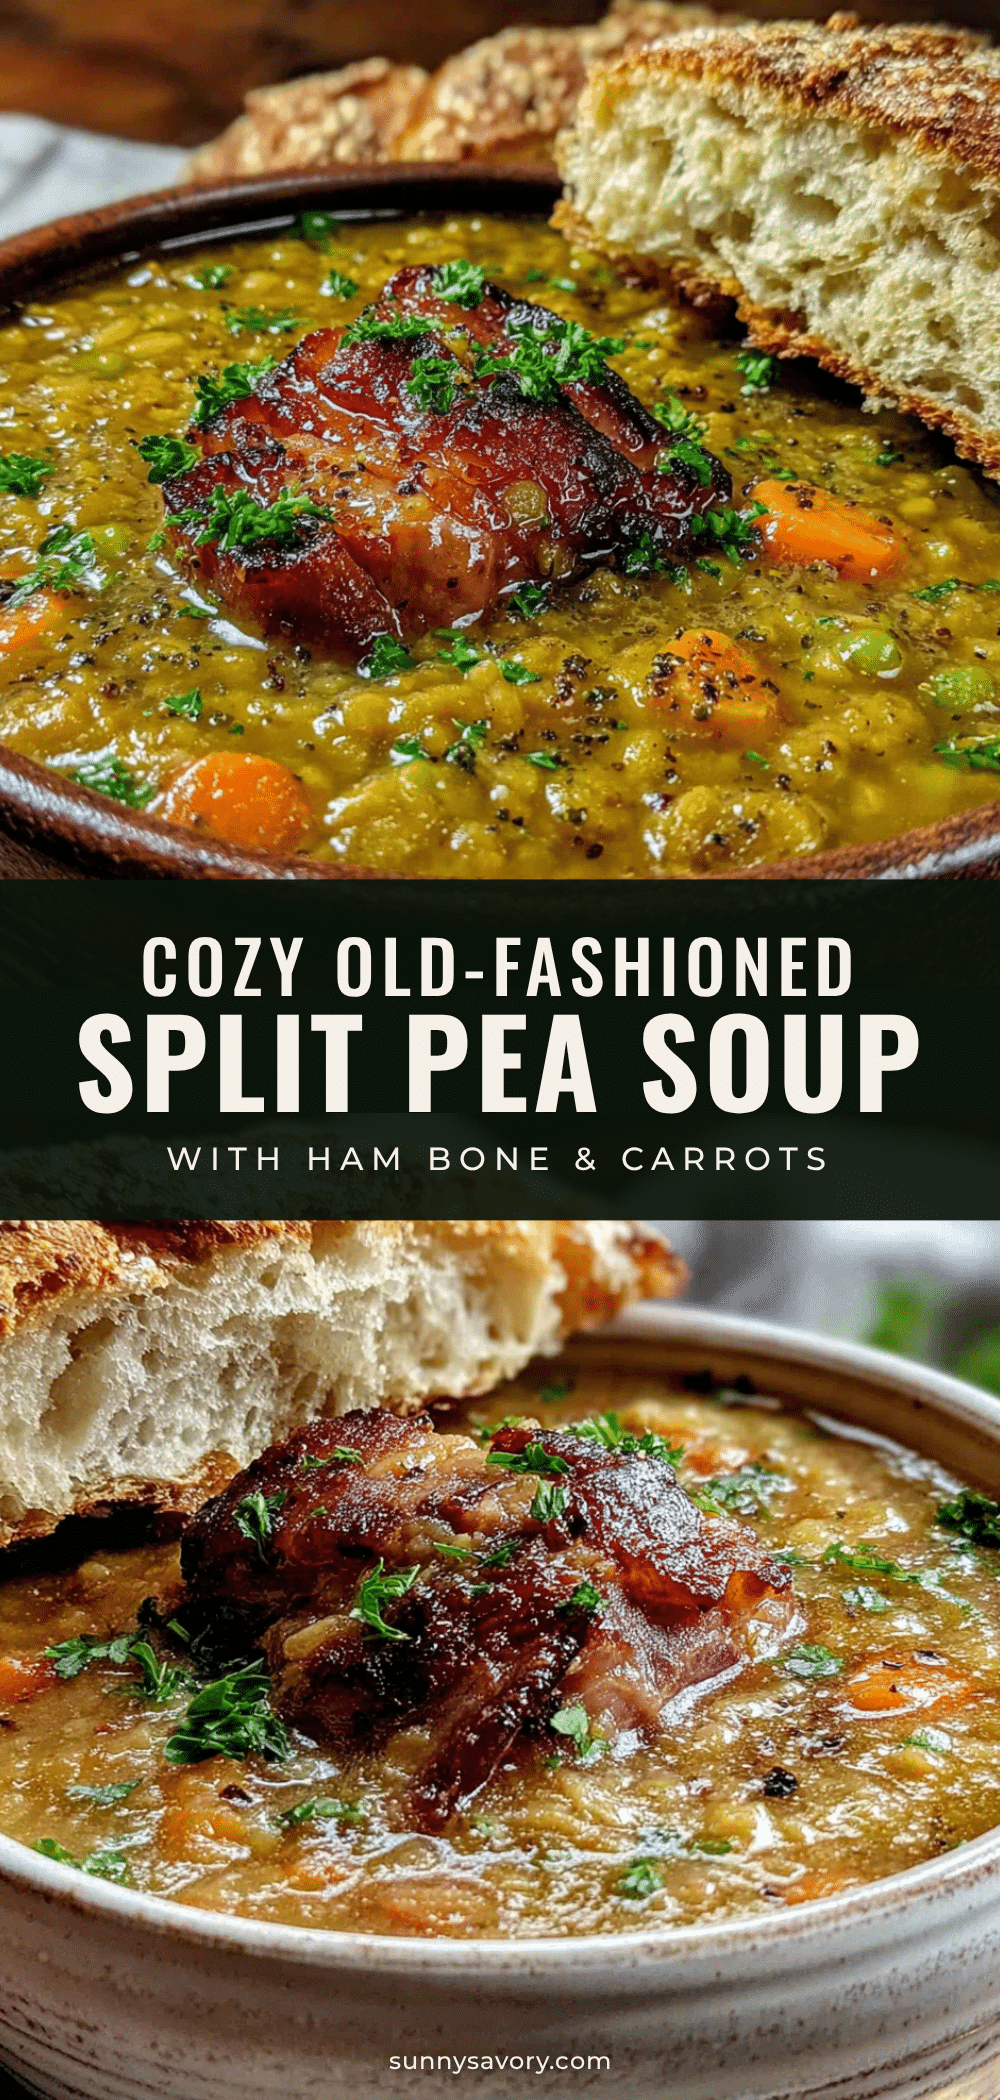
Cozy Old-Fashioned Split Pea Soup with Ham Bone

A rich, smoky split pea soup made with a leftover ham bone, simple pantry ingredients, and a long, gentle simmer. It’s the ultimate comfort food for chilly days, naturally hearty and satisfying without any cream or flour.
- Prep Time: 15 minutes
- Cook Time: 75 minutes
- Total Time: 90 minutes
- Yield: 8 servings 1x
- Category: Soup
- Cuisine: American
Ingredients
- 1 leftover ham bone (with some meat still attached, if possible)
- 1 pound dried green split peas (about 2 cups)
- 1 large yellow onion, diced
- 2 large carrots, peeled and diced
- 2 celery stalks, diced (optional but recommended)
- 3 cloves garlic, minced
- 6 cups low-sodium chicken broth (or water)
- 1 bay leaf
- ½ teaspoon dried thyme
- Salt and black pepper, to taste
- 1 tablespoon olive oil or butter (for sautéing)
Instructions
- Rinse the split peas in a fine-mesh strainer under cold running water. Pick out any tiny stones or shriveled peas. Set aside.
- Heat 1 tablespoon of olive oil or butter in a Dutch oven over medium heat. Add the diced onion, carrots, and celery. Cook, stirring occasionally, until softened and the onion is translucent, about 8 minutes. Add the minced garlic and cook for another 30 seconds until fragrant.
- Nestle the ham bone into the pot, meaty side down if possible. Pour in the rinsed split peas. Stir to coat the peas with the oil from the vegetables.
- Pour in the 6 cups of chicken broth (or water). Add the bay leaf and dried thyme. Do not add salt yet.
- Turn the heat to high and bring the soup to a rolling boil. Reduce the heat to low, cover the pot with the lid slightly ajar, and let it simmer gently for 60-90 minutes, stirring occasionally, especially after the first 30 minutes.
- After 60 minutes, check the soup. The split peas should be breaking down and the soup thickening. Use tongs to carefully remove the ham bone and place it on a cutting board. Let it cool for a few minutes, then pick off any remaining meat. Discard the bone, fat, and gristly bits. Chop the meat into small pieces.
- If desired, use an immersion blender to partially blend the soup right in the pot, leaving about half chunky for texture. Alternatively, ladle about 2 cups of soup into a regular blender, blend until smooth, and stir back into the pot. Be careful with hot liquid.
- Stir the chopped ham back into the soup. Let it simmer for another 5 minutes to heat through.
- Taste the soup and add salt and black pepper as needed. Remove the bay leaf. Ladle into bowls and serve hot.
Notes
Don’t skip sautéing the vegetables—it builds flavor. Watch the salt; ham bones vary in saltiness. Stir occasionally toward the end to prevent sticking. Leftovers taste even better the next day. For a vegetarian version, omit the ham bone and add smoked paprika and liquid smoke.
Nutrition
- Serving Size: 1 bowl (about 1.5 cu
- Calories: 300
- Sugar: 6
- Sodium: 600
- Fat: 6.5
- Saturated Fat: 2
- Carbohydrates: 37
- Fiber: 13
- Protein: 20
Keywords: split pea soup, ham bone, old-fashioned, cozy, comfort food, freezer-friendly, meal prep



