Love this? Save it for later!
Share the inspiration with your friends
My daughter asked why I couldn’t just pour sweetened condensed milk over snow and call it ice cream. I started to explain why that wouldn’t work—something about texture, consistency, and the science of freezing—then stopped. Honestly, I had no good reason. I was about to launch into a whole lecture about traditional ice cream bases and churning methods when I realized I was just repeating what I’d been taught without ever questioning it myself.
So I handed her the mixing bowl. “Alright, show me what you’ve got.”
She grabbed a handful of clean snow from the backyard (the first decent snowfall we’d had in weeks), dumped it in the bowl, and drizzled that sweetened condensed milk right on top. I winced internally, expecting a sugary slush. She stirred it with a wooden spoon—slowly at first, then faster—and let me tell you, the look on her face when that creamy, scoopable mixture came together was pure triumph. I took a bite. Then another. It was ridiculously good. Creamy, sweet, with that unmistakable fresh-snow texture that somehow tastes like winter itself. She was right, and I was thrilled to be wrong.
Maybe you’ve been there—that moment when a kid’s simple idea makes you realize you’ve been overcomplicating things for years. This recipe is that moment. It’s the kind of kitchen discovery that makes you wonder why nobody told you sooner. And now, every time it snows, we’re both out there with our bowls, racing to see who can make it first.
Why You’ll Love This Recipe
Let’s be real—making ice cream from scratch usually involves fancy equipment, a long list of ingredients, and way more patience than most of us have on a Tuesday afternoon. This snow ice cream flips all of that on its head. It’s the kind of recipe that makes you feel like a kitchen genius without actually doing much work.
- Quick & Easy: From start to finish, this takes about 10 minutes. No joke. The hardest part is waiting for it to snow.
- Simple Ingredients: You probably already have sweetened condensed milk and vanilla extract in your pantry. The star ingredient? Fresh snow. That’s it.
- Perfect for Snow Days: When the kids are bouncing off the walls and you need something fun to do, this recipe turns a winter storm into a kitchen adventure.
- Crowd-Pleaser: I’ve served this to picky eaters, adults who swear they don’t like “weird” desserts, and everyone in between. It disappears every single time.
- Unbelievably Delicious: The texture is soft and creamy—not icy or crunchy like you might expect. That sweetened condensed milk does something magical to the snow, creating a richness that rivals any store-bought ice cream.
What makes this recipe different from every other snow ice cream out there? It’s the ratio. I’ve tested this more times than I care to admit, and the perfect balance is 1 can of sweetened condensed milk to about 8 cups of clean, fluffy snow. Too much snow and you get icy crystals. Too little and it’s overly sweet syrup. This is the Goldilocks version—just right every time.
This recipe isn’t just good—it’s the kind that makes you close your eyes after the first bite. It’s comfort food reimagined: simpler, faster, but with the same soul-soothing satisfaction. Perfect for turning a snow day into something memorable without stressing yourself out.
What Ingredients You Will Need
This recipe uses simple, everyday ingredients to deliver a dessert that tastes like a winter wonderland. No fancy grocery trips needed—you likely already have everything except the snow itself.
- Fresh, clean snow (about 8 cups) – This is the star. Collect it from a clean area away from roads, pets, and trees. The fluffier and drier the snow, the better the texture. I prefer snow that’s fallen within the first few hours of a storm—it’s lighter and less compacted.
- 1 can (14 ounces) sweetened condensed milk – This is your sweetener and cream base all in one. I recommend Eagle Brand or Nestlé La Lechera for consistent results. Don’t substitute evaporated milk—it’s not the same and won’t give you that creamy texture.
- 1 teaspoon vanilla extract – Pure vanilla extract makes a noticeable difference. If you only have imitation vanilla, it’ll still work, but the flavor won’t be as rich. You can also use vanilla bean paste for those fancy specks.
- Pinch of salt (optional but recommended) – A tiny pinch of fine sea salt balances the sweetness and enhances the vanilla flavor. Don’t skip it—you won’t taste salt, you’ll just taste better ice cream.
Optional mix-ins:
- Chocolate chips or mini chocolate chips (about 1/2 cup)
- Sprinkles for color and crunch
- Crushed cookies (Oreos are a family favorite)
- Fresh or frozen berries (if using frozen, let them thaw slightly first)
Ingredient tips from experience:
- Don’t use snow that’s been sitting for days or has melted and refrozen—it’ll be too dense and icy.
- If you’re in a pinch and don’t have snow, you can use shaved ice from a snow cone machine. It won’t be quite the same, but it works in a bind.
- The sweetened condensed milk is non-negotiable for the signature creamy texture. I’ve tried making this with regular milk and sugar, and it turns into a sad, icy mess.
Equipment Needed
You don’t need much for this recipe, which is part of the beauty. Here’s what you’ll want to have on hand:
- Large mixing bowl – Any bowl works, but a wide, shallow bowl makes stirring easier. I use a stainless steel bowl because it stays cold longer.
- Wooden spoon or rubber spatula – A wooden spoon is great for folding the snow into the milk without crushing it too much. A rubber spatula works too, especially for scraping the sides.
- Measuring cups – You’ll need a 1-cup measure for the snow and a set of measuring spoons for the vanilla.
- Can opener – Unless you’re buying the squeeze bottle version of sweetened condensed milk.
- Bowls or cups for serving – Small bowls work best since this ice cream is rich and a little goes a long way.
- Freezer-safe container (optional) – If you want to save leftovers, an airtight container works great. I use a glass loaf pan.
Budget-friendly tip: Don’t run out and buy special equipment for this. Your regular kitchen bowls and spoons are perfect. The only thing I’d recommend splurging on is good vanilla extract—it makes a real difference in flavor.
Preparation Method

This is where the magic happens. Follow these steps, and you’ll have creamy snow ice cream in minutes.
-
Collect your snow. Head outside with a large bowl and gather about 8 cups of fresh, clean snow. Aim for the top layer—the stuff that’s light and fluffy. Avoid any snow that looks discolored or has debris in it. I usually collect from our backyard, away from the fence line and any trees. Pro tip: Bring the bowl inside immediately—snow melts fast, especially if you’re in a warmer climate.
-
Mix the base. In a separate small bowl, combine the sweetened condensed milk, vanilla extract, and a tiny pinch of salt. Stir until everything is well combined. This step ensures the vanilla is evenly distributed before you add the snow. Trust me on this—mixing it beforehand saves you from clumps of vanilla later.
-
Combine gently. Pour the milk mixture over the snow in your large bowl. Using a wooden spoon or rubber spatula, fold the mixture together gently. Don’t stir aggressively—you want to incorporate the milk without melting the snow too much. Think of it like folding whipped cream into a batter. You’ll see the snow start to soften and turn creamy almost immediately.
-
Check the consistency. Keep folding until everything is evenly combined. The mixture should look like soft-serve ice cream—smooth, creamy, and scoopable. If it’s too runny, add a bit more snow. If it’s too thick and icy, add a splash more sweetened condensed milk. This is where you get to trust your instincts—every batch of snow is a little different.
-
Add mix-ins (optional). If you’re using chocolate chips, sprinkles, or any other additions, fold them in now. Don’t overmix—you want those little pockets of goodness throughout.
-
Serve immediately. Spoon the ice cream into bowls and enjoy right away. This is at its best when freshly made. The texture is soft, creamy, and perfectly scoopable. If you want a firmer texture, pop it in the freezer for 15-20 minutes before serving.
-
Store leftovers (if there are any). Transfer any remaining ice cream to an airtight container and place it in the freezer. It will freeze solid, so let it sit at room temperature for 5-10 minutes before scooping. Fair warning: it won’t be as creamy as fresh, but it’s still pretty good.
Cooking Tips & Techniques
I’ve made this recipe more times than I can count, and I’ve learned a few things the hard way. Here are my best tips for success:
- Snow quality matters. The best snow for this recipe is light, fluffy, and freshly fallen. Snow that’s been sitting for days or has started to melt and refreeze will be too dense and icy. If you tap the snow and it feels hard or crusty, find fresher snow.
- Work quickly. Snow melts fast, especially if your kitchen is warm. Have everything prepped and ready before you bring the snow inside. I lay out my bowl, measuring cups, and milk mixture beforehand so I’m not scrambling.
- Don’t overmix. I learned this the hard way. Stirring too vigorously melts the snow into a soupy mess. Gentle folding is the way to go. You want to see little bits of snow still visible as you mix—they’ll incorporate fully as you stir.
- Adjust as you go. Every batch of snow is different. Some snow is drier and fluffier, some is wetter. Start with the recommended 8 cups of snow to 1 can of milk, then adjust from there. If it’s too sweet, add more snow. If it’s not sweet enough, drizzle in a bit more milk.
- Keep kids involved but safe. This is a great recipe for little helpers, but make sure they use clean bowls and spoons. I let my daughter collect the snow while I handle the mixing—it keeps her engaged without the risk of her eating raw ingredients.
- Make it ahead for parties. If you’re serving this at a gathering, you can mix the milk base ahead of time and store it in the fridge. Then, when the snow falls, just combine and serve. It’s a fun party trick that always gets “wow” reactions.
Variations & Adaptations
One of the best things about this recipe is how customizable it is. Here are some variations I’ve tried and loved:
- Chocolate Snow Ice Cream: Add 2 tablespoons of unsweetened cocoa powder to the milk mixture before combining with snow. Whisk until smooth, then proceed as usual. It tastes like a chocolate cloud.
- Mint Chip Version: Substitute 1/2 teaspoon of peppermint extract for the vanilla and fold in 1/2 cup of mini chocolate chips. It’s like a winter-themed mint chip ice cream that’s perfect for the holidays.
- Dairy-Free Option: Use a can of full-fat coconut milk sweetened with 1/2 cup of powdered sugar or maple syrup. It won’t be as thick as the original, but it’s still creamy and delicious. I’ve made this for a friend with dairy allergies, and she was thrilled.
- Fruity Snow Ice Cream: Fold in 1/2 cup of mashed strawberries or blueberries after combining the milk and snow. The fruit adds a fresh, tangy contrast to the sweetness.
- Cookies and Cream: Crush 4-5 Oreo cookies and fold them into the finished ice cream. This is my daughter’s favorite variation—she says it tastes like “a snow day in a bowl.”
- Lower Sugar Option: Use a can of low-fat sweetened condensed milk or reduce the amount to 3/4 cup. The texture won’t be as creamy, but it’s still a fun treat with less sugar.
Serving & Storage Suggestions
This snow ice cream is best enjoyed immediately, but here’s how to make the most of it:
- Serving temperature: Serve right after mixing for a soft-serve texture. If you prefer a firmer scoop, let it sit in the freezer for 15-20 minutes. Don’t leave it longer than that or it’ll freeze solid.
- Presentation ideas: Serve in small bowls or cups—this stuff is rich, so a little goes a long way. Top with sprinkles, a drizzle of chocolate syrup, or a few fresh berries for color. I sometimes add a mint leaf on top for that fancy restaurant look.
- What to serve with it: Warm brownies or cookies are a perfect pairing. The contrast between warm and cold is amazing. You could also serve it alongside a slice of pie or cake for a winter dessert spread.
- Storage: If you have leftovers (rare in my house), transfer them to an airtight container and freeze. It will freeze solid, so let it sit at room temperature for 5-10 minutes before scooping. The texture won’t be as creamy as fresh, but it’s still tasty.
- Reheating tip: Don’t microwave this—it’ll melt into a puddle. If it’s too hard, just let it sit out for a few minutes. You can also break it up with a fork to make it easier to scoop.
- Flavor development: Honestly, this is best fresh. The snow’s texture changes as it sits, so don’t expect it to taste the same the next day. That’s why I always make just enough for one sitting.
Nutritional Information & Benefits
Let’s be honest—this is a treat, not a health food. But here’s what you should know:
- Estimated per serving (1/2 cup): Approximately 180-200 calories, 4g fat, 34g carbohydrates, 4g protein. These numbers vary based on your mix-ins and portion size.
- Key ingredients: Sweetened condensed milk provides calcium and protein from the milk content. Snow, well, it’s frozen water—zero calories, zero nutrients, but lots of fun.
- Dietary considerations: This recipe contains dairy and is not suitable for vegans or those with lactose intolerance (unless you use the dairy-free variation). It’s naturally gluten-free, which is great for those with celiac disease or gluten sensitivity.
- Potential allergens: Milk is the primary allergen here. If you’re serving a crowd, make sure to ask about dairy allergies before offering this.
- My personal take: I don’t make this every day—it’s a snow day special. But when we do make it, I don’t stress about the sugar content. It’s about the experience, the memory, and the joy of making something magical out of something as simple as snow. Balance is key, and this recipe brings a lot of happiness to our table.
Conclusion
This kid-approved snow ice cream with sweetened condensed milk is proof that the best recipes often come from the simplest ideas. It’s quick, it’s easy, and it turns a snowy day into something truly special. My daughter still reminds me of that afternoon when she proved me wrong—and honestly, I’m grateful she did. Now it’s a tradition we look forward to every winter.
I’d love to hear how yours turns out. Did you add any fun mix-ins? Did your kids have any brilliant suggestions? Drop a comment below and share your snow ice cream creations. And if you try a variation I haven’t mentioned, definitely let me know—I’m always looking for new ideas to test out.
So next time it snows, grab a bowl, head outside, and make some memories. This recipe is more than just dessert—it’s a little bit of winter magic you can eat with a spoon. Enjoy every bite!
Frequently Asked Questions
Can I use any type of snow for this recipe?
You want fresh, clean snow that’s fallen recently. Avoid snow that’s been sitting for days, has melted and refrozen, or is near roads, pets, or trees. The fluffier and drier the snow, the better your ice cream will turn out.
What if I don’t have sweetened condensed milk?
You can substitute with a mixture of 1 cup of heavy cream and 1/2 cup of powdered sugar, whisked together until smooth. It won’t be as thick or creamy as the original, but it works in a pinch. Regular milk and sugar won’t give you the same texture—trust me, I’ve tried.
Can I make this ahead of time for a party?
You can prep the milk mixture ahead and store it in the fridge. Then, when the snow falls, just combine and serve. The finished ice cream is best fresh, so I don’t recommend making it more than an hour before serving. If you need to, freeze it in an airtight container and let it soften slightly before scooping.
How do I store leftovers?
Transfer any leftover ice cream to an airtight container and freeze. It will freeze solid, so let it sit at room temperature for 5-10 minutes before scooping. The texture won’t be as creamy as fresh, but it’s still tasty. Don’t microwave it—it’ll melt into a puddle.
Is this recipe safe for kids to help with?
Absolutely! This is a great recipe for little helpers. Just make sure they use clean bowls and spoons when collecting the snow, and supervise the mixing process. My daughter loves collecting the snow and adding the mix-ins—it’s become our favorite snow day tradition.
Pin This Recipe!
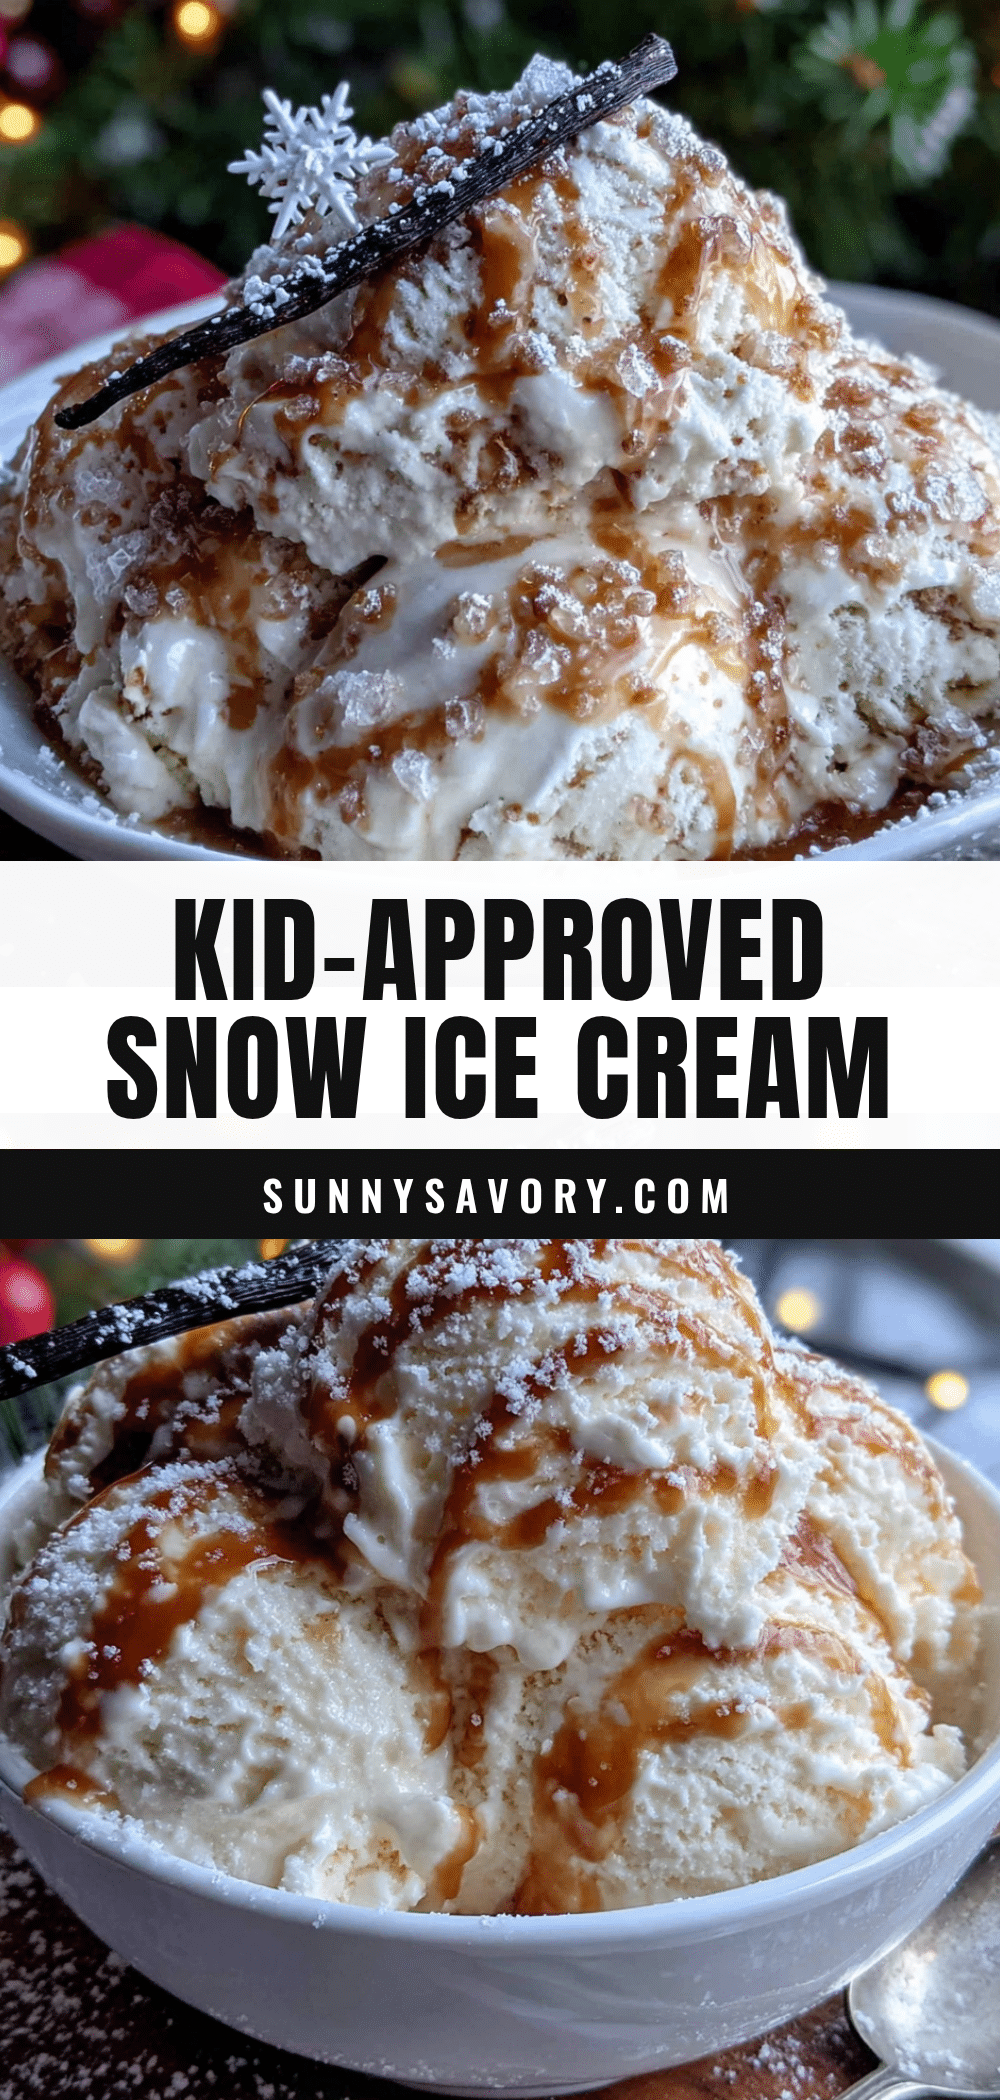
Kid-Approved Snow Ice Cream with Sweetened Condensed Milk

A quick and easy snow ice cream recipe made with fresh snow and sweetened condensed milk. This creamy, scoopable treat turns a winter storm into a kitchen adventure and is perfect for snow days with the family.
- Prep Time: 10 minutes
- Cook Time: 0 minutes
- Total Time: 10 minutes
- Yield: 4 servings 1x
- Category: Dessert
- Cuisine: American
Ingredients
- 8 cups fresh, clean snow
- 1 can (14 ounces) sweetened condensed milk (recommended: Eagle Brand or Nestlé La Lechera)
- 1 teaspoon vanilla extract (pure vanilla extract preferred)
- Pinch of fine sea salt (optional but recommended)
- 1/2 cup chocolate chips or mini chocolate chips (optional)
- Sprinkles (optional)
- Crushed cookies like Oreos (optional)
- Fresh or frozen berries (optional, thaw if frozen)
Instructions
- Collect your snow: Head outside with a large bowl and gather about 8 cups of fresh, clean snow. Aim for the top layer that’s light and fluffy. Avoid snow that looks discolored or has debris. Bring the bowl inside immediately to prevent melting.
- Mix the base: In a separate small bowl, combine the sweetened condensed milk, vanilla extract, and a tiny pinch of salt. Stir until everything is well combined.
- Combine gently: Pour the milk mixture over the snow in your large bowl. Using a wooden spoon or rubber spatula, fold the mixture together gently. Don’t stir aggressively—you want to incorporate the milk without melting the snow too much. The snow will start to soften and turn creamy almost immediately.
- Check the consistency: Keep folding until everything is evenly combined. The mixture should look like soft-serve ice cream—smooth, creamy, and scoopable. If it’s too runny, add a bit more snow. If it’s too thick and icy, add a splash more sweetened condensed milk.
- Add mix-ins (optional): If using chocolate chips, sprinkles, or other additions, fold them in now. Don’t overmix—you want those little pockets of goodness throughout.
- Serve immediately: Spoon the ice cream into bowls and enjoy right away. This is at its best when freshly made. For a firmer texture, pop it in the freezer for 15-20 minutes before serving.
- Store leftovers (if any): Transfer any remaining ice cream to an airtight container and freeze. It will freeze solid, so let it sit at room temperature for 5-10 minutes before scooping.
Notes
Snow quality matters: Use fresh, fluffy snow that has fallen within the first few hours of a storm. Work quickly as snow melts fast. Don’t overmix to avoid a soupy mess. Adjust consistency as needed—every batch of snow is different. For best results, serve immediately. If making ahead, prep the milk mixture and combine with snow just before serving.
Nutrition
- Serving Size: 1/2 cup
- Calories: 190
- Sugar: 32
- Sodium: 80
- Fat: 4
- Saturated Fat: 2.5
- Carbohydrates: 34
- Protein: 4
Keywords: snow ice cream, sweetened condensed milk, snow day recipe, easy ice cream, kid-friendly dessert, winter treat, no-churn ice cream



