Love this? Save it for later!
Share the inspiration with your friends
My sister-in-law Jen wasn’t trying to impress anyone. I’d stopped by her place on a random Tuesday to drop off a casserole dish I’d borrowed, and the smell hit me before I even got through the front door. Chocolate, but different—something tangy and almost floral underneath. She was pulling a pan out of the oven with these oven mitts that had a hole in the thumb, completely unfazed.
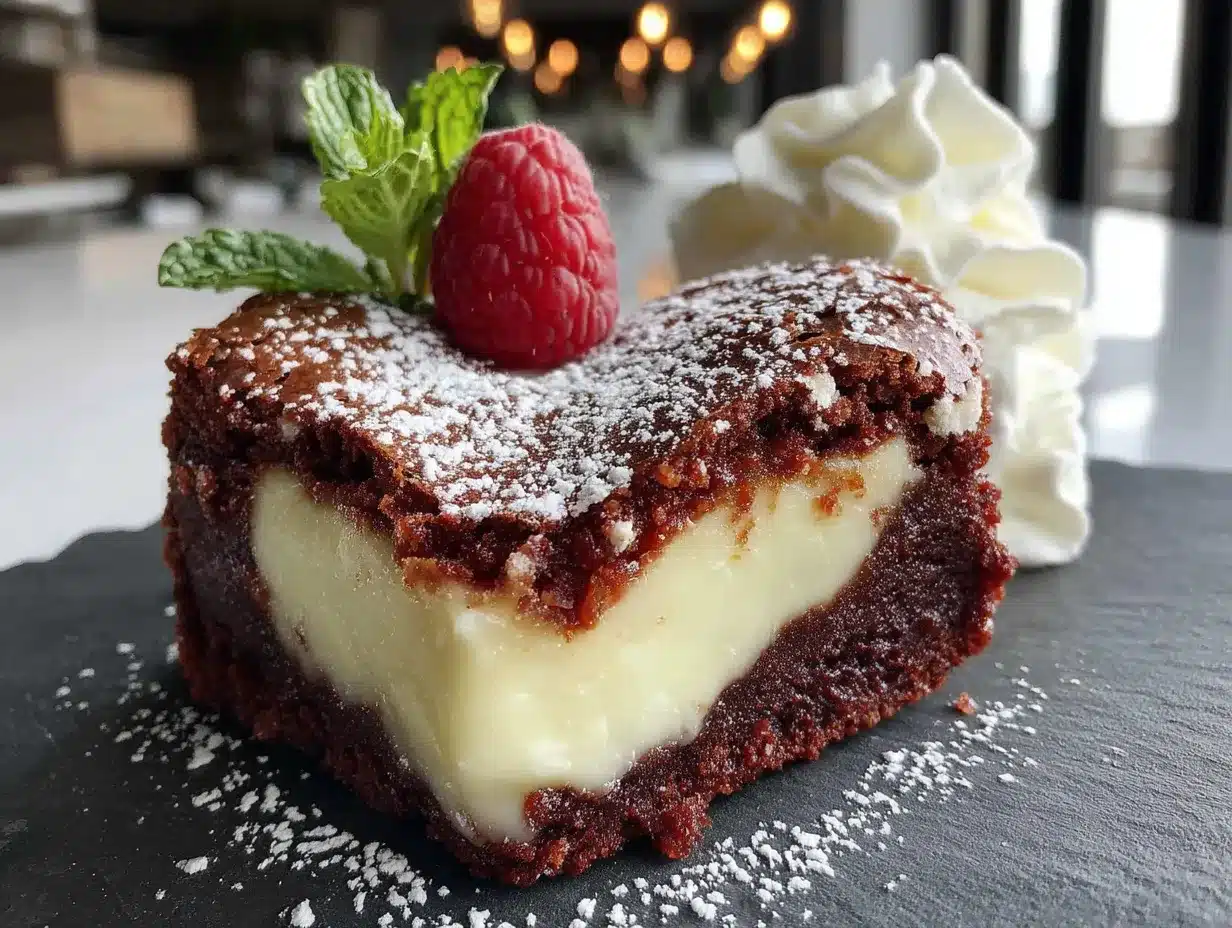
“Oh, those are just brownies,” she said when I asked what on earth that amazing smell was. Just brownies. But when she cut into them, I saw these perfect little heart shapes staring up at me. Red velvet swirled with creamy cheesecake, all baked into the most adorable heart-shaped bites I’d ever seen. She’d made them for her daughter’s class party and had leftovers. Lucky me.
I stood there in her kitchen, eating one warm, and honestly, I almost forgot to breathe. The brownie part was fudgy and rich, with that classic red velvet tang. The cheesecake swirl was silky and sweet. And the heart shapes? Completely unnecessary and utterly perfect. “They’re for Valentine’s Day,” she shrugged, “but honestly, I make them all year round.” That casual confidence—like she’d invented something brilliant and just decided it was no big deal—stuck with me. I asked for the recipe on my way out, and she scribbled it on a sticky note. That sticky note is now stained and splattered, but I’ll never throw it away.
You know that feeling when you taste something and immediately start planning who you’re going to make it for? That’s these brownies. They’re the kind of dessert that makes people at a party stop mid-conversation and ask, “Wait, who made these?” And the best part? They’re actually pretty simple to pull off. Let me show you how.
Why You’ll Love This Recipe
I’ve made these heart-shaped red velvet cheesecake brownies for everything from book club to New Year’s Eve parties, and they never fail to get that “oh wow” reaction. Here’s why they’ve become my go-to for hosting:
- Showstopper Presentation: The heart shape does all the work. You don’t need fancy piping or complicated decorations—just a heart-shaped pan and you’re golden. Your guests will think you spent hours on them.
- Two Layers, One Pan: Rich, fudgy red velvet brownie on the bottom, creamy cheesecake swirl on top. It’s like two desserts in one, and the contrast in textures is absolutely addictive.
- Make-Ahead Friendly: These actually taste better the next day after the flavors have melded in the fridge. Perfect for party prep when you’re already juggling a million things.
- Scales Beautifully: Doubling the recipe for a crowd? No problem. The batter comes together quickly, and you can bake multiple pans at once if your oven allows.
- No Fancy Equipment Needed: Besides the heart-shaped pan (which is easy to find online or in stores), everything else is standard kitchen gear. A hand mixer works just as well as a stand mixer here.
What makes these different from every other brownie recipe you’ve tried? It’s the combination of that classic red velvet tang—thanks to a little vinegar and buttermilk—with the luxurious cream cheese layer. Most red velvet brownies are just red chocolate brownies. These have the real red velvet flavor profile, balanced perfectly so neither the chocolate nor the cheesecake overpowers the other. I’ve tested this recipe at least six times to get the ratios right, and I’m telling you, this is the version that disappears fastest at parties.
These brownies are perfect for Valentine’s Day, anniversaries, Galentine’s gatherings, or honestly, any time you want to make a Tuesday feel special. They’re comfort food dressed up in its party best, and they’re guaranteed to make you look like a rockstar host.
What Ingredients You Will Need
This recipe uses simple, mostly pantry-staple ingredients to create something that tastes far more complicated than it is. The magic happens when the tangy red velvet meets the creamy cheesecake—so pay attention to a few key details.
For the Red Velvet Brownie Layer
- 1/2 cup (113g) unsalted butter, melted and slightly cooled (I prefer Kerrygold for its rich flavor, but any good-quality butter works)
- 1 cup (200g) granulated sugar (adds sweetness and helps create that crackly top)
- 2 large eggs, room temperature (cold eggs will seize the melted butter)
- 1 teaspoon vanilla extract (use pure, not imitation, for the best flavor)
- 2 tablespoons (30ml) buttermilk, room temperature (this is key for the red velvet tang—see substitution below)
- 1 tablespoon (15ml) red food coloring (gel food coloring works best for a vibrant red without thinning the batter)
- 1 teaspoon white vinegar (sounds weird, I know, but it reacts with the buttermilk and cocoa to create that classic red velvet flavor)
- 3/4 cup (95g) all-purpose flour (spoon and level for accuracy—don’t scoop directly from the bag)
- 2 tablespoons (10g) unsweetened cocoa powder (I use Dutch-process for a smoother, less acidic chocolate flavor, but natural works too)
- 1/4 teaspoon salt (balances the sweetness)
For the Cheesecake Swirl Layer
- 8 oz (226g) cream cheese, softened to room temperature (full-fat is non-negotiable here—low-fat gets too watery)
- 1/4 cup (50g) granulated sugar
- 1 large egg yolk, room temperature (just the yolk—the white would make it too loose)
- 1/2 teaspoon vanilla extract
Ingredient Tips & Substitutions
Buttermilk substitute: If you don’t have buttermilk, add 1 teaspoon of lemon juice or vinegar to 2 tablespoons of regular milk and let it sit for 5 minutes. It’ll thicken and sour slightly, doing the same job.
Food coloring: If you prefer natural coloring, you can use beet powder or natural red food dye, but the color will be more muted—think rusty red rather than bright crimson. The taste is still amazing.
Cocoa powder: Don’t be tempted to add more cocoa powder to make it “more chocolate.” Red velvet isn’t supposed to be super chocolatey—it’s supposed to be a subtle chocolate flavor with that distinctive tang.
Cream cheese: Set it out on the counter at least 30 minutes before you start. Cold cream cheese will leave lumps in your cheesecake layer, and nobody wants that.
Equipment Needed
You don’t need a professional bakery setup for these, but a few specific tools will make your life easier:
- Heart-shaped brownie pan (8×8-inch or similar size—I got mine on Amazon for about $15, and it’s worth every penny)
- Mixing bowls (one medium, one small)
- Hand mixer or stand mixer (you can whisk by hand, but the cheesecake layer comes out much smoother with electric mixing)
- Rubber spatula (for scraping every bit of batter—don’t waste a drop)
- Parchment paper (cut to fit your pan with overhang for easy lifting)
- Measuring cups and spoons
- Toothpick or skewer (for creating the swirl pattern)
- Wire cooling rack
If you don’t have a heart-shaped pan, you can absolutely use a regular 8×8 square pan and cut the brownies into squares—they’ll taste just as good. But honestly, the heart shape is what makes these so special for parties. It’s a tiny detail that makes a huge impression.
Preparation Method
Let’s get baking! This recipe comes together in about 45 minutes total, with most of that being hands-off baking time. Perfect for when you’re prepping for a gathering.
- Preheat and prep: Preheat your oven to 350°F (175°C). Line your heart-shaped pan with parchment paper, leaving enough overhang on two opposite sides to use as handles later. This is your lifeline for getting the brownies out cleanly—don’t skip it.
- Make the brownie batter: In a medium bowl, whisk together the melted butter and sugar until well combined. It’ll look a bit grainy—that’s normal. Add the eggs one at a time, whisking well after each addition. Stir in the vanilla, buttermilk, red food coloring, and vinegar. The batter should be a vibrant, uniform red.
- Add dry ingredients: In a small bowl, whisk together the flour, cocoa powder, and salt. Fold this into the wet mixture using a rubber spatula. Mix just until you don’t see any more flour streaks—overmixing will make the brownies tough. The batter will be thick and fudgy.
- Make the cheesecake layer: In a separate bowl, beat the softened cream cheese with the sugar until smooth and creamy—about 2 minutes with a hand mixer. Add the egg yolk and vanilla, then beat until just combined. Don’t overbeat or the cheesecake can become too thin.
- Layer it up: Pour the red velvet brownie batter into your prepared pan and spread it into an even layer. Drop spoonfuls of the cheesecake mixture over the top, spacing them out evenly. You should have about 6-8 dollops.
- Create the swirl: Take a toothpick or skewer and drag it through the cheesecake and brownie layers in a figure-eight pattern. Don’t over-swirl—you want distinct pockets of cheesecake, not a muddy pink mess. About 5-6 passes is perfect.
- Bake: Place the pan in the preheated oven and bake for 28-32 minutes. The edges should look set, and the center should be slightly jiggly—like a cheesecake. A toothpick inserted into the brownie part (not the cheesecake) should come out with a few moist crumbs. Overbaking will dry them out.
- Cool completely: Let the brownies cool in the pan on a wire rack for at least 1 hour. Then transfer to the refrigerator and chill for at least 2 hours—overnight is even better. This step is crucial for clean slices and the best texture.
- Slice and serve: Once fully chilled, use the parchment overhang to lift the entire block of brownies out of the pan. Place on a cutting board and slice into individual hearts along the pan’s divisions. If you used a square pan, cut into 16 squares.
Cooking Tips & Techniques
I’ve made these brownies at least a dozen times, and I’ve learned a few things the hard way. Here’s what I wish someone had told me:
Don’t skip the chill time. The first time I made these, I was impatient and tried to cut them after just 30 minutes of cooling. Disaster. The cheesecake layer was still soft, and the brownies crumbled everywhere. Trust me—2 hours minimum in the fridge. They’re so much easier to work with cold.
Room temperature ingredients matter. I know, I know, nobody plans that far ahead. But cold cream cheese will leave lumps in your cheesecake layer, and cold eggs can seize your melted butter. Set everything out on the counter 30 minutes before you start. Your future self will thank you.
Watch the baking time. Every oven runs differently. Start checking at 25 minutes. The brownies are done when the edges are set and the center still wobbles slightly when you shake the pan. They’ll continue cooking from residual heat as they cool.
For cleaner slices: Use a sharp knife and wipe it clean between each cut. I run the knife under hot water, dry it, then slice. It makes a huge difference in presentation, especially when you’re serving these to guests.
Multitasking strategy: While the brownie batter comes together in about 5 minutes, you can make the cheesecake layer. Then while the brownies bake, clean up your dishes. By the time they’re done, your kitchen is already tidy. That’s my kind of baking.
Variations & Adaptations
One of the best things about this recipe is how adaptable it is. Here are a few ways I’ve switched it up:
White Chocolate Raspberry: Swap the red food coloring for a few drops of pink (or leave it out entirely) and add 1/2 cup of fresh raspberries to the brownie batter. The tart berries pair beautifully with the white chocolate and cheesecake.
Gluten-Free Version: Use a 1:1 gluten-free flour blend (I like King Arthur’s) in place of the all-purpose flour. No other adjustments needed—the texture stays remarkably close to the original.
Dairy-Free Option: Use vegan butter and a dairy-free cream cheese alternative (Miyoko’s is my favorite). The texture will be slightly less creamy, but the flavor is still fantastic.
Peppermint Twist: Add 1/4 teaspoon of peppermint extract to the brownie batter and crush some candy canes over the top after baking. Perfect for holiday parties.
Extra Chocolatey: Fold 1/2 cup of semi-sweet chocolate chips into the brownie batter before layering. Because more chocolate is never a bad thing.
I once made a batch with a swirl of strawberry jam mixed into the cheesecake layer, and it was honestly one of the best things I’ve ever baked. The jam added a fruity brightness that cut through the richness perfectly. Just swirl it in gently so you don’t lose the marbled effect.
Serving & Storage Suggestions
These brownies are best served slightly chilled or at room temperature—I prefer them straight from the fridge on a warm day, but they soften up beautifully after about 15 minutes on the counter.
Presentation tips for hosting: Arrange the heart-shaped brownies on a white platter or cake stand for maximum visual impact. Dust with a little powdered sugar just before serving (use a fine-mesh sieve for even coverage). Add a few fresh raspberries or strawberries around the plate for color contrast. If you’re feeling extra fancy, drizzle a little melted white chocolate over the top.
What to serve alongside: A scoop of vanilla bean ice cream or a dollop of lightly sweetened whipped cream balances the richness beautifully. For a beverage pairing, a strong cup of coffee or a glass of cold milk is classic. For adult gatherings, a dessert wine like a late-harvest Riesling or a port would be lovely.
Storage: Store leftover brownies in an airtight container in the refrigerator for up to 5 days. They actually get better on day two as the flavors meld. To freeze, wrap individual brownies tightly in plastic wrap, then place in a freezer-safe bag. They’ll keep for up to 3 months. Thaw in the refrigerator overnight before serving.
Reheating: If you prefer warm brownies, microwave an individual brownie for about 10-15 seconds. The cheesecake will soften slightly, and the chocolate flavor becomes more pronounced. Just don’t overdo it, or the cheesecake can get weepy.
Nutritional Information & Benefits
Per serving (1 heart-shaped brownie, based on 16 servings):
- Calories: 245
- Fat: 14g
- Carbohydrates: 27g
- Protein: 4g
- Sugar: 20g
- Sodium: 135mg
While these are definitely a treat, there are a few redeeming qualities. The cream cheese adds a good amount of protein and calcium, and the cocoa powder contains antioxidants called flavonoids that are good for heart health (fitting, given the shape!). The buttermilk provides probiotics and calcium as well.
If you’re watching your sugar intake, you can reduce the sugar in the brownie layer to 3/4 cup without compromising the texture too much. The cheesecake layer needs its sugar for structure, so I’d leave that as is.
These brownies are vegetarian but not vegan (though see the dairy-free variation above). They contain gluten, dairy, and eggs, so they’re not suitable for those with allergies to those ingredients without substitutions.
Conclusion
These heart-shaped red velvet cheesecake brownies are the kind of dessert that makes people feel special. They look like you spent hours on them, but honestly, they come together in about 45 minutes of active time. The combination of fudgy red velvet and creamy cheesecake is irresistible, and the heart shape adds that little extra something that turns a simple brownie into a conversation starter.
I love making these for gatherings because they always make me look good—and I’m happy to let them take the credit. Whether it’s Valentine’s Day, a birthday, a Galentine’s brunch, or just a random Tuesday that needs a little brightening, these brownies deliver.
I’d love to hear how yours turn out! Leave a comment below and let me know if you tried any variations, or tag me on Pinterest with your photos. Happy baking, friends—you’ve got this.
Frequently Asked Questions
Can I make these without a heart-shaped pan?
Absolutely! Use a standard 8×8 square pan and cut the brownies into squares. They’ll taste exactly the same—just without the cute shape. You can also use a mini heart-shaped silicone mold for individual brownies, but adjust the baking time to about 18-20 minutes.
Why did my cheesecake layer crack?
Cracks usually happen from overbaking or sudden temperature changes. Make sure you don’t bake past the 32-minute mark, and let the brownies cool gradually in the pan on the counter before moving them to the fridge. If cracks do appear, a dusting of powdered sugar hides them beautifully.
Can I use natural food coloring instead of red dye?
Yes! Beet powder or natural red food coloring will work, but the color will be more of a deep reddish-brown rather than bright crimson. The taste won’t be affected. For a brighter natural color, try using a concentrated beet juice reduction, but keep in mind it will add a slight earthy flavor.
How do I get clean, sharp slices?
Chill the brownies for at least 2 hours (overnight is best). Use a sharp knife and wipe it clean between each cut. Run the knife under hot water, dry it, then slice. This prevents the cheesecake from smearing across the cut edges.
Can I freeze these brownies?
Yes, they freeze beautifully! Wrap individual brownies tightly in plastic wrap, then place them in a freezer-safe bag or container. They’ll keep for up to 3 months. Thaw in the refrigerator overnight before serving, or let them sit at room temperature for about 30 minutes.
Pin This Recipe!
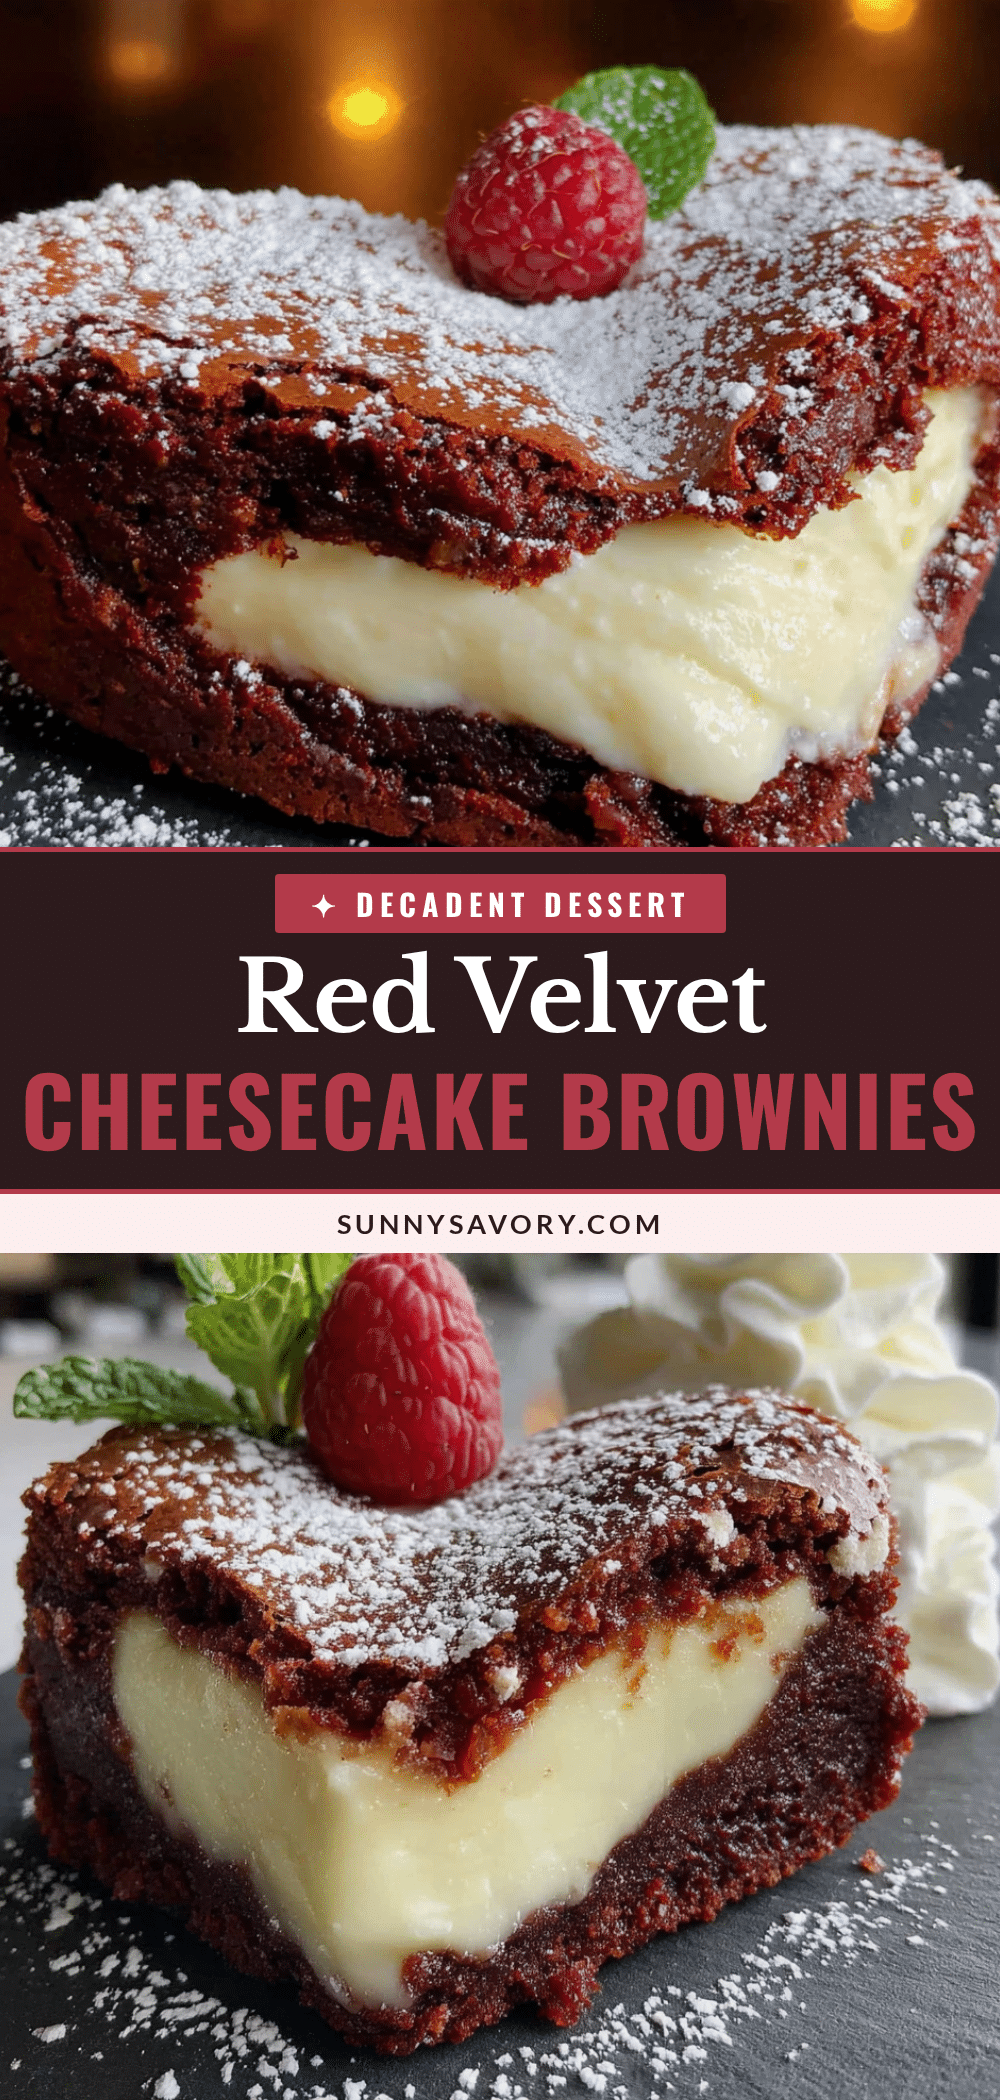
Best Easy Heart-Shaped Red Velvet Cheesecake Brownies
Fudgy red velvet brownies swirled with creamy cheesecake, baked into adorable heart shapes. Perfect for Valentine’s Day or any occasion, these easy brownies are a showstopper that tastes as amazing as they look.
- Prep Time: 15 minutes
- Cook Time: 30 minutes
- Total Time: 45 minutes
- Yield: 16 servings 1x
- Category: Dessert
- Cuisine: American
Ingredients
- 1/2 cup (113g) unsalted butter, melted and slightly cooled
- 1 cup (200g) granulated sugar
- 2 large eggs, room temperature
- 1 teaspoon vanilla extract
- 2 tablespoons (30ml) buttermilk, room temperature
- 1 tablespoon (15ml) red food coloring (gel preferred)
- 1 teaspoon white vinegar
- 3/4 cup (95g) all-purpose flour
- 2 tablespoons (10g) unsweetened cocoa powder (Dutch-process preferred)
- 1/4 teaspoon salt
- 8 oz (226g) cream cheese, softened to room temperature
- 1/4 cup (50g) granulated sugar
- 1 large egg yolk, room temperature
- 1/2 teaspoon vanilla extract
Instructions
- Preheat oven to 350°F (175°C). Line a heart-shaped pan (8×8-inch) with parchment paper, leaving overhang on two opposite sides.
- In a medium bowl, whisk together melted butter and sugar until combined. Add eggs one at a time, whisking well after each. Stir in vanilla, buttermilk, red food coloring, and vinegar until uniform.
- In a small bowl, whisk together flour, cocoa powder, and salt. Fold into wet mixture with a rubber spatula until just combined (do not overmix).
- In a separate bowl, beat cream cheese with sugar until smooth (about 2 minutes). Add egg yolk and vanilla, beat until just combined.
- Pour red velvet batter into prepared pan and spread evenly. Drop spoonfuls of cheesecake mixture over the top (6-8 dollops).
- Use a toothpick or skewer to swirl the cheesecake into the brownie batter in a figure-eight pattern (5-6 passes).
- Bake for 28-32 minutes until edges are set and center is slightly jiggly. Cool in pan on a wire rack for 1 hour, then refrigerate for at least 2 hours (overnight preferred).
- Use parchment overhang to lift brownies out of pan. Slice into individual hearts along pan divisions (or into 16 squares if using a square pan).
Notes
Chill brownies for at least 2 hours for clean slices. Room temperature ingredients are crucial for smooth texture. Do not overbake; center should be slightly jiggly. For cleaner slices, use a sharp knife wiped clean between cuts.
Nutrition
- Serving Size: 1 heart-shaped brown
- Calories: 245
- Sugar: 20
- Sodium: 135
- Fat: 14
- Saturated Fat: 8
- Carbohydrates: 27
- Fiber: 1
- Protein: 4
Keywords: red velvet, cheesecake brownies, heart-shaped, Valentine's Day, easy dessert, party dessert



