Love this? Save it for later!
Share the inspiration with your friends
It was 11:47 PM on a drizzly Tuesday in late September, and I had a singular, almost irrational craving for something smoky and spicy. I didn’t have the energy for a full enchilada production—the rolling, the baking, the endless dishes—but I had a bag of roasted Hatch chiles in the freezer from a trip to the farmers market and a half-cooked chicken breast sitting in the fridge. The idea that arrived was simple: what if I just threw it all in one skillet and let the flavors figure it out?
Honestly, I was skeptical. I mean, enchiladas without the rolling? That felt almost disrespectful. But I was too tired to care, and the smell of those chiles hitting a hot pan with some cumin and garlic was enough to make me forget about tradition. I grabbed a can of fire-roasted tomatoes, some leftover crema, and a mountain of shredded cheese, and I just started cooking. Let me tell you, something about the late hour loosened the usual rules. I wasn’t trying to impress anyone. I was just feeding the craving.
That skillet turned into something I still dream about. The smoky heat from the Hatch chiles, the tender chicken, the way the cheese melted into a golden, bubbly crust—it was better than any rolled enchilada I’d ever made. I’ve made this Smoky Hatch Chili Chicken Enchilada Skillet at least a dozen times since that night, and it never fails. Maybe you’ve been there—wanting the soul of a dish without the fuss. This one-pan wonder is for those nights. It stayed with me because it proved that the best recipes aren’t always the most complicated. Sometimes they’re just the ones you need at exactly the right moment.
Why You’ll Love This Recipe
This isn’t just another chicken skillet dinner. This is the kind of meal that makes you forget you’re eating from a single pan. Here’s why it stands out:
- One-Pan Wonder: Everything comes together in a single skillet, from searing the chicken to bubbling the cheese. Less cleanup means more time to actually enjoy your meal.
- Bold, Smoky Flavor: The star here is the Hatch chile. Its unique smokiness pairs perfectly with fire-roasted tomatoes and cumin, creating a depth of flavor that tastes like it simmered all day—but it didn’t.
- Quick & Easy: From start to table in about 40 minutes. Perfect for those weeknights when you want something that feels special but doesn’t demand hours in the kitchen.
- Simple Ingredients: No need for a specialty grocery run. Most of these ingredients are likely in your pantry or fridge right now.
- Crowd-Pleaser: I’ve served this to spice lovers and spice skeptics alike, and everyone goes back for seconds. The heat is warm, not punishing.
- Better Than Takeout: Honestly, this skillet beats any enchilada I’ve ever ordered. The texture of the tortillas simmered in the sauce, the gooey cheese—it’s comfort food at its finest.
What makes this recipe different is the technique. Instead of rolling enchiladas, you layer torn tortillas directly into the smoky sauce. They soak up all that flavor while the edges get crispy. It’s a brilliant shortcut that doesn’t sacrifice taste. This is the recipe you’ll turn to when you want the soul of enchiladas without the stress.
What Ingredients You Will Need
This recipe uses simple, honest ingredients to create something truly memorable. Most of these are pantry staples, but a few key players make all the difference. Let’s break it down.
- Chicken Breast (1 lb, boneless skinless): The protein base. I prefer using chicken thighs for extra juiciness, but breasts work perfectly here. Cut them into bite-sized pieces for even cooking.
- Hatch Chiles (4-5 whole, roasted, peeled, and chopped): The heart of this dish. You can find them roasted and frozen at most grocery stores during the fall. If you can’t find Hatch, use 2-3 poblano peppers plus a pinch of smoked paprika for that smoky kick.
- Fire-Roasted Tomatoes (1 can, 14.5 oz): Adds a deep, charred sweetness that complements the chiles beautifully. I recommend the Muir Glen brand for consistent quality.
- Yellow Onion (1 medium, diced): Aromatic base. Sweet onions work too, but yellow holds up better to the smoky flavors.
- Garlic (4 cloves, minced): Non-negotiable. Fresh garlic is key here—don’t use the jarred stuff.
- Ground Cumin (1 teaspoon): Earthy and warm. It ties the chiles and tomatoes together.
- Smoked Paprika (1 teaspoon): Reinforces the smoky theme. Use regular paprika if that’s all you have.
- Dried Oregano (1/2 teaspoon): A subtle herbal note that lifts the dish.
- Chicken Broth (1/2 cup): Helps create the sauce. Low-sodium is best so you can control the salt.
- Corn Tortillas (6-8, 6-inch): The structural element. Torn, not cut. The rough edges get wonderfully crispy in the skillet.
- Shredded Cheese (1 1/2 cups): A blend of Monterey Jack and sharp cheddar is my go-to. It melts beautifully and adds richness. Pre-shredded works, but freshly grated melts better.
- Sour Cream or Crema (for serving): A cool, tangy finish to balance the heat.
- Fresh Cilantro (for garnish): Bright and fresh. If you’re a cilantro hater, try fresh parsley or skip it.
- Neutral Oil (2 tablespoons): For searing. Avocado or grapeseed oil works well.
- Salt and Pepper (to taste): Simple seasoning to bring everything together.
Equipment Needed
You don’t need a fancy kitchen for this one. Here’s what you’ll need:
- Large Skillet (12-inch, oven-safe): This is crucial. You’ll be searing, simmering, and broiling all in one pan. A cast-iron skillet is ideal for even heat, but any heavy-bottomed oven-safe skillet works. I’ve used my trusty Lodge cast iron for years—it’s worth the investment.
- Chef’s Knife: A sharp knife makes prepping the chiles, onions, and chicken a breeze. A dull knife is a recipe for frustration.
- Cutting Board: Wood or plastic, just make sure it’s stable.
- Wooden Spoon or Spatula: For stirring the sauce and breaking up the chicken. Silicone works too.
- Measuring Spoons: Precision matters with the spices, even in a rustic dish.
- Box Grater: For grating cheese fresh. It melts so much better than pre-shredded.
If you don’t have an oven-safe skillet, you can transfer the mixture to a baking dish before adding the cheese and broiling. Just one extra dish to wash, but it works in a pinch.
Preparation Method
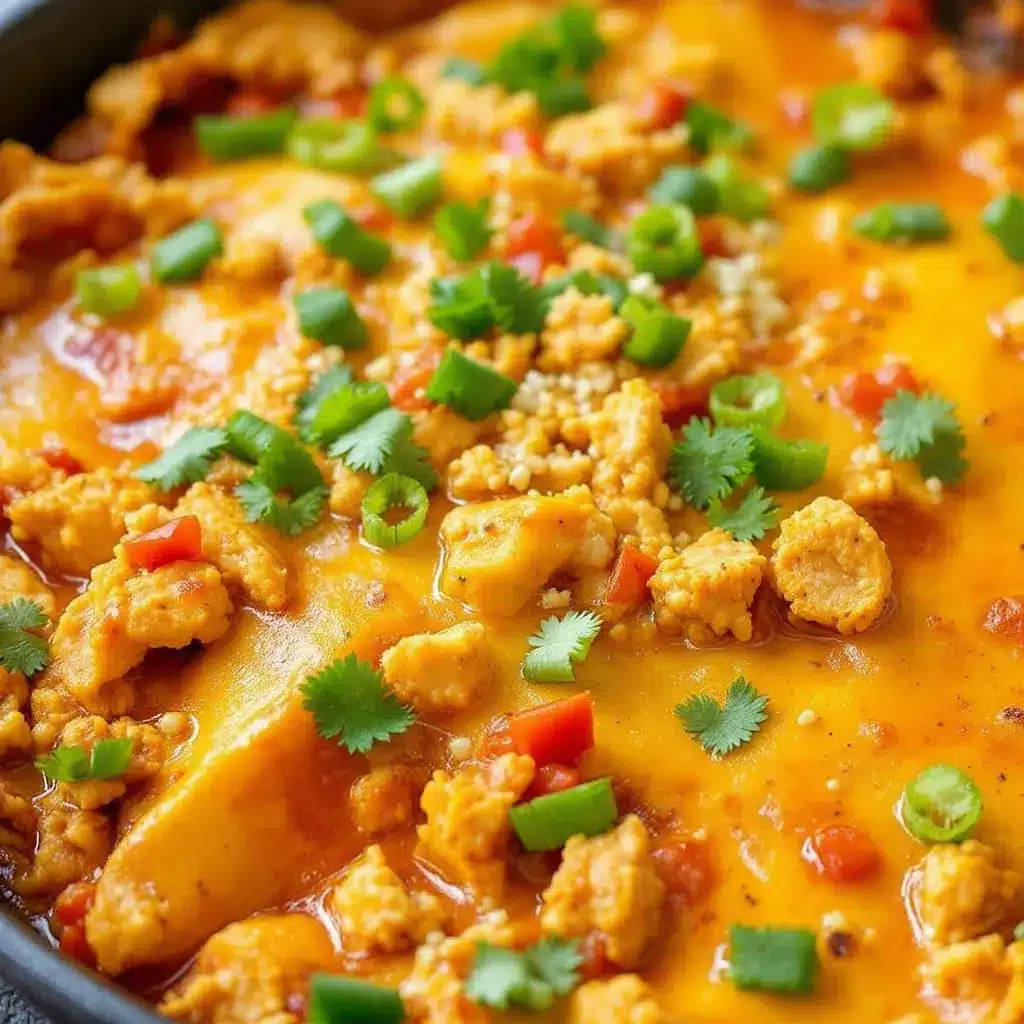
Let’s get cooking. This comes together faster than you’d think, so have everything prepped before you start.
- Prep the Ingredients: Dice the onion, mince the garlic, and chop the roasted Hatch chiles. Cut the chicken into 1-inch cubes. Grate the cheese if you’re using a block. Tear the corn tortillas into rough 2-inch pieces. Having everything ready makes the cooking process smooth and stress-free.
- Sear the Chicken: Heat 2 tablespoons of neutral oil in your large skillet over medium-high heat. Once shimmering, add the chicken pieces in a single layer. Season with a pinch of salt and pepper. Cook for 4-5 minutes, stirring once, until golden brown on all sides. The chicken doesn’t need to be fully cooked through—it will finish in the sauce. Remove the chicken to a plate and set aside.
- Build the Aromatics: Reduce the heat to medium. Add the diced onion to the skillet and cook for 3-4 minutes, scraping up any browned bits from the bottom. The onion should soften and become translucent. Add the minced garlic, cumin, smoked paprika, and dried oregano. Stir constantly for 30 seconds until fragrant. Don’t let the garlic burn—it turns bitter fast.
- Create the Sauce: Pour in the fire-roasted tomatoes (with their juices) and the chicken broth. Add the chopped Hatch chiles. Stir everything together, scraping up any remaining fond from the bottom of the pan. Bring the sauce to a gentle simmer. Let it cook for 5 minutes, stirring occasionally, until it thickens slightly. Taste and adjust salt and pepper. The sauce should be smoky, slightly tangy, and just a little spicy.
- Layer the Tortillas: Return the seared chicken to the skillet, along with any accumulated juices. Nestle the torn tortilla pieces into the sauce, pushing them down so they soak up the liquid. Don’t stir too much—you want some tortillas to stay above the sauce so they get crispy later. Let everything simmer together for 3-4 minutes. The tortillas will soften and absorb the smoky flavors.
- Top with Cheese: Sprinkle the shredded cheese evenly over the top of the skillet. Cover the skillet with a lid (or a baking sheet if you don’t have a lid) and let it cook for 2-3 minutes, until the cheese is mostly melted. The steam helps the cheese melt into every crevice.
- Broil for the Finish: Preheat your broiler to high. Uncover the skillet and transfer it to the oven, placing it on the top rack. Broil for 2-3 minutes, watching closely, until the cheese is bubbly and golden brown in spots. The edges of the tortillas that were poking out will get wonderfully crispy. Remove carefully—the handle is hot!
- Rest and Serve: Let the skillet rest for 5 minutes before serving. This allows the flavors to settle and the sauce to thicken slightly. Spoon onto plates, top with a dollop of sour cream or crema, and garnish with fresh cilantro.
Cooking Tips & Techniques
I’ve made this skillet more times than I can count, and I’ve learned a few things along the way. Here are my best tips for success.
- Don’t Overcrowd the Pan: When searing the chicken, give each piece space. If the pan is too crowded, the chicken will steam instead of brown. Browned chicken means more flavor. Cook in batches if needed.
- Toast the Tortillas First: For extra texture, you can quickly toast the torn tortilla pieces in a dry skillet for 1-2 minutes before adding them to the sauce. This adds a subtle corn flavor and helps them hold up better during simmering. I skip this on lazy nights, but it’s a nice touch.
- Watch the Broiler: Broilers vary wildly in power. I once walked away for “just a second” and came back to a blackened top. Stay close and check at the 2-minute mark. You want bubbly and golden, not charred.
- Let It Rest: I know it’s tempting to dig in immediately, but that 5-minute rest is important. The sauce thickens, the cheese sets slightly, and the flavors meld. Trust me on this one.
- Use Room Temperature Ingredients: If you can, let the chicken and sour cream sit out for 15 minutes before cooking. Room temperature ingredients cook more evenly and incorporate better into the sauce.
- My Biggest Failure: The first time I made this, I used pre-shredded cheese. It melted, but it was greasy and clumpy instead of smooth and creamy. Freshly grated cheese is non-negotiable for that perfect, stretchy melt. Learn from my mistake.
Variations & Adaptations
This skillet is incredibly forgiving. Here are some ways to make it your own.
- Make It Vegetarian: Skip the chicken and use two cans of black beans (drained and rinsed) instead. Add them with the tortillas. The beans soak up the smoky sauce beautifully. You can also add a can of hominy for extra texture.
- Spice It Up: If you want more heat, add a diced jalapeño with the onion or a pinch of cayenne pepper with the spices. For a milder version, use only 2 Hatch chiles and add a bell pepper for bulk.
- Swap the Protein: Shredded rotisserie chicken works perfectly here—just skip the searing step and add it with the tortillas. Ground beef or turkey is also great. Brown it first, then proceed with the recipe.
- Go Gluten-Free: This recipe is naturally gluten-free as long as you use corn tortillas. Double-check your broth and spice blends to be safe.
- Dairy-Free Option: Use a dairy-free shredded cheese alternative (I like the Follow Your Heart brand) and skip the sour cream or use a cashew-based crema.
- Seasonal Twist: In the summer, I sometimes add a cup of fresh corn kernels with the tortillas. In the winter, a handful of chopped kale stirred in at the end adds a nice earthy note.
Serving & Storage Suggestions
This skillet is a meal on its own, but a few thoughtful sides make it even better.
- Serving Temperature: Serve hot, straight from the skillet. The cheese should be bubbly and the sauce should be thick. A dollop of cold sour cream or crema adds a refreshing contrast.
- What to Serve With It: A simple side salad with a lime vinaigrette cuts through the richness. Mexican rice or cilantro-lime rice is always a hit. Warm tortillas on the side are great for scooping up every last bit of sauce.
- Beverage Pairings: A cold Mexican lager like Modelo or a crisp margarita pairs beautifully with the smoky heat. For a non-alcoholic option, try horchata or a tart limeade.
- Storage Instructions: Store leftovers in an airtight container in the refrigerator for up to 3 days. The flavors actually deepen overnight, making it even better the next day.
- Reheating: The best way to reheat is in a skillet over medium-low heat, covered, for 5-7 minutes. Add a splash of broth or water if the sauce seems dry. The microwave works in a pinch, but the tortillas will be softer.
- Freezing: This skillet freezes well. Let it cool completely, then transfer to a freezer-safe container. Freeze for up to 3 months. Thaw in the refrigerator overnight and reheat in a skillet. The texture of the tortillas will be slightly softer, but the flavor remains excellent.
Nutritional Information & Benefits
Here’s a rough estimate per serving (based on 4 servings):
- Calories: ~480
- Protein: 38g
- Fat: 22g
- Carbohydrates: 32g
- Fiber: 5g
- Sugar: 6g
- Sodium: 680mg
This recipe is packed with protein from the chicken and cheese, keeping you full and satisfied. The Hatch chiles are rich in vitamin C and capsaicin, which can boost metabolism and reduce inflammation. Fire-roasted tomatoes provide lycopene, a powerful antioxidant. Corn tortillas offer complex carbohydrates for steady energy. For a lower-carb option, serve over cauliflower rice or a bed of greens. This dish is naturally gluten-free and can be made dairy-free with simple swaps. The balance of protein, healthy fats, and fiber makes it a well-rounded meal that doesn’t leave you feeling heavy.
Conclusion
This Smoky Hatch Chili Chicken Enchilada Skillet has become a staple in my kitchen for one simple reason: it delivers everything I love about enchiladas without the fuss. The smoky heat, the tender chicken, the crispy tortilla edges, the melted cheese—it’s pure comfort in a single pan. I’ve made it for quiet weeknight dinners, for impromptu gatherings with friends, and even for a lazy Sunday meal prep. Every time, it disappears.
I hope you give this recipe a try and make it your own. Maybe you’ll add extra chiles for heat, or swap in black beans for a vegetarian twist. That’s the beauty of a skillet like this—it’s a canvas for your cravings. I’d love to hear how it turns out for you. Drop a comment below and tell me about your version. Did you change something? Did it become a new favorite? Share your story. And if you loved it, please share this recipe with someone who needs a little smoky comfort in their life.
Until next time, keep cooking with heart and a little bit of fire.
Frequently Asked Questions
Can I use canned Hatch chiles instead of fresh roasted ones?
Absolutely. Canned Hatch chiles are a great shortcut. They’re already roasted and peeled, so you can just drain and chop them. The flavor is slightly milder, but still delicious. Use about 1 cup of canned chiles for this recipe.
What if I don’t have an oven-safe skillet?
No problem at all. After you’ve added the cheese, simply transfer the mixture to a 9×13 baking dish. Broil as directed until the cheese is bubbly and golden. It’s one extra dish to wash, but it works perfectly.
Can I make this ahead of time?
You can prepare the sauce and cook the chicken up to a day in advance. Store them separately in the refrigerator. When you’re ready to serve, reheat the sauce and chicken in the skillet, then proceed with the tortillas and cheese. The final broil should be done just before serving for the best texture.
How do I know when the Hatch chiles are at their peak?
Fresh Hatch chiles are typically available from late August through September. Look for firm, glossy chiles with a deep green color. If you’re buying them roasted and frozen, they’re available year-round at many grocery stores. The frozen ones are just as good as fresh for this recipe.
Can I use flour tortillas instead of corn?
You can, but the texture will be different. Flour tortillas absorb more liquid and become very soft, almost doughy. Corn tortillas hold their shape better and develop those crispy edges. If you only have flour, tear them into larger pieces and reduce the simmering time by a minute or two.
Pin This Recipe!
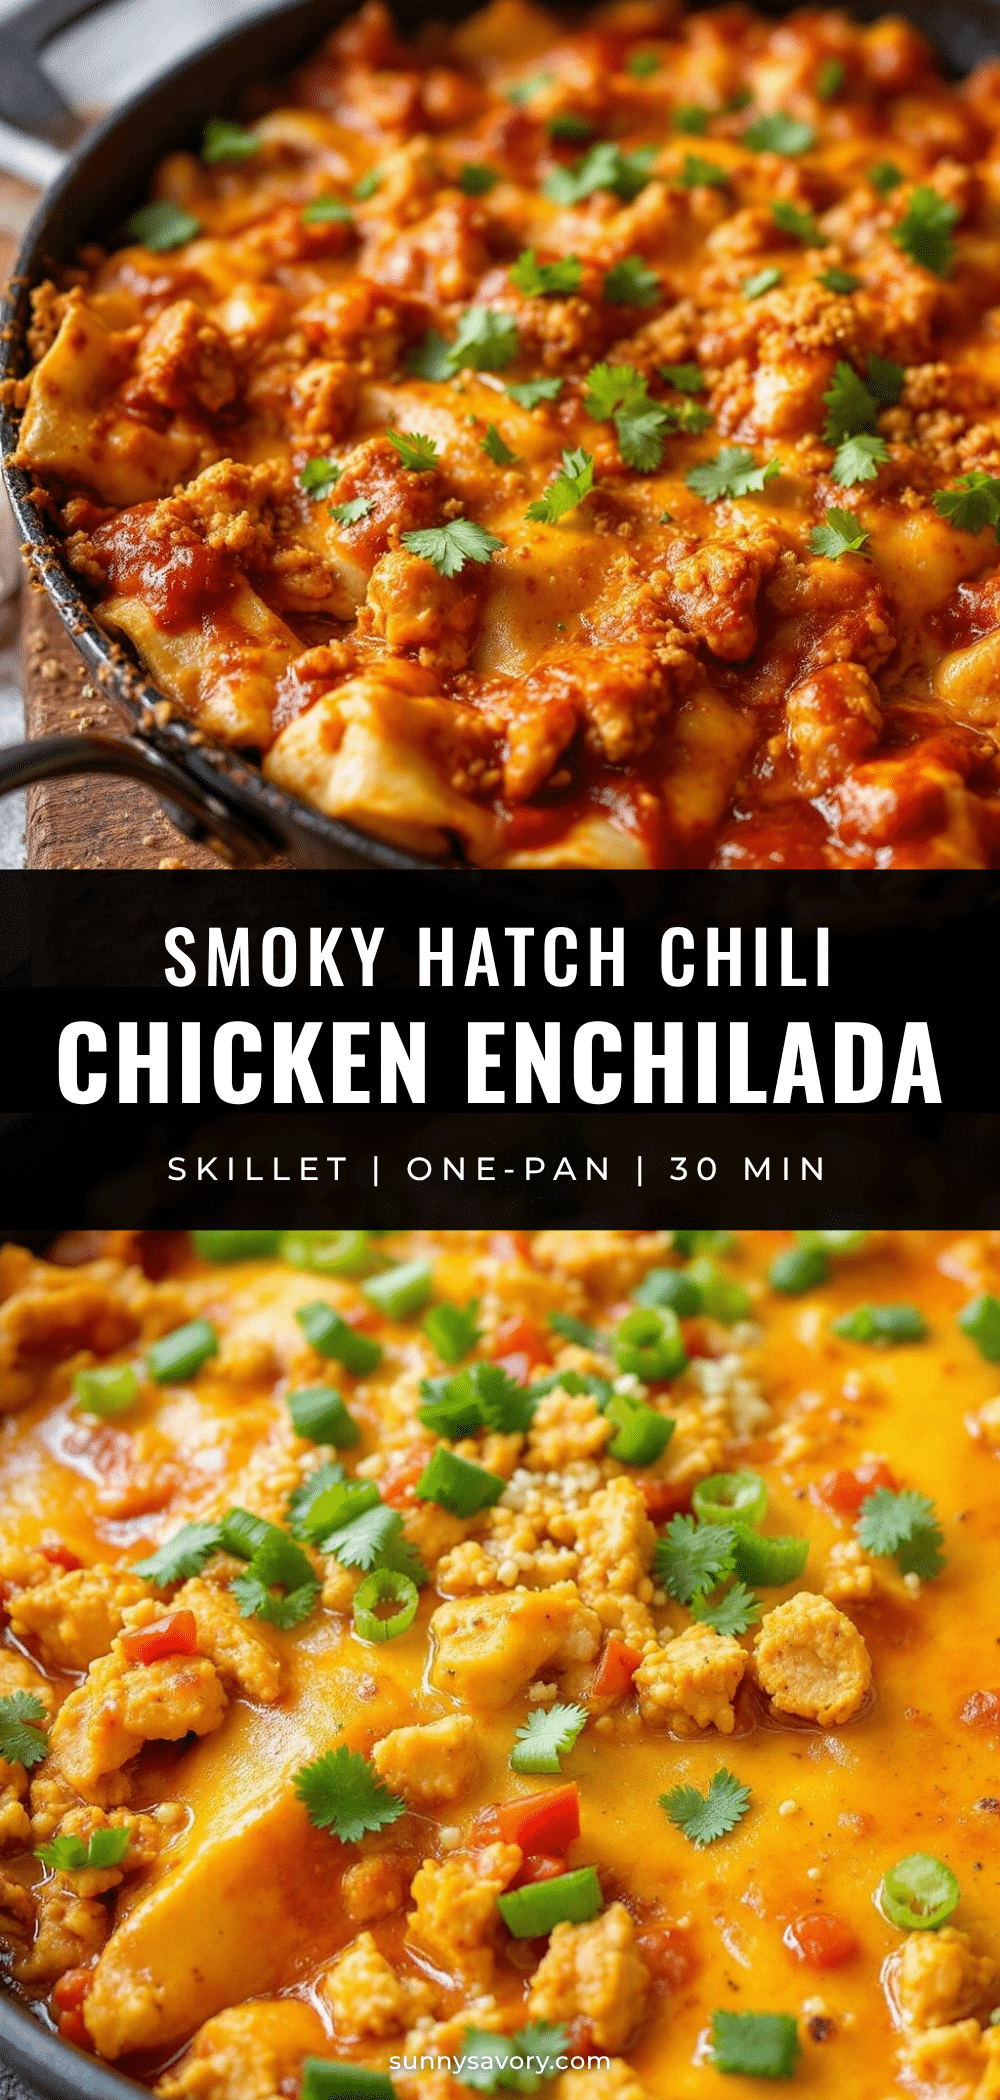
Smoky Hatch Chili Chicken Enchilada Skillet

A one-pan wonder that delivers all the smoky, spicy flavor of enchiladas without the fuss of rolling and baking. Tender chicken, roasted Hatch chiles, and crispy tortilla edges come together in a single skillet for a quick and easy weeknight dinner.
- Prep Time: 15 minutes
- Cook Time: 25 minutes
- Total Time: 40 minutes
- Yield: 4 servings 1x
- Category: Main Course
- Cuisine: Mexican
Ingredients
- 1 lb boneless skinless chicken breast, cut into 1-inch cubes
- 4–5 whole Hatch chiles, roasted, peeled, and chopped
- 1 can (14.5 oz) fire-roasted tomatoes
- 1 medium yellow onion, diced
- 4 cloves garlic, minced
- 1 teaspoon ground cumin
- 1 teaspoon smoked paprika
- 1/2 teaspoon dried oregano
- 1/2 cup low-sodium chicken broth
- 6–8 corn tortillas (6-inch), torn into 2-inch pieces
- 1 1/2 cups shredded cheese (Monterey Jack and sharp cheddar blend)
- Sour cream or crema, for serving
- Fresh cilantro, for garnish
- 2 tablespoons neutral oil (avocado or grapeseed)
- Salt and pepper, to taste
Instructions
- Prep the Ingredients: Dice the onion, mince the garlic, and chop the roasted Hatch chiles. Cut the chicken into 1-inch cubes. Grate the cheese if using a block. Tear the corn tortillas into rough 2-inch pieces.
- Sear the Chicken: Heat 2 tablespoons of neutral oil in a large oven-safe skillet over medium-high heat. Add the chicken pieces in a single layer, season with salt and pepper, and cook for 4-5 minutes, stirring once, until golden brown. Remove chicken to a plate and set aside.
- Build the Aromatics: Reduce heat to medium. Add the diced onion to the skillet and cook for 3-4 minutes until softened. Add minced garlic, cumin, smoked paprika, and oregano. Stir constantly for 30 seconds until fragrant.
- Create the Sauce: Pour in the fire-roasted tomatoes (with juices) and chicken broth. Add the chopped Hatch chiles. Stir, scraping up any browned bits from the bottom. Bring to a gentle simmer and cook for 5 minutes, stirring occasionally, until slightly thickened. Season with salt and pepper to taste.
- Layer the Tortillas: Return the seared chicken to the skillet along with any accumulated juices. Nestle the torn tortilla pieces into the sauce, pushing them down to soak up liquid. Let simmer for 3-4 minutes.
- Top with Cheese: Sprinkle the shredded cheese evenly over the top. Cover the skillet with a lid or baking sheet and cook for 2-3 minutes until cheese is mostly melted.
- Broil for the Finish: Preheat broiler to high. Uncover the skillet and transfer to the top rack. Broil for 2-3 minutes until cheese is bubbly and golden brown. Watch closely to prevent burning.
- Rest and Serve: Let the skillet rest for 5 minutes. Spoon onto plates, top with sour cream or crema, and garnish with fresh cilantro.
Notes
For extra texture, toast the torn tortilla pieces in a dry skillet for 1-2 minutes before adding to the sauce. Let the skillet rest for 5 minutes before serving to allow flavors to meld. Freshly grated cheese melts better than pre-shredded.
Nutrition
- Serving Size: 1 serving
- Calories: 480
- Sugar: 6
- Sodium: 680
- Fat: 22
- Saturated Fat: 8
- Carbohydrates: 32
- Fiber: 5
- Protein: 38
Keywords: Hatch chile, chicken enchilada, one-pan, skillet dinner, smoky, easy weeknight dinner, gluten-free