Love this? Save it for later!
Share the inspiration with your friends
I’d been staring at the box of devil’s food cake mix for about twenty minutes. It was a Tuesday. My neighbor, a guy named Dave who I’d never actually talked to before, had texted me asking if I could bring a dessert to the block party that weekend. I said yes before thinking. Now I was panicking. I’m not a cake person. Honestly, I find most cakes dry and disappointing. They promise so much and then crumble into sad, flavorless dust on your plate. I wanted to bring something that would actually make people stop mid-conversation. Something that felt like a real treat, not just a grocery store afterthought.
The idea hit me when I saw the jar of peanut butter next to the coffee maker. Peanut butter and chocolate. It’s not a new combo, obviously. But what if I didn’t just slap some frosting on top? What if I made the cake soak up all that peanut buttery goodness? That’s the moment the Ultimate Reese’s Peanut Butter Cup Poke Cake was born in my head. I grabbed a bag of mini Reese’s cups from the pantry, feeling a little smug. I won’t lie to you—I messed up the first batch. I poked the holes too small, and the filling just sat on top. It was a sticky mess. But the second time? The second time was magic. The cake was so moist it almost felt like a fudge brownie, and every single bite had that salty-sweet peanut butter kick. Dave’s block party turned into a feeding frenzy. People were asking for the recipe before they even finished their first slice. And honestly? I get it. This isn’t just another chocolate cake. It’s the kind of dessert that makes you close your eyes after the first bite, maybe even let out a little groan. You know the feeling.
Why You’ll Love This Recipe
Let’s be real. You want a dessert that feels impressive without making you spend all day in the kitchen. This cake delivers on every level. I’ve tested this recipe at least five times now, tweaking the amount of sweetened condensed milk and the timing of the pour. It’s foolproof, I promise.
- Quick & Easy: From box to table in under an hour. Most of that time is just waiting for the cake to bake and cool a little. It’s perfect for those “I need dessert now” moments.
- Simple Ingredients: You probably have 90% of these in your pantry right now. No weird extracts or specialty flours. Just good, honest ingredients.
- Perfect for Potlucks & Parties: This cake travels beautifully. It stays moist for days, so you can make it the night before without worrying. It’s always the first thing to disappear at gatherings.
- Crowd-Pleaser: I’ve watched kids and adults alike go back for thirds. The combination of rich chocolate, creamy peanut butter, and that crunchy topping is universally loved.
- Unbelievably Delicious: The texture is the real star here. It’s dense but not heavy, moist but not soggy. The poke method lets the sweetened condensed milk and peanut butter soak deep into the cake, making every forkful perfect.
What makes this version different from every other poke cake out there? It’s the ratio. Most recipes use too much milk or not enough peanut butter. I spent a whole afternoon figuring out the sweet spot. You get a distinct peanut butter flavor in every bite, not just a hint. And the topping—crushed Reese’s cups mixed with a drizzle of melted peanut butter—adds a crunch that contrasts beautifully with the soft cake. This isn’t just a recipe; it’s your new secret weapon for dessert emergencies.
What Ingredients You Will Need
This recipe uses simple, wholesome ingredients to deliver that next-level flavor. Most of these are pantry staples, which makes this cake a lifesaver when you need something impressive fast.
- For the Cake:
- 1 box (15.25 oz) devil’s food cake mix (I prefer Duncan Hines for its deep chocolate flavor)
- 3 large eggs, room temperature
- 1/2 cup vegetable oil
- 1 cup water
- For the Poke Filling:
- 1 can (14 oz) sweetened condensed milk (this is non-negotiable for the texture)
- 1/2 cup creamy peanut butter (I use Jif—it has the perfect sweetness and salt balance)
- 1 teaspoon vanilla extract
- For the Topping:
- 1 container (8 oz) frozen whipped topping, thawed (like Cool Whip)
- 1/2 cup creamy peanut butter, melted
- 1 cup mini Reese’s peanut butter cups, roughly chopped
- 1/4 cup chocolate syrup, for drizzling (optional, but highly recommended)
A quick note on the peanut butter: don’t use the natural kind that separates. It’s too runny and won’t give you that thick, creamy texture you need for the filling. Stick with the classic processed stuff for this one. For the cake mix, you can use a chocolate fudge mix if you want an even richer flavor. I’ve also tried this with a milk chocolate mix, and it works, but the devil’s food gives you that dark, almost bittersweet base that balances the sweet peanut butter perfectly.
If you’re out of vegetable oil, you can swap in melted coconut oil or canola oil. Just avoid olive oil—the flavor is too strong. And for the whipped topping, you can definitely make your own stabilized whipped cream if you’re feeling fancy. But honestly, the store-bought stuff works great here and saves you time.
Equipment Needed
You don’t need a professional bakery setup for this cake. Here’s what you’ll need:
- 9×13-inch baking pan (metal or glass both work, but glass gives a slightly softer edge)
- Large mixing bowl and whisk
- Hand mixer or stand mixer (you can whisk by hand, but a mixer makes the filling smoother)
- Wooden spoon handle or the round end of a chopstick for poking holes
- Small saucepan or microwave-safe bowl for melting peanut butter
- Rubber spatula for scraping every last bit of filling
- Cooling rack
If you don’t have a 9×13 pan, you can use two 8-inch square pans, but you’ll need to adjust the baking time. Start checking at 20 minutes. I’ve also used a disposable aluminum pan for taking this to parties—works like a charm and means less cleanup. For the poking tool, I actually prefer a thick chopstick over a fork. The holes are bigger, which lets more filling seep in. Just be careful not to poke all the way through the bottom of the cake.
Preparation Method
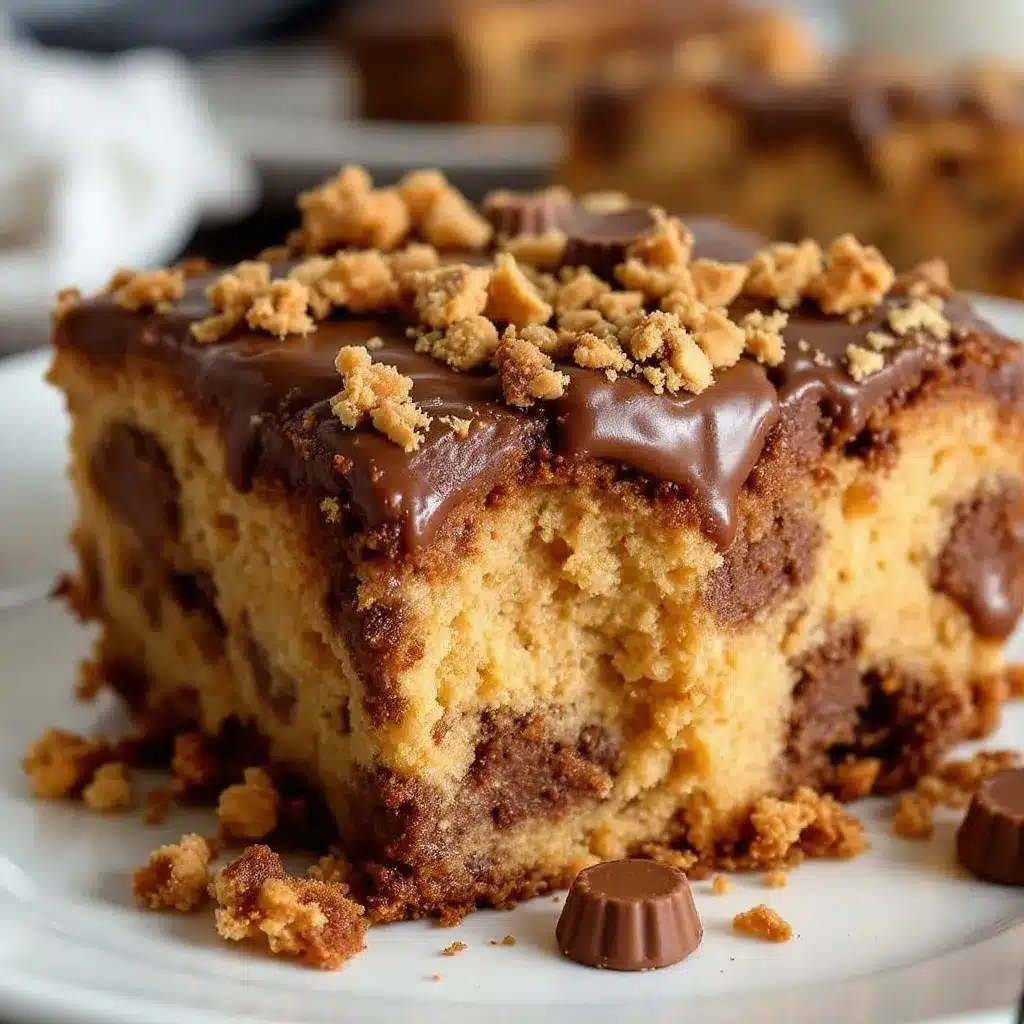
Let’s get to the good part. Follow these steps, and you’ll have a cake that makes you look like a hero.
- Preheat and Prep: Preheat your oven to 350°F (175°C). Grease your 9×13 baking pan generously with butter or cooking spray. Don’t skip this step—the filling is sticky, and you want those edges to release cleanly.
- Make the Cake Batter: In a large bowl, combine the devil’s food cake mix, eggs, vegetable oil, and water. Mix on medium speed for about 2 minutes until smooth. The batter will be thick and glossy. Scrape down the sides once to make sure everything is incorporated.
- Bake the Cake: Pour the batter into your prepared pan and spread it evenly. Bake for 28-32 minutes, or until a toothpick inserted in the center comes out with just a few moist crumbs. Don’t overbake—the cake will continue to cook from the residual heat. Let it cool in the pan for 10 minutes. You want it warm, not hot, for the next step.
- Make the Poke Filling: While the cake is cooling, make the filling. In a medium bowl, whisk together the sweetened condensed milk, 1/2 cup creamy peanut butter, and vanilla extract. Microwave it for 30 seconds if the peanut butter is stiff—this helps everything blend smoothly. The mixture should be thick but pourable.
- Poke the Holes: This is the crucial step. Using the handle of a wooden spoon or a thick chopstick, poke holes all over the warm cake. Space them about 1 inch apart. Don’t be shy—you want deep holes that go almost to the bottom of the cake. I usually poke in rows, making sure I don’t miss any spots.
- Pour the Filling: Slowly pour the peanut butter-condensed milk mixture over the entire cake. Use a spatula to spread it evenly, making sure it seeps into all those holes. You’ll see the mixture disappear into the cake. It’s very satisfying. Let the cake cool completely at room temperature—about 1 hour.
- Add the Topping: Once the cake is completely cool, spread the thawed whipped topping evenly over the surface. Don’t press too hard; you don’t want to disturb the filling underneath.
- Finish with the Good Stuff: Melt the remaining 1/2 cup peanut butter in the microwave in 20-second bursts, stirring between each. Drizzle it over the whipped topping. Sprinkle the chopped Reese’s cups generously over the top. Finish with a drizzle of chocolate syrup if you’re using it.
- Chill and Serve: Refrigerate the cake for at least 2 hours before serving. This lets everything set up properly. The cake is actually better the next day—the flavors meld together beautifully overnight.
Cooking Tips & Techniques
I’ve made every mistake in the book with this cake so you don’t have to. Here’s what I learned the hard way.
Don’t skip the cooling step. If you pour the filling into a cake that’s too hot, the sweetened condensed milk will just run off the sides and pool in the pan. You want the cake warm enough to absorb the liquid but cool enough that it doesn’t flood. The 10-minute rest is perfect.
Poke deep and wide. My first attempt failed because I used a fork. The holes were too small and shallow. The filling just sat on top like a sticky blanket. Use a thick tool and go deep—almost to the bottom. You want those pockets of peanut butter goodness in every single bite.
Be patient with the chilling. I know you want to dig in immediately. I’ve been there. But if you slice this cake too soon, it will be a gooey mess. The 2-hour chill is non-negotiable for clean slices. Overnight is even better. The cake absorbs the filling more deeply, and the flavors get all cozy together.
Toast the Reese’s cups. This is a pro tip I stumbled on by accident. If you have time, spread the chopped Reese’s cups on a baking sheet and toast them in a 300°F oven for 5 minutes. They get slightly crunchy and the chocolate caramelizes a bit. It adds an incredible texture contrast to the soft cake and creamy topping.
Timing strategy: Make the cake in the evening, let it cool, poke it, and pour the filling. Leave it on the counter overnight (covered). In the morning, add the topping and refrigerate. By lunchtime, it’s perfect. This method spreads out the work and gives you the best results.
Variations & Adaptations
This recipe is a fantastic base for experimentation. Here are a few variations I’ve tried and loved.
Gluten-Free Version: Use a gluten-free chocolate cake mix. Most brands work well, but check the package for any additional ingredient requirements. Everything else in the recipe is naturally gluten-free. I’ve tested this with King Arthur’s gluten-free mix, and my gluten-eating friends couldn’t tell the difference.
Peanut Butter Lover’s Extreme: Add 1/2 cup of creamy peanut butter directly into the cake batter before baking. It makes the cake itself peanut buttery, not just the filling. You can also swirl extra peanut butter into the whipped topping for even more flavor. This version is dangerously good.
Chocolate Overload: Use a chocolate fudge cake mix and add 1/2 cup of chocolate chips to the batter. Drizzle extra chocolate syrup over the top instead of the peanut butter drizzle. You get a double chocolate base with the peanut butter filling. It’s like a Reese’s cup exploded in cake form.
Healthier-ish Twist: Swap the devil’s food mix for a sugar-free chocolate cake mix. Use reduced-fat sweetened condensed milk and light whipped topping. The texture will be slightly less rich, but it still hits that craving. I’ve made this for a friend who’s watching her sugar intake, and she said it was the best dessert she’d had in months.
Seasonal Variation: For fall, add 1 teaspoon of cinnamon to the cake batter and top with chopped pecans along with the Reese’s cups. The warm spice pairs beautifully with the chocolate and peanut butter. For summer, swap the chocolate syrup for a berry compote drizzle. The tartness cuts through the richness perfectly.
Serving & Storage Suggestions
This cake is best served cold, straight from the fridge. The texture is firmer, the flavors are more pronounced, and the slices come out clean. Let it sit at room temperature for about 10 minutes before serving if you want a softer, more decadent bite.
Presentation tip: For clean slices, use a sharp knife dipped in hot water and wiped dry between cuts. This gives you those picture-perfect layers. Serve on a white plate to make the dark chocolate and peanut butter colors pop. A dollop of extra whipped cream on the side never hurts.
Storage: Cover the cake tightly with plastic wrap or aluminum foil and store it in the refrigerator for up to 5 days. The cake actually gets better after day one. I’ve had slices on day four that were still incredibly moist and flavorful. You can also freeze individual slices wrapped in plastic wrap and then foil for up to 3 months. Thaw in the refrigerator overnight.
Reheating: I prefer this cake cold, but if you want a warm dessert experience, microwave a single slice for 15-20 seconds. The peanut butter filling gets slightly melty, and the cake becomes almost pudding-like. Top with a scoop of vanilla ice cream for the ultimate treat.
Flavor development: The magic really happens overnight. The sweetened condensed milk and peanut butter continue to soak into the cake, making it more moist and flavorful. The whipped topping also sets up firmer. If you can plan ahead, this is a perfect make-ahead dessert for parties.
Nutritional Information & Benefits
Let’s be honest—this is a treat, not a health food. But knowing what’s in it helps you enjoy it mindfully.
Estimated per serving (12 servings): Calories: 485, Fat: 26g, Carbohydrates: 58g, Protein: 10g, Sugar: 42g, Fiber: 2g.
Health highlights: Peanut butter is a good source of protein and healthy monounsaturated fats. It also contains vitamin E, magnesium, and potassium. Dark chocolate (from the devil’s food mix) has antioxidants called flavonoids. The eggs provide high-quality protein and choline for brain health.
Dietary considerations: This recipe contains dairy, peanuts, eggs, and gluten. For a dairy-free version, use a dairy-free cake mix, coconut cream instead of whipped topping, and a dairy-free sweetened condensed milk alternative. For a nut-free version, replace the peanut butter with sunflower seed butter and use SunButter cups instead of Reese’s. The flavor will be different but still delicious.
My perspective: I believe in balance. This cake is for celebrations, potlucks, and those days when you just need something comforting. One slice is plenty satisfying. Pair it with a glass of milk or a cup of coffee, and you’ve got a moment of pure joy. No guilt required.
Conclusion
This Ultimate Reese’s Peanut Butter Cup Poke Cake is more than just a dessert. It’s the cake that made my neighbor Dave ask for the recipe three times. It’s the cake that disappeared before the burgers were even off the grill. It’s the cake I now bring to every gathering because it’s foolproof, crowd-pleasing, and honestly, it makes me look like I know what I’m doing in the kitchen.
I want you to make this your own. Add extra peanut butter if that’s your thing. Swap the devil’s food for yellow cake if you want a different vibe. Top it with crushed pretzels for a salty crunch. The base recipe is solid, but the variations are endless. That’s the beauty of a good poke cake—it’s forgiving and adaptable.
I’d love to hear how yours turns out. Did you add something unexpected? Did you double the Reese’s cups? Drop a comment below and tell me about it. Share this recipe with a friend who needs a dessert win. And most importantly, save a slice for yourself before the crowd descends. You’ve earned it.
Happy baking, friend. Your kitchen is about to smell incredible.
Frequently Asked Questions
Can I use a homemade chocolate cake instead of a box mix?
Absolutely. Use your favorite homemade chocolate cake recipe. Just make sure it’s a dense, sturdy cake that can hold up to the poking and filling. A light, fluffy sponge might fall apart. I’ve used a sour cream chocolate cake recipe before, and it was incredible—the tanginess balanced the sweet peanut butter perfectly.
How do I prevent the cake from sticking to the pan?
Grease your pan generously with butter or baking spray that contains flour. You can also line the bottom with parchment paper, leaving overhang on the sides for easy lifting. Let the cake cool completely before slicing—warm cake is more fragile and likely to stick.
Can I make this cake a day ahead?
Yes, and I actually recommend it. The cake tastes better the next day because the filling has more time to soak in. Make the cake, poke it, and add the filling. Cover and refrigerate overnight. Add the whipped topping and garnishes the next day before serving. This method gives you the best texture and flavor.
What if I don’t have sweetened condensed milk?
You can make a quick substitute by simmering 1 cup of milk with 3/4 cup of sugar over low heat until it reduces by half. It takes about 15 minutes and won’t be quite as thick, but it works in a pinch. Alternatively, you can use a can of evaporated milk mixed with 1/2 cup of sugar. The texture will be slightly different, but the flavor will still be delicious.
How do I get the Reese’s cups to stay on top without falling off?
Press the chopped Reese’s cups gently into the whipped topping while it’s still soft. Don’t just sprinkle them on top—give them a little push. The topping will hold them in place as it sets in the fridge. For extra security, you can also drizzle the melted peanut butter over the cups to glue them down.
Pin This Recipe!

Best Reese’s Peanut Butter Cup Poke Cake Recipe
This Ultimate Reese’s Peanut Butter Cup Poke Cake is a moist, fudgy chocolate cake soaked with a sweet peanut butter filling, topped with whipped topping, melted peanut butter, and chopped Reese’s cups. It’s an easy, crowd-pleasing dessert perfect for potlucks and parties.
- Prep Time: 15 minutes
- Cook Time: 30 minutes
- Total Time: 45 minutes (plus 2 hours chilling)
- Yield: 12 servings 1x
- Category: Dessert
- Cuisine: American
Ingredients
- 1 box (15.25 oz) devil’s food cake mix
- 3 large eggs, room temperature
- 1/2 cup vegetable oil
- 1 cup water
- 1 can (14 oz) sweetened condensed milk
- 1/2 cup creamy peanut butter (for filling)
- 1 teaspoon vanilla extract
- 1 container (8 oz) frozen whipped topping, thawed
- 1/2 cup creamy peanut butter, melted (for topping)
- 1 cup mini Reese’s peanut butter cups, roughly chopped
- 1/4 cup chocolate syrup (optional)
Instructions
- Preheat oven to 350°F (175°C). Grease a 9×13-inch baking pan.
- In a large bowl, combine cake mix, eggs, oil, and water. Mix on medium speed for 2 minutes until smooth.
- Pour batter into prepared pan and bake for 28-32 minutes, until a toothpick inserted in center comes out with moist crumbs. Let cool in pan for 10 minutes.
- While cake cools, whisk together sweetened condensed milk, 1/2 cup peanut butter, and vanilla extract. Microwave 30 seconds if needed to blend smoothly.
- Using the handle of a wooden spoon or a thick chopstick, poke holes all over the warm cake, spacing them about 1 inch apart and going almost to the bottom.
- Slowly pour the peanut butter-condensed milk mixture over the cake, spreading evenly to fill the holes. Let cool completely at room temperature (about 1 hour).
- Spread thawed whipped topping evenly over the cooled cake.
- Melt remaining 1/2 cup peanut butter in microwave in 20-second bursts. Drizzle over whipped topping. Sprinkle chopped Reese’s cups on top. Drizzle with chocolate syrup if desired.
- Refrigerate for at least 2 hours before serving. Overnight is best for flavor development.
Notes
Don’t use natural peanut butter that separates; use classic processed peanut butter. Poke holes deep and wide for best absorption. Chill at least 2 hours for clean slices. Cake tastes even better the next day. For a pro tip, toast chopped Reese’s cups at 300°F for 5 minutes for extra crunch.
Nutrition
- Serving Size: 1 slice (1/12 of cak
- Calories: 485
- Sugar: 42
- Sodium: 380
- Fat: 26
- Saturated Fat: 8
- Carbohydrates: 58
- Fiber: 2
- Protein: 10
Keywords: Reese's, peanut butter cup, poke cake, chocolate cake, easy dessert, potluck, block party