Love this? Save it for later!
Share the inspiration with your friends
This was supposed to be a taco night. I had the ground beef defrosting, the tortillas warming, and the sour cream ready to go. But I got distracted—honestly, I was scrolling through my phone looking at some ridiculous video my cousin sent me—and I grabbed the wrong bag of chips from the pantry. Instead of soft taco shells, I pulled out a family-size bag of tortilla chips. And I was already running late for a movie night with friends. You know that feeling when you realize you’ve messed up but there’s no time to fix it? That was me, standing in my kitchen with a pound of seasoned beef, a bag of chips, and a sinking feeling.
So I did what any reasonable person would do. I panicked for a minute, then I decided to just… go with it. I threw the chips on a baking sheet, piled on the beef, dumped a jar of queso over the top (because why not), and stuck it under the broiler. What came out of that oven was nothing like the plan—and honestly, it was so much better. The chips got all crispy and golden at the edges, the queso bubbled up into every little crevice, and the beef was already perfectly seasoned from my taco plan. My friends devoured the whole thing in about ten minutes flat. Someone actually asked me for the recipe before the movie even started.
That night, the Loaded Nacho Bar was born—by accident, out of a mistake, and with no backup plan. I’ve made it dozens of times since then, tweaking and perfecting every layer. It’s the kind of recipe that feels like a cheat code for entertaining. You barely have to try, and everyone thinks you’re a genius. Maybe you’ve been there—staring at a half-prepped dinner that’s gone sideways, wondering how to salvage it. Let me tell you, sometimes the best dishes come from the biggest disasters. This one sure did.
Why You’ll Love This Recipe
This isn’t just another nacho recipe. I mean, I’ve tested about fifteen different versions over the years, and this one is the one I keep coming back to. It’s the kind of dish that makes you close your eyes after the first bite—the kind where the cheese pulls and the beef is perfectly spiced and the chips somehow stay crunchy even under all that goodness.
Here’s what makes it stand out:
- Quick & Easy: From fridge to table in under 30 minutes. Seriously. This is my go-to for busy weeknights when I need dinner on the table fast, or for spontaneous gatherings where I forgot to plan ahead.
- Simple Ingredients: No fancy grocery trips needed. You likely already have ground beef, cheese, chips, and a few spices in your kitchen. The queso can be store-bought or homemade—both work beautifully.
- Perfect for Entertaining: Set up a nacho bar and let everyone build their own plate. It’s great for game days, movie nights, birthday parties, or casual dinners with friends. Everyone gets exactly what they want.
- Crowd-Pleaser: I have never, not once, had leftovers from this recipe. Kids love it, adults love it, picky eaters love it. It’s basically magic in a baking dish.
- Unbelievably Delicious: The combination of crispy chips, seasoned beef, melty queso, and fresh toppings is next-level comfort food. It hits every single craving at once.
What makes my version different from the rest? It’s the layering technique. Most people just dump everything on top of the chips and call it a day. I layer the chips and beef twice, so every single chip gets some love. No dry chips at the bottom of the pan. No sad, bare tortilla pieces. Every bite is loaded. Plus, I use a blend of queso and shredded cheese that creates this ultra-gooey, stretchy texture that store-bought nachos just can’t replicate.
This recipe isn’t just good—it’s the kind that makes you want to invite people over just so you have an excuse to make it again. It’s comfort food reimagined: faster, easier, but with the same soul-soothing satisfaction. Perfect for impressing guests without stress, or turning a simple Tuesday night into something memorable.
What Ingredients You Will Need
This recipe uses simple, everyday ingredients to deliver big flavor without the fuss. Most of these are pantry staples or easy to find at any grocery store. I’ve included my personal brand preferences and substitution notes where helpful.
For the Seasoned Ground Beef
- 1 lb ground beef (80/20 blend works best—lean enough to not be greasy, but enough fat for flavor. I prefer 85/15 if I can find it)
- 1 tablespoon olive oil (for browning the beef)
- 1 small yellow onion, finely diced (about ½ cup)
- 3 cloves garlic, minced (fresh is best—don’t use the jarred stuff here)
- 1 tablespoon chili powder (I use McCormick’s—it’s reliable and not too spicy)
- 1 teaspoon ground cumin
- 1 teaspoon smoked paprika (adds a subtle smoky depth you won’t get from regular paprika)
- ½ teaspoon garlic powder
- ½ teaspoon onion powder
- ½ teaspoon salt (or to taste)
- ¼ teaspoon black pepper
- ¼ cup beef broth (or water, if that’s what you have—adds moisture and helps the seasoning meld)
For the Nacho Base
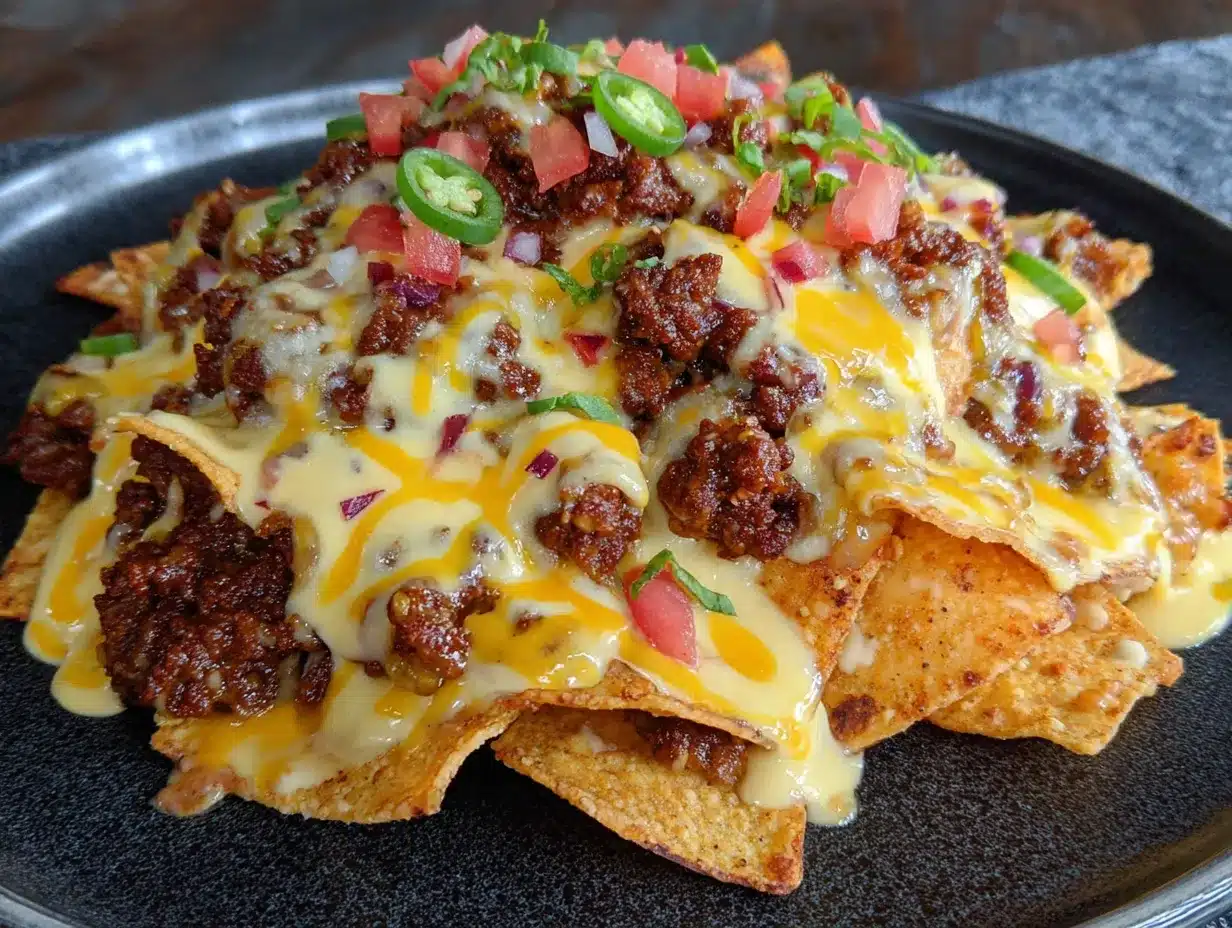
- 1 large bag (13-16 oz) restaurant-style tortilla chips (look for sturdy chips that won’t break easily—I like Tostitos Scoops for the shape, but any thick chip works. Avoid thin, delicate chips—they’ll get soggy)
- 2 cups shredded Mexican blend cheese (or a mix of cheddar and Monterey Jack. Shred it yourself if you can—pre-shredded has anti-caking agents that don’t melt as smoothly)
- 1½ cups queso (store-bought is fine—I use the creamy white queso from Trader Joe’s, or you can make a quick homemade version with Velveeta and Rotel. Both work great)
For Toppings (The Fun Part)
- 1 cup sour cream
- 1 cup pico de gallo or fresh salsa (drain excess liquid to avoid soggy chips)
- 1 avocado, diced (or guacamole—I’m partial to just diced avocado for texture)
- ½ cup pickled jalapeños (adds acidity and heat—adjust to your tolerance)
- ¼ cup fresh cilantro, chopped
- 2 green onions, sliced (both white and green parts)
- 1 lime, cut into wedges (for squeezing over the top—trust me, don’t skip this)
- Optional: black olives, diced tomatoes, shredded lettuce, hot sauce (customize to your heart’s content)
Ingredient Selection Tips: For the best texture, look for a queso that’s smooth and pourable, not thick and gloppy. If you’re making your own, use Velveeta and a can of Rotel—it’s foolproof and tastes surprisingly good. For the chips, I cannot stress this enough: use sturdy chips. I learned this the hard way after a soggy nacho disaster that left me eating chip mush with a spoon. Not my finest moment.
Substitution Guidance: Use ground turkey or chicken instead of beef for a lighter option. For a vegetarian version, swap in black beans and corn. Use dairy-free cheese and vegan queso if needed—just know the texture will be slightly different. And if you don’t have chili powder, use a mix of cumin, paprika, and a pinch of cayenne.
Equipment Needed
You don’t need anything fancy for this recipe—which is part of why I love it so much. Here’s what you’ll need:
- Large skillet or frying pan (for browning the beef. I use a 12-inch cast iron skillet—it gives the beef a nice sear, but any non-stick or stainless steel pan works fine)
- Large baking sheet or oven-safe dish (I use a half-sheet pan—it’s big enough to spread the chips in a single layer. A 9×13 baking dish works too, but you’ll need to layer more carefully)
- Chef’s knife and cutting board (for dicing the onion, avocado, and prepping toppings)
- Small saucepan (if you’re making homemade queso. If using store-bought, you can just microwave it)
- Spatula or wooden spoon (for breaking up the beef as it cooks)
- Measuring spoons (for the spices—I’m terrible at eyeballing, so I always measure)
- Aluminum foil or parchment paper (optional, for easy cleanup. I line my baking sheet with foil—makes washing up a breeze)
Budget-Friendly Options: Don’t have a baking sheet? Use a large oven-safe skillet or even a disposable aluminum pan. No cast iron? Any skillet will do. Honestly, I’ve made this in a hotel room with a microwave and a plastic plate. It wasn’t pretty, but it worked. The point is: don’t let equipment hold you back.
Personal Experience: I used to use a glass baking dish for nachos, and the chips never got as crispy as I wanted. Switching to a metal baking sheet was a game-changer—the heat distributes more evenly, and the edges of the chips get that perfect golden-brown crunch. Worth the swap, trust me.
Preparation Method
Let’s get cooking. This comes together fast, so I recommend prepping all your toppings before you start—that way you’re not scrambling while the beef is hot and the cheese is melting.
- Preheat your oven to 400°F (200°C). Line a large baking sheet with aluminum foil or parchment paper for easy cleanup. Set aside.
- Cook the ground beef. Heat 1 tablespoon olive oil in a large skillet over medium-high heat. Add the diced onion and cook for 2-3 minutes, until softened and translucent. Add the minced garlic and cook for another 30 seconds—just until fragrant. Don’t burn the garlic; it turns bitter fast.
- Brown the beef. Add the ground beef to the skillet. Break it up with a spatula as it cooks. Let it sit undisturbed for about 2 minutes to get a nice sear, then stir and continue breaking it apart. Cook for 6-8 minutes, until no pink remains. Drain off any excess fat if necessary (I usually leave a little for flavor).
- Season the beef. Reduce heat to medium-low. Add the chili powder, cumin, smoked paprika, garlic powder, onion powder, salt, and pepper. Stir well to coat the beef evenly. Pour in the beef broth and let it simmer for 2-3 minutes, until the liquid has mostly absorbed. Taste and adjust seasoning—I always add a little more salt at this stage. Set aside.
- Layer the chips (first layer). Spread half the tortilla chips in an even layer on the prepared baking sheet. Don’t overlap too much—you want each chip to have room to get crispy. Sprinkle half the seasoned beef over the chips, followed by half the shredded cheese. Drizzle half the queso over the top.
- Add the second layer. Repeat with the remaining chips, beef, shredded cheese, and queso. This double-layering ensures every chip gets some goodness—no dry bites allowed.
- Bake. Place the baking sheet in the preheated oven and bake for 8-10 minutes, until the cheese is fully melted and bubbly, and the edges of the chips are starting to turn golden brown. Keep an eye on it—ovens vary, and you don’t want burnt edges. I usually check at the 7-minute mark.
- Add fresh toppings. Remove from the oven. Immediately dollop spoonfuls of sour cream over the hot nachos. Sprinkle with pico de gallo, diced avocado, pickled jalapeños, fresh cilantro, and sliced green onions. Squeeze lime juice over everything—this brightens up all the rich flavors.
- Serve immediately. Nachos wait for no one. The chips start to soften after about 10 minutes, so serve right away while everything is hot and crunchy. I like to put the baking sheet right in the middle of the table and let everyone dig in family-style.
Sensory Cues: At step 3, the beef should sizzle loudly when it hits the pan—that’s the sound of a good sear. At step 4, the spices should smell warm and smoky, like a taco shop. At step 7, you’ll see the cheese bubbling around the edges and the chips turning a deeper golden color. That’s your cue to pull it out.
Troubleshooting: If your chips are getting too dark but the cheese isn’t fully melted, cover the pan loosely with foil for the last 2 minutes of baking. If your queso is too thick to drizzle, warm it up with a splash of milk or water until it’s pourable. And if you accidentally burn the garlic (I’ve done it more times than I care to admit), just start over—burnt garlic ruins the whole dish.
Cooking Tips & Techniques
Over the years, I’ve made every mistake in the book with nachos. Soggy chips. Unevenly distributed toppings. Cheese that seized up and turned into a rubbery mess. Here’s what I’ve learned so you don’t have to make the same mistakes.
Don’t overbake. This is the number one mistake people make. Nachos only need 8-10 minutes in a hot oven. Any longer, and the chips start to burn and the cheese can turn greasy. You want the cheese melted and bubbly, not brown and crispy. Watch it like a hawk.
Layer strategically. I cannot stress this enough. Put chips, then beef, then cheese. Repeat. This ensures every chip has something on it. If you just dump everything on top, the bottom chips end up bare and sad. No one wants a bare chip.
Warm the queso before drizzling. Cold queso straight from the fridge won’t spread evenly. Warm it up in the microwave or on the stovetop until it’s pourable. This makes layering so much easier and ensures the queso gets into all the nooks and crannies.
Drain your toppings. Pico de gallo and salsa have a lot of liquid. If you dump them on straight from the container, you’ll end up with soggy chips. Drain off the excess juice before adding. Same goes for pickled jalapeños—pat them dry with a paper towel if they’re swimming in brine.
Use room temperature sour cream. Cold sour cream straight from the fridge can make the hot nachos cool down too fast. Let it sit out for 10-15 minutes before serving, or at least take the chill off. It’ll spread more smoothly too.
Multitasking strategy: While the beef is browning, prep your toppings. While the nachos are baking, set the table and get drinks ready. This whole dish comes together in about 20 minutes of active time, and the oven does the rest. It’s practically a one-person operation.
Personal failure story: I once made nachos for a Super Bowl party and forgot to layer the chips at all. I just dumped everything on top and baked it. The bottom layer was a sad, dry mess of naked chips. Everyone was polite about it, but I knew. I knew. Never again.
Variations & Adaptations
One of the best things about this recipe is how flexible it is. I’ve made so many versions over the years, and honestly, I’ve loved most of them. Here are a few ways to switch it up.
Vegetarian Version: Swap the ground beef for two cans of black beans (drained and rinsed) and a cup of corn kernels. Season them the same way—chili powder, cumin, smoked paprika—and cook them in the skillet for 5 minutes until heated through. The texture is different, but the flavor is still big and satisfying. I’ve served this to meat-eaters who didn’t even notice the swap.
Chicken Nachos: Use shredded rotisserie chicken instead of ground beef. Shred about 2 cups of chicken, toss it with the same spice blend, and warm it in the skillet with a little broth. It’s quicker than browning beef and has a different, lighter texture. Great for when you’re in a hurry.
Spicy Version: Add a diced jalapeño to the beef while it cooks, use pepper jack cheese instead of Mexican blend, and drizzle with hot sauce before serving. I like Cholula or Valentina for their vinegary kick. This version is not for the faint of heart, but it’s amazing if you love heat.
Breakfast Nachos: This is my secret weekend indulgence. Swap the beef for scrambled eggs and chorizo. Use the same cheese and queso. Top with avocado, salsa, and a dollop of sour cream. It sounds weird, but it’s honestly one of the best breakfasts I’ve ever had. My husband looked at me like I was crazy the first time I made it. He ate three servings.
Low-Carb / Keto Version: Use pork rinds instead of tortilla chips. I know, I know—it sounds strange. But pork rinds have a similar crunch and they hold up really well under the cheese and beef. Use full-fat cheese and sour cream to keep it keto-friendly. It’s not exactly the same, but it scratches the nacho itch when you’re watching your carbs.
Seasonal Twist: In the summer, I add fresh corn kernels straight off the cob and diced zucchini. In the fall, I swap the pico de gallo for roasted butternut squash cubes and use a smoky chipotle queso. The base recipe is so adaptable—just think about what’s in season and throw it on.
Serving & Storage Suggestions
Nachos are best served hot and fresh, right out of the oven. I put the baking sheet on a trivet in the middle of the table and let everyone grab their own portion. It’s casual, it’s fun, and it encourages people to eat with their hands—which is honestly the best way to eat nachos.
Serving Temperature: Serve immediately while the cheese is still molten and the chips are crunchy. After about 10 minutes, the chips start to soften from the moisture in the toppings. That’s not necessarily a bad thing—some people prefer them a little softer—but for maximum crunch, eat right away.
Complementary Dishes: I like to serve these nachos with a simple side of refried beans or Mexican rice for a more filling meal. A crisp green salad with lime vinaigrette cuts through the richness nicely. And for drinks? A cold beer (Mexican lager, please), a margarita, or even just sparkling water with lime. Keep it simple.
Storage: Okay, let’s be real—nachos don’t store well. The chips get soft, the toppings get soggy, and it’s just not the same. But if you have leftovers (unlikely, but possible), store them in an airtight container in the refrigerator for up to 2 days. They won’t be crunchy, but they’ll still taste good.
Reheating: The best way to reheat leftover nachos is in the oven or air fryer. Spread them on a baking sheet and bake at 350°F for 5-7 minutes, until warmed through. The microwave will turn them into a sad, soggy mess—avoid it if you can. I’ve made that mistake and regretted it deeply.
How Flavors Develop: Honestly, the flavors don’t really improve with time on this one. Nachos are a now-food. They’re meant to be eaten hot and fresh, with the cheese pulling and the chips cracking. That’s the magic. Don’t try to make them ahead—just make them and eat them immediately.
Nutritional Information & Benefits
Let’s be honest: these nachos are not health food. They’re comfort food, indulgence food, happy food. But that doesn’t mean they can’t have some redeeming qualities. Here’s a rough estimate per serving (about ¼ of the full recipe):
- Calories: ~550-650
- Protein: 28-32g
- Fat: 35-40g
- Carbohydrates: 35-40g
- Fiber: 4-6g
- Sugar: 5-7g
Health Benefits: The ground beef provides a solid dose of protein and iron, which helps with energy and muscle repair. The avocado adds healthy monounsaturated fats and fiber, which are good for heart health. The tomatoes in the pico de gallo are rich in lycopene, an antioxidant. And the cilantro? It’s actually a good source of vitamins A, C, and K. So there are some bright spots in there.
Dietary Considerations: This recipe is naturally gluten-free (check your queso and spice blends for hidden gluten). It’s not low-carb unless you use the pork rind variation. It contains dairy, so it’s not suitable for vegans or those with lactose intolerance without substitutions. And it’s relatively high in sodium, so be mindful if you’re watching your salt intake.
Personal Wellness Perspective: I believe in balance. These nachos are not an everyday meal—they’re a celebration meal, a gathering meal, a “I had a rough week and I deserve this” meal. And that’s okay. Food is about more than just fuel. It’s about joy, connection, and sometimes, eating chips covered in cheese with your bare hands. Life is short. Eat the nachos.
Conclusion
This Loaded Nacho Bar started as a mistake—a wrong bag of chips, a distracted cook, and a deadline looming. But sometimes the best recipes come from those moments of chaos. This one certainly did. Every time I make it, I remember that night in my kitchen, staring at a baking sheet full of chips and beef, wondering if I’d just ruined dinner. Turns out, I’d accidentally created something worth sharing.
I hope you make this recipe your own. Add your favorite toppings, swap in whatever protein you have on hand, and don’t be afraid to get creative. The beauty of a nacho bar is that everyone gets exactly what they want. It’s customizable, it’s forgiving, and it’s always, always delicious.
If you try this recipe, I’d love to hear about it. Leave a comment below and tell me what toppings you used, or tag me in your photos on social media. Did you make the spicy version? The breakfast version? Did you discover a new favorite combination? Share it with me—I’m always looking for inspiration.
And if you’re ever standing in your kitchen, staring at a bag of chips and wondering if you’ve messed up dinner, just go with it. You might surprise yourself. Happy cooking, friends.
Frequently Asked Questions
Can I make these nachos ahead of time?
I don’t recommend it. Nachos are best eaten immediately after baking. The chips start to soften as they sit, and the toppings lose their freshness. If you need to prep ahead, cook the beef and chop the toppings in advance, then assemble and bake just before serving.
What’s the best chip to use for nachos?
Use thick, sturdy restaurant-style tortilla chips. Thin chips will break under the weight of the toppings and get soggy quickly. I like Tostitos Scoops or any thick, yellow corn chip. Avoid the thin, delicate kind—they just don’t hold up.
Can I freeze leftover nachos?
I wouldn’t. The texture of the chips and toppings changes too much after freezing and thawing. You’ll end up with a soggy, unappetizing mess. If you have leftover beef and toppings, store them separately from the chips and use them for tacos or burrito bowls instead.
How do I keep the chips from getting soggy?
Layer strategically—chips, then beef, then cheese—and don’t overbake. Drain your wet toppings like pico de gallo and pickled jalapeños before adding them. And serve immediately after baking. The longer they sit, the softer they get.
Can I use ground turkey instead of beef?
Absolutely. Ground turkey works great in this recipe. Just be aware that turkey is leaner, so you may need to add a little extra oil to the pan when browning. Season it the same way, and it’ll be just as flavorful. I’ve made this swap many times and never been disappointed.
Pin This Recipe!
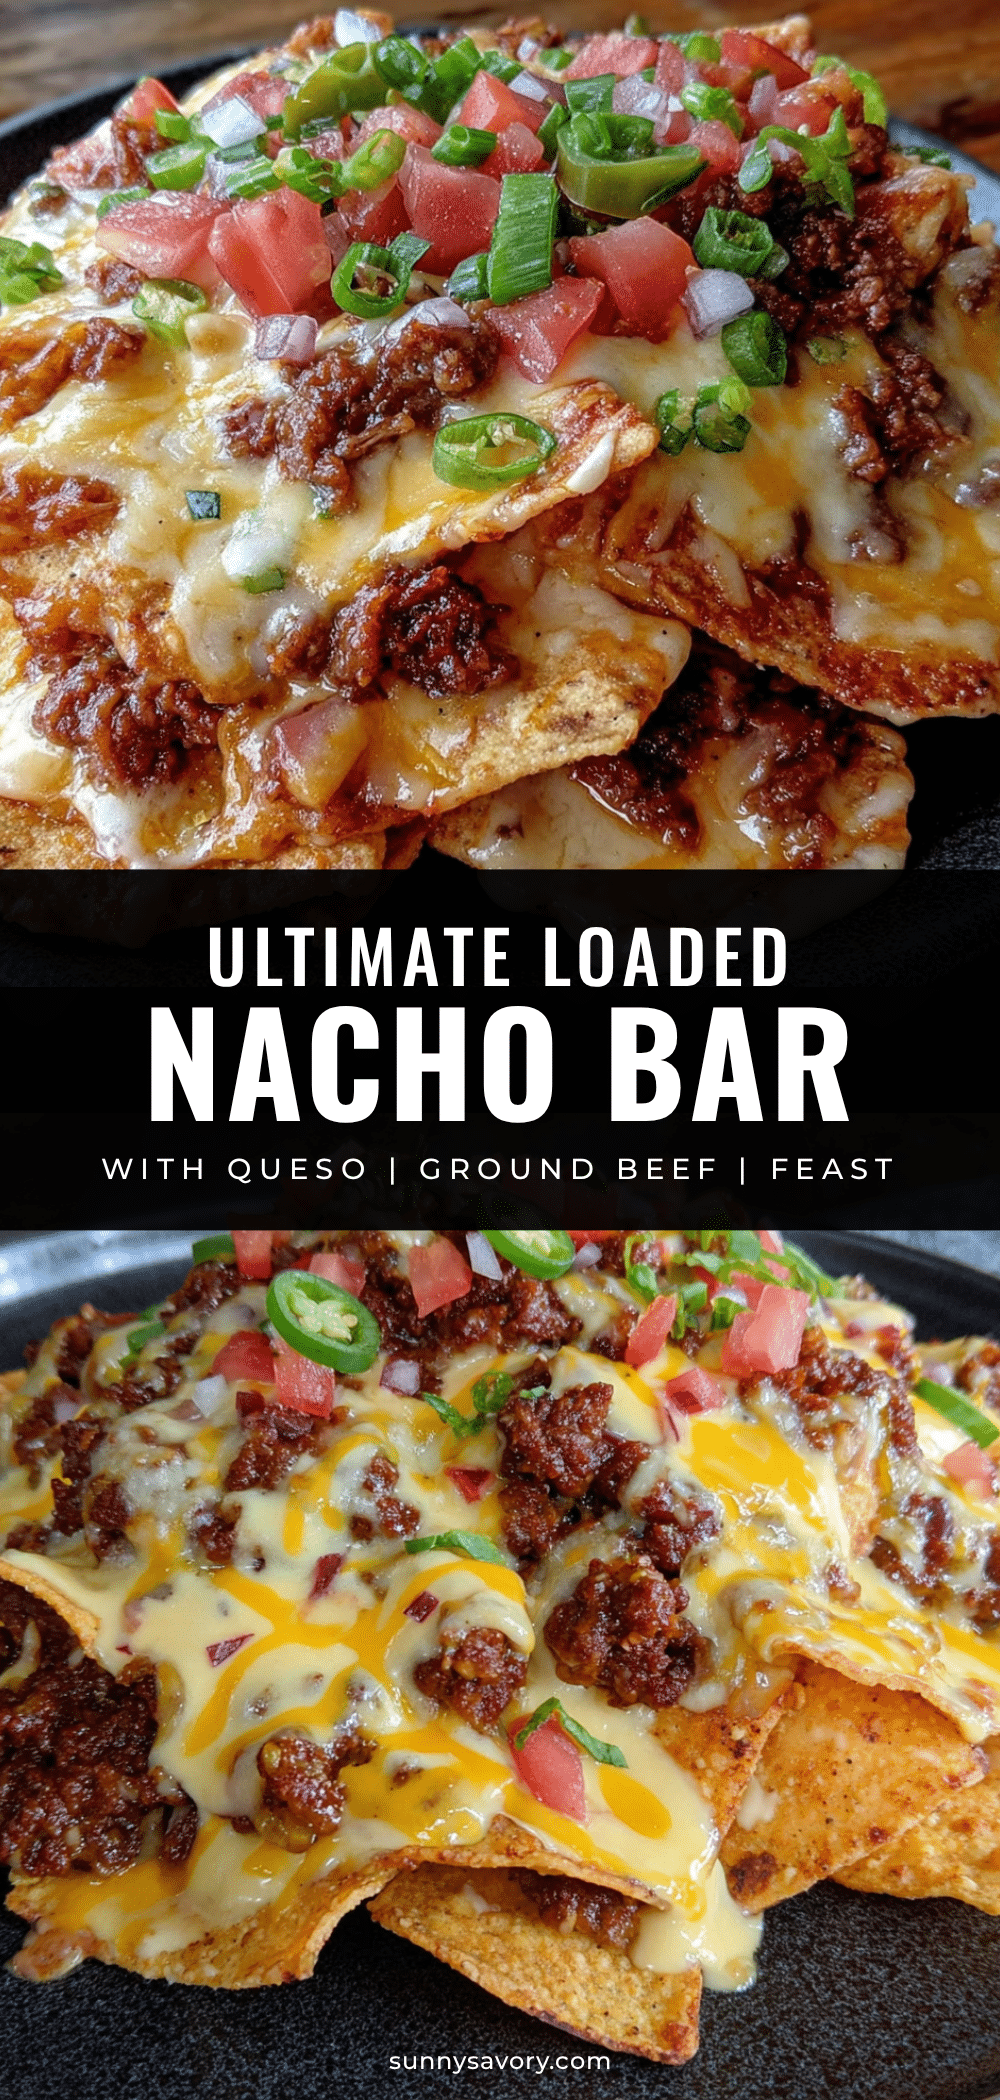
Ultimate Loaded Nacho Bar with Ground Beef & Queso

This Loaded Nacho Bar started as a mistake—a wrong bag of chips, a distracted cook, and a deadline looming. But sometimes the best recipes come from those moments of chaos. Every time I make it, I remember that night in my kitchen, staring at a baking sheet full of chips and beef, wondering if I’d just ruined dinner. Turns out, I’d accidentally created something worth sharing.
- Prep Time: 15 minutes
- Cook Time: 20 minutes
- Total Time: 35 minutes
- Yield: 4 servings 1x
- Category: Main Course
- Cuisine: Mexican
Ingredients
- 1 lb ground beef (80/20 blend works best)
- 1 tablespoon olive oil
- 1 small yellow onion, finely diced (about ½ cup)
- 3 cloves garlic, minced
- 1 tablespoon chili powder
- 1 teaspoon ground cumin
- 1 teaspoon smoked paprika
- ½ teaspoon garlic powder
- ½ teaspoon onion powder
- ½ teaspoon salt (or to taste)
- ¼ teaspoon black pepper
- ¼ cup beef broth (or water)
- 1 large bag (13–16 oz) restaurant-style tortilla chips (e.g., Tostitos Scoops)
- 2 cups shredded Mexican blend cheese (or a mix of cheddar and Monterey Jack)
- 1½ cups queso (store-bought or homemade)
- 1 cup sour cream
- 1 cup pico de gallo or fresh salsa (drained)
- 1 avocado, diced (or guacamole)
- ½ cup pickled jalapeños
- ¼ cup fresh cilantro, chopped
- 2 green onions, sliced (both white and green parts)
- 1 lime, cut into wedges
- Optional: black olives, diced tomatoes, shredded lettuce, hot sauce
Instructions
- Preheat your oven to 400°F (200°C). Line a large baking sheet with aluminum foil or parchment paper for easy cleanup. Set aside.
- Cook the ground beef. Heat 1 tablespoon olive oil in a large skillet over medium-high heat. Add the diced onion and cook for 2-3 minutes, until softened and translucent. Add the minced garlic and cook for another 30 seconds—just until fragrant. Don’t burn the garlic; it turns bitter fast.
- Brown the beef. Add the ground beef to the skillet. Break it up with a spatula as it cooks. Let it sit undisturbed for about 2 minutes to get a nice sear, then stir and continue breaking it apart. Cook for 6-8 minutes, until no pink remains. Drain off any excess fat if necessary (I usually leave a little for flavor).
- Season the beef. Reduce heat to medium-low. Add the chili powder, cumin, smoked paprika, garlic powder, onion powder, salt, and pepper. Stir well to coat the beef evenly. Pour in the beef broth and let it simmer for 2-3 minutes, until the liquid has mostly absorbed. Taste and adjust seasoning—I always add a little more salt at this stage. Set aside.
- Layer the chips (first layer). Spread half the tortilla chips in an even layer on the prepared baking sheet. Don’t overlap too much—you want each chip to have room to get crispy. Sprinkle half the seasoned beef over the chips, followed by half the shredded cheese. Drizzle half the queso over the top.
- Add the second layer. Repeat with the remaining chips, beef, shredded cheese, and queso. This double-layering ensures every chip gets some goodness—no dry bites allowed.
- Bake. Place the baking sheet in the preheated oven and bake for 8-10 minutes, until the cheese is fully melted and bubbly, and the edges of the chips are starting to turn golden brown. Keep an eye on it—ovens vary, and you don’t want burnt edges. I usually check at the 7-minute mark.
- Add fresh toppings. Remove from the oven. Immediately dollop spoonfuls of sour cream over the hot nachos. Sprinkle with pico de gallo, diced avocado, pickled jalapeños, fresh cilantro, and sliced green onions. Squeeze lime juice over everything—this brightens up all the rich flavors.
- Serve immediately. Nachos wait for no one. The chips start to soften after about 10 minutes, so serve right away while everything is hot and crunchy. I like to put the baking sheet right in the middle of the table and let everyone dig in family-style.
Notes
Don’t overbake—nachos only need 8-10 minutes in a hot oven. Layer strategically: chips, then beef, then cheese, repeat. Warm the queso before drizzling for even distribution. Drain wet toppings like pico de gallo and pickled jalapeños to avoid soggy chips. Use room temperature sour cream for better spreading. Serve immediately for maximum crunch.
Nutrition
- Serving Size: 1/4 of full recipe
- Calories: 600
- Sugar: 6
- Sodium: 900
- Fat: 38
- Saturated Fat: 15
- Carbohydrates: 38
- Fiber: 5
- Protein: 30
Keywords: nachos, loaded nachos, ground beef nachos, queso, game day food, easy dinner, party food, comfort food



