Love this? Save it for later!
Share the inspiration with your friends
I used to think canning was for people with pantries the size of a garage and a whole weekend to kill. Honestly, it felt like a lot of work for something I could just buy in a jar. But then came that first fall when the tomatoes at the farmer’s market were practically being given away, and I had a sudden, stubborn urge to bottle up that end-of-summer flavor. This small-batch recipe was born out of that moment, and it completely changed my mind.
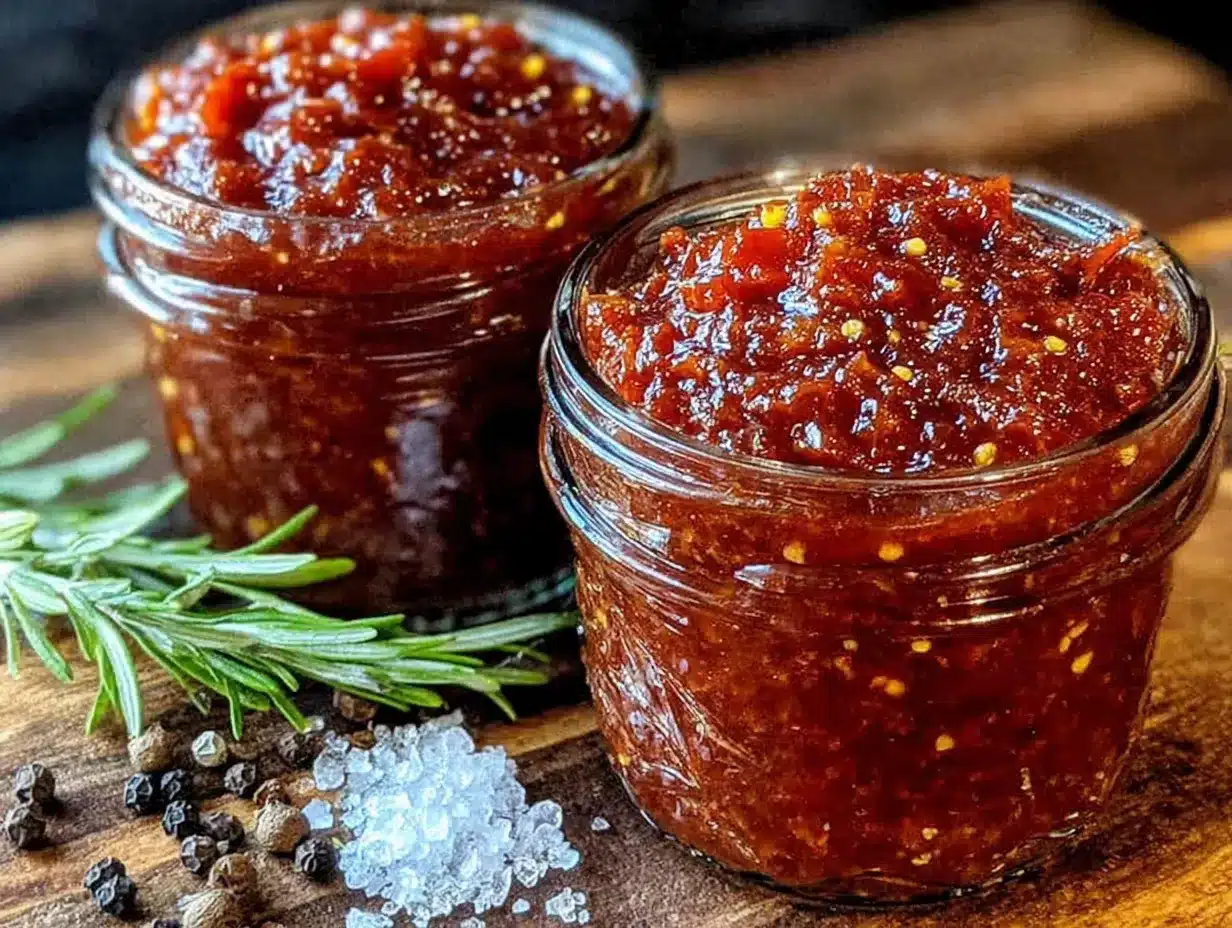
The beauty of this homemade canned tomato sauce is that it’s actually manageable. You don’t need a farm or a canning kitchen. You just need a few pounds of ripe tomatoes, a couple of hours, and a little bit of patience. The result? A jar of sauce that tastes like September in a way that nothing from a store ever could. It’s rich, it’s savory, and it has that slow-simmered depth that makes you feel like you’ve done something really special.
I remember the first time I pulled a jar out of the water bath. The lid popped with that satisfying *thunk*, and I honestly felt a little proud of myself. It sounds silly, but there’s something deeply satisfying about seeing those jars lined up on your counter, knowing you made them yourself. This recipe is for anyone who wants that feeling without the overwhelm. It’s my little secret to a cozy fall kitchen.
Why You’ll Love This Recipe
This isn’t just another tomato sauce recipe. It’s a small-batch approach that makes canning feel doable for anyone, even on a busy Tuesday. Here’s why this one is different:
- Small Batch, Big Flavor: This recipe is designed to make about 4-5 pints, not 20 quarts. It’s perfect for fall when you want to capture that last burst of garden goodness without spending your whole weekend in the kitchen.
- Simple, Whole Ingredients: No weird preservatives or added sugars. Just tomatoes, a little onion, garlic, and herbs. You control everything that goes into the jar.
- Perfect for Fall Gifting: A jar of homemade sauce tied with a bit of twine makes the most thoughtful, personal gift. It says, “I took the time to make this for you.”
- Crowd-Pleaser for Cozy Nights: This sauce is the base for everything from a simple spaghetti dinner to a hearty lasagna. It’s the taste of comfort, just when you need it most.
- Unbelievably Satisfying: There’s a quiet magic in opening a jar of your own sauce in the middle of winter. It’s like a little taste of sunshine on a cold day. That feeling is worth every minute of the work.
What makes this recipe stand out is the roasting step. Instead of just simmering the tomatoes, you roast them first. This caramelizes the natural sugars and concentrates the flavor, giving you a sauce that tastes like it’s been simmering all day, even though it comes together in a fraction of the time. It’s a simple trick that makes a huge difference.
What Ingredients You Will Need
This recipe relies on a handful of quality ingredients. The beauty is in the simplicity. Here’s what you’ll need to gather:
For the Sauce Base
- 5-6 pounds ripe Roma tomatoes (or other paste tomatoes; they have less water and more flesh, which means a thicker sauce faster)
- 1 large yellow onion, quartered (adds a savory depth without being overpowering)
- 4-5 cloves of garlic, peeled (use fresh; it makes a difference)
- 2 tablespoons extra-virgin olive oil (I like using a good quality one for roasting)
- 1 teaspoon salt (I prefer kosher salt for its clean flavor)
- 1/2 teaspoon black pepper
For the Finishing Touch
- 1 tablespoon dried oregano (or 2 tablespoons fresh, chopped)
- 1 teaspoon dried basil (or 1 tablespoon fresh, chopped)
- 1/4 teaspoon red pepper flakes (optional, for a little warmth)
- 2 tablespoons lemon juice (bottled, for safe canning acidity; please don’t skip this)
Ingredient Tips: I always look for tomatoes that are heavy for their size and smell sweet at the stem. If you can’t find Romas, San Marzano or even Amish Paste tomatoes work beautifully. For the olive oil, I recommend a brand like California Olive Ranch for a consistent, fruity flavor. If you’re using dried herbs, make sure they’re not too old—they should still smell aromatic when you open the jar.
For substitutions, you can swap the onion for a leek (white and light green parts only) for a milder flavor. If you’re avoiding nightshades, this recipe isn’t for you, but you can use roasted red peppers and carrots for a different kind of “sauce” base. Just keep in mind it won’t be tomato sauce anymore!
Equipment Needed
You don’t need a ton of fancy gear, but having the right tools makes the process much smoother. Here’s what you’ll need:
- Large baking sheet (for roasting the tomatoes)
- Large pot or Dutch oven (for simmering the sauce)
- Food mill or immersion blender (a food mill gives the smoothest texture, but an immersion blender is faster and easier to clean)
- Water bath canner (or a large, deep pot with a rack)
- 4-5 pint-sized canning jars with new lids and bands
- Canning funnel (trust me, this is worth the few dollars it costs)
- Jar lifter (for safely removing hot jars from the water bath)
- Clean kitchen towels
If you don’t have a food mill, don’t worry. A simple colander and a wooden spoon work in a pinch to push the roasted tomatoes through. It takes a little more elbow grease, but it gets the job done. For the canner, any pot that’s deep enough to cover your jars with at least an inch of water will work. Just make sure you have a rack or a folded towel at the bottom to keep the jars from touching the direct heat.
Preparation Method
Let’s get into the fun part. The steps are straightforward, but I’ve added a few notes from my own trial and error. Follow these closely, and you’ll be rewarded with the best sauce of your life.
- Preheat your oven to 400°F (200°C). While it’s heating, wash your tomatoes and cut them in half lengthwise. Remove the tough core where the stem was attached.
- Toss the tomato halves, quartered onion, and garlic cloves with the olive oil, salt, and pepper on your large baking sheet. Spread them out in a single layer. Don’t overcrowd them—if they’re too close, they’ll steam instead of roast. Use two sheets if you need to.
- Roast for 45-60 minutes, or until the tomatoes are soft, wrinkled, and starting to brown at the edges. The onions should be tender and caramelized. Your kitchen will smell incredible at this point. Let everything cool for about 10 minutes—just enough so it’s safe to handle.
- Set up your food mill or immersion blender. If using a food mill, pass the roasted vegetables through it into a large pot. This will remove the skins and seeds, leaving you with a smooth, silky puree. If using an immersion blender, carefully transfer the roasted vegetables to your pot and blend until smooth. The sauce will have a slightly different texture—a bit more rustic—but it’s equally delicious.
- Add the dried oregano, basil, and red pepper flakes to the pot. Stir to combine. Bring the sauce to a gentle simmer over medium heat. Don’t let it boil hard. Let it simmer, uncovered, for about 30-40 minutes, stirring occasionally. You want it to thicken slightly. It should reduce by about a third. You’ll know it’s ready when it coats the back of a spoon.
- While the sauce simmers, prepare your canning equipment. Wash your jars, lids, and bands in hot, soapy water. Rinse well. Place the jars in your canner or a large pot, cover them with water, and bring to a boil. Turn off the heat and let them sit in the hot water until you’re ready to fill them. This keeps them hot so they don’t crack when you add the hot sauce. Place the lids in a small bowl of hot water to soften the rubber seals.
- Stir in the bottled lemon juice. This is crucial for safe canning. The acidity level needs to be high enough to prevent botulism. Bottled lemon juice has a consistent pH, so don’t use fresh. Taste the sauce at this point and adjust the salt if needed.
- Fill your jars. Using your canning funnel, ladle the hot sauce into the hot jars, leaving about 1/2 inch of headspace at the top. Wipe the rims of the jars with a clean, damp towel to remove any drips. Place a lid on each jar and screw on the band until it’s fingertip-tight—don’t crank it down.
- Process the jars in your water bath canner. Using your jar lifter, carefully lower the jars into the boiling water. Make sure they’re covered by at least an inch of water. Put the lid on the canner and bring the water back to a full boil. Process for 35 minutes (adjust for altitude if needed).
- Remove the jars and let them cool. Turn off the heat and carefully lift the jars out. Place them on a clean kitchen towel, leaving at least an inch of space between them. Let them cool completely, undisturbed, for 12-24 hours. You’ll hear the satisfying “pop” as the lids seal. After they’ve cooled, press the center of each lid. If it doesn’t flex up and down, it’s sealed. Store any unsealed jars in the fridge and use them within a week.
Cooking Tips & Techniques
I’ve made a few mistakes with this recipe over the years, so you don’t have to. Here are my best tips for getting it right every time.
Don’t skip the roasting step. I know it’s tempting to just dump everything in a pot and simmer, but roasting is the secret to deep, complex flavor. It caramelizes the natural sugars and removes some of the water, so you don’t have to simmer the sauce for hours. I once tried to skip this step when I was short on time, and the sauce was noticeably thinner and less flavorful. Never again.
Watch your headspace. When you’re filling the jars, that 1/2 inch of space is important. Too much headspace and the jars might not seal properly. Too little, and the sauce can bubble out during processing, messing up the seal. I use a ruler to check, but honestly, a chopstick works just as well for measuring.
Let the jars cool slowly. Don’t be tempted to move them to a drafty spot or put them in the fridge to speed things up. Sudden temperature changes can cause the jars to crack. Just let them sit on the counter overnight. It’s a good excuse to go read a book or watch a movie while the magic happens.
Multitasking is your friend. While the tomatoes are roasting, you can wash your jars and get your canner set up. While the sauce is simmering, you can clean up the kitchen. This makes the whole process feel much less overwhelming.
One more thing: if you’re new to canning, don’t stress about the lids. If one doesn’t seal, it’s not the end of the world. Just put that jar in the fridge and use it first. It’s still delicious sauce.
Variations & Adaptations
This sauce is a fantastic base, but it’s also easy to customize. Here are a few ways I’ve played with it over the years.
- Herb Garden Variation: In the summer, I swap the dried herbs for a big handful of fresh basil and oregano from my garden. I stir them in right before blending. The flavor is brighter and more vibrant. It’s a completely different sauce, but just as good.
- Spicy Arrabbiata Style: If you like a kick, double or triple the red pepper flakes. You could also add a finely chopped fresh chili, like a serrano or jalapeño, to the roasting pan. Just be careful not to touch your eyes after handling the peppers!
- Roasted Garlic & Rosemary: For a more sophisticated flavor, add a whole head of garlic (cut in half horizontally) to the roasting pan. You can squeeze the soft, caramelized cloves into the sauce after roasting. Add a sprig of fresh rosemary to the simmering pot and remove it before blending. This is my go-to for a fancy pasta dinner.
- Dietary Adaptations: This recipe is naturally vegan, gluten-free, and dairy-free. If you’re watching your salt intake, you can reduce the salt and add a splash of balsamic vinegar at the end for depth instead. It’s very forgiving.
Serving & Storage Suggestions
This sauce is a workhorse in the kitchen. Here’s how to use and store it.
Serving: I love this sauce at room temperature over a bowl of fresh pasta, with a generous grating of Parmesan on top. It’s also incredible on a homemade pizza, as a base for shakshuka, or stirred into a hearty minestrone soup. The flavor is robust enough to stand up to any dish.
Storage: Sealed jars can be stored in a cool, dark place (like a pantry or basement) for up to 18 months. Once opened, keep the jar in the refrigerator and use it within 5-7 days. The flavor actually deepens after a few weeks in the jar, so don’t be afraid to let it sit for a bit.
Reheating: Just pour the sauce into a small saucepan and warm it over low heat. If it’s too thick, add a splash of pasta water or a little olive oil to loosen it up. I find the flavors are even better the next day, after they’ve had a chance to meld together.
If you’re not canning, this sauce freezes beautifully. Pour it into freezer-safe bags or containers, leaving a little headspace for expansion. It will keep for up to 6 months. Just thaw it in the fridge overnight before using.
Nutritional Information & Benefits
This sauce is as good for you as it is delicious. Here’s a quick look at what you’re getting in a half-cup serving.
| Nutrient | Amount per Serving (approx.) |
|---|---|
| Calories | 45 |
| Total Fat | 2g |
| Sodium | 200mg |
| Total Carbohydrates | 7g |
| Dietary Fiber | 2g |
| Sugars | 4g |
| Protein | 1g |
| Vitamin C | 15% DV |
| Vitamin A | 10% DV |
Tomatoes are packed with lycopene, a powerful antioxidant that’s been linked to heart health and reduced inflammation. Roasting them actually makes the lycopene more bioavailable, so your body can absorb it better. The olive oil adds healthy monounsaturated fats, and the garlic is great for your immune system. This is comfort food that works for you.
This recipe is naturally low in calories and fat, and it’s free from common allergens like dairy, nuts, and gluten. It’s a wonderful, wholesome addition to any healthy eating plan.
Conclusion
This homemade canned tomato sauce is more than just a recipe. It’s a way to hold onto the warmth of fall, one jar at a time. It’s the taste of a season slowing down, of kitchens filled with steam and the smell of roasting tomatoes. I honestly look forward to making it every year, and I hope you will too.
Don’t be afraid to make this your own. Add a pinch of sugar if you like a sweeter sauce, or a splash of red wine for extra depth. The best recipes are the ones you tweak until they feel like yours. So go ahead, grab some tomatoes, and give it a try. I promise you’ll be so glad you did.
I’d love to hear how it turns out for you! Drop a comment below and let me know if you added your own twist, or share a photo of your jars on Pinterest. Tag me so I can see your beautiful work. Happy canning!
Frequently Asked Questions
Can I use any type of tomato for this recipe?
You can, but paste tomatoes like Romas or San Marzanos work best. They have less water and more flesh, which means a thicker sauce in less time. If you use juicy slicing tomatoes, you’ll need to simmer the sauce longer to reduce it.
Do I have to use bottled lemon juice?
Yes, for safe canning, you should use bottled lemon juice. It has a consistent, known acidity level. Fresh lemon juice can vary in acidity, which could make the sauce unsafe for long-term storage.
How do I know if my jars are sealed properly?
After they cool, press the center of each lid. If it doesn’t flex up and down, it’s sealed. You can also remove the band and gently lift the jar by the lid. If the lid holds, it’s sealed. If not, just store that jar in the fridge and use it first.
Can I double this recipe?
Absolutely. Just make sure you have a large enough pot for the sauce and a canner big enough to process all the jars. You may need to roast the tomatoes in batches to avoid overcrowding the baking sheet.
How long will the canned sauce last?
Stored in a cool, dark place, properly sealed jars will last for up to 18 months. For best quality, try to use them within a year. Once opened, keep the jar in the fridge and use it within a week.
Pin This Recipe!
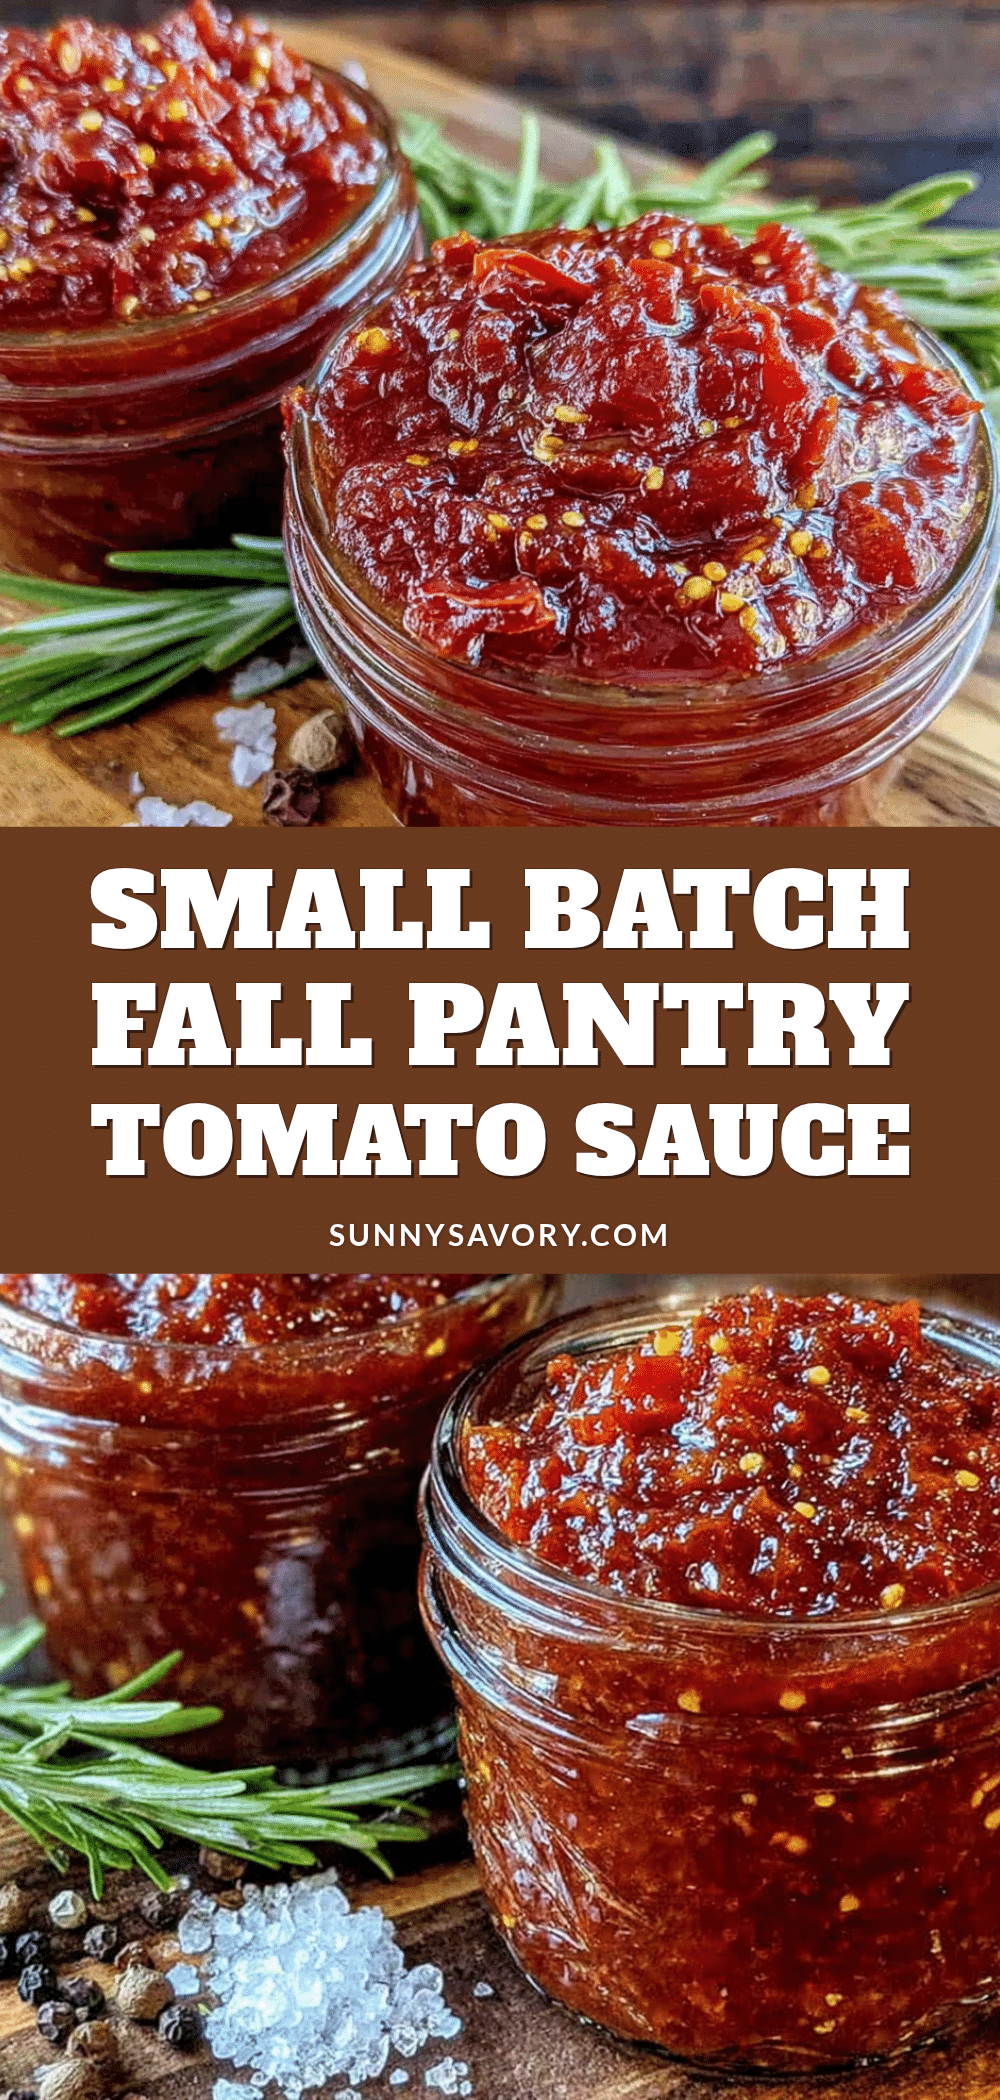
Homemade Canned Tomato Sauce for Fall
A small-batch, manageable recipe for homemade canned tomato sauce that captures the rich, savory flavor of ripe fall tomatoes. Roasting the tomatoes first caramelizes their natural sugars, creating a deep, slow-simmered taste without the all-day effort.
- Prep Time: 20 minutes
- Cook Time: 1 hour 35 minutes
- Total Time: 2 hours 30 minutes
- Yield: 4-5 pints 1x
- Category: Sauce
- Cuisine: American
Ingredients
- 5–6 pounds ripe Roma tomatoes (or other paste tomatoes)
- 1 large yellow onion, quartered
- 4–5 cloves garlic, peeled
- 2 tablespoons extra-virgin olive oil
- 1 teaspoon kosher salt
- 1/2 teaspoon black pepper
- 1 tablespoon dried oregano (or 2 tablespoons fresh, chopped)
- 1 teaspoon dried basil (or 1 tablespoon fresh, chopped)
- 1/4 teaspoon red pepper flakes (optional)
- 2 tablespoons bottled lemon juice
Instructions
- Preheat your oven to 400°F (200°C). Wash the tomatoes and cut them in half lengthwise. Remove the tough core where the stem was attached.
- Toss the tomato halves, quartered onion, and garlic cloves with the olive oil, salt, and pepper on a large baking sheet. Spread them out in a single layer. Use two sheets if needed to avoid overcrowding.
- Roast for 45-60 minutes, until the tomatoes are soft, wrinkled, and starting to brown at the edges. The onions should be tender and caramelized. Let cool for about 10 minutes.
- Set up a food mill or immersion blender. If using a food mill, pass the roasted vegetables through it into a large pot. If using an immersion blender, transfer the roasted vegetables to the pot and blend until smooth.
- Add the dried oregano, basil, and red pepper flakes to the pot. Stir to combine. Bring the sauce to a gentle simmer over medium heat. Simmer, uncovered, for 30-40 minutes, stirring occasionally, until it thickens and reduces by about a third.
- While the sauce simmers, prepare your canning equipment. Wash jars, lids, and bands in hot, soapy water. Rinse well. Place jars in a canner or large pot, cover with water, and bring to a boil. Turn off heat and let them sit in hot water until ready to fill. Place lids in a small bowl of hot water to soften the rubber seals.
- Stir in the bottled lemon juice. Taste and adjust salt if needed.
- Using a canning funnel, ladle the hot sauce into the hot jars, leaving 1/2 inch of headspace. Wipe the rims with a clean, damp towel. Place a lid on each jar and screw on the band until fingertip-tight.
- Using a jar lifter, carefully lower the jars into the boiling water in the canner. Ensure they are covered by at least an inch of water. Put the lid on the canner and bring the water back to a full boil. Process for 35 minutes (adjust for altitude if needed).
- Turn off the heat and carefully lift the jars out. Place them on a clean kitchen towel, leaving at least an inch of space between them. Let them cool completely, undisturbed, for 12-24 hours. Check that the lids are sealed (press the center; if it doesn’t flex, it’s sealed). Store any unsealed jars in the fridge and use within a week.
Notes
Don’t skip the roasting step—it caramelizes natural sugars and deepens flavor. Use bottled lemon juice for safe canning acidity. Let jars cool slowly to avoid cracking. If a jar doesn’t seal, refrigerate and use within a week. The sauce freezes well for up to 6 months.
Nutrition
- Serving Size: 1/2 cup
- Calories: 45
- Sugar: 4
- Sodium: 200
- Fat: 2
- Carbohydrates: 7
- Fiber: 2
- Protein: 1
Keywords: homemade tomato sauce, canned tomato sauce, fall recipe, small batch canning, roasted tomato sauce, pantry staple, gift idea



