Love this? Save it for later!
Share the inspiration with your friends
I was at the hardware store last October, balancing a gallon of paint and three different shades of green swatches, when the cashier—a guy named Dwight who looked like he’d rather be anywhere else—glanced at my selections and said, “You know, that exact green is the color of my wife’s Frankenstein cookies.” I froze. He had my full attention. He shrugged and added, “She just uses sugar cookie mix and some candy. Kids lose their minds over them.” Dwight didn’t look like a baking guru. He looked like someone who changed his own oil. But honestly, that random encounter changed my entire Halloween baking game. I scribbled his wife’s method on a receipt, bought my paint, and left the store already mentally planning a batch. That was three years ago, and I haven’t made a single complicated Halloween cookie since.
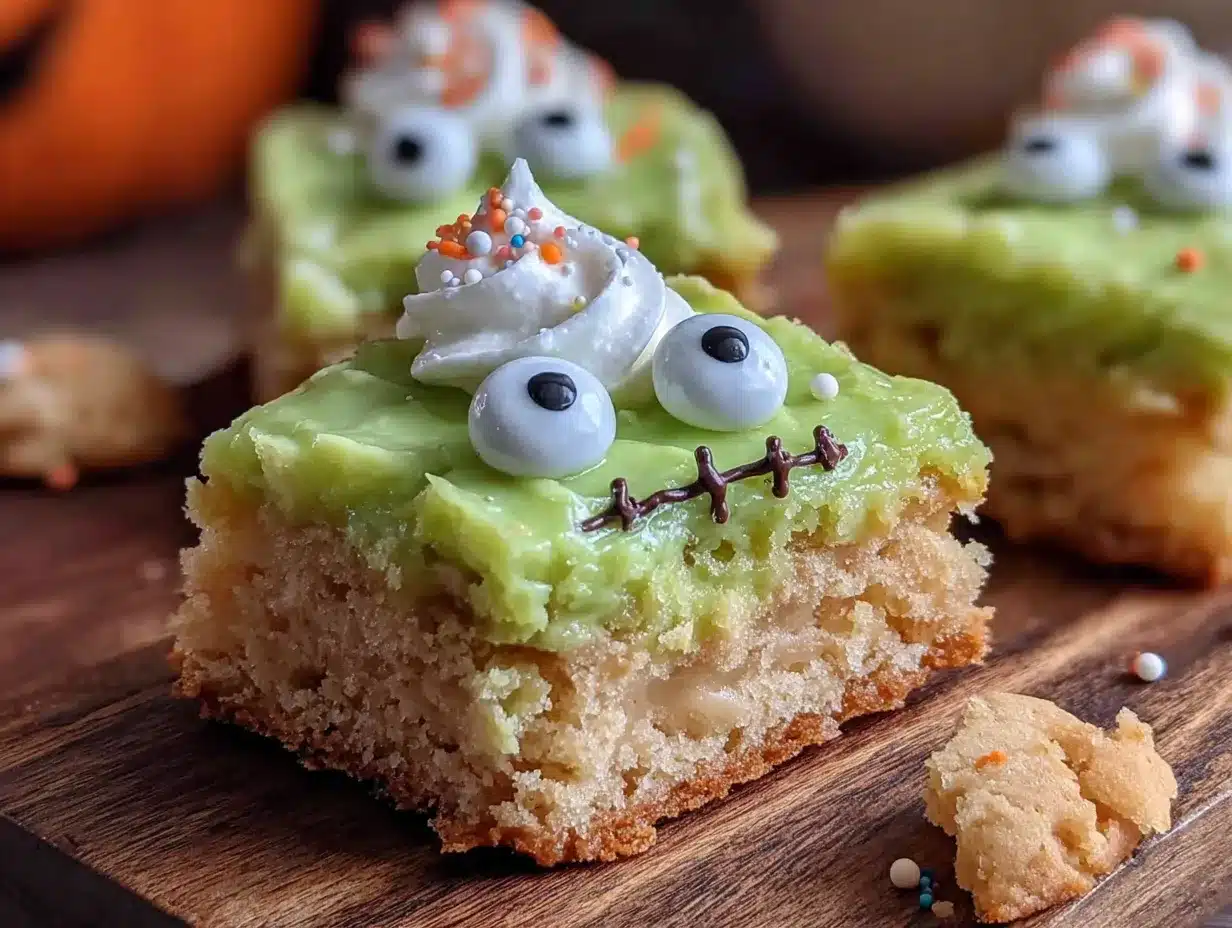
These Easy Frankenstein Sugar Cookie Bars are exactly what you need when you want something festive, fun, and completely stress-free. Maybe you’ve been there—staring at a Pinterest board full of elaborate decorated cookies, feeling that familiar mix of ambition and dread. These bars skip all the rolling, cutting, and individual decorating. You just press the dough into a pan, bake, frost, and create the most adorable little monsters in about thirty minutes. I mean, what’s not to love about that?
Let me tell you, there’s something deeply satisfying about watching a pan of plain sugar cookie bars transform into a row of grinning green faces. It’s the kind of recipe that makes you feel like a kitchen wizard, even though it’s almost embarrassingly simple. The first time I made these, I forgot to chill the frosting before piping it, and the green dripped everywhere like a sad, melted ogre. It was a mess. But you know what? The kids didn’t care. They ate every single misshapen, drippy face and asked for more. That’s when I knew this recipe was a keeper.
Why You’ll Love This Recipe
After testing this recipe about six times (those first batches were for quality control, obviously), I can confidently say these Frankenstein Sugar Cookie Bars are a game-changer. Here’s why they work so well:
- Quick & Easy: From start to finish, you’re looking at about 30 minutes of hands-on time. No chilling dough, no rolling pins, no fuss. Perfect for those evenings when you suddenly remember you need a classroom treat for tomorrow.
- Simple Ingredients: You probably already have most of what you need in your pantry. Sugar cookie mix, butter, eggs, powdered sugar, and some candy. No trips to specialty baking stores required.
- Perfect for Halloween Parties: These bars are the star of any Halloween gathering, potluck, or school event. They’re portable, easy to serve, and everyone gravitates toward them.
- Crowd-Pleaser: Kids and adults alike go crazy for these. There’s something about a green cookie face that brings out the kid in everyone.
- Unbelievably Delicious: The base is a soft, buttery sugar cookie bar that stays tender for days. The frosting is a simple buttercream that sets just firm enough to hold the candy decorations.
What sets this recipe apart from other Halloween treats is the sheer simplicity combined with maximum cuteness. I’ve tried making detailed royal icing cookies before, and honestly, I don’t have the patience or the steady hand for it. These bars give you that same festive, decorated look without the stress. The green frosting is tinted just right—not too neon, not too army—and the candy features are so forgiving. Your Frankenstein can look goofy, cross-eyed, or even slightly scary, and it just adds to the charm.
This recipe is the kind that makes you close your eyes after the first bite. It’s comfort food reimagined for Halloween—faster, easier, but with the same soul-soothing satisfaction. Perfect for impressing guests without stress, or turning a simple weeknight into something memorable.
What Ingredients You Will Need
This recipe uses straightforward ingredients to deliver soft, tender cookie bars and a creamy, pipeable frosting. Most of these are pantry staples, so you’re probably already halfway there.
For the Sugar Cookie Bars
- 1 box (17.5 oz) sugar cookie mix (I recommend Betty Crocker or Pillsbury for consistent results)
- 1/2 cup unsalted butter, melted and slightly cooled (adds richness and tenderness)
- 1 large egg, room temperature (helps bind the dough)
- 1 teaspoon vanilla extract (enhances the cookie flavor)
For the Buttercream Frosting
- 1/2 cup unsalted butter, softened (let it sit out for about 30 minutes)
- 2 cups powdered sugar (sift it if you want extra smooth frosting)
- 2 tablespoons milk (use whole milk for best texture, or dairy-free milk if needed)
- 1 teaspoon vanilla extract
- Green gel food coloring (I prefer Americolor or Wilton gel colors—they give a vibrant green without thinning the frosting)
For Decorating the Frankenstein Faces
- Candy eyes (the classic white and black ones work perfectly)
- Black licorice strings or black frosting pen (for the mouth and hair details)
- Mini chocolate chips or black candy melts (for the bolts on the side of the head)
Ingredient Tips & Substitutions: If you want a gluten-free version, use a gluten-free sugar cookie mix and ensure your other ingredients are certified gluten-free. For a dairy-free option, substitute the butter with a plant-based butter stick (not the spreadable kind) and use almond or oat milk in the frosting. I’ve also made these with a homemade sugar cookie dough if you prefer from-scratch—just use your favorite recipe and press it into the pan. The bake time might vary slightly, so keep an eye on it.
When it comes to food coloring, avoid the liquid kind you find in the baking aisle. It will thin out your frosting and give you a pale, watery green. Gel colors are concentrated and give you that perfect monster green without messing with the consistency. I learned this the hard way my first time—my frosting looked more like mint ice cream than Frankenstein!
Equipment Needed
You don’t need a lot of fancy tools for this recipe. Here’s what you’ll need:
- 9×13-inch baking pan (metal or glass both work, but metal gives you slightly crispier edges)
- Parchment paper (for easy removal—trust me, don’t skip this)
- Mixing bowls (one large for the cookie dough, one medium for the frosting)
- Electric hand mixer or stand mixer (you can do the cookie dough by hand, but the frosting needs some beating)
- Spatula (for spreading the dough evenly)
- Piping bag or zip-top bag (for the frosting—a zip-top bag with a corner snipped off works perfectly)
- Cooling rack (for letting the bars cool completely before frosting)
If you don’t have a piping bag, honestly, a sturdy zip-top bag is your best friend. Just fill it with frosting, snip off a tiny corner, and pipe away. I’ve used this method for years and it works like a charm. For the candy eyes and bolts, you don’t need any special tools—just your fingers and maybe some tweezers for precision placement.
Preparation Method
Let’s get those monsters made! Follow these steps carefully, and you’ll have a pan full of adorable Frankenstein faces in no time.
- Preheat your oven to 350°F (175°C). Line your 9×13-inch baking pan with parchment paper, leaving some overhang on the long sides. This creates handles that make lifting the bars out super easy later.
- Make the cookie dough. In a large bowl, combine the sugar cookie mix, melted butter, egg, and vanilla extract. Stir until a soft dough forms. It will be slightly sticky—that’s normal. Don’t overmix or the bars will be tough.
- Press the dough into the pan. Transfer the dough to your prepared pan. Using your hands or a spatula, press it evenly into the bottom. Try to make it as even as possible so the bars bake uniformly. If the dough is too sticky, lightly wet your fingers with water.
- Bake for 15-18 minutes. The edges should be lightly golden and the center should look set but still soft. A toothpick inserted in the center should come out with a few moist crumbs, not wet batter. I usually check at 15 minutes and go from there. Every oven runs a little differently.
- Cool completely. Let the bars cool in the pan on a wire rack for about 30 minutes. Then use the parchment handles to lift them out and let them cool completely on the rack. This is crucial—if you frost them while they’re still warm, the frosting will melt into a green puddle. I speak from messy experience.
- Make the frosting. While the bars are cooling, beat the softened butter in a medium bowl with an electric mixer until smooth and creamy, about 1 minute. Gradually add the powdered sugar, beating on low speed to prevent a sugar cloud. Add the milk and vanilla extract, then increase the speed to medium and beat for 2-3 minutes until light and fluffy.
- Add the green color. Add a few drops of green gel food coloring and beat until the color is evenly distributed. Start with a small amount—you can always add more, but you can’t take it away. Aim for a fun, monster green shade.
- Frost the bars. Spread a thin, even layer of green frosting over the completely cooled cookie bars. You can use a spatula for this, or you can pipe it on for a more textured look. I like to pipe small dollops and then smooth them slightly with the back of a spoon.
- Cut into rectangles. Use a sharp knife to cut the frosted bars into 12-15 rectangles. Each rectangle will become one Frankenstein face. Wipe the knife clean between cuts for neat edges.
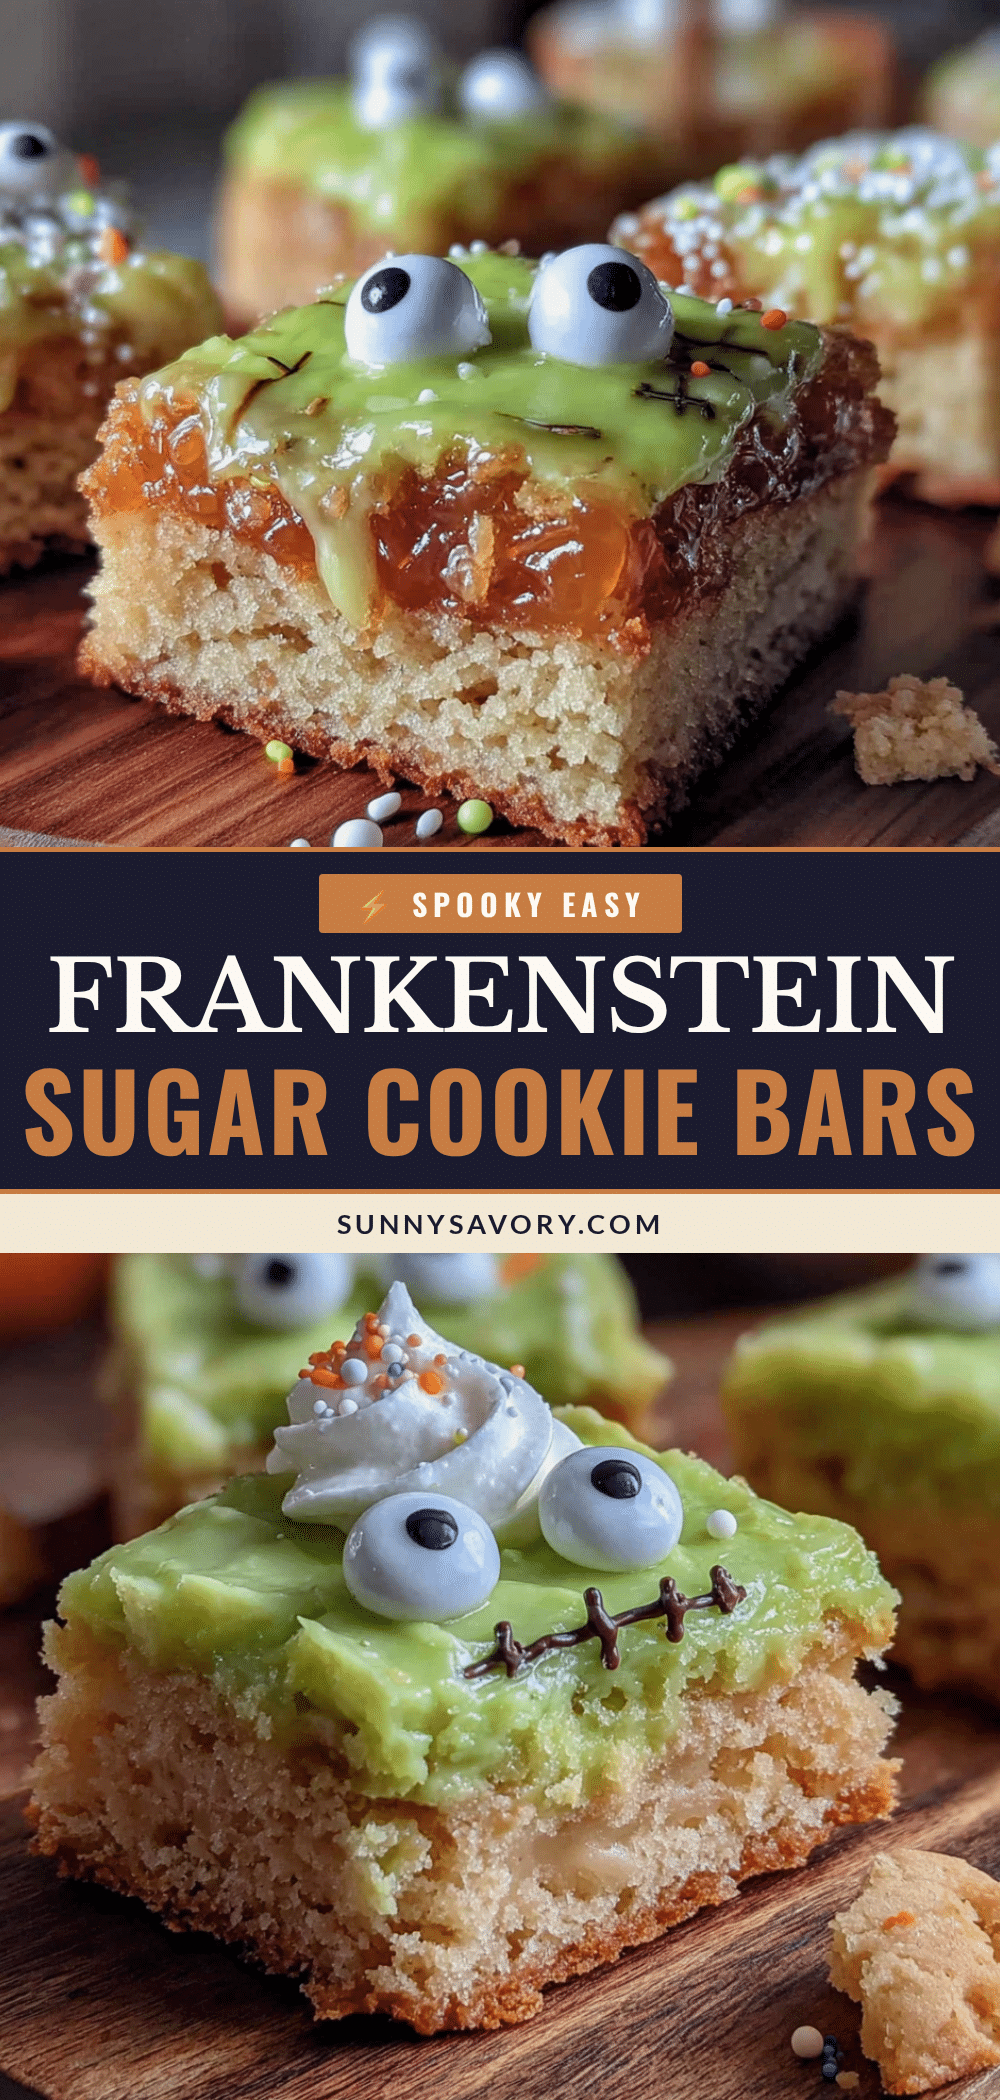
- Decorate the faces. Place two candy eyes in the center of each bar, about halfway up. Use a black frosting pen or a piece of black licorice string to draw a mouth—a zigzag or a stitched line works great. Add two mini chocolate chips or black candy melts on the sides of the head for the bolts. You can also pipe or place some black licorice strips on top for hair.
- Let the frosting set. Allow the decorated bars to sit at room temperature for about 15-20 minutes so the frosting firms up slightly. This makes them easier to handle and serve.
Pro tip for even cutting: Use a ruler to measure and mark where you want to cut. It sounds a little extra, but it gives you perfectly uniform Frankenstein faces that look professional and impressive.
Cooking Tips & Techniques
Over the years, I’ve made plenty of mistakes with these bars so you don’t have to. Here are the lessons I learned the hard way:
Don’t overbake the cookie base. The number one mistake people make is leaving the bars in the oven too long. They should be just set and barely golden around the edges. Overbaked bars turn dry and crumbly, which makes them difficult to cut and frost. If you’re unsure, err on the side of underbaking. They’ll continue to set as they cool.
Patience with cooling is non-negotiable. I know it’s tempting to rush, but warm bars plus cold frosting equals a green disaster. Give them the full cooling time. I usually make the bars in the afternoon, let them cool completely, and then frost and decorate in the evening. It makes the process feel less rushed and more fun.
Use a light hand with the frosting. You don’t need a thick layer of green buttercream. A thin, even layer looks cuter and makes the candy features stand out better. Plus, it keeps the bars from being overly sweet. Remember, you’re going for cute monster, not frosting mountain.
Gel food coloring is your friend. I cannot stress this enough. Liquid food coloring will ruin your frosting. It makes it runny and gives you a pale, washed-out green. Gel colors are concentrated and give you that vibrant, fun monster color with just a few drops.
Multitask like a pro. While the bars are baking, make your frosting. While the frosting is setting up, lay out your candy decorations. This recipe moves fast, so having everything ready before you start decorating makes the whole process smoother and more enjoyable.
Variations & Adaptations
One of the best things about this recipe is how easy it is to customize. Here are some variations I’ve tried and loved:
Gluten-Free Frankenstein Bars: Use a gluten-free sugar cookie mix and ensure your other ingredients are certified gluten-free. The texture might be slightly more delicate, so handle with care when cutting. I’ve made these for a friend with celiac disease, and they were a huge hit.
Chocolate Frankenstein Bars: Swap the sugar cookie mix for a chocolate cake mix or brownie mix. The dark chocolate base makes the green frosting pop even more. Bake according to the mix instructions, then frost and decorate the same way. It’s a fun twist that chocolate lovers go crazy for.
Vegan Frankenstein Bars: Use a vegan sugar cookie mix, substitute the butter with vegan butter sticks, and use a flax egg (1 tablespoon ground flaxseed mixed with 3 tablespoons water) instead of the regular egg. For the frosting, use vegan butter and plant-based milk. The texture is slightly different but still delicious.
Spooky Spider Variation: Instead of Frankenstein faces, use black frosting to draw spider legs on the bars and place a candy spider ring on top. This is a great option if you have kids who want to customize their own bars.
Mini Frankenstein Bites: Press the dough into a mini muffin tin instead of a 9×13 pan. Bake for about 10-12 minutes. These bite-sized versions are perfect for Halloween parties and school treats. Just adjust your frosting and decorating accordingly.
Serving & Storage Suggestions
These Frankenstein Sugar Cookie Bars are best served at room temperature. The cookie base stays soft and tender, and the frosting has a nice, creamy texture. If you’ve refrigerated them, let them sit out for about 15 minutes before serving to take the chill off.
Presentation Ideas: Arrange the bars on a platter lined with orange and black napkins for a festive look. You can also place them on a wire rack and drizzle with extra green frosting for a more dramatic effect. For Halloween parties, I like to serve them alongside other spooky treats like ghost-shaped cookies or pumpkin cupcakes.
Storage Instructions: Store leftover bars in an airtight container at room temperature for up to 3 days. If your kitchen is warm, you can refrigerate them, but let them come to room temperature before serving for the best texture. I don’t recommend freezing these bars because the frosting can become grainy when thawed.
How Flavors Develop: Honestly, these bars taste even better the next day. The cookie base absorbs a little moisture from the frosting, making it even softer and more tender. The flavors meld together beautifully. Just keep them covered so they don’t dry out.
Nutritional Information & Benefits
While these are definitely a treat, here’s a rough estimate of what you’re looking at per bar (based on 12 servings):
- Calories: Approximately 320-350 per bar
- Fat: 16-18g
- Carbohydrates: 42-46g
- Protein: 3-4g
- Sugar: 28-32g
Health Considerations: These bars contain dairy, gluten, and eggs. If you have allergies, check the ingredient labels on your cookie mix and candy decorations carefully. The butter provides a small amount of vitamin A, and the egg adds a bit of protein, but let’s be real—this is a dessert, not a health food. And that’s okay!
My Personal Perspective: I believe in balance. These bars are meant to be a fun, festive treat for a special occasion. They’re not an everyday indulgence, and that’s what makes them so special. When Halloween rolls around, I make a batch, enjoy a few with my family, and share the rest with neighbors and friends. It’s about the joy of creating something cute and delicious, not about counting every calorie.
Conclusion
These Easy Frankenstein Sugar Cookie Bars have become my go-to Halloween recipe for a reason. They’re simple enough to make on a busy weeknight, but impressive enough to steal the show at any party. The soft, buttery cookie base combined with the creamy green frosting and adorable candy faces is a combination that never gets old.
I love that this recipe came from a completely unexpected source—a hardware store cashier who probably had no idea he was sharing gold. It reminds me that the best recipes often come from the most unlikely places. And honestly, that’s part of the fun of cooking. You never know when you’ll stumble upon your next favorite dish.
I encourage you to make these your own. Play with the decorations, try different candy combinations, and let your creativity run wild. Whether you stick with the classic Frankenstein face or invent your own monster, these bars are guaranteed to bring smiles to faces of all ages.
So go ahead—grab that sugar cookie mix, dig out your green food coloring, and get ready to create the cutest monsters in town. And when you do, I’d love to hear about it. Share your creations, tell me about your decorating adventures, and let me know if you discover any fun variations. Happy Halloween, and happy baking!
Frequently Asked Questions
Can I use homemade sugar cookie dough instead of a mix?
Absolutely! If you have a favorite sugar cookie recipe, you can absolutely use it for the base. Just press it into the pan and bake according to your recipe’s instructions. Keep in mind that homemade dough might spread differently, so watch the bake time closely.
My frosting turned out too thin. What went wrong?
This usually happens if you used liquid food coloring instead of gel, or if you added too much milk. To fix it, add more powdered sugar, one tablespoon at a time, until it reaches a pipeable consistency. If it’s still too thin, pop it in the fridge for 10 minutes to firm up.
Can I make these bars ahead of time?
Yes! You can bake the cookie base a day in advance and store it covered at room temperature. Frost and decorate the next day. The bars are best eaten within 2-3 days of decorating, but they’ll stay fresh in an airtight container at room temperature.
How do I get clean cuts on my bars?
Use a sharp knife and wipe it clean between each cut. For the neatest edges, chill the frosted bars in the refrigerator for about 15 minutes before cutting. This firms up the frosting and makes it less likely to smudge.
My kids want to help decorate. Any tips?
This recipe is perfect for little helpers! Set up a decorating station with the frosted bars, candy eyes, and frosting pens. Let each child decorate their own bar. Expect some creative interpretations—Frankenstein might end up with three eyes or a lopsided smile, but that’s part of the fun. Just be prepared for some extra frosting consumption!
Pin This Recipe!
Easy Frankenstein Sugar Cookie Bars: Best Halloween Treat
These Easy Frankenstein Sugar Cookie Bars are exactly what you need when you want something festive, fun, and completely stress-free. You just press the dough into a pan, bake, frost, and create the most adorable little monsters in about thirty minutes.
- Prep Time: 15 minutes
- Cook Time: 15-18 minutes
- Total Time: 30 minutes
- Yield: 12-15 servings 1x
- Category: Dessert
- Cuisine: American
Ingredients
- 1 box (17.5 oz) sugar cookie mix (Betty Crocker or Pillsbury recommended)
- 1/2 cup unsalted butter, melted and slightly cooled
- 1 large egg, room temperature
- 1 teaspoon vanilla extract
- 1/2 cup unsalted butter, softened (for frosting)
- 2 cups powdered sugar (sifted if desired)
- 2 tablespoons milk (whole milk preferred)
- 1 teaspoon vanilla extract (for frosting)
- Green gel food coloring (Americolor or Wilton recommended)
- Candy eyes (white and black)
- Black licorice strings or black frosting pen
- Mini chocolate chips or black candy melts
Instructions
- Preheat your oven to 350°F (175°C). Line your 9×13-inch baking pan with parchment paper, leaving some overhang on the long sides.
- In a large bowl, combine the sugar cookie mix, melted butter, egg, and vanilla extract. Stir until a soft dough forms. Do not overmix.
- Transfer the dough to the prepared pan. Using your hands or a spatula, press it evenly into the bottom. If the dough is too sticky, lightly wet your fingers with water.
- Bake for 15-18 minutes. The edges should be lightly golden and the center should look set but still soft. A toothpick inserted in the center should come out with a few moist crumbs.
- Let the bars cool in the pan on a wire rack for about 30 minutes. Then use the parchment handles to lift them out and let them cool completely on the rack.
- While the bars are cooling, beat the softened butter in a medium bowl with an electric mixer until smooth and creamy, about 1 minute. Gradually add the powdered sugar, beating on low speed. Add the milk and vanilla extract, then increase the speed to medium and beat for 2-3 minutes until light and fluffy.
- Add a few drops of green gel food coloring and beat until the color is evenly distributed. Aim for a fun, monster green shade.
- Spread a thin, even layer of green frosting over the completely cooled cookie bars. You can use a spatula or pipe it on for a more textured look.
- Use a sharp knife to cut the frosted bars into 12-15 rectangles. Wipe the knife clean between cuts for neat edges.
- Place two candy eyes in the center of each bar, about halfway up. Use a black frosting pen or a piece of black licorice string to draw a mouth—a zigzag or a stitched line works great. Add two mini chocolate chips or black candy melts on the sides of the head for the bolts. Optionally, pipe or place some black licorice strips on top for hair.
- Allow the decorated bars to sit at room temperature for about 15-20 minutes so the frosting firms up slightly.
Notes
Don’t overbake the cookie base—bars should be just set and barely golden around the edges. Patience with cooling is non-negotiable; warm bars plus frosting equals a green disaster. Use gel food coloring, not liquid, for vibrant color without thinning the frosting. For clean cuts, chill frosted bars in the refrigerator for about 15 minutes before cutting. Bars taste even better the next day as the cookie base absorbs moisture from the frosting.
Nutrition
- Serving Size: 1 bar
- Calories: 320350
- Sugar: 2832
- Sodium: 200250
- Fat: 1618
- Saturated Fat: 1012
- Carbohydrates: 4246
- Fiber: 1
- Protein: 34
Keywords: Frankenstein cookies, Halloween sugar cookie bars, easy Halloween treats, sugar cookie bars, Halloween dessert, monster cookies