Love this? Save it for later!
Share the inspiration with your friends
This was supposed to be a pumpkin roll. I had the cream cheese softening, the powdered sugar sifted, and that specific confidence you only get when you’ve made something a dozen times before. But somewhere between answering my phone and trying to find where my toddler hid the measuring cups, I grabbed the wrong pan size, poured the batter way too thin, and realized my oven was running about 25 degrees cooler than it said. The pumpkin roll was a flat, sticky, impossible-to-roll disaster. I stood there staring at this sad, golden puddle of pumpkin batter, honestly ready to just order pizza. But I had already used the last of my pumpkin puree, and I was not about to let that go to waste.
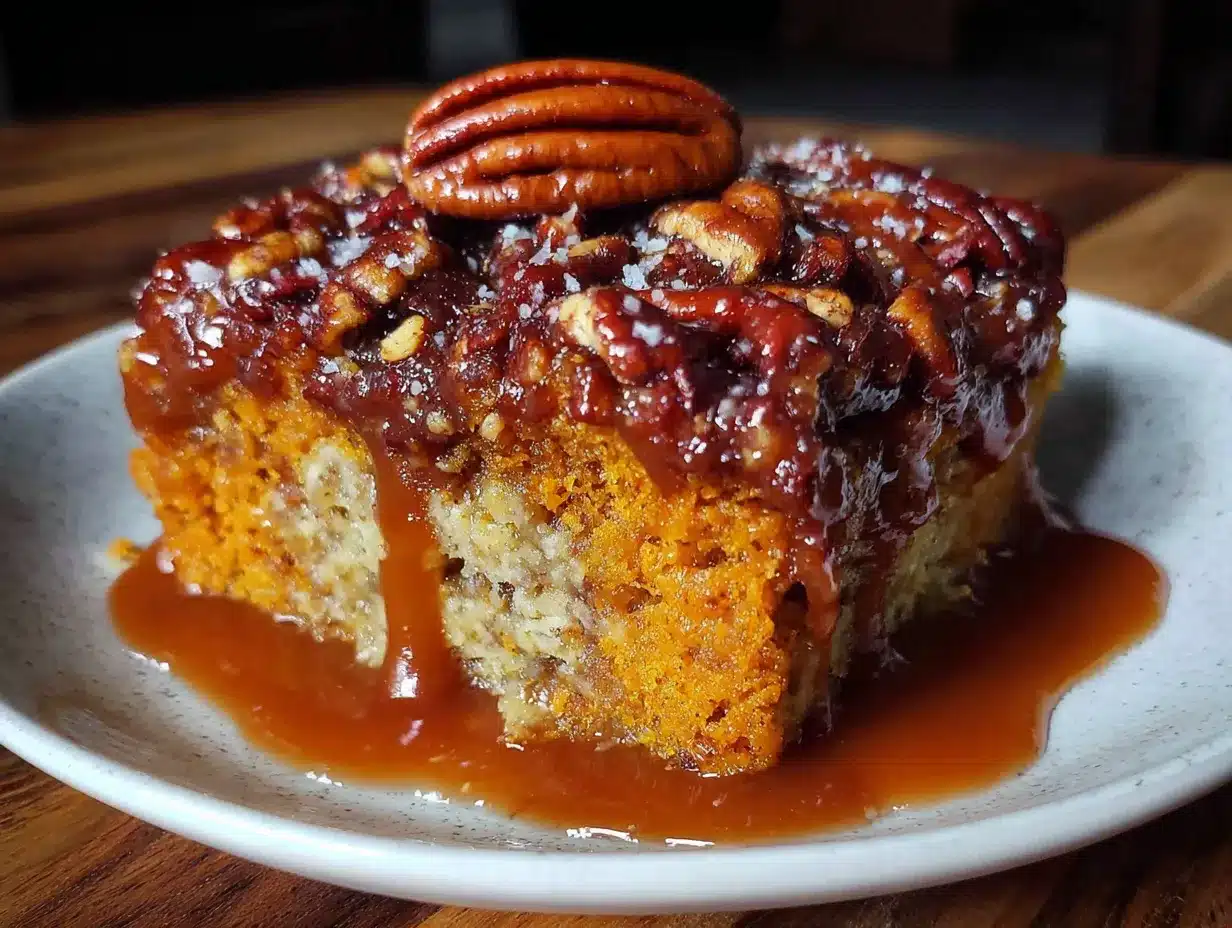
So I did what any reasonable, slightly frustrated home cook would do. I dumped the whole mess into a buttered baking dish, grabbed some brown butter I had made earlier for a different recipe, and just started layering things on top. Cake mix, pecans, more butter—I wasn’t measuring, I was just hoping. It came out of the oven looking nothing like a pumpkin roll. It looked better. The top was all craggy and caramelized, the edges were bubbling, and the smell was so absurdly good that my husband walked in from the garage and asked if I had secretly started a bakery. I told him it was a failed pumpkin roll. He told me it was the best mistake I ever made. And honestly? He wasn’t wrong. That dump cake became the thing everyone asks me to bring to every fall gathering. Maybe you’ve been there—staring at a kitchen fail, wondering if you should just give up. Don’t. Sometimes the mess turns into the masterpiece.
Why You’ll Love This Recipe
Let me tell you why this brown butter pumpkin dump cake has earned a permanent spot in my fall rotation. It’s not just another pumpkin dessert—it’s the one that makes people stop mid-conversation and ask for the recipe.
- Quick & Easy: This comes together in about 15 minutes of hands-on time. No rolling, no fussing, no complicated steps. Just layer and bake.
- Simple Ingredients: You likely have most of these in your pantry right now. Canned pumpkin, cake mix, butter, pecans—no fancy grocery trips required.
- Perfect for Fall Gatherings: Whether it’s Thanksgiving, a potluck, or a cozy Sunday dinner, this cake fits right in. It feeds a crowd and travels beautifully.
- Crowd-Pleaser: I’ve served this to kids, grandparents, and picky eaters. It disappears every single time. The combination of brown butter and pumpkin is just that good.
- Unbelievably Delicious: The brown butter adds this nutty, toasty depth that regular butter just can’t touch. Paired with the warm pumpkin spice and crunchy pecans? It’s next-level comfort food.
What makes this recipe different from all the other pumpkin dump cakes out there is the brown butter. Most recipes skip this step, and they’re missing out. Browning the butter takes just a few extra minutes, but it transforms the entire dessert. It adds a richness that makes the cake taste like you spent hours on it. Trust me, once you try it this way, you won’t go back.
This isn’t just a good pumpkin dessert. It’s the kind that makes you close your eyes after the first bite. It’s comfort food reimagined—warm, spiced, buttery, and completely satisfying. Perfect for impressing guests without the stress, or turning a simple weeknight into something memorable.
What Ingredients You Will Need
This recipe uses simple, wholesome ingredients that work together to create something truly special. Most of these are pantry staples, especially during the fall season. Here’s what you’ll need and why each one matters.
For the Pumpkin Base
- 1 can (15 oz) pumpkin puree (not pumpkin pie filling—make sure it’s 100% pure pumpkin. I prefer Libby’s for consistent texture)
- 1 can (12 oz) evaporated milk (adds creaminess without making the base too thin)
- 3 large eggs, room temperature (room temperature eggs blend more smoothly into the mixture)
- ¾ cup granulated sugar (just enough sweetness to balance the pumpkin’s earthiness)
- 1 teaspoon vanilla extract (pure vanilla extract makes a noticeable difference here)
- 2 teaspoons pumpkin pie spice (or make your own with cinnamon, nutmeg, ginger, and cloves)
- ½ teaspoon salt (enhances all the flavors and balances the sweetness)
For the Brown Butter Topping
- 1 cup (2 sticks) unsalted butter (you’ll brown this yourself—trust the process)
- 1 box (15.25 oz) yellow cake mix (Duncan Hines or Betty Crocker both work great. Do not use a mix with pudding in the mix for best texture)
- 1 cup chopped pecans (raw or toasted—I prefer toasted for extra crunch and flavor)
Ingredient Tips and Substitutions
For the pumpkin puree, look for a can that’s firm and doesn’t have too much liquid on top. If you’re using fresh pumpkin, make sure to drain it well after roasting and blending. For the evaporated milk, you can substitute with heavy cream for an even richer result, but the texture will be slightly denser.
If you need a gluten-free option, use a gluten-free yellow cake mix. I’ve tested this with King Arthur’s gluten-free yellow cake mix and it worked beautifully. Just make sure to check that your pumpkin pie spice is also gluten-free if that’s a concern.
For the pecans, you can substitute with walnuts or even skip them entirely if you have a nut allergy. The cake will still be delicious, just without the crunch. I personally love the texture contrast that pecans add, so I always include them.
One more thing—don’t skip the salt. It might seem like a small detail, but it really makes the pumpkin and brown butter flavors pop. I use fine sea salt for even distribution.
Equipment Needed
You don’t need a fancy kitchen to make this cake, and that’s part of its charm. Here’s what you’ll need:
- 9×13-inch baking dish (glass or ceramic works best for even baking. I use a Pyrex dish and it’s never let me down)
- Small saucepan (for browning the butter. Light-colored stainless steel is ideal so you can see the color change)
- Large mixing bowl (for whisking the pumpkin base)
- Whisk (a sturdy whisk makes blending the pumpkin base effortless)
- Measuring cups and spoons (for accuracy, especially with the spices)
- Spatula (for scraping every last bit of brown butter into the dish—don’t waste a drop)
- Cooling rack (for letting the cake cool evenly before serving)
If you don’t have a 9×13-inch dish, you can use a 10-inch cast iron skillet. Just adjust the baking time slightly and keep an eye on it. I’ve also used a disposable aluminum pan for potlucks, and it works fine—just place it on a baking sheet for stability.
For the saucepan, don’t use nonstick if you can avoid it. The light color of stainless steel helps you see when the butter is properly browned. Dark pans make it hard to tell, and you might end up with burnt butter instead of browned.
Preparation Method
Alright, let’s get to the good part. This recipe is straightforward, but I’ll walk you through every step so you get that perfect, caramelized top and creamy pumpkin base every time.
- Preheat your oven to 350°F (175°C). While it’s heating, grease your 9×13-inch baking dish with butter or nonstick spray. Don’t skip this—the pumpkin base will stick otherwise.
- Make the brown butter. Place the 1 cup (2 sticks) of unsalted butter in a small saucepan over medium heat. Let it melt completely, then continue cooking, swirling the pan occasionally. You’ll see it start to foam and bubble. After about 5-7 minutes, the foam will subside and you’ll see golden brown specks forming at the bottom. The butter will smell nutty and amazing. Remove it from the heat immediately and set it aside. Be careful not to burn it—brown butter can go from perfect to burnt in seconds.
- Prepare the pumpkin base. In a large mixing bowl, whisk together the pumpkin puree, evaporated milk, eggs, granulated sugar, vanilla extract, pumpkin pie spice, and salt. Whisk until everything is smooth and well combined. The mixture should be thick but pourable, like a thin pudding. If it looks curdled, don’t panic—just keep whisking. Sometimes the cold milk and room temperature eggs take a second to get along.
- Pour the pumpkin base into the prepared baking dish. Spread it evenly with your spatula. Give the dish a gentle shake to level it out. This layer will be about ½ inch thick, and that’s perfect.
- Sprinkle the dry cake mix evenly over the pumpkin base. Don’t stir it in—just let it sit on top. This is what creates that beautiful, crumbly crust as it bakes. Make sure you cover the entire surface. I like to use my fingers to break up any clumps in the cake mix before sprinkling.
- Sprinkle the chopped pecans over the cake mix layer. Again, spread them evenly so every bite gets some crunch.
- Drizzle the brown butter over the top. Try to cover as much of the surface as possible. The butter will soak into the cake mix and pecans as it bakes, creating that golden, caramelized topping. Don’t worry if some spots get more butter than others—it will all work out in the oven.
- Bake for 45-50 minutes, or until the top is golden brown and the edges are bubbling. The center should be set but still slightly jiggly—it will continue to set as it cools. If the top is browning too quickly, tent the dish with foil for the last 10-15 minutes.
- Let it cool on a wire rack for at least 20 minutes before serving. This is important—the cake needs time to set so you get clean slices. I know it’s tempting to dig in right away, but trust me, the wait is worth it.
One thing I learned the hard way—don’t overmix the pumpkin base. Just whisk until combined. Overmixing can incorporate too much air, which can cause the base to puff up and then collapse as it cools. You want it dense and creamy, not airy.
Cooking Tips & Techniques
Over the years, I’ve made this cake more times than I can count, and I’ve picked up a few tricks along the way. Here are my best tips for getting it perfect every time.
Master the brown butter. This is the most important technique in the recipe. Start with cold butter cut into pieces so it melts evenly. Swirl the pan constantly once it starts foaming. The moment you see those brown specks and smell that nutty aroma, pull it off the heat. Residual heat will continue to cook it, so don’t wait until it looks too dark. If you’re nervous, use a light-colored pan and watch closely. I’ve burned my fair share of butter, and it’s a sad, smoky mess. Brown butter should smell like toasted nuts, not burnt popcorn.
Don’t skip the cooling time. I know I said this already, but it’s worth repeating. This cake needs at least 20 minutes to set. If you cut into it too soon, it will be runny and messy. The pumpkin base firms up as it cools, giving you those clean, beautiful slices. I usually let it cool for 30 minutes if I have the patience.
Use room temperature eggs. Cold eggs can cause the pumpkin base to seize up or become lumpy. If you forgot to take them out of the fridge, place them in a bowl of warm water for 5 minutes. It works like a charm.
Toast your pecans first. If you have an extra 5 minutes, toast the pecans in a dry skillet over medium heat until they’re fragrant. This deepens their flavor and adds even more crunch. Just watch them closely—they burn fast.
Check for doneness with a gentle jiggle. The center of the cake should jiggle slightly when you shake the dish. If it’s completely firm, it’s overbaked. If it’s still liquid, give it more time. The edges should be bubbly and the top should be golden brown.
One mistake I used to make was using a dark nonstick pan. The cake would always burn on the bottom before the top was done. Switch to glass or ceramic, and you’ll get much more even baking. Trust me on this one.
Variations & Adaptations
This recipe is wonderfully adaptable, and I’ve tried several variations over the years. Here are a few of my favorites.
Spiced Pecan Variation: Toss the chopped pecans with 1 tablespoon of melted butter, 1 teaspoon of cinnamon, and a pinch of cayenne pepper before sprinkling them on top. The heat from the cayenne pairs beautifully with the sweet pumpkin and brown butter. I made this for a Friendsgiving once, and it was the first thing to disappear.
Chocolate Lover’s Version: Use a chocolate cake mix instead of yellow cake mix. The chocolate and pumpkin are surprisingly good together. Add ½ cup of chocolate chips to the pecan layer for extra indulgence. My kids absolutely love this version, and honestly, so do I.
Gluten-Free Adaptation: Substitute the yellow cake mix with a gluten-free yellow cake mix. I’ve tested this with King Arthur’s gluten-free mix, and it works perfectly. Just make sure your pumpkin pie spice is also gluten-free. The texture is slightly more crumbly, but the flavor is just as good.
Dairy-Free Option: Use vegan butter for browning (Miyoko’s is my go-to) and replace the evaporated milk with full-fat coconut milk. The coconut milk adds a subtle tropical note that works surprisingly well with the pumpkin. This version is a hit with my dairy-free friends.
Extra Crunchy Topping: Add ½ cup of rolled oats to the pecan layer. The oats toast up in the oven and add a wonderful texture. I tried this on a whim one morning when I was out of pecans and only had oats and walnuts. It was a happy accident that I now make on purpose.
Feel free to experiment with the spice blend too. Add a pinch of cardamom or allspice for a more complex flavor profile. I sometimes add ¼ teaspoon of black pepper to the pumpkin base—it sounds weird, but it really enhances the warmth of the spices.
Serving & Storage Suggestions
This cake is delicious at any temperature, but I have a few serving suggestions that take it to the next level.
Serve it warm with a scoop of vanilla ice cream or a dollop of whipped cream. The contrast between the warm, spiced cake and the cold, creamy topping is absolutely divine. For an extra touch, drizzle caramel sauce over the top. I like to use a good quality store-bought caramel or make a quick salted caramel at home.
Room temperature is also wonderful. The flavors seem to meld together even more after the cake has cooled completely. This is how I usually serve it at potlucks, and it’s always a hit.
For breakfast—yes, I said breakfast. A slice of this cake with a cup of coffee is a perfectly acceptable fall morning treat. Don’t let anyone tell you otherwise.
Storage: Cover the baking dish tightly with foil or plastic wrap and store it in the refrigerator for up to 5 days. The cake actually gets better after a day or two as the flavors continue to develop. I often make it a day ahead of time for holidays.
Freezing: This cake freezes beautifully. Let it cool completely, then wrap the entire dish in plastic wrap, followed by a layer of foil. Freeze for up to 3 months. To serve, thaw overnight in the refrigerator and reheat in a 350°F oven for 10-15 minutes, or until warmed through. You can also microwave individual slices for about 30 seconds.
Reheating: For best results, reheat in the oven rather than the microwave. The oven helps restore the crunchiness of the topping. If you’re in a hurry, the microwave works fine, but the topping will be softer.
One thing I’ve noticed—the flavors really deepen after a day in the fridge. The pumpkin spice and brown butter meld together into something even more delicious. So don’t be afraid to make it ahead of time.
Nutritional Information & Benefits
While this is definitely a treat, it does have some redeeming qualities. Here’s a rough estimate of the nutritional values per serving (based on 12 servings):
- Calories: Approximately 420
- Fat: 24g
- Carbohydrates: 48g
- Protein: 6g
- Fiber: 3g
- Sugar: 32g
These are estimates and will vary based on the specific brands and substitutions you use.
Health Benefits: Pumpkin is packed with vitamin A, which is great for eye health and immune function. It’s also a good source of fiber, which aids digestion. The pecans add healthy fats and antioxidants. So while this isn’t health food, it’s not completely devoid of nutritional value either.
Dietary Considerations: This recipe contains gluten, dairy, eggs, and tree nuts (pecans). For gluten-free and dairy-free options, see the variations section above. It can also be made nut-free by omitting the pecans.
Allergen Note: If you’re serving this at a gathering, be sure to label it if anyone has nut allergies. The pecans are visible, but the brown butter is made from dairy, so those with dairy allergies should be aware.
From a wellness perspective, I believe in balance. This cake is a celebration of fall flavors, and it’s meant to be enjoyed in moderation. Pair it with a protein-rich meal or a big salad to balance out the indulgence. And honestly, a slice of this cake with a cup of tea is a beautiful way to slow down and savor the season.
FAQs
Can I use pumpkin pie filling instead of pumpkin puree?
No, I don’t recommend it. Pumpkin pie filling is already sweetened and spiced, so it will throw off the balance of the recipe. Stick with 100% pure pumpkin puree for the best results. If you only have pumpkin pie filling, reduce the sugar and spices in the recipe, but honestly, it’s better to just use the puree.
Can I make this in advance?
Absolutely! This cake is actually better the next day. Make it a day ahead, let it cool completely, cover it, and store it in the refrigerator. Reheat in a 350°F oven for 10-15 minutes before serving, or serve it cold. It’s perfect for holiday meal prep.
Why is my brown butter burning?
Brown butter can go from perfect to burnt in seconds. The key is to watch it closely once it starts foaming. Use a light-colored pan so you can see the color change, and remove it from the heat as soon as you see golden brown specks. The residual heat will continue to cook it, so don’t wait until it’s too dark. If you’re unsure, err on the side of under-browning—it’s better than burnt.
Can I use a different type of cake mix?
Yes, you can. Yellow cake mix is classic, but spice cake mix, butter pecan cake mix, or even chocolate cake mix all work beautifully. Just keep in mind that the flavor profile will change. Spice cake mix will make the pumpkin spice even more pronounced, while chocolate will add a rich, decadent twist. I’ve tried them all, and each one is delicious in its own way.
How do I know when the dump cake is done?
The top should be golden brown and the edges should be bubbling. The center will still be slightly jiggly—that’s normal. It will continue to set as it cools. If the top is browning too quickly, tent the dish with foil for the last 10-15 minutes of baking. A toothpick inserted into the center should come out clean, but the pumpkin base underneath the cake mix layer will be soft, so don’t rely on the toothpick test alone.
Conclusion
This brown butter pumpkin dump cake started as a mistake, but it’s become one of my most treasured fall recipes. It’s proof that sometimes the best things in life come from things going wrong. The nutty brown butter, the warm pumpkin spice, the crunchy pecans, and that soft, creamy pumpkin base—every bite is a little piece of autumn perfection.
I hope you give this recipe a try, whether you’re a seasoned baker or someone who’s never made a dump cake before. It’s forgiving, it’s delicious, and it’s guaranteed to impress. Feel free to customize it with your favorite variations—that’s the beauty of a recipe like this. Make it your own.
I’d love to hear how it turns out for you. Drop a comment below and let me know if you tried any variations, or share a photo of your creation on social media. Tag me so I can see your beautiful cake! And if you have any questions, don’t hesitate to ask. Happy baking, friends—here’s to happy accidents and delicious desserts.
Pin This Recipe!
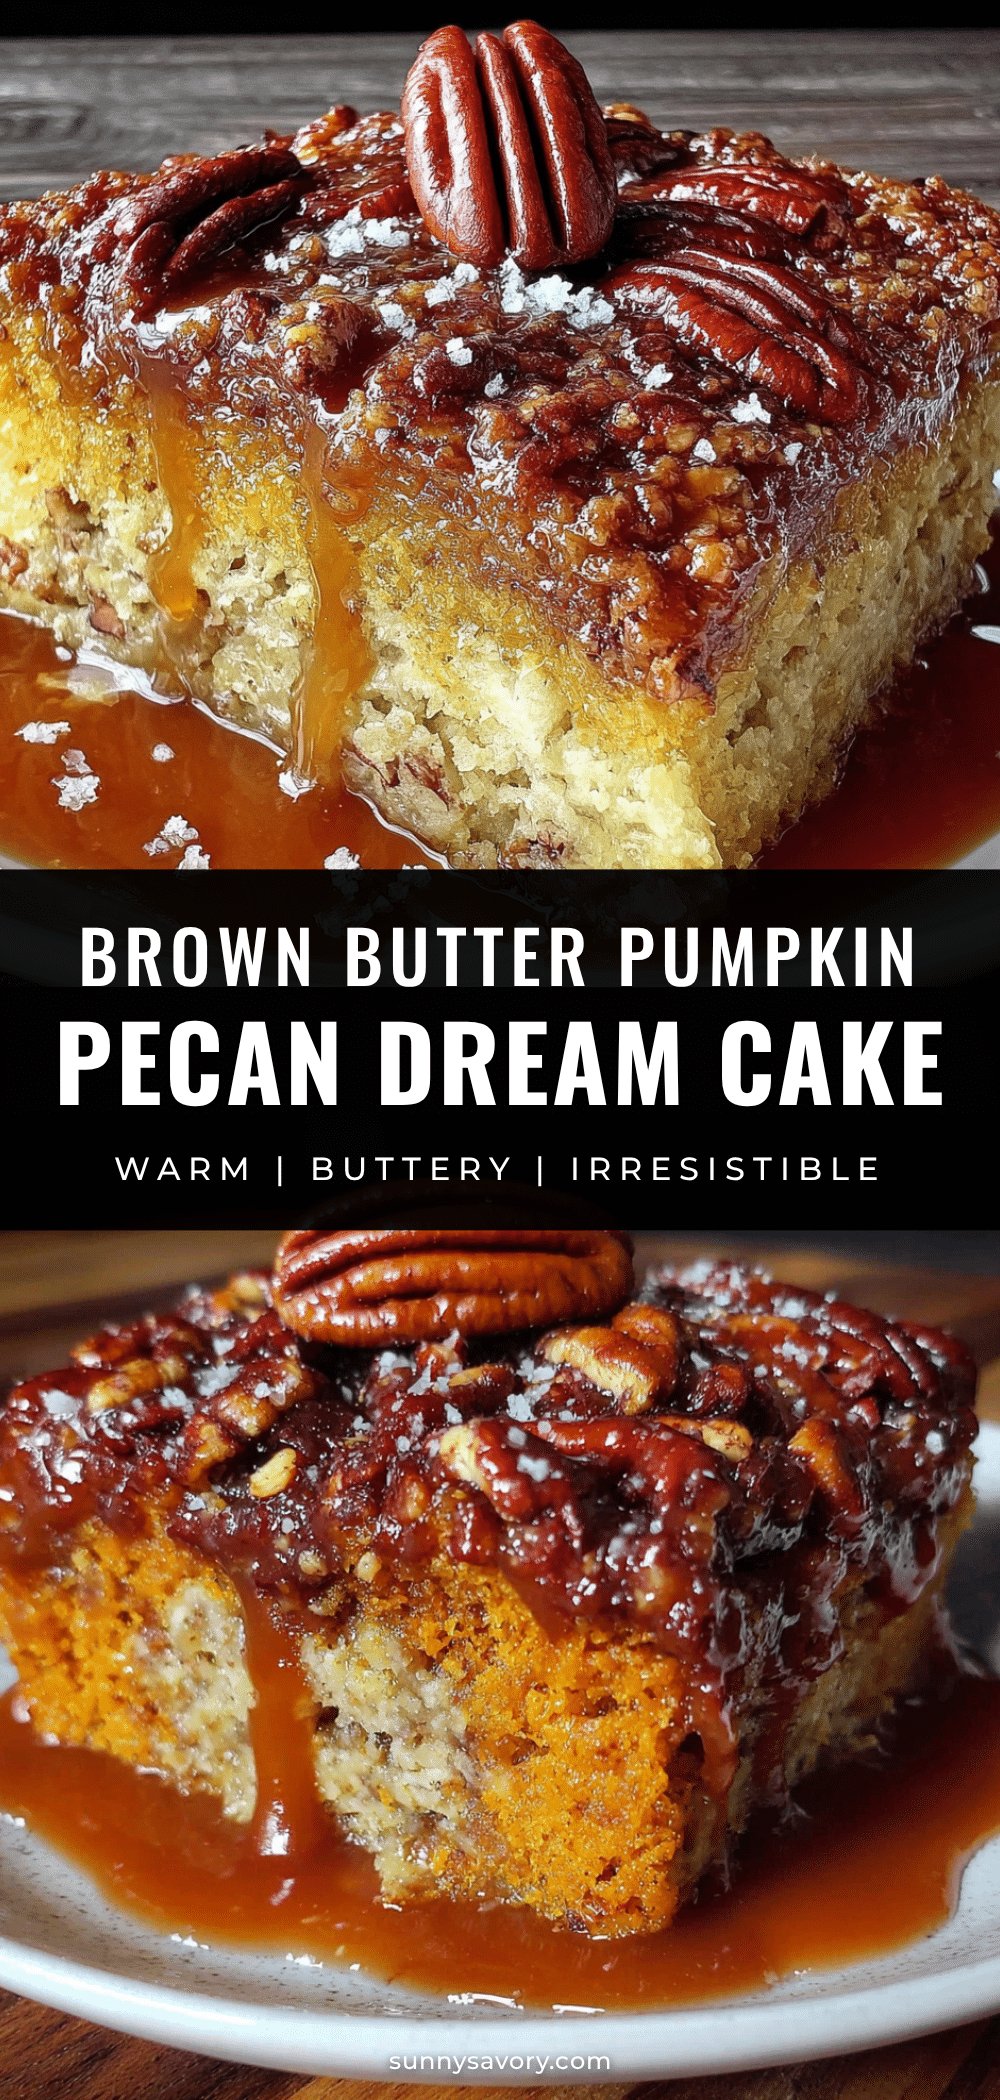
Best Brown Butter Pumpkin Dump Cake with Pecans
A happy accident turned masterpiece—this brown butter pumpkin dump cake features a creamy pumpkin base, a crumbly cake mix topping, and crunchy pecans, all brought together with nutty brown butter. It’s an easy, crowd-pleasing fall dessert that comes together in minutes.
- Prep Time: 15 minutes
- Cook Time: 50 minutes
- Total Time: 1 hour 5 minutes
- Yield: 12 servings 1x
- Category: Dessert
- Cuisine: American
Ingredients
- 1 can (15 oz) pumpkin puree (not pumpkin pie filling)
- 1 can (12 oz) evaporated milk
- 3 large eggs, room temperature
- ¾ cup granulated sugar
- 1 teaspoon vanilla extract
- 2 teaspoons pumpkin pie spice
- ½ teaspoon salt
- 1 cup (2 sticks) unsalted butter
- 1 box (15.25 oz) yellow cake mix (without pudding in the mix)
- 1 cup chopped pecans (raw or toasted)
Instructions
- Preheat your oven to 350°F (175°C). Grease a 9×13-inch baking dish with butter or nonstick spray.
- Make the brown butter: Place 1 cup (2 sticks) unsalted butter in a small saucepan over medium heat. Melt completely, then continue cooking, swirling occasionally, until it foams, subsides, and golden brown specks form (about 5-7 minutes). Remove from heat immediately and set aside.
- Prepare the pumpkin base: In a large mixing bowl, whisk together pumpkin puree, evaporated milk, eggs, granulated sugar, vanilla extract, pumpkin pie spice, and salt until smooth and well combined.
- Pour the pumpkin base into the prepared baking dish and spread evenly with a spatula.
- Sprinkle the dry cake mix evenly over the pumpkin base. Do not stir.
- Sprinkle the chopped pecans evenly over the cake mix layer.
- Drizzle the brown butter over the top, covering as much surface as possible.
- Bake for 45-50 minutes, until the top is golden brown and the edges are bubbling. The center should be set but slightly jiggly. If browning too quickly, tent with foil for the last 10-15 minutes.
- Let cool on a wire rack for at least 20 minutes before serving.
Notes
Don’t overmix the pumpkin base—just whisk until combined. Let the cake cool for at least 20 minutes before slicing to allow it to set. Brown butter can burn quickly; remove from heat as soon as golden specks appear. For best results, use a light-colored pan to monitor browning. The cake can be made a day ahead and actually tastes better the next day.
Nutrition
- Serving Size: 1 slice (1/12 of cak
- Calories: 420
- Sugar: 32
- Sodium: 380
- Fat: 24
- Saturated Fat: 12
- Carbohydrates: 48
- Fiber: 3
- Protein: 6
Keywords: pumpkin dump cake, brown butter, pecan, fall dessert, easy pumpkin dessert, dump cake