Love this? Save it for later!
Share the inspiration with your friends
This was supposed to be a fancy layered mousse cake for a Fourth of July barbecue. I had everything planned out—the gelatin, the multiple chilling stages, the complicated piping. But somewhere between the grocery store and my kitchen, I lost the plot. I grabbed the wrong cream cheese (low-fat, because I wasn’t paying attention), the power went out for an hour in the middle of prep (thanks, summer thunderstorms), and I was already running late because I’d promised to bring dessert for twenty people. What came out was nothing like the plan—and better. Honestly, I stood there staring at the fridge, feeling that familiar panic rise, when I spotted the box of graham crackers I’d bought for s’mores later that week. And the blueberries. And the strawberries. And a tub of Cool Whip I’d grabbed on a whim. And I thought, what if I just… layered it?
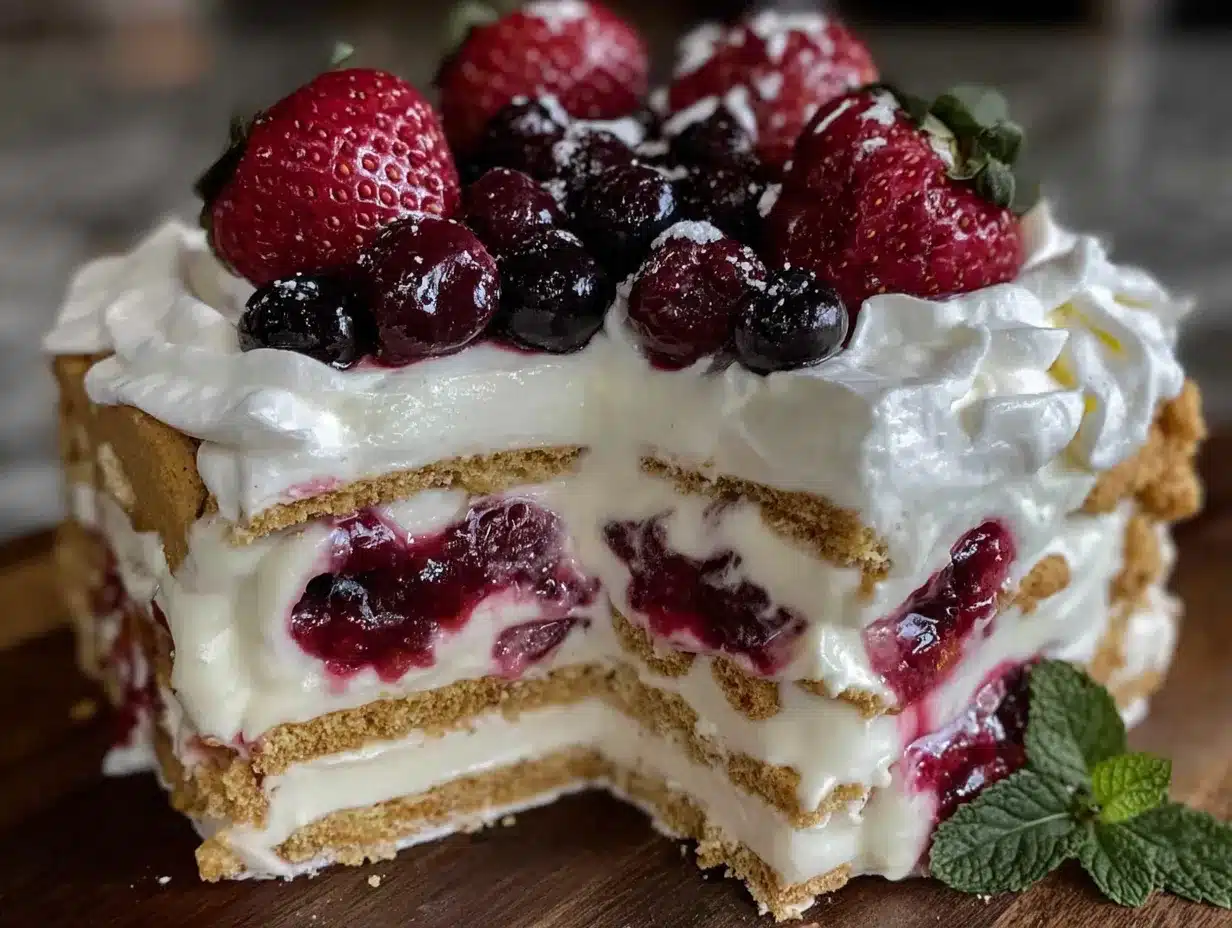
Let me tell you, that moment of desperation became my favorite kitchen memory. I layered graham crackers, a quick no-cook cream cheese mixture, fresh berries, and whipped topping in a simple dish. No baking, no fuss, no complicated techniques. I mean, I was literally layering things in a pan like a toddler building with blocks. But when I pulled that dish out of the fridge the next day and cut into it, the layers were perfect. The crackers had softened into a cake-like texture, the cream cheese filling was tangy and light, and the berries added these bright pops of flavor. My neighbor, Carol, took one bite and said, “This is the best thing you’ve ever made.” And she wasn’t being nice—Carol is brutally honest. Maybe you’ve been there, where the thing you throw together in a panic becomes the thing everyone asks you to make again and again. That’s this cake. It’s the recipe that taught me to stop panicking when things go wrong in the kitchen. Sometimes the happy accidents are the ones worth repeating.
Why You’ll Love This Recipe
This Easy Red White & Blueberry No-Bake Icebox Cake is the kind of dessert that makes you look like a hero without any of the stress. I’ve tested this recipe at three different barbecues, two family dinners, and one very humid picnic where everything else melted—and it held up every single time. Here’s why it works so well:
- No Oven Required: When the summer heat is unbearable, the last thing you want to do is turn on the oven. This cake comes together completely on your countertop and chills in the fridge. That’s it.
- Simple Ingredients: You probably have most of these in your kitchen right now. Graham crackers, cream cheese, whipped topping, fresh berries. No fancy extracts or hard-to-find items.
- Perfect for Patriotic Holidays: The red strawberries, white cream filling, and blueberries make this an instant showstopper for Memorial Day, Fourth of July, or Labor Day. But honestly? I make it all summer long.
- Crowd-Pleaser: I’ve served this to kids who usually push dessert away and adults who claim they don’t eat sweets. It disappears every time. The texture is what gets them—it’s like a cold, creamy cheesecake but lighter.
- Make-Ahead Friendly: This cake actually gets better after sitting overnight. The graham crackers soften perfectly, the flavors meld together, and you get to relax while your guests rave about your “hard work.”
What makes this version different from other icebox cakes is the balance. I tested the cream cheese to whipped topping ratio six times before I got it right—not too heavy, not too sweet, just tangy and creamy. And I learned the hard way that you need to macerate the berries first. Skip that step, and you end up with a watery mess. Trust me on that one. This recipe isn’t just good—it is the kind that makes you close your eyes after the first bite. It’s comfort food reimagined for hot summer days, with the same soul-soothing satisfaction as a slice of cheesecake but without the work.
What Ingredients You Will Need
This recipe uses simple, wholesome ingredients to deliver bold flavor and satisfying texture without the fuss. Most of these are pantry staples or easy to find at any grocery store. I’ve noted a few substitutions and tips to help you get the best results.
For the Creamy Filling
- 8 oz cream cheese, softened to room temperature (I recommend Philadelphia for the smoothest texture—generic brands can be grainy)
- 1/2 cup granulated sugar (you can reduce to 1/3 cup if you prefer less sweet)
- 1 teaspoon vanilla extract (pure vanilla extract makes a noticeable difference here)
- 2 cups heavy whipping cream, cold (or use a 16 oz tub of Cool Whip, thawed, for convenience)
For the Berry Layer
- 2 cups fresh strawberries, hulled and sliced (about 1 pint)
- 1 cup fresh blueberries (about 6 oz)
- 2 tablespoons granulated sugar (to macerate the berries and draw out their juices)
- 1 tablespoon lemon juice (fresh squeezed is best—it brightens the flavor)
For the Base and Layers
- 1 box (14.4 oz) graham crackers (you’ll need about 2 full sleeves—honey or original both work)
- Optional: 1/4 cup blueberry or strawberry jam (for an extra flavor boost between layers)
Let me talk about the cream cheese for a second. I’ve made this with both full-fat and reduced-fat cream cheese, and honestly, the full-fat version is noticeably creamier and sets up better. If you’re dairy-free, you can use a plant-based cream cheese, but look for one that’s thick and not whipped. The texture matters here because it’s the backbone of the filling.
For the berries, fresh is definitely best, but frozen works in a pinch. If using frozen berries, thaw them completely and drain off the excess liquid before macerating. Otherwise, you’ll end up with a soggy cake. I learned that one the hard way during a last-minute dessert emergency last June.
As for the graham crackers, I’ve tried this with gluten-free graham crackers and it works beautifully. Just be gentle when layering because they tend to be a bit more fragile. Also, if you can’t find graham crackers, digestive biscuits or even vanilla wafers make excellent substitutes—just adjust the layering pattern to fit your dish.
Equipment Needed
- 9×13 inch baking dish (glass or ceramic works best—you want to see those pretty layers)
- Electric hand mixer or stand mixer (for whipping the cream and cream cheese together)
- Large mixing bowl (preferably metal or glass—plastic can hold onto odors)
- Medium mixing bowl (for macerating the berries)
- Spatula (a rubber spatula is ideal for spreading the filling evenly)
- Sharp knife and cutting board (for slicing strawberries)
- Measuring cups and spoons
- Plastic wrap or aluminum foil (for covering the cake while it chills)
If you don’t have a 9×13 dish, you can use two 8×8 square dishes or even a deep pie plate. The layers will just be thicker or thinner depending on the dish. I once made this in a round springform pan for a fancier presentation—it worked great, just be careful when removing the ring. Also, if you don’t have an electric mixer, you can whisk the cream by hand. It takes about 8-10 minutes of vigorous whisking, but it’s a great arm workout. My grandmother used to do it that way, and she swore the cake tasted better because of the “love” she put into it.
Preparation Method
This cake is all about layering, so take your time and enjoy the process. It’s meditative, honestly. Here’s how to put it together:
- Macerate the berries (15 minutes before starting): In a medium bowl, combine the sliced strawberries, blueberries, 2 tablespoons of sugar, and 1 tablespoon of lemon juice. Stir gently to coat. Let them sit for at least 15 minutes. The sugar will draw out the natural juices and create a light syrup. Stir once halfway through. You’ll notice the berries getting glossy and the liquid turning a beautiful pinkish-purple. This step is non-negotiable—don’t skip it or your cake will be watery.
- Make the cream filling (10 minutes): In a large mixing bowl, beat the softened cream cheese with an electric mixer on medium speed until smooth and fluffy, about 2 minutes. Scrape down the sides of the bowl with a spatula. Add the 1/2 cup of sugar and vanilla extract, and beat for another minute until well combined and slightly lighter in color. In a separate bowl, whip the heavy cream on high speed until stiff peaks form—this takes about 3-4 minutes. Gently fold the whipped cream into the cream cheese mixture using a spatula. Fold until no white streaks remain. The mixture should be thick, airy, and spreadable. If you’re using Cool Whip instead, just fold it straight into the cream cheese mixture without whipping first.
- Layer the first graham crackers (5 minutes): Arrange a single layer of graham crackers on the bottom of your 9×13 dish. Break crackers as needed to fill gaps—I usually break one or two in half to fit the edges. Don’t leave large empty spaces because the filling will sink through. Press them down gently so they sit flat.
- Add the first cream layer (5 minutes): Spread about one-third of the cream filling evenly over the graham crackers. Use a spatula to reach the edges. Don’t worry if it’s not perfectly smooth—the next layers will cover it. If you’re using jam, now is the time to drop small spoonfuls over the cream layer and swirl it in with a knife.
- Add the first berry layer (5 minutes): Using a slotted spoon, scatter about half of the macerated berries over the cream layer. Reserve the juices for drizzling later. Try to distribute the berries evenly so every slice gets a good mix of strawberries and blueberries.
- Repeat the layers (10 minutes): Add another layer of graham crackers on top of the berries. Press down gently. Spread another third of the cream filling over the crackers. Add the remaining berries. Top with a final layer of graham crackers. Spread the remaining cream filling over the top, making sure to cover all the crackers completely—any exposed edges will stay crunchy instead of softening into cake-like texture.
- Chill the cake (at least 6 hours or overnight): Cover the dish tightly with plastic wrap or foil. Refrigerate for at least 6 hours, but overnight is best. The graham crackers need time to absorb moisture from the cream and berries and soften into a cake-like texture. If you cut into it too early, you’ll get crunchy crackers and runny filling. Trust me, I’ve made that mistake at 11 PM when I was too impatient to wait until morning.
- Garnish and serve (10 minutes before serving): Just before serving, top with fresh berries and a light dusting of powdered sugar if desired. You can also add a drizzle of the reserved berry syrup for a beautiful presentation. Slice with a sharp knife, wiping it clean between cuts for neat edges.
One thing I want to emphasize: when you’re layering the graham crackers, don’t stress about making them perfect. They’ll soften and settle as the cake chills. I’ve had layers shift a little, and honestly, the rustic look is part of the charm. It’s a homemade dessert, not a magazine cover.
Cooking Tips & Techniques
After making this cake more times than I can count, I’ve picked up a few tricks that make a real difference. Here are the ones I wish someone had told me the first time:
Let the cream cheese truly soften. I know, I know, everyone says this. But I’ve been impatient and microwaved cream cheese before, and it creates lumps that never fully smooth out. Leave it on the counter for at least 30 minutes before starting. If you’re in a rush, cut it into small cubes and let them sit for 15 minutes—that actually works pretty well.
Don’t overmix the cream. When you’re whipping the heavy cream, stop as soon as you see stiff peaks. If you keep going, you’ll end up with butter. I did this once while distracted by a phone call, and suddenly I had sweetened butter and watery liquid. Not the disaster you want.
Pat the berries dry after macerating. Use a slotted spoon to lift them out of the juices, and let them drain for a minute before layering. Too much liquid makes the cake soggy instead of perfectly moist. The reserved juices are great for drizzling on top, so don’t throw them away.
Press the top layer of crackers gently. After you add the final layer of graham crackers, press down very lightly with your palm. This helps the filling settle into the cracks and ensures even softening. But don’t press too hard or you’ll push the filling out the sides.
Use a hot knife for clean slices. Run your knife under hot water, dry it off, then slice. The warmth helps cut through the cream cleanly. Wipe the knife between each slice for picture-perfect pieces.
Plan ahead for best results. This cake genuinely tastes better on day two. The flavors meld, the texture becomes perfectly uniform, and it slices like a dream. So if you’re making this for a party, make it the day before. Your future self will thank you.
Variations & Adaptations
One of the best things about this recipe is how flexible it is. I’ve experimented with several variations, and here are my favorites:
Chocolate Lover’s Version: Swap the graham crackers for chocolate wafer cookies or Oreo thins. Use chocolate pudding mix (prepared) in place of half the cream filling. The combination of chocolate and berries is absolutely divine. I made this for a friend’s birthday and she said it was the best dessert she’d ever had—and she’s a pastry chef.
Lemon Blueberry Twist: Add the zest of one lemon to the cream filling and substitute lemon juice for the vanilla extract. Use only blueberries (skip the strawberries) and add a layer of lemon curd between the cream and berries. The bright citrus cuts through the richness beautifully. This version is perfect for spring brunches.
Dairy-Free Adaptation: Use dairy-free cream cheese (I like Kite Hill or Violife) and coconut cream (chilled and whipped) in place of heavy cream. Make sure your graham crackers are vegan—some brands contain honey. The texture will be slightly different, but it’s still incredibly creamy and satisfying. My dairy-intolerant sister-in-law requests this version for every family gathering.
Individual Servings: Instead of a 9×13 dish, layer the ingredients in mason jars or small dessert cups. This is fantastic for picnics or barbecues where you don’t want to deal with slicing and serving. Plus, they look adorable. Layer graham cracker pieces, cream, and berries in each jar, then chill. You can even prep them a day ahead.
Berry Swap: Not a fan of strawberries or blueberries? Use raspberries, blackberries, or sliced peaches instead. The key is to macerate whatever fruit you choose to draw out the excess moisture. I’ve made a summer peach version that was absolutely heavenly—just peel and slice the peaches first.
Feel free to get creative with this. The basic formula is graham crackers + creamy filling + fruit. Everything else is just delicious details.
Serving & Storage Suggestions
This cake is best served cold, straight from the refrigerator. I like to let it sit out for about 10 minutes before slicing—it takes the chill off just enough to let the flavors shine. For presentation, arrange fresh berries on top in a patriotic pattern or just scatter them casually. A light dusting of powdered sugar adds a lovely finishing touch.
As for what to serve alongside, this cake is rich enough to stand on its own, but it pairs beautifully with a scoop of vanilla ice cream or a dollop of fresh whipped cream. If you’re serving it after a heavy meal, keep it simple. For a summer brunch, try it with a side of fresh fruit salad or a light lemon sorbet.
Storage: Cover the dish tightly with plastic wrap or foil and refrigerate. The cake will keep for up to 4 days, though the texture is best within the first 2-3 days. After that, the graham crackers can become a bit too soft. Honestly, I’ve never had leftovers last longer than two days in my house—it disappears too quickly.
Freezing: You can freeze this cake for up to 2 months. Wrap the entire dish (or individual slices) tightly in plastic wrap, then foil. Thaw overnight in the refrigerator before serving. The texture will be slightly softer after freezing, but it’s still delicious. I’ve done this for holiday prep and it works like a charm.
Reheating: You don’t need to reheat this cake—it’s meant to be served cold. But if you’ve frozen it, let it thaw in the fridge for at least 6 hours before serving. Don’t rush this with the microwave or you’ll end up with a sad, soupy mess.
One last tip: the flavors actually improve after 24 hours. The berries release more juice, the cream sets up firmer, and everything melds together beautifully. So if you can resist the urge to dig in right away, you’ll be rewarded with an even better dessert.
Nutritional Information & Benefits
Here’s the estimated nutritional breakdown per serving (based on 12 servings):
| Nutrient | Amount per Serving |
|---|---|
| Calories | 320 |
| Total Fat | 18g |
| Saturated Fat | 11g |
| Cholesterol | 55mg |
| Sodium | 220mg |
| Total Carbohydrates | 38g |
| Dietary Fiber | 2g |
| Sugars | 24g |
| Protein | 4g |
While this is definitely a treat, it does offer some nutritional benefits. The strawberries and blueberries are packed with antioxidants, vitamin C, and fiber. Blueberries, in particular, are known for their brain-health benefits. The cream cheese provides calcium and protein, though it’s also a source of saturated fat, so enjoy in moderation.
If you’re looking to lighten it up, you can use reduced-fat cream cheese and light whipped topping. The texture won’t be quite as luxurious, but it’s still a solid dessert option. For a lower-sugar version, use a sugar substitute like monk fruit sweetener in the cream filling and skip the macerating sugar—just let the berries sit with lemon juice instead.
As always, this recipe contains dairy and gluten. For dietary restrictions, check the variations section above for dairy-free and gluten-free options. And if you’re serving this to someone with allergies, always double-check your ingredient labels.
Conclusion
This Easy Red White & Blueberry No-Bake Icebox Cake is proof that the best recipes often come from the most unexpected places. What started as a failed attempt at something fancy turned into a dessert I make on repeat, every single summer. It’s the kind of recipe that makes you look like a kitchen genius without any of the stress—no oven, no complicated techniques, just simple layers of creamy, fruity goodness.
I love this recipe because it’s forgiving. You can use whatever berries you have, swap the crackers, adjust the sweetness—it always works. And every time I make it, I remember that afternoon when everything went wrong and I almost gave up. Now, when I pull this cake out of the fridge and watch people’s faces light up, I’m glad I didn’t.
I’d love to hear how yours turns out. Did you try a variation? Did your family devour it in five minutes? Drop a comment below and let me know. And if you’re looking for more no-bake summer desserts, be sure to check out our no-bake cheesecake recipe—it’s another favorite that’s perfect for hot days. Happy baking, friends—or should I say, happy layering!
Frequently Asked Questions
Can I use frozen berries instead of fresh?
Yes, you can. Just thaw them completely and drain off the excess liquid before macerating. Frozen berries tend to release more water, so pat them dry with a paper towel if needed. The texture will be slightly softer, but the flavor is still great.
How long does this cake need to chill?
At least 6 hours, but overnight is best. The graham crackers need time to absorb moisture and soften into that cake-like texture. If you cut into it too early, you’ll get crunchy crackers and runny filling—not the experience you want.
Can I make this gluten-free?
Absolutely. Use gluten-free graham crackers or digestive biscuits. Just be gentle when layering because gluten-free crackers tend to be more fragile. The rest of the ingredients are naturally gluten-free.
Why did my cake turn out watery?
This usually happens if you skip the macerating step or don’t drain the berries properly. The sugar draws out the natural juices, and if you add those juices directly to the cake, it can make the filling thin. Always use a slotted spoon to lift the berries out of the syrup, and reserve the liquid for drizzling on top.
Can I use Cool Whip instead of heavy cream?
Yes, and it actually makes the recipe even easier. Use a 16 oz tub of Cool Whip, thawed, and fold it directly into the cream cheese mixture. The texture will be slightly lighter and airier, but it’s still delicious. I’ve done it both ways, and honestly, I can’t tell the difference once the cake has chilled overnight.
Pin This Recipe!
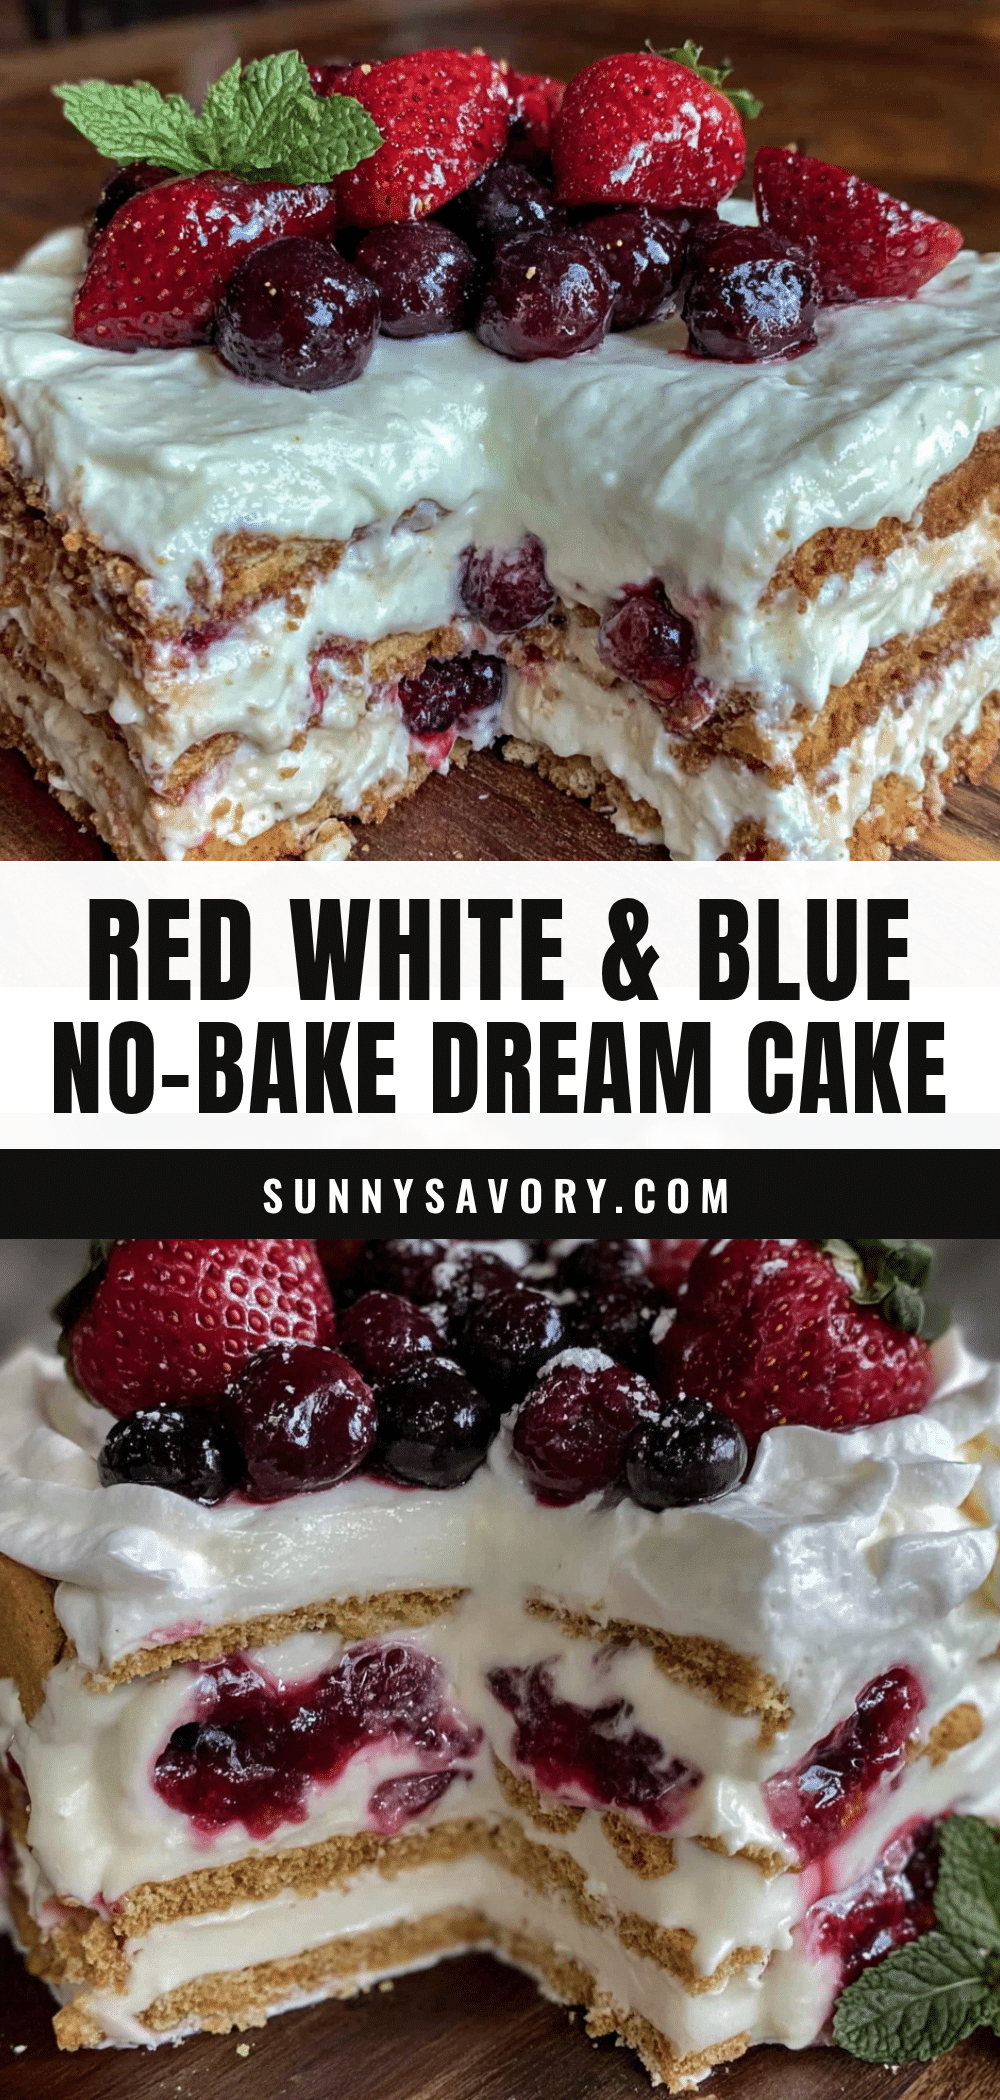
Easy Red White & Blueberry No-Bake Icebox Cake
A simple, no-bake dessert featuring layers of graham crackers, a creamy no-cook cream cheese filling, and fresh macerated strawberries and blueberries. Perfect for patriotic holidays and summer gatherings, this make-ahead cake is a crowd-pleaser that requires no oven and minimal effort.
- Prep Time: 20 minutes
- Cook Time: 0 minutes
- Total Time: 6 hours 20 minutes (includes chilling time)
- Yield: 12 servings 1x
- Category: Dessert
- Cuisine: American
Ingredients
- 8 oz cream cheese, softened to room temperature
- 1/2 cup granulated sugar (or 1/3 cup for less sweet)
- 1 teaspoon vanilla extract (pure vanilla extract recommended)
- 2 cups heavy whipping cream, cold (or 16 oz Cool Whip, thawed)
- 2 cups fresh strawberries, hulled and sliced (about 1 pint)
- 1 cup fresh blueberries (about 6 oz)
- 2 tablespoons granulated sugar (for macerating berries)
- 1 tablespoon lemon juice (fresh squeezed)
- 1 box (14.4 oz) graham crackers (about 2 full sleeves, honey or original)
- Optional: 1/4 cup blueberry or strawberry jam (for extra flavor between layers)
Instructions
- Macerate the berries: In a medium bowl, combine sliced strawberries, blueberries, 2 tablespoons sugar, and 1 tablespoon lemon juice. Stir gently to coat. Let sit for at least 15 minutes, stirring once halfway through. The berries will become glossy and release juices.
- Make the cream filling: In a large mixing bowl, beat softened cream cheese with an electric mixer on medium speed until smooth and fluffy, about 2 minutes. Scrape down sides. Add 1/2 cup sugar and vanilla extract, beat for another minute until well combined. In a separate bowl, whip heavy cream on high speed until stiff peaks form (about 3-4 minutes). Gently fold whipped cream into cream cheese mixture until no white streaks remain. If using Cool Whip, fold directly into cream cheese mixture wit…
- Layer the first graham crackers: Arrange a single layer of graham crackers on the bottom of a 9×13 inch baking dish. Break crackers as needed to fill gaps, pressing down gently so they sit flat.
- Add the first cream layer: Spread about one-third of the cream filling evenly over the graham crackers using a spatula. If using jam, drop small spoonfuls over the cream layer and swirl in with a knife.
- Add the first berry layer: Using a slotted spoon, scatter about half of the macerated berries over the cream layer. Reserve the juices for drizzling later. Distribute berries evenly.
- Repeat the layers: Add another layer of graham crackers on top of the berries. Press down gently. Spread another third of the cream filling over the crackers. Add the remaining berries. Top with a final layer of graham crackers. Spread the remaining cream filling over the top, covering all crackers completely.
- Chill the cake: Cover the dish tightly with plastic wrap or foil. Refrigerate for at least 6 hours, but overnight is best. The graham crackers need time to soften into a cake-like texture.
- Garnish and serve: Just before serving, top with fresh berries and a light dusting of powdered sugar if desired. Drizzle reserved berry syrup for presentation. Slice with a sharp knife, wiping clean between cuts.
Notes
Let cream cheese soften at room temperature for at least 30 minutes to avoid lumps. Do not overmix the cream; stop at stiff peaks to avoid turning it into butter. Pat berries dry after macerating using a slotted spoon to prevent a soggy cake. Press the top layer of graham crackers gently to help filling settle. Use a hot knife for clean slices. The cake tastes better on day two as flavors meld. For best results, make a day ahead.
Nutrition
- Serving Size: 1 slice (1/12 of cak
- Calories: 320
- Sugar: 24
- Sodium: 220
- Fat: 18
- Saturated Fat: 11
- Carbohydrates: 38
- Fiber: 2
- Protein: 4
Keywords: no-bake icebox cake, red white blueberry dessert, Fourth of July dessert, summer no-bake dessert, graham cracker cake, berry icebox cake, easy dessert recipe