Love this? Save it for later!
Share the inspiration with your friends
My son’s preschool spring picnic was in three hours and I’d completely forgotten I was supposed to bring snacks for the whole class. Everyone else would be bringing those perfectly decorated fruit skewers and homemade muffins that looked like they came from a bakery. I had a half-empty jar of peanut butter, some sad-looking oats, and a bag of chocolate chips that were probably past their prime. The panic was real, let me tell you.
I stood there staring into my pantry, mentally preparing to show up empty-handed and explain that my organizational skills were a myth. But then I spotted the honey, and something clicked. I mean, I’d made energy balls before, but never under this kind of pressure. I started throwing things together—peanut butter, honey, oats, whatever looked promising—and hoped for the best. Twenty minutes later, I had a tray of these little bites chilling in the fridge, and I honestly wasn’t sure if they’d be a hit or a total flop.
Fast forward to pick-up time, and I walked in with my container of lumpy, unassuming balls. The other moms had these gorgeous spreads, and I felt my face get warm. But then the kids descended. And you know that feeling when something you threw together in a panic becomes the thing everyone asks for? Yeah, that happened. Three different parents asked for the recipe, and my son told me I was “the best snack maker ever.” These easy no-bake peanut butter granola lunchbox bites have been a staple in our house ever since, and they’ve saved me more times than I can count.
Why You’ll Love This Recipe
Let’s be real—finding snacks that are both kid-approved and parent-approved feels like winning the lottery. These little bites check every box, and I’ve tested them on picky eaters, busy moms, and even my neighbor who claims she doesn’t like peanut butter (she asked for the recipe too, by the way).
- Quick & Easy: From start to finish, you’re looking at about 15 minutes of active work. The hardest part is waiting for them to chill, and honestly, that’s just a test of your willpower.
- Simple Ingredients: You probably have everything in your pantry right now. No special trips to the health food store, no obscure ingredients you’ll use once and forget about.
- Perfect for Lunchboxes: These bites are sturdy enough to survive the chaos of a backpack, and they don’t get mushy or weird by lunchtime. Trust me, I’ve tested this extensively.
- Crowd-Pleaser: I’ve brought these to playdates, birthday parties, and even a book club meeting (don’t judge). They disappear every single time, and adults go back for seconds just as often as kids do.
- Unbelievably Delicious: The combination of creamy peanut butter, sweet honey, and crunchy granola creates this texture that’s somehow both satisfying and addictive. You’ll find yourself sneaking one every time you open the fridge.
What makes these different from every other energy ball recipe out there? It’s the ratio. I’ve tweaked this over dozens of batches to get that perfect balance where they hold together beautifully without being too sticky or too dry. And the granola adds this extra crunch that makes them feel more like a treat than a health food. Honestly, they’re the kind of snack that makes you feel good about feeding them to your kids—and yourself.
What Ingredients You Will Need
This recipe uses simple, wholesome ingredients that come together to create something truly special. The beauty is in the simplicity, and each ingredient plays a crucial role in the final texture and flavor.
- Creamy Peanut Butter (1 cup): I prefer using a natural peanut butter with no added sugar or weird oils. The kind that separates in the jar? That’s the good stuff. Just give it a good stir before measuring. Skippy or Jif work fine too, but the texture will be slightly different—they’re a bit sweeter and firmer.
- Honey (1/2 cup): This is your natural sweetener and binder. Local honey is my go-to because it has a more complex flavor, but any honey works. If you’re vegan, maple syrup is an excellent substitute, though the bites will be slightly softer.
- Old-Fashioned Rolled Oats (1 1/2 cups): These provide the bulk and chewiness. Don’t use instant oats—they’ll turn into mush. Quick oats work in a pinch, but the texture won’t be quite as nice. I’ve tried both, and old-fashioned is definitely the winner.
- Granola (1 cup): This is where you can get creative. I love using a honey almond granola for extra crunch, but any granola you enjoy eating by the handful will work. If your granola has large clusters, give it a gentle crush before adding it in.
- Mini Chocolate Chips (1/2 cup): Because chocolate makes everything better. Mini chips distribute more evenly than regular-sized ones, and they add little pockets of sweetness throughout. Dark chocolate chips are great for a less sweet version, or use milk chocolate if you’re feeding a crowd of kids.
- Flaxseed Meal (2 tablespoons): This is my secret ingredient. It helps bind everything together and adds a boost of omega-3s. You can skip it, but you’ll need to add a tablespoon more peanut butter to compensate. I promise you won’t taste it.
- Vanilla Extract (1 teaspoon): Just a splash to round out the flavors. Pure vanilla extract is worth the splurge here—the imitation stuff has a chemical aftertaste that’s hard to hide.
- Pinch of Salt (1/4 teaspoon): Only if your peanut butter is unsalted. Salt heightens all the other flavors and keeps these bites from tasting flat. I learned this the hard way after one particularly bland batch.
Equipment Needed
You don’t need a fancy kitchen to make these bites, which is honestly my favorite thing about them. Here’s what you’ll need:
- Large Mixing Bowl: Any big bowl works—I use my grandmother’s old ceramic one, but a stainless steel or glass bowl is perfect too. You just need enough room to mix everything without ingredients flying everywhere.
- Measuring Cups and Spoons: Accurate measurements matter here, especially with the peanut butter and honey. If you’re off, the texture can go from perfect to crumbly or sticky real quick.
- Rubber Spatula or Wooden Spoon: The mixture gets thick, so you want something sturdy. I prefer a silicone spatula because it scrapes the sides clean, but a good old wooden spoon works just fine.
- Baking Sheet or Large Plate: For chilling the bites. Line it with parchment paper or wax paper for easy removal. I’ve used a dinner plate in a pinch—no judgment here.
- Cookie Scoop or Tablespoon: For portioning the mixture into uniform bites. A #60 cookie scoop (about 1 tablespoon) is my go-to. If you don’t have one, just use two spoons—one to scoop and one to scrape.
- Parchment Paper: Not strictly necessary, but it makes cleanup so much easier. Plus, the bites won’t stick to the paper while they’re chilling.
- Refrigerator: This is non-negotiable. The bites need at least 30 minutes to set up, and the fridge is where the magic happens. Your freezer works too if you’re in a hurry.
Preparation Method
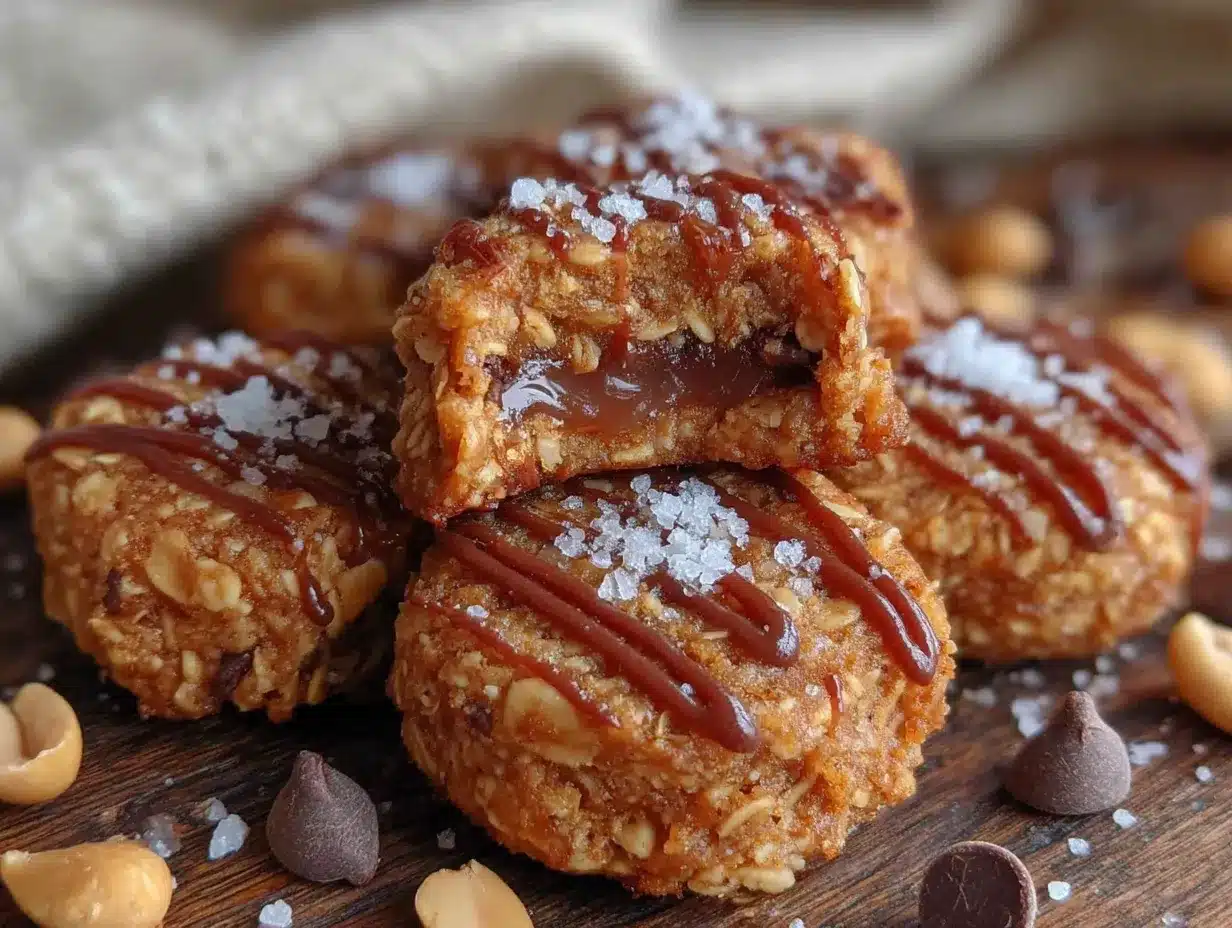
Alright, let’s get to the fun part. I’ve made these so many times I could do it in my sleep, but I’ll walk you through every step like you’re standing right next to me in my kitchen.
- Combine the wet ingredients: In your large mixing bowl, add 1 cup of creamy peanut butter and 1/2 cup of honey. If your peanut butter is cold and stiff, give it a quick stir to loosen it up. Add 1 teaspoon of vanilla extract and 1/4 teaspoon of salt (if using). Mix everything together until it’s smooth and well combined. The mixture should look glossy and smell amazing at this point.
- Add the dry ingredients: Pour in 1 1/2 cups of old-fashioned rolled oats, 1 cup of granola, 1/2 cup of mini chocolate chips, and 2 tablespoons of flaxseed meal. Don’t dump everything in at once—add the oats first, give it a stir, then add the rest. This prevents the chocolate chips from getting crushed.
- Mix thoroughly: This is where you need a little arm strength. The mixture will be thick and sticky, so switch to your hands if the spatula isn’t cutting it. I always end up using my hands to really work everything together. You want every oat and granola cluster to be coated in the peanut butter-honey mixture. Keep mixing until you can’t see any dry spots.
- Check the consistency: Take a small amount of the mixture and squeeze it in your hand. It should hold together firmly without crumbling. If it’s too dry and falling apart, add another tablespoon of peanut butter or honey. If it’s too sticky to handle, add a tablespoon more oats. I’ve had to adjust both ways, and it’s totally normal.
- Portion the bites: Line your baking sheet or plate with parchment paper. Using your cookie scoop or tablespoon, scoop out portions of the mixture. I like to pack the scoop firmly to make sure each bite is compact. Drop them onto the parchment paper, spacing them about an inch apart—they won’t spread, so it’s mostly for easy grabbing.
- Roll into balls: Here’s a pro tip: lightly wet your hands with a little water before rolling. This prevents the mixture from sticking to your palms and makes the process so much smoother. Roll each portion into a smooth ball. Don’t over-roll, or they can get greasy. Just a few gentle rotations should do it.
- Chill and set: Place the baking sheet in the refrigerator for at least 30 minutes. I know it’s tempting to sneak one right away, but trust me—they need this time to firm up. After 30 minutes, they should be firm to the touch but still slightly soft inside. For the best texture, let them chill for a full hour.
- Final touch (optional): If you want them to look extra pretty, press a few extra mini chocolate chips or a sprinkle of flaky sea salt on top of each bite before they set. This is purely cosmetic, but it makes them look like something from a fancy bakery.
Cooking Tips & Techniques
I’ve made plenty of mistakes with these bites so you don’t have to. Here are the lessons I learned the hard way:
The temperature matters. If your kitchen is warm, the peanut butter will be softer and the mixture will be stickier. On hot days, I pop the bowl in the fridge for 10 minutes before rolling. On cold days, I might need to microwave the peanut butter for 10 seconds to make it more workable. Pay attention to your environment—it makes a difference.
Don’t skip the chill time. I once served these after only 15 minutes in the fridge because I was in a rush. They were a mess—falling apart, sticky, and not at all satisfying. The chill time isn’t optional; it’s where the flavors meld and the texture sets. Plan ahead so you’re not tempted to rush.
Consistency is key. Every batch of peanut butter behaves differently. Natural peanut butters that are oilier will make a softer mixture. Thicker, processed peanut butters will make a firmer mixture. If your first batch is too dry, add a little more honey. Too wet? More oats. I keep a small bag of extra oats on hand just for adjustments.
Multitasking strategy: While the bites are chilling, clean up your kitchen. The peanut butter and honey can be stubborn to wash off, so soak your bowl and utensils in hot soapy water while you wait. It’s a small thing, but walking into a clean kitchen after snack prep feels amazing.
Variations & Adaptations
One of the best things about this recipe is how flexible it is. Here are some variations I’ve tried and loved:
- Chocolate Peanut Butter Bliss: Swap 1/4 cup of the oats for 1/4 cup of cocoa powder. You’ll need to add an extra tablespoon of honey to balance the bitterness. These taste like fudgy brownie bites, and my kids go absolutely crazy for them.
- Trail Mix Bites: Replace the granola with an equal amount of your favorite trail mix. I’ve used one with dried cranberries, almonds, and sunflower seeds. Just make sure any large pieces are chopped smaller so the bites hold together. The dried fruit adds a nice chewy texture.
- Sunflower Seed Version: For a nut-free option (perfect for school lunchboxes), swap the peanut butter for sunflower seed butter. The flavor is different but still delicious. Note that sunflower seed butter can react with baking soda if you ever bake with it, but since these are no-bake, you’re totally fine. Just add an extra tablespoon of honey because sunflower seed butter is less sweet.
- Coconut Lover’s Bites: Add 1/2 cup of unsweetened shredded coconut to the mixture. Toast the coconut first for an extra nutty flavor—just spread it on a baking sheet and bake at 350°F for 5-7 minutes, watching carefully so it doesn’t burn. I made this version for a tropical-themed party, and it was a hit.
- Spiced Pumpkin Bites: In the fall, I swap 1/4 cup of the oats for 1/4 cup of pumpkin puree and add 1 teaspoon of pumpkin pie spice. The puree makes the mixture a bit wetter, so you might need to add an extra 2 tablespoons of oats. These taste like autumn in a bite-sized package.
Serving & Storage Suggestions
These bites are best served cold or at room temperature. I personally love them straight from the fridge—they’re firmer and more satisfying that way. But if you’re packing them in a lunchbox, they’ll be perfectly fine at room temperature for several hours. I’ve even taken them on hiking trips, and they held up beautifully.
For presentation, arrange them on a platter with some fresh fruit and a drizzle of honey. They look gorgeous on a wooden board for parties, or you can pop them into a mason jar for a cute gift idea. I’ve given them as teacher appreciation gifts with a little tag that says “Thanks for being a peanut!”—corny, but it always gets a smile.
Storage: Keep these bites in an airtight container in the refrigerator for up to 2 weeks. Honestly, they never last that long in my house, but they’ll stay fresh and delicious. You can also freeze them for up to 3 months. Just layer them between sheets of parchment paper in a freezer-safe container. When you’re ready to eat, let them thaw in the fridge overnight or at room temperature for about 15 minutes.
One thing I’ve noticed: the flavors actually get better after a day or two in the fridge. The oats absorb some of the moisture, and everything melds together into this perfect, harmonious bite. So if you can resist eating them all on day one, you’re in for a treat.
Nutritional Information & Benefits
Let’s talk about what’s actually in these little powerhouses. Per bite (based on making about 24 bites from this recipe), you’re looking at roughly:
- Calories: 150-170
- Protein: 5-6 grams
- Healthy Fats: 8-10 grams (from peanut butter and granola)
- Fiber: 2-3 grams
- Sugar: 8-10 grams (mostly from honey, with some from chocolate chips)
The peanut butter provides protein and healthy monounsaturated fats that keep you full and satisfied. Oats are packed with soluble fiber, which is great for heart health and digestion. The flaxseed meal adds omega-3 fatty acids, which are fantastic for brain health—perfect for growing kids. And the chocolate chips? Well, they’re just there to make life better, and I’m not going to apologize for that.
These bites are naturally gluten-free if you use certified gluten-free oats and granola. They’re also dairy-free if you use dairy-free chocolate chips. Always check labels if you’re serving someone with allergies, but generally, this recipe is pretty friendly for most dietary needs.
Conclusion
Look, I know there are a million snack recipes out there. But these easy no-bake peanut butter granola lunchbox bites are the real deal. They’ve saved me from showing up empty-handed to countless events, they’ve made my kids feel special, and they’ve become my go-to when I need something quick that actually tastes good. The best part? You can make them your own. Swap ingredients, adjust the sweetness, add whatever mix-ins your family loves. That’s the beauty of a simple recipe—it’s a starting point, not a rulebook.
I’d love to hear how these turn out for you. Did you try a fun variation? Did your kids gobble them up? Drop a comment below and let me know—I read every single one, and your feedback honestly makes my day. And if you share a photo on Pinterest or Instagram, tag me so I can see your creations. Happy snacking, friend!
Frequently Asked Questions
Can I use crunchy peanut butter instead of creamy?
Absolutely! Crunchy peanut butter adds even more texture and works perfectly in this recipe. Just keep in mind that the final bites will have little peanut pieces throughout, which some people love. The binding properties are the same, so you don’t need to adjust anything else.
My mixture is too crumbly and won’t hold together. What went wrong?
This usually happens when the peanut butter is too thick or the oats are too dry. Try adding an extra tablespoon of honey or a splash of warm water to help everything stick. If that doesn’t work, melt the peanut butter slightly in the microwave (about 15 seconds) before mixing. The warmth helps it bind better.
Can I make these without honey?
Yes! Maple syrup is the best substitute, but you can also use agave nectar or brown rice syrup. Keep in mind that different liquid sweeteners have different sweetness levels and consistency. Maple syrup will make the mixture slightly thinner, so you might need to add an extra tablespoon of oats to compensate.
How long do these stay fresh in the freezer?
These bites freeze beautifully for up to 3 months. I like to make a double batch and keep a stash in the freezer for busy mornings or last-minute school events. Just make sure they’re in an airtight container or freezer bag to prevent freezer burn. They thaw in about 15 minutes at room temperature.
Can I add protein powder to make them more filling?
You can, but be careful with the ratio. Add about 1/4 cup of your favorite protein powder and reduce the oats by the same amount. The protein powder will absorb more moisture, so you’ll likely need to add an extra tablespoon of peanut butter or honey. Vanilla or chocolate protein powder works best flavor-wise. I’ve tried unflavored, and it was a bit bland.
Pin This Recipe!
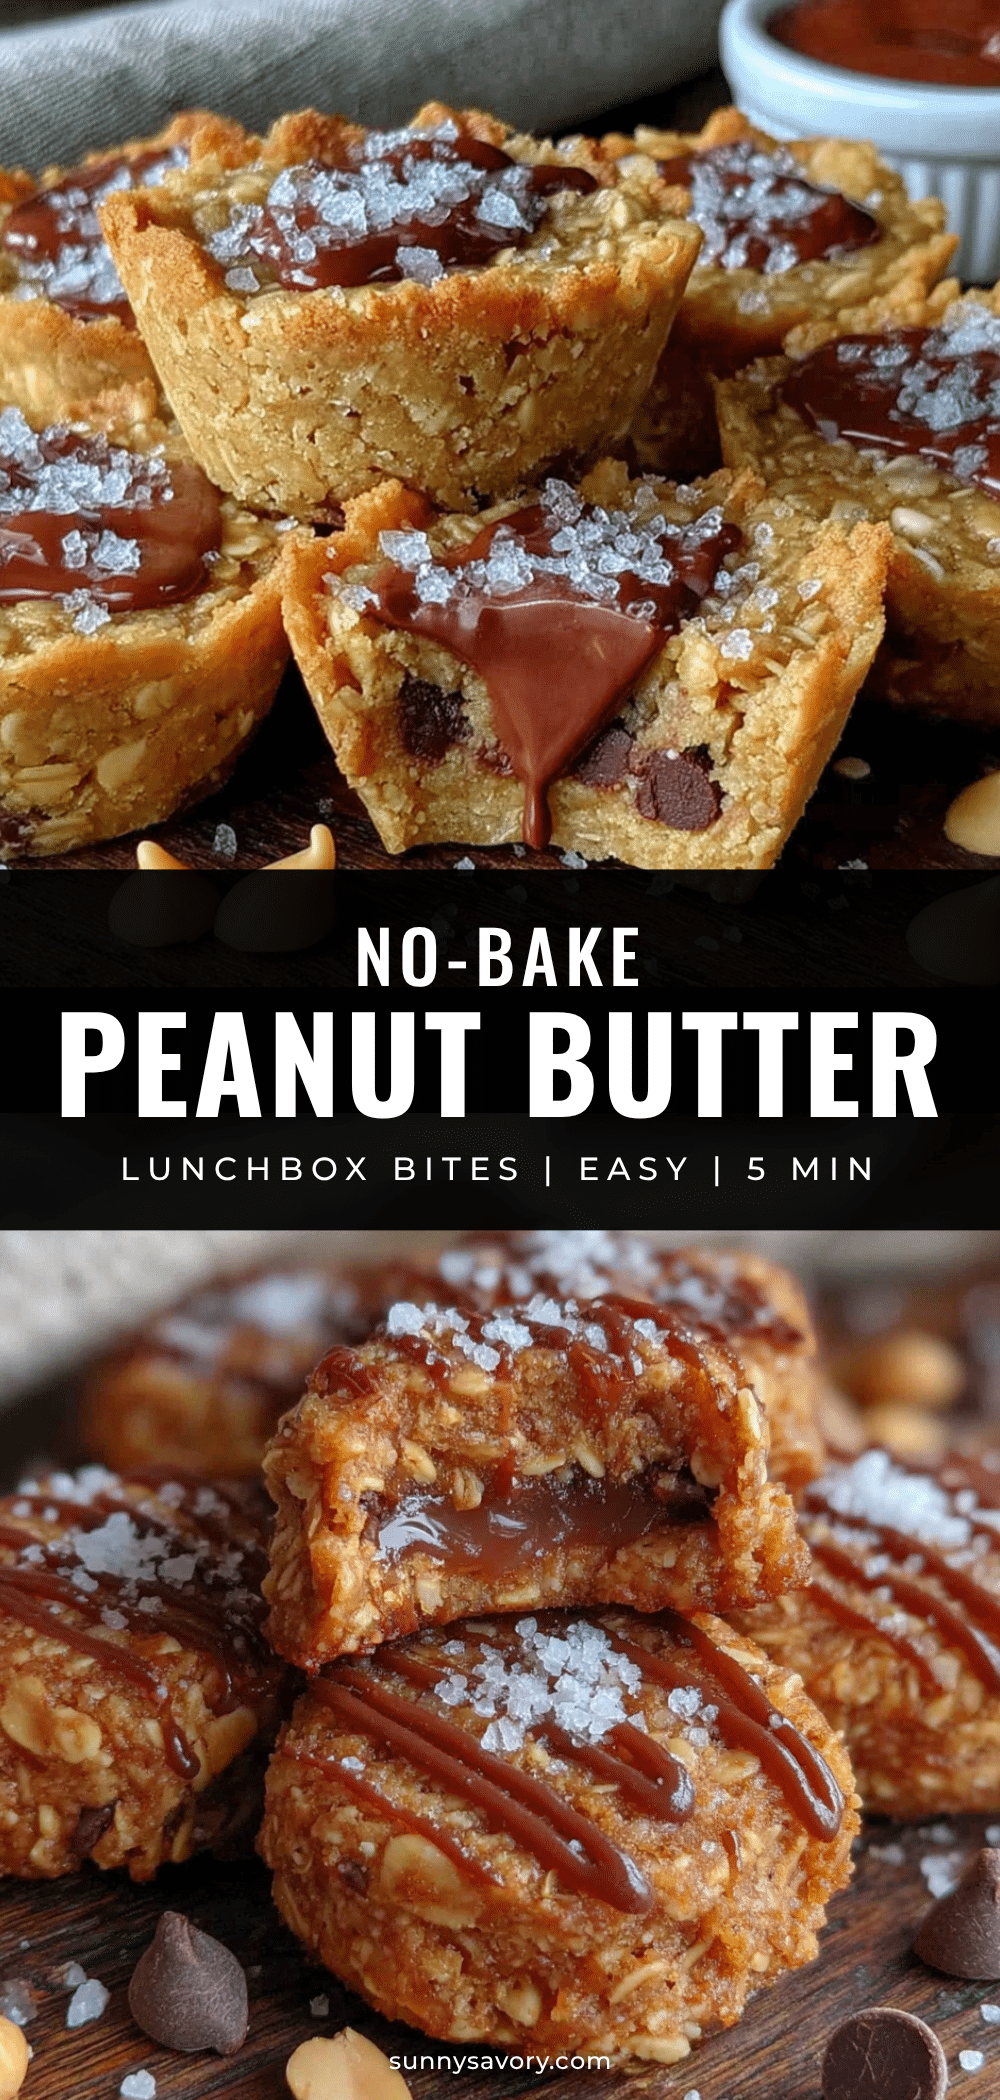
Easy No-Bake Peanut Butter Granola Lunchbox Bites
These no-bake peanut butter granola bites are the perfect quick and easy snack for lunchboxes, playdates, or any time you need a delicious treat. Made with simple pantry ingredients, they’re kid-approved and parent-approved.
- Prep Time: 15 minutes
- Cook Time: 0 minutes
- Total Time: 45 minutes (including chilling time)
- Yield: 24 bites 1x
- Category: Snack
- Cuisine: American
Ingredients
- 1 cup creamy peanut butter
- 1/2 cup honey
- 1 1/2 cups old-fashioned rolled oats
- 1 cup granola
- 1/2 cup mini chocolate chips
- 2 tablespoons flaxseed meal
- 1 teaspoon vanilla extract
- 1/4 teaspoon salt (if peanut butter is unsalted)
Instructions
- In a large mixing bowl, combine 1 cup creamy peanut butter, 1/2 cup honey, 1 teaspoon vanilla extract, and 1/4 teaspoon salt (if using). Mix until smooth and well combined.
- Add 1 1/2 cups old-fashioned rolled oats, 1 cup granola, 1/2 cup mini chocolate chips, and 2 tablespoons flaxseed meal. Stir until all dry ingredients are evenly coated.
- Mix thoroughly, using your hands if needed, until the mixture holds together when squeezed. If too dry, add a tablespoon of peanut butter or honey; if too sticky, add a tablespoon of oats.
- Line a baking sheet or plate with parchment paper. Using a cookie scoop or tablespoon, portion the mixture into uniform balls.
- Lightly wet your hands with water and roll each portion into a smooth ball. Place on the prepared baking sheet.
- Refrigerate for at least 30 minutes, or up to 1 hour for best texture, until firm.
- Optional: Press a few extra mini chocolate chips or a sprinkle of flaky sea salt on top before setting.
Notes
For best results, use natural peanut butter (stirred well). The bites can be stored in an airtight container in the refrigerator for up to 2 weeks or frozen for up to 3 months. The flavors improve after a day in the fridge. If your kitchen is warm, chill the mixture for 10 minutes before rolling to prevent stickiness.
Nutrition
- Serving Size: 1 bite
- Calories: 160
- Sugar: 9
- Sodium: 80
- Fat: 9
- Saturated Fat: 2
- Carbohydrates: 18
- Fiber: 2.5
- Protein: 5.5
Keywords: no-bake, peanut butter, granola, lunchbox bites, energy balls, kid-friendly, easy snack



