Love this? Save it for later!
Share the inspiration with your friends
I was standing in the frozen food aisle last Saturday, staring at a bag of crinkle-cut fries, when it hit me. Not the bag — the memory. The smell of chili simmering on the stove, the sound of the TV blaring from the living room, the way my best friend Mike would yell “TOUCHDOWN!” and then immediately ask if the cheese was ready yet. I was twenty-three, living in a cramped apartment with three roommates, and we had absolutely no business hosting a game day party. But we did it anyway, every single weekend that season, and the centerpiece of those chaotic, glorious afternoons was always the same thing: a giant sheet pan of chili cheese fries that we’d set in the middle of the coffee table like some kind of edible trophy.
Honestly, I’d forgotten about those days until that moment in the grocery store. I mean, life gets busy, right? You trade sheet pan dinners for meal prep containers and suddenly you’re eating quinoa salad at your desk while pretending you don’t miss the mess of real food. But standing there, I grabbed the bag of fries without thinking. Then the ground beef. Then the block of cheddar. My cart filled up like my stomach remembered something my brain had filed away. And let me tell you, recreating that Ultimate Game Day Chili Cheese Fries Bar in my own kitchen last Sunday was like visiting an old friend. Maybe you’ve had that feeling — when a recipe isn’t just food, it’s a time machine.
That first bite, with the crispy fries, the rich chili, the melted cheese pulling in strings, and the cold sour cream cutting through it all — I closed my eyes. Mike would’ve made fun of me for that. But honestly, this recipe stayed with me because it’s not complicated. It’s not fancy. It’s just good, honest food that brings people together. And that’s exactly why I keep making it.
Why You’ll Love This Recipe
Let me tell you why this Ultimate Game Day Chili Cheese Fries Bar is about to become your new favorite thing to make. I’ve tested this recipe about seven times now, tweaking the chili spice blend, adjusting the fry cooking time, and figuring out the best cheese sauce consistency. So trust me — every detail here is intentional.
- Quick & Easy: The whole setup comes together in about 45 minutes, which is perfect for game day when you want to spend time watching the game, not slaving in the kitchen.
- Simple Ingredients: You probably already have most of these in your pantry. No weird specialty items, no expensive cuts of meat — just real, honest ingredients.
- Perfect for Game Day: This is the ultimate crowd-pleaser for Super Bowl parties, playoff games, or even just a casual Saturday with friends.
- Crowd-Pleaser: I’ve served this to picky eaters, vegetarians (with a bean swap), and even my uncle who “doesn’t do toppings” — everyone goes back for seconds.
- Unbelievably Delicious: The combination of crispy fries, hearty chili, creamy cheese sauce, and fresh toppings is next-level comfort food.
What makes this different from every other chili cheese fries recipe out there? It’s the bar concept. Instead of assembling everything on one sad plate that gets soggy in minutes, you set up a build-your-own station. Everyone gets to customize their plate with exactly what they want. Plus, I’ve perfected the cheese sauce so it stays smooth and doesn’t get that grainy texture that happens when you rush it. This isn’t just another version — it’s the best version.
This recipe is the kind that makes you close your eyes after the first bite. It’s comfort food reimagined — faster, more customizable, but with the same soul-soothing satisfaction. Perfect for impressing your game day guests without stress, or turning a simple weekend meal into something memorable.
What Ingredients You Will Need
This Ultimate Game Day Chili Cheese Fries Bar uses simple, wholesome ingredients to deliver bold flavor and satisfying texture without the fuss. Most of these are pantry staples or easy to find at any grocery store.
For the Chili
- 1 lb ground beef (80/20 works best for flavor; can substitute ground turkey)
- 1 medium yellow onion, finely diced
- 3 cloves garlic, minced
- 1 can (15 oz) diced tomatoes, undrained
- 1 can (15 oz) kidney beans, drained and rinsed
- 2 tablespoons tomato paste
- 1 tablespoon chili powder (I prefer McCormick for consistent heat)
- 1 teaspoon ground cumin
- 1 teaspoon smoked paprika
- ½ teaspoon cayenne pepper (optional, for heat)
- Salt and black pepper to taste
- ½ cup beef broth (or water if that’s what you have)
For the Fries
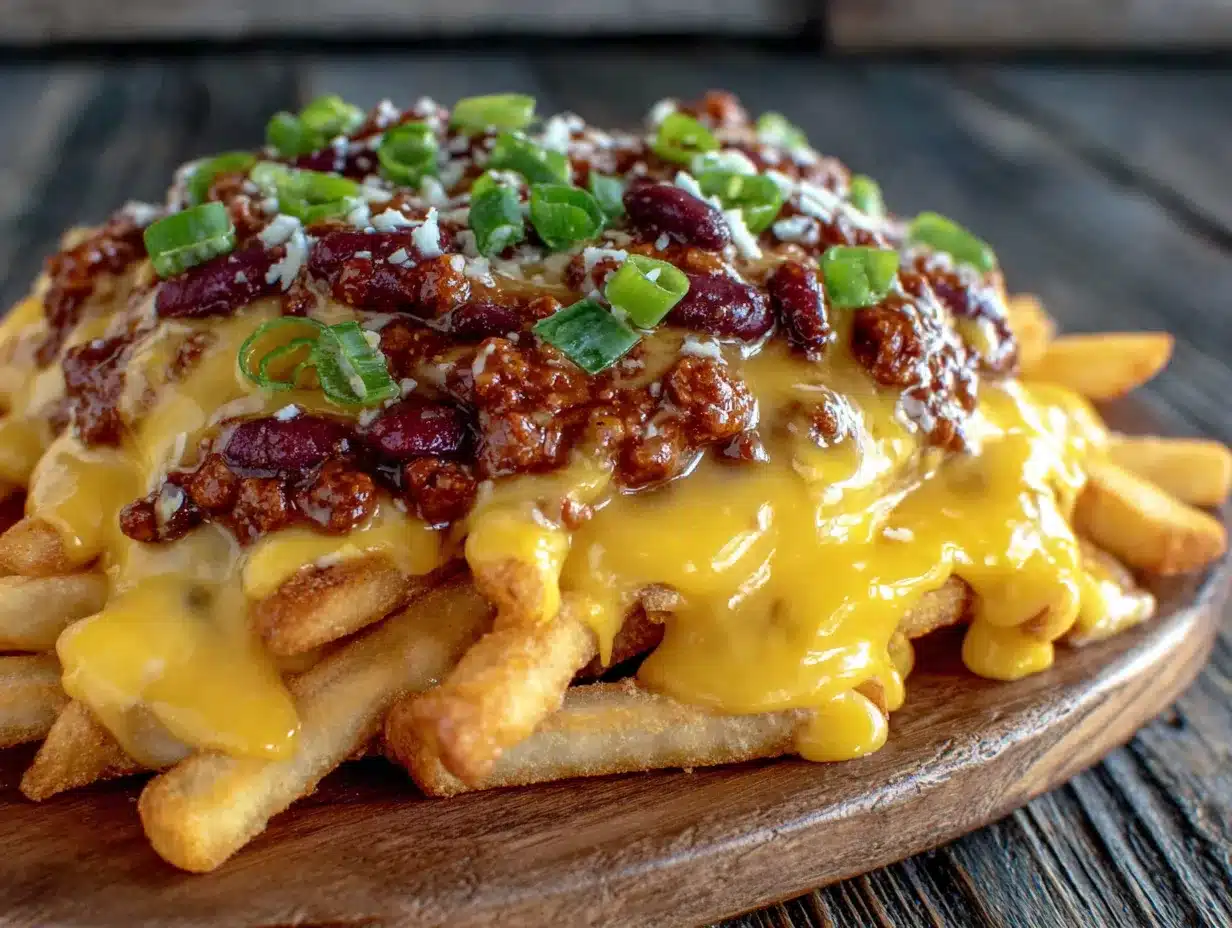
- 1 bag (28 oz) frozen crinkle-cut fries (or steak fries for a heartier base)
- 2 tablespoons olive oil
- Salt for sprinkling
For the Cheese Sauce
- 2 tablespoons unsalted butter
- 2 tablespoons all-purpose flour
- 1 cup whole milk (warm — this prevents lumps)
- 2 cups shredded sharp cheddar cheese (freshly shredded melts better than pre-shredded)
- ½ teaspoon Dijon mustard (trust me, it enhances the cheese flavor)
- Pinch of cayenne pepper
For the Toppings Bar
- 1 cup sour cream
- ½ cup pickled jalapeños
- ½ cup diced tomatoes
- ¼ cup sliced green onions
- ¼ cup chopped fresh cilantro
- 1 avocado, diced (adds creaminess)
- Hot sauce of choice (I like Cholula for game day)
For the ground beef, I recommend using 80/20 because the extra fat gives the chili a richer flavor. If you’re watching your intake, ground turkey works well — just add an extra tablespoon of olive oil when browning. For the cheese, please shred it yourself from a block. I know it’s an extra step, but pre-shredded cheese has anti-caking agents that make the sauce grainy. You’ll thank me later.
Equipment Needed
- Large Dutch oven or heavy-bottomed pot (for the chili)
- Large baking sheet (half-sheet size is perfect)
- Medium saucepan (for the cheese sauce)
- Wooden spoon or spatula
- Cheese grater (box grater or Microplane)
- Cutting board and sharp knife
- Measuring cups and spoons
- Small bowls for toppings bar
- Whisk (for smooth cheese sauce)
If you don’t have a Dutch oven, any large pot with a thick bottom will work — just keep an eye on the heat so the chili doesn’t burn. For the baking sheet, I’ve used a 9×13 pan in a pinch, but the fries don’t crisp up as well. A cheap half-sheet pan from the grocery store works great and costs about $10. And honestly? Don’t overthink the equipment. I’ve made this with a $5 saucepan and a fork for whisking. It still turned out amazing.
Preparation Method
Let’s get cooking. This Ultimate Game Day Chili Cheese Fries Bar comes together in stages, so read through everything before you start. Trust me — timing is everything here.
- Preheat your oven to 425°F (220°C). Spread the frozen fries in a single layer on your baking sheet. Drizzle with olive oil and toss to coat. Bake for 20-25 minutes, flipping halfway through, until golden and crispy. Pro tip: don’t overcrowd the pan. If you’re making a big batch, use two sheets.
- While the fries bake, start the chili. Heat your Dutch oven over medium-high heat. Add the ground beef and cook, breaking it apart with a wooden spoon, until browned — about 6-8 minutes. Don’t drain all the fat; leave about a tablespoon for flavor. Add the diced onion and cook for 3 minutes until softened. Add the garlic and cook for 30 seconds until fragrant. You’ll know it’s ready when your kitchen smells like a stadium concession stand.
- Add the tomato paste, chili powder, cumin, smoked paprika, and cayenne. Stir constantly for 1 minute. This toasts the spices and deepens their flavor. Pour in the diced tomatoes with their juices and the beef broth. Bring to a simmer, then reduce heat to low. Add the kidney beans. Let it simmer uncovered for 15-20 minutes, stirring occasionally. The chili should thicken slightly. Season with salt and pepper to taste.
- Make the cheese sauce about 5 minutes before the fries are done. In a medium saucepan, melt the butter over medium heat. Whisk in the flour and cook for 1 minute — this is your roux, and it should look like wet sand. Slowly pour in the warm milk while whisking constantly. Keep whisking until the mixture thickens, about 2-3 minutes. It should coat the back of a spoon. Remove from heat and stir in the shredded cheddar cheese until completely melted. Add the Dijon mustard and cayenne. Taste and add salt if needed. If the sauce seems too thick, whisk in a splash more warm milk.
- While everything cooks, prep your toppings bar. Dice the tomatoes, slice the green onions, chop the cilantro, and cube the avocado. Arrange everything in small bowls. This is where the “bar” concept comes alive — let people build their own plates.
- Assemble the fries bar. When the fries are done, transfer them to a large platter or leave them on the baking sheet (I like to serve it family-style on the sheet pan for that casual game day vibe). Ladle the chili over the fries. Drizzle with cheese sauce. Then let everyone add their own toppings.
One thing I learned the hard way: don’t pour the cheese sauce over everything before serving. Some people want extra cheese, some want less, and some weirdos (like my brother-in-law) don’t want any at all. Keep the sauce on the side if you can. Also, if the chili seems too thin, let it simmer a bit longer uncovered. If it’s too thick, add a splash of broth.
Cooking Tips & Techniques
After making this Ultimate Game Day Chili Cheese Fries Bar more times than I care to admit, I’ve picked up a few tricks that make a real difference.
Don’t skip the roux for the cheese sauce. I know it’s tempting to just melt cheese and pour it over everything. But trust me — a proper roux gives you that silky, restaurant-quality sauce that clings to every fry instead of pooling at the bottom of the plate. The first time I made this, I tried the shortcut method with just melted cheese and milk. It was a clumpy disaster. Learn from my mistakes.
Season the fries while they’re hot. As soon as they come out of the oven, sprinkle them with a little salt while they’re still sizzling. The salt sticks better and the flavor penetrates. Don’t oversalt though — the chili and cheese sauce are already seasoned.
Toast your spices. That step where you cook the chili powder and cumin with the tomato paste? Don’t rush it. Toasting the spices for that full minute releases their essential oils and makes the chili taste like it simmered for hours, not minutes. This is the difference between “good” chili and “wait, what’s your secret?” chili.
Keep everything warm but separate. If you’re serving this for a party, keep the chili in a slow cooker on warm, the cheese sauce in a small saucepan on low heat (stir occasionally), and the fries on a baking sheet in a 200°F oven. This way, nothing gets cold or soggy while people are going back for seconds.
Multitasking is your friend. While the fries bake, you can brown the beef. While the chili simmers, make the cheese sauce and prep the toppings. I’ve got this down to 45 minutes start to finish, and that includes cleanup.
Variations & Adaptations
One of the best things about this Ultimate Game Day Chili Cheese Fries Bar is how easy it is to adapt. Here are some variations I’ve tried and loved.
Vegetarian Version: Swap the ground beef for 1½ cups of cooked lentils or a plant-based ground meat substitute. I use brown lentils because they hold their shape and have that meaty texture. Add an extra tablespoon of olive oil when sautéing the onions. My vegetarian friend Sarah couldn’t tell the difference — she actually asked for the recipe.
Loaded Baked Potato Fries: Instead of regular fries, use thick-cut steak fries and top them with chili, cheese sauce, crumbled bacon, and a dollop of sour cream. It’s dangerously good. I made this for a potluck and someone asked if I catered. I don’t, but I took it as a compliment.
Spicy Southwest Twist: Add a can of drained corn and a diced chipotle pepper in adobo sauce to the chili. Top the finished fries with pickled red onions and a squeeze of lime. The smokiness from the chipotle pairs perfectly with the cheese sauce.
Sweet Potato Fries Base: For a slightly healthier take, use frozen sweet potato fries. Bake them a few minutes longer until they’re extra crispy. The sweetness balances the spicy chili beautifully. My kids actually prefer this version — don’t tell them it’s healthier.
Dairy-Free Option: Use a dairy-free butter substitute and unsweetened oat milk for the cheese sauce. Look for a shredded vegan cheddar that melts well — Daiya and Violife are both good options. The sauce won’t be as creamy, but it still tastes great.
Serving & Storage Suggestions
This Ultimate Game Day Chili Cheese Fries Bar is best served immediately while the fries are still crispy and the cheese sauce is warm and pourable. I like to set everything up on the kitchen island or counter and let people build their own plates. It’s interactive, it’s fun, and it means less work for you.
For the perfect game day spread, serve these fries alongside some cold beers, a big bowl of guacamole with tortilla chips, and maybe a simple side salad for anyone who wants to pretend they’re being healthy. The fries pair surprisingly well with a crisp lager or even a light IPA — the bitterness cuts through the richness.
Storage: If you have leftovers (unlikely, but possible), store the chili, cheese sauce, and fries separately in airtight containers in the refrigerator. The chili keeps for up to 4 days, and the cheese sauce for about 3 days. The fries will get soft, but don’t throw them away — they’re still good for something else.
Reheating: Reheat the chili in a saucepan over medium heat, adding a splash of water if it’s too thick. The cheese sauce should be reheated gently over low heat, whisking constantly. Don’t microwave it — it’ll separate and get greasy. For the fries, spread them on a baking sheet and reheat in a 400°F oven for 5-7 minutes until they crisp back up.
Freezer: The chili freezes beautifully for up to 3 months. I often make a double batch and freeze half for another day. The cheese sauce doesn’t freeze well (it gets grainy), so make that fresh. And obviously, don’t freeze the fries.
Nutritional Information & Benefits
Let’s be real — this is indulgent food. But that doesn’t mean it can’t have some redeeming qualities. Here’s a rough estimate per serving (based on about 1 cup of fries with chili, cheese sauce, and a tablespoon of sour cream):
- Calories: 520
- Protein: 28g
- Fat: 32g
- Carbohydrates: 35g
- Fiber: 8g
- Sugar: 6g
- Sodium: 890mg
The kidney beans in the chili are a great source of fiber and plant-based protein, which helps keep you full. The tomatoes provide lycopene, an antioxidant linked to heart health. And the cheese sauce gives you a good dose of calcium. Is it health food? No. But it’s real food made from scratch, and that counts for something.
If you’re watching your sodium, use low-sodium beef broth and no-salt-added canned tomatoes. You can also reduce the cheese and use Greek yogurt instead of sour cream for a lighter option. But honestly? Game day is not the day for counting calories. Enjoy it.
Conclusion
This Ultimate Game Day Chili Cheese Fries Bar is more than just a recipe — it’s an experience. It’s the kind of food that makes people gather around the kitchen, laughing and building their perfect plates, reaching over each other for the jalapeños and the hot sauce. It’s messy, it’s indulgent, and it’s absolutely worth every single calorie.
I love this recipe because it reminds me that the best meals aren’t about perfection. They’re about connection. About the way a shared plate of fries can turn strangers into friends and a regular Sunday into something special. So go ahead — customize it, make it your own, pile on the toppings until your plate is groaning. That’s the whole point.
I’d love to hear how yours turns out! Drop a comment below and tell me what toppings you added, or tag me in your photos if you share them. And if you come up with a wild variation I haven’t tried, definitely let me know — I’m always looking for my next game day obsession. Happy cooking, friends!
Frequently Asked Questions
Can I make the chili ahead of time?
Absolutely! The chili actually tastes better the next day after the flavors have had time to meld. Make it a day ahead, let it cool, and store it in the fridge. Just reheat it gently on the stove while the fries are baking. This is my favorite time-saving trick for game day parties.
What’s the best type of fries to use?
I prefer crinkle-cut or steak fries because they’re sturdy enough to hold up under the chili and cheese sauce without getting soggy immediately. Shoestring fries are too thin and will turn to mush. Waffle fries also work great if you want extra surface area for toppings.
Can I make this in a slow cooker?
Yes! Brown the beef and sauté the onions on the stove first, then transfer everything (including the beans and tomatoes) to a slow cooker. Cook on low for 4-6 hours or high for 2-3 hours. Make the cheese sauce on the stove right before serving. The fries still need to be baked or air-fried for crispiness.
How do I prevent the cheese sauce from getting grainy?
The secret is low heat and patience. Always shred your own cheese from a block — pre-shredded cheese has anti-caking agents that cause graininess. Use warm milk (not cold) when making the roux, and remove the saucepan from heat before adding the cheese. Stir gently until just melted. Overheating is the number one cause of grainy cheese sauce.
What if I don’t eat meat? Can I still enjoy this?
Definitely! Swap the ground beef for cooked lentils, black beans, or a plant-based meat substitute. The chili will still be hearty and flavorful. Just add an extra tablespoon of olive oil when cooking the onions to make up for the missing beef fat. My vegetarian friends rave about this version.
Pin This Recipe!
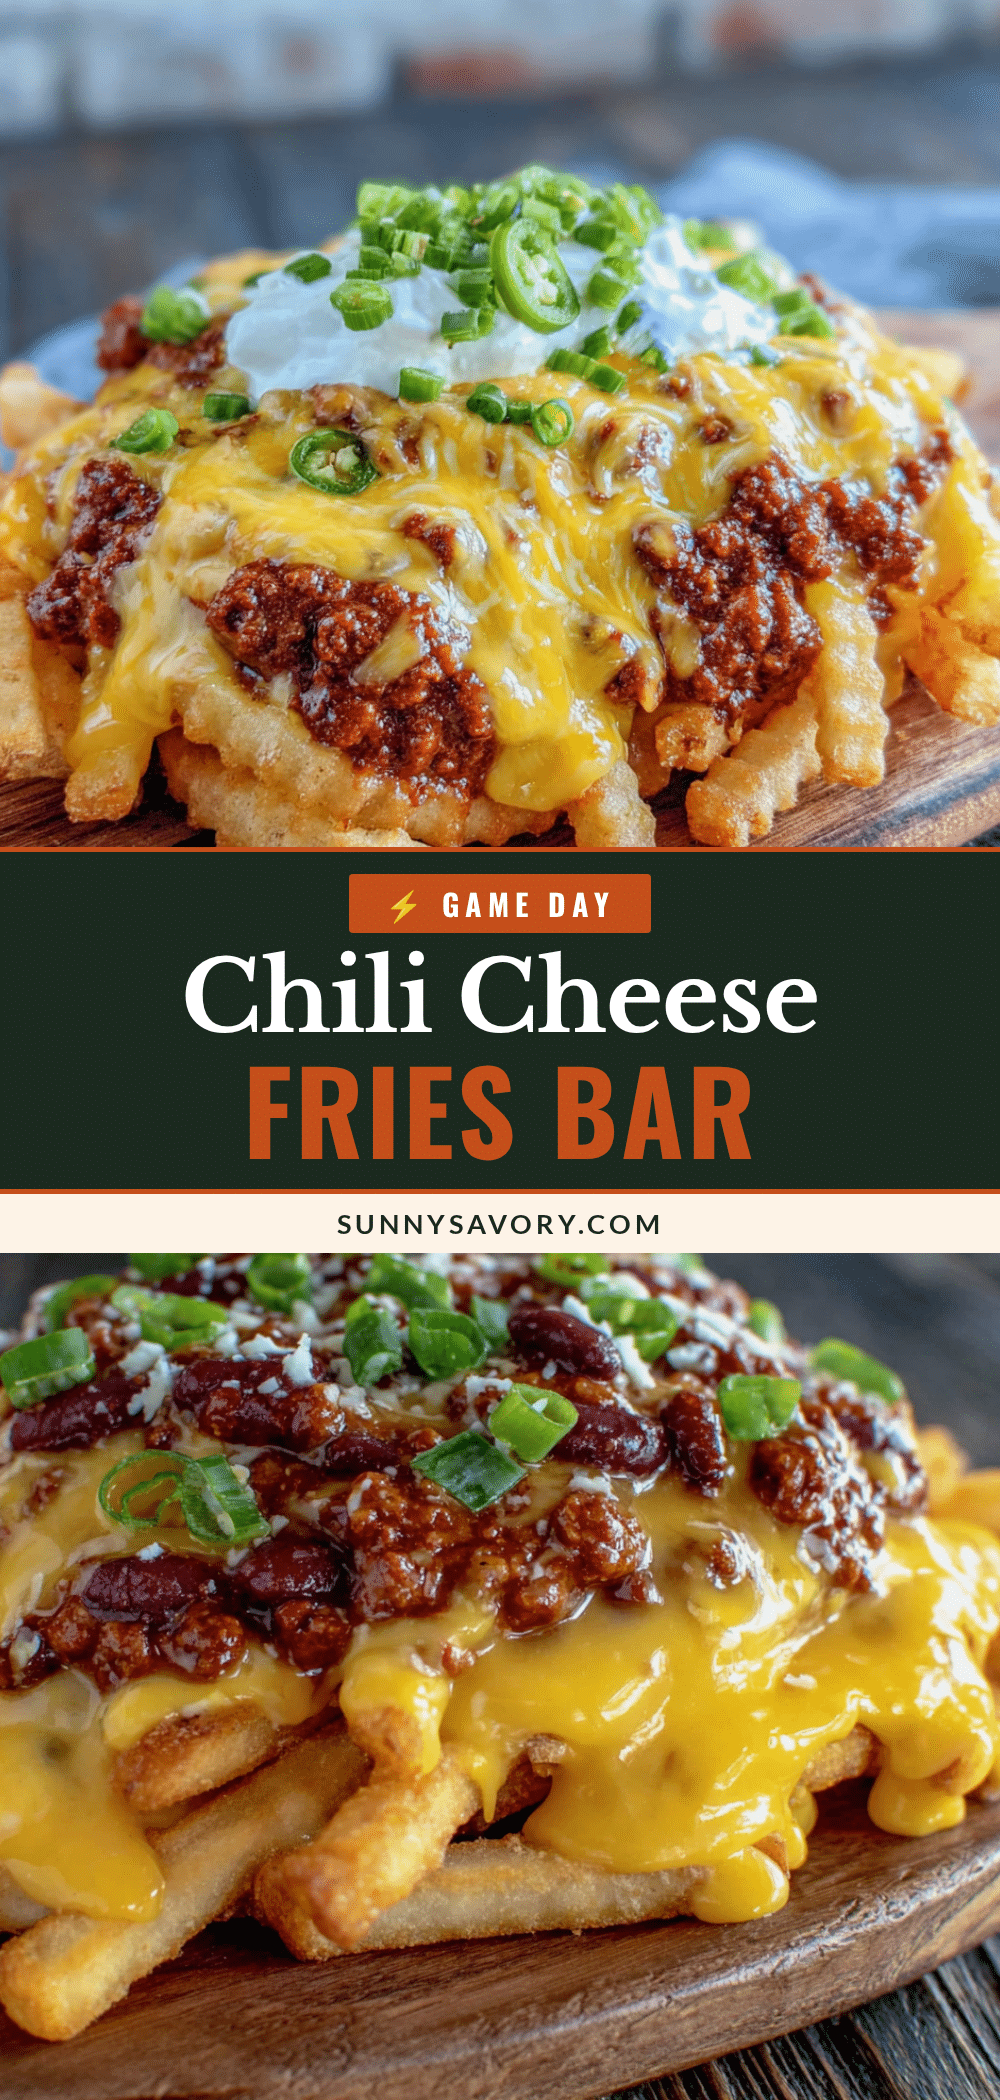
The Best Ultimate Game Day Chili Cheese Fries Bar
This Ultimate Game Day Chili Cheese Fries Bar is the perfect crowd-pleaser for Super Bowl parties or casual weekends. It features crispy fries topped with hearty chili, smooth cheese sauce, and a build-your-own toppings bar for a customizable, indulgent experience.
- Prep Time: 15 minutes
- Cook Time: 30 minutes
- Total Time: 45 minutes
- Yield: 4 servings 1x
- Category: Main Course
- Cuisine: American
Ingredients
- 1 lb ground beef (80/20 works best; can substitute ground turkey)
- 1 medium yellow onion, finely diced
- 3 cloves garlic, minced
- 1 can (15 oz) diced tomatoes, undrained
- 1 can (15 oz) kidney beans, drained and rinsed
- 2 tablespoons tomato paste
- 1 tablespoon chili powder
- 1 teaspoon ground cumin
- 1 teaspoon smoked paprika
- ½ teaspoon cayenne pepper (optional, for heat)
- Salt and black pepper to taste
- ½ cup beef broth (or water)
- 1 bag (28 oz) frozen crinkle-cut fries (or steak fries)
- 2 tablespoons olive oil
- Salt for sprinkling
- 2 tablespoons unsalted butter
- 2 tablespoons all-purpose flour
- 1 cup whole milk (warm)
- 2 cups shredded sharp cheddar cheese (freshly shredded)
- ½ teaspoon Dijon mustard
- Pinch of cayenne pepper
- 1 cup sour cream
- ½ cup pickled jalapeños
- ½ cup diced tomatoes
- ¼ cup sliced green onions
- ¼ cup chopped fresh cilantro
- 1 avocado, diced
- Hot sauce of choice (e.g., Cholula)
Instructions
- Preheat your oven to 425°F (220°C). Spread the frozen fries in a single layer on a baking sheet. Drizzle with olive oil and toss to coat. Bake for 20-25 minutes, flipping halfway through, until golden and crispy.
- While the fries bake, start the chili. Heat a Dutch oven over medium-high heat. Add the ground beef and cook, breaking it apart, until browned (6-8 minutes). Leave about a tablespoon of fat. Add the diced onion and cook for 3 minutes until softened. Add the garlic and cook for 30 seconds until fragrant.
- Add the tomato paste, chili powder, cumin, smoked paprika, and cayenne. Stir constantly for 1 minute. Pour in the diced tomatoes with their juices and the beef broth. Bring to a simmer, then reduce heat to low. Add the kidney beans. Simmer uncovered for 15-20 minutes, stirring occasionally. Season with salt and pepper to taste.
- Make the cheese sauce about 5 minutes before the fries are done. In a medium saucepan, melt the butter over medium heat. Whisk in the flour and cook for 1 minute. Slowly pour in the warm milk while whisking constantly. Continue whisking until the mixture thickens (2-3 minutes). Remove from heat and stir in the shredded cheddar cheese until melted. Add the Dijon mustard and cayenne. Taste and add salt if needed.
- While everything cooks, prep the toppings bar: dice the tomatoes, slice the green onions, chop the cilantro, and cube the avocado. Arrange everything in small bowls.
- Assemble the fries bar: transfer the baked fries to a large platter or leave on the baking sheet. Ladle the chili over the fries. Drizzle with cheese sauce. Let everyone add their own toppings.
Notes
For best results, shred cheese from a block to avoid graininess. Keep cheese sauce on the side for customizable servings. Toast spices to deepen flavor. For a vegetarian version, swap ground beef with 1½ cups cooked lentils or plant-based meat substitute.
Nutrition
- Serving Size: 1 cup of fries with
- Calories: 520
- Sugar: 6
- Sodium: 890
- Fat: 32
- Carbohydrates: 35
- Fiber: 8
- Protein: 28
Keywords: chili cheese fries, game day recipe, Super Bowl food, loaded fries, comfort food, party appetizer



