Love this? Save it for later!
Share the inspiration with your friends
I was standing in line at the hardware store—of all places—on a drizzly October afternoon, holding a new light fixture I wasn’t entirely sure how to install. The woman ahead of me turned around, noticed I was clutching a can of pumpkin puree along with my light fixture (don’t ask, it was a weird shopping day), and just started talking. “You making pumpkin bread?” she asked. Before I could answer, she was telling me about her grandmother’s recipe, the one that used only one bowl and came out perfect every single time. She was maybe seventy, with flour dusted on her sweater like she’d just come from her own kitchen. I wasn’t expecting baking advice from a stranger at the hardware store, but there I was, soaking in every word while the rain dripped off my jacket.
That conversation changed my fall baking forever. She told me the secret was in the chocolate chips—semi-sweet, not milk chocolate—and that you had to resist the urge to overmix. “Be lazy with it,” she said, laughing. “That’s when it turns out best.” I went home, dumped everything into one bowl, and pulled out a loaf that made my whole apartment smell like a bakery. I burned my tongue on the first slice because I couldn’t wait. Honestly, I’ve made it at least a dozen times since, and it’s never let me down. Maybe you’ve been there—standing in an aisle somewhere, not expecting to find the best recipe of your life, but there it is, handed to you by a complete stranger. That’s how good this one bowl chocolate chip pumpkin bread is. It finds you when you least expect it.
Why You’ll Love This Recipe
Let me tell you why this particular one bowl chocolate chip pumpkin bread has earned a permanent spot in my fall rotation. I’ve tested it six times to get the texture exactly right—moist but not soggy, tender but sturdy enough to hold those chocolate chips without them all sinking to the bottom. The first time I made it, I used too much pumpkin and ended up with what I can only describe as pumpkin soup in loaf form. Not my finest moment. But I learned, and this version is the result of all those happy accidents.
- Quick & Easy: From bowl to oven in under 15 minutes. No mixer required. No sifting. No nonsense.
- Simple Ingredients: You probably have everything except the pumpkin and chocolate chips already in your pantry. I’m serious—check your cabinets.
- Perfect for Fall Gatherings: Bring this to a potluck, a Thanksgiving brunch, or a cozy night in with friends. It disappears fast.
- Crowd-Pleaser: Kids love the chocolate chips. Adults love that it’s not overly sweet. Everyone loves that it tastes like autumn in a slice.
- Unbelievably Delicious: The combination of warm pumpkin spices and melted chocolate is honestly next-level. It’s the kind of bread that makes you close your eyes after the first bite.
What makes this recipe different from the dozens of other pumpkin breads out there? It’s the texture, plain and simple. The pumpkin keeps it incredibly moist without making it heavy, and the chocolate chips add little pockets of richness that balance the spices perfectly. I’ve tried versions with nuts, with streusel toppings, with cream cheese swirls—and I keep coming back to this one. It’s not trying to be fancy. It’s just trying to be really, really good. And it succeeds.
This isn’t just another pumpkin bread recipe. It’s the one you’ll make when you want something reliable, something that works every time, something that makes your kitchen smell like the best part of autumn. It’s comfort food in its purest form—simple, satisfying, and made to be shared.
What Ingredients You Will Need
This recipe uses simple, pantry-friendly ingredients to deliver big flavor without any fuss. Most of these are things you likely already have on hand, especially if you do any kind of fall baking. Here’s what you’ll need and why each one matters.
For the Bread Batter
- All-purpose flour, 1 ¾ cups (220g) — gives the bread structure without making it dense. I’ve used King Arthur Flour for years and love the consistent results.
- Granulated sugar, 1 cup (200g) — provides sweetness and helps create that tender crumb. You can reduce it to ¾ cup if you prefer a less sweet loaf.
- Light brown sugar, ½ cup (100g), packed — adds moisture and a hint of molasses flavor that pairs beautifully with pumpkin.
- Pumpkin puree, 1 cup (245g) — not pumpkin pie filling! Make sure you grab 100% pure pumpkin. I prefer Libby’s for its consistent thickness.
- Vegetable oil, ½ cup (120ml) — keeps the bread incredibly moist. Canola or melted coconut oil work too.
- Large eggs, 2, room temperature — help bind everything together and add richness. Take them out of the fridge 30 minutes before starting.
- Vanilla extract, 1 teaspoon — enhances all the warm flavors. Pure vanilla is best, but imitation works in a pinch.
- Baking soda, 1 teaspoon — helps the bread rise and gives it that light texture.
- Baking powder, ½ teaspoon — works with the baking soda for the perfect lift.
- Salt, ½ teaspoon — balances the sweetness and brings out the pumpkin flavor.
- Ground cinnamon, 1 ½ teaspoons — the backbone of the spice blend. I use Penzey’s Vietnamese cinnamon for extra warmth.
- Ground nutmeg, ½ teaspoon — adds that classic fall note. Freshly grated is amazing if you have it.
- Ground ginger, ½ teaspoon — gives a little warmth without being overpowering.
- Ground cloves, ¼ teaspoon — just a pinch for depth. Go easy—cloves are potent.
- Semi-sweet chocolate chips, 1 cup (175g) — the star of the show. I recommend Ghirardelli or Guittard for chips that hold their shape and melt beautifully.
Ingredient Tips & Substitutions
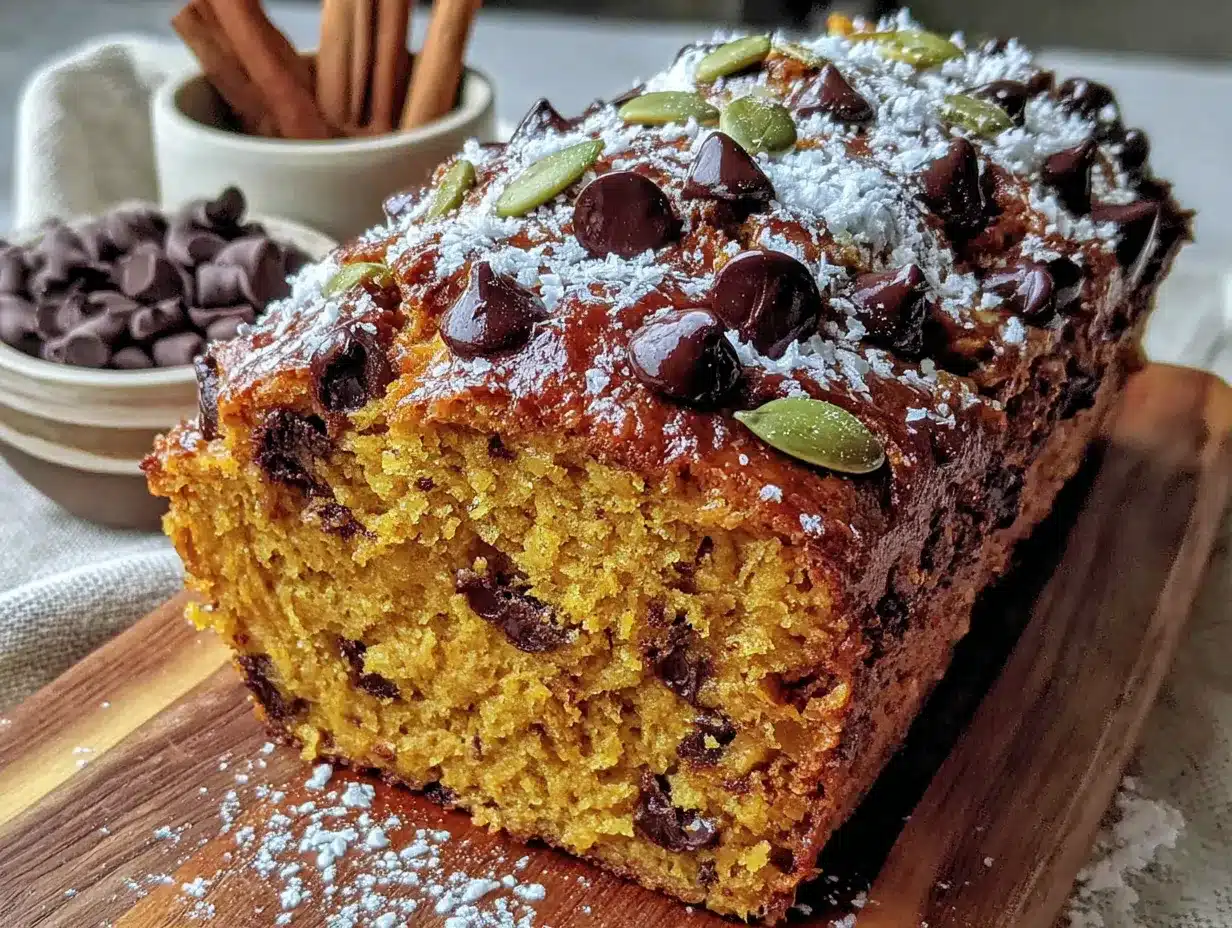
If you’re out of brown sugar, you can use all granulated sugar—the bread will be a little less moist but still delicious. For a dairy-free version, make sure your chocolate chips are dairy-free (many semi-sweet brands are). You can swap the all-purpose flour with a 1:1 gluten-free baking flour blend if needed, though the texture will be slightly more crumbly. And if you’re feeling adventurous, try adding a handful of toasted pecans or walnuts along with the chocolate chips—the crunch is lovely.
Equipment Needed
One of the best things about this recipe is how little equipment it requires. You truly only need a few basic kitchen tools, and I’ve included some alternatives in case you don’t have the exact thing.
- Large mixing bowl — any bowl will do, but a wide one makes mixing easier. My favorite is a simple ceramic bowl I’ve had for years.
- Whisk or wooden spoon — a whisk works best for smoothing out lumps, but a sturdy spoon gets the job done too.
- Rubber spatula — for scraping down the sides and folding in the chocolate chips without overmixing.
- 9×5-inch loaf pan — the standard size for this recipe. If you only have an 8×4-inch pan, the bread will take a few extra minutes to bake.
- Parchment paper — not strictly necessary, but it makes lifting the bread out of the pan so much easier. I’ve forgotten it before and regretted it.
- Cooling rack — lets air circulate so the bottom of the bread doesn’t get soggy. A wire rack from any baking set works perfectly.
- Measuring cups and spoons — for accuracy. I’ve eyeballed ingredients before and learned the hard way that baking is a science.
- Toothpick or cake tester — to check for doneness. A wooden skewer works too.
If you don’t have a cooling rack, you can use the inverted lid of a clean roasting pan or even a few chopsticks balanced across a baking sheet. I’ve done both in a pinch. And if you’re buying a loaf pan for the first time, a basic metal one from a kitchen supply store will serve you well for years—no need for anything fancy.
Preparation Method
Alright, let’s get to the good part. This one bowl chocolate chip pumpkin bread comes together faster than you’d think, and I’ve broken it down into clear steps so you know exactly what to expect. Take your time with the first few—the rest is smooth sailing.
- Preheat your oven to 350°F (175°C). Position the rack in the center of the oven. While it’s heating, grease your 9×5-inch loaf pan with butter or non-stick spray, then line it with parchment paper, leaving some overhang on the long sides. This makes lifting the finished bread out effortless.
- In your large mixing bowl, combine the wet ingredients. Add the pumpkin puree, vegetable oil, both sugars, eggs, and vanilla extract. Whisk them together until smooth and well combined. Don’t worry if it looks a little separated at first—that’s normal. Keep whisking until it comes together into a uniform, glossy mixture. This takes about 30 seconds of gentle but steady whisking.
- Add the dry ingredients directly to the bowl. Sprinkle the flour, baking soda, baking powder, salt, cinnamon, nutmeg, ginger, and cloves over the wet mixture. Here’s the important part: don’t dump them all in one spot. Scatter them a bit so they start incorporating more evenly. Use your whisk or spoon to stir gently, just until the flour disappears into the batter. You should see no more dry streaks. Overmixing at this stage will make the bread tough, so stop as soon as it comes together. A few small lumps are totally fine—they’ll bake out.
- Fold in the chocolate chips. Using your rubber spatula, gently fold the chocolate chips into the batter. Don’t stir vigorously—just fold them in with a few broad strokes. Reserve about a tablespoon of chips to sprinkle on top of the batter once it’s in the pan. This gives you those beautiful chocolate-studded tops that look so inviting.
- Pour the batter into the prepared loaf pan. Scrape every last bit out of the bowl—you earned it. Spread the batter evenly with your spatula, then sprinkle the reserved chocolate chips on top. Give the pan a gentle tap on the counter to release any air bubbles.
- Bake for 50-60 minutes. Place the pan in the preheated oven and bake until the top is golden brown and a toothpick inserted into the center comes out clean or with just a few moist crumbs. Start checking at 50 minutes. Every oven is different—mine runs hot, so I usually start checking at 45 minutes. The bread should feel springy to the touch when you gently press the center.
- Cool in the pan for 15 minutes. This is crucial—if you try to remove it too soon, it might fall apart. Let it rest on a cooling rack (or that chopstick setup we talked about) for a quarter of an hour. Then use the parchment overhang to lift the bread out of the pan and transfer it to the rack to cool completely.
- Wait before slicing. I know it’s hard. The smell filling your kitchen is absolutely intoxicating. But if you slice into it while it’s still warm, the texture will be gummy and the chocolate chips will smear everywhere. Let it cool completely—about 1 to 1½ hours—for clean slices and the best texture. Trust me on this one. I’ve ruined two loaves learning this lesson.
Cooking Tips & Techniques
After making this one bowl chocolate chip pumpkin bread more times than I care to count, I’ve picked up a few tricks that make the process smoother and the results more consistent. Here are the ones I wish someone had told me from the start.
Room temperature ingredients matter. I know it’s annoying to wait for eggs to come to room temperature, but it really does make a difference. Cold eggs can seize the batter and create an uneven texture. If you’re in a hurry, place the eggs in a bowl of warm water for 5 minutes before using them. Same goes for the pumpkin puree—let it sit out while you preheat the oven.
Don’t overmix the batter. This is the most common mistake I see, and I’ve made it myself plenty of times. When you add the dry ingredients, mix just until the flour disappears. Overmixing develops the gluten too much, and you end up with a dense, tough loaf instead of a tender, moist one. Be lazy with it, just like that woman at the hardware store said.
Check for doneness with your senses. The toothpick test is reliable, but also pay attention to how the bread looks and smells. When it’s done, the edges will pull away slightly from the pan, the top will be a deep golden brown, and your kitchen will smell like a pumpkin spice dream. If the top is browning too quickly but the center isn’t done yet, tent the pan loosely with aluminum foil for the last 10-15 minutes of baking.
Let it cool completely. I mentioned this in the steps, but it bears repeating. Cooling isn’t optional—it’s part of the recipe. The bread continues to set as it cools, and cutting it too early ruins the texture. I once had a friend who sliced into her loaf after 10 minutes and ended up with a pile of crumbs. Learn from her mistake.
Use a kitchen scale for accuracy. If you have one, weighing your flour and sugar gives the most consistent results. Flour can vary wildly in volume depending on how it’s scooped. A cup of fluffed flour might be 120g, while a packed cup could be 150g. Weighing eliminates that guesswork.
Variations & Adaptations
This one bowl chocolate chip pumpkin bread is wonderful as written, but it’s also incredibly adaptable. Here are some variations I’ve tried and loved, along with a few I’m planning to test next.
Gluten-Free Version: Substitute the all-purpose flour with a good 1:1 gluten-free baking flour blend. I’ve had success with Bob’s Red Mill and King Arthur’s gluten-free blends. The texture will be slightly more delicate, so handle the batter gently and don’t skip the cooling step. Add an extra tablespoon of oil to compensate for the lack of gluten structure.
Vegan Adaptation: Replace the eggs with flax eggs (2 tablespoons ground flaxseed mixed with 6 tablespoons water, let sit for 5 minutes) and use dairy-free chocolate chips. The bread will be a touch denser but still delicious. I tested this for a friend’s vegan birthday and it disappeared in minutes.
Spice It Up: If you love a stronger spice profile, add ¼ teaspoon of cardamom or allspice along with the other spices. I once added a pinch of cayenne pepper for a subtle heat that played surprisingly well with the chocolate. Start small—you can always add more next time.
Nutty Crunch: Fold in ½ cup of toasted pecans or walnuts along with the chocolate chips. Toast them first in a dry pan over medium heat for 3-4 minutes until fragrant. The crunch adds a lovely contrast to the soft bread.
Mini Loaves or Muffins: This batter works beautifully in mini loaf pans or a muffin tin. For mini loaves, bake for 30-35 minutes. For muffins, bake for 18-22 minutes. The chocolate chip-to-batter ratio stays perfect, and they’re great for gifting or freezing.
Serving & Storage Suggestions
This bread is incredibly versatile when it comes to serving. Here’s how I like to enjoy it, plus everything you need to know about storing it for later.
Serving Temperature: I prefer this bread at room temperature, but a slightly warm slice (microwaved for 10-15 seconds) is pure heaven. The chocolate chips get all melty again, and the spices seem to bloom in the warmth. For a special treat, toast a slice and spread it with a little salted butter—trust me on this one.
Presentation Ideas: Slice the bread into thick, even pieces and arrange them on a wooden board or a simple white plate. Dust with a little powdered sugar for a pretty finish, or drizzle with a simple glaze made from ½ cup powdered sugar mixed with 1-2 tablespoons milk or cream. For fall gatherings, I sometimes add a few fresh cranberries and a sprig of rosemary to the board for color.
What to Serve With It: A cup of hot coffee or chai tea is the perfect companion. For brunch, pair it with a frittata or a fresh fruit salad. For dessert, serve it with a scoop of vanilla ice cream or a dollop of whipped cream. The bread is sweet enough to stand alone, but these additions make it feel extra special.
Storage Instructions: Store the bread in an airtight container at room temperature for up to 4 days. If your kitchen is warm, the chocolate chips might get a little soft—that’s fine, just keep it in a cool spot. For longer storage, wrap the cooled loaf tightly in plastic wrap, then in aluminum foil, and freeze for up to 3 months. Thaw overnight in the refrigerator or at room temperature for a few hours.
Reheating: To bring back that fresh-from-the-oven texture, warm individual slices in a toaster or toaster oven for 1-2 minutes. For a whole loaf, wrap it in foil and warm it in a 300°F oven for 10-15 minutes. The flavors actually deepen after a day or two, so day-old bread can be even better than fresh.
Nutritional Information & Benefits
Here’s a rough estimate of the nutritional values per slice (based on 10 slices per loaf). Keep in mind these are approximations and can vary based on specific ingredients and brands used.
| Nutrient | Amount per Slice |
|---|---|
| Calories | 320 |
| Total Fat | 14g |
| Saturated Fat | 4g |
| Cholesterol | 35mg |
| Sodium | 220mg |
| Total Carbohydrates | 46g |
| Dietary Fiber | 2g |
| Sugars | 28g |
| Protein | 4g |
Pumpkin is packed with vitamin A, which supports eye health and immune function. It’s also a good source of fiber and potassium. The chocolate chips add a touch of antioxidants (hello, dark chocolate benefits), and the whole-grain option with a flour blend can increase the fiber content. This isn’t health food, but it’s a treat that brings some nutritional value to the table. I love that I can feel good about sharing it with my family—it’s indulgence with a little something extra.
Frequently Asked Questions
Can I use pumpkin pie filling instead of pumpkin puree?
No, please don’t. Pumpkin pie filling is pre-sweetened and spiced, which will throw off the sugar and spice balance in this recipe. Stick with 100% pure pumpkin puree for the best results. Your taste buds will thank you.
Why did my bread sink in the middle?
This usually happens for one of three reasons: the oven wasn’t hot enough, the batter was overmixed, or the bread was underbaked. Make sure your oven is fully preheated to 350°F, mix just until the flour disappears, and always test with a toothpick before pulling it out. A slight dip is normal, but a crater means something went wrong.
Can I make this recipe without chocolate chips?
Absolutely. You can leave them out entirely for a classic pumpkin bread, or substitute with an equal amount of chopped nuts, dried cranberries, or even white chocolate chips. The base recipe is sturdy enough to handle whatever mix-ins you prefer.
How do I know when the bread is fully baked?
Insert a toothpick or wooden skewer into the center of the loaf. If it comes out clean or with just a few moist crumbs (not wet batter), it’s done. The top should be golden brown and spring back when lightly pressed. If the top is browning too fast, tent with foil for the last 10-15 minutes.
Can I double this recipe?
Yes, and I do it all the time. Double all the ingredients and bake in two separate loaf pans. The baking time stays roughly the same, but start checking at 50 minutes. Giving one loaf away as a gift is one of my favorite fall traditions—it always makes someone’s day.
Conclusion
This one bowl chocolate chip pumpkin bread has become a staple in my kitchen for good reason. It’s simple enough for a Tuesday afternoon, special enough for a holiday brunch, and forgiving enough for a beginner baker. Every time I make it, I think about that rainy day at the hardware store and the stranger who shared her grandmother’s recipe with me. It’s a reminder that the best things in life often come from unexpected places.
I hope you’ll give this recipe a try and make it your own. Add your favorite mix-ins, adjust the spices to your taste, and don’t be afraid to experiment. That’s what cooking is all about. And when you do make it, I’d love to hear how it turned out. Drop a comment below, share a photo, or tell me about your own unexpected recipe discovery. Happy baking, friends—may your kitchen smell like autumn and your chocolate chips always be plentiful.
Pin This Recipe!
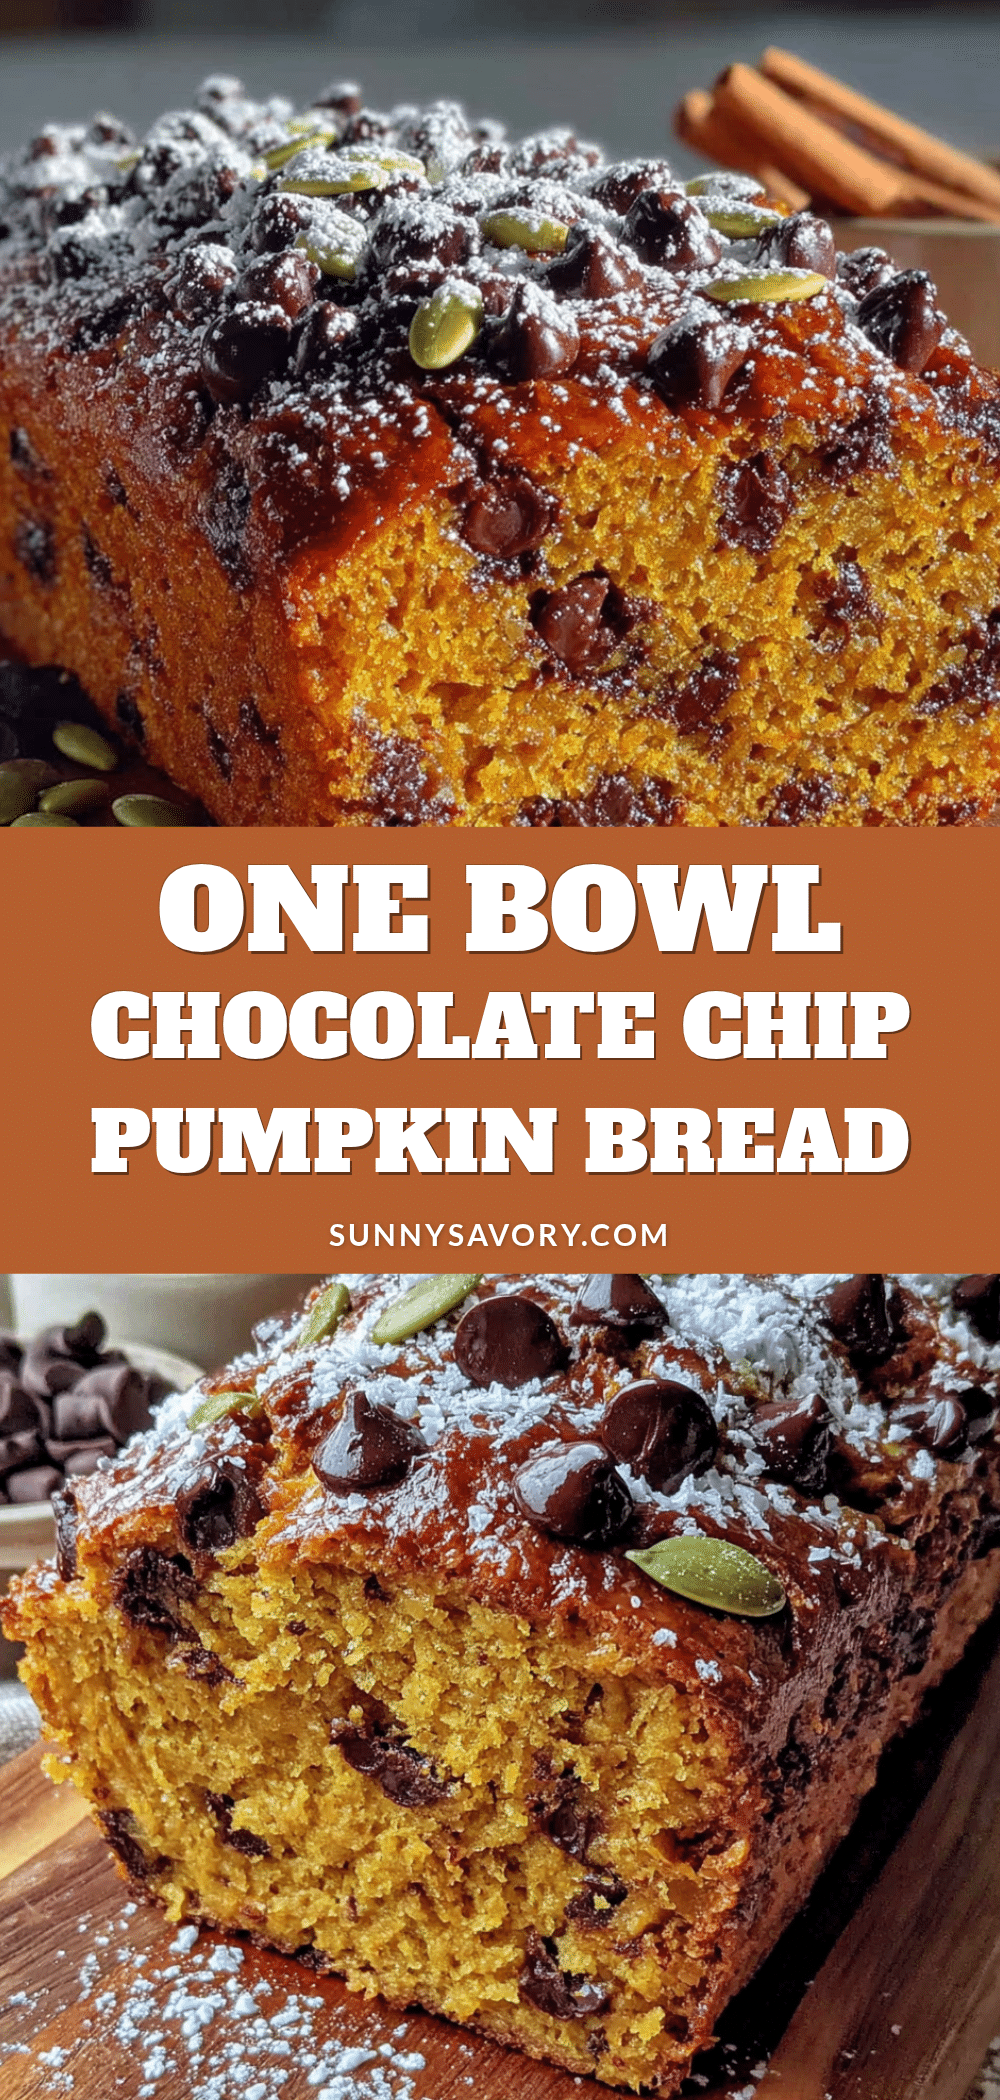
One Bowl Chocolate Chip Pumpkin Bread: Easy Fall Recipe
This one bowl chocolate chip pumpkin bread is moist, tender, and packed with warm fall spices and semi-sweet chocolate chips. It’s an easy, no-mixer recipe that comes together in minutes and fills your kitchen with the cozy aroma of autumn.
- Prep Time: 15 minutes
- Cook Time: 50-60 minutes
- Total Time: 1 hour 15 minutes to 1 hour 30 minutes
- Yield: 10 servings 1x
- Category: Dessert
- Cuisine: American
Ingredients
- 1 ¾ cups (220g) all-purpose flour
- 1 cup (200g) granulated sugar
- ½ cup (100g) packed light brown sugar
- 1 cup (245g) pumpkin puree (not pumpkin pie filling)
- ½ cup (120ml) vegetable oil (or canola or melted coconut oil)
- 2 large eggs, room temperature
- 1 teaspoon vanilla extract
- 1 teaspoon baking soda
- ½ teaspoon baking powder
- ½ teaspoon salt
- 1 ½ teaspoons ground cinnamon
- ½ teaspoon ground nutmeg
- ½ teaspoon ground ginger
- ¼ teaspoon ground cloves
- 1 cup (175g) semi-sweet chocolate chips
Instructions
- Preheat your oven to 350°F (175°C). Grease a 9×5-inch loaf pan with butter or non-stick spray, then line with parchment paper, leaving overhang on the long sides.
- In a large mixing bowl, combine the pumpkin puree, vegetable oil, granulated sugar, brown sugar, eggs, and vanilla extract. Whisk until smooth and glossy, about 30 seconds.
- Add the flour, baking soda, baking powder, salt, cinnamon, nutmeg, ginger, and cloves directly to the bowl. Stir gently with a whisk or spoon just until the flour disappears. Do not overmix; a few small lumps are fine.
- Using a rubber spatula, gently fold in the chocolate chips. Reserve about 1 tablespoon of chips to sprinkle on top.
- Pour the batter into the prepared loaf pan and spread evenly. Sprinkle the reserved chocolate chips on top. Tap the pan gently on the counter to release air bubbles.
- Bake for 50-60 minutes, until the top is golden brown and a toothpick inserted into the center comes out clean or with a few moist crumbs. If the top browns too quickly, tent loosely with foil for the last 10-15 minutes.
- Cool in the pan on a wire rack for 15 minutes. Then use the parchment overhang to lift the bread out and transfer to the rack to cool completely, about 1 to 1½ hours, before slicing.
Notes
For best results, use room temperature ingredients. Do not overmix the batter. Let the bread cool completely before slicing to avoid a gummy texture. Store in an airtight container at room temperature for up to 4 days, or freeze for up to 3 months.
Nutrition
- Serving Size: 1 slice (1/10 of loa
- Calories: 320
- Sugar: 28
- Sodium: 220
- Fat: 14
- Saturated Fat: 4
- Carbohydrates: 46
- Fiber: 2
- Protein: 4
Keywords: pumpkin bread, chocolate chip pumpkin bread, one bowl pumpkin bread, easy fall recipe, pumpkin dessert, fall baking