Love this? Save it for later!
Share the inspiration with your friends
My friend Jenna watched me stare at a bag of candy corn in the grocery store aisle for a good ten seconds before she finally spoke up. She didn’t say anything at first—just stood there with her cart, a little smirk on her face. Then she said, “You’re overthinking it, you know. That bag wants to be in a Rice Krispie treat, not eaten by the handful.” And honestly, she was right. I had been standing there, half-convinced I was going to buy that bag and then regret it, because candy corn is one of those things you either love or you leave in the bowl at a party. But Jenna, she sees potential where others see a problem.
She told me about a version her aunt used to make for Halloween parties, where the candy corn gets mixed into a marshmallow base and creates these little pockets of chewy, sweet goodness. I was skeptical at first—I mean, candy corn in a Rice Krispie treat? But she described the way the colors sort of melt together, creating this marbled, festive look that screams “fall” without any of the fuss of actual baking. So I bought the bag, and I went home, and I made them that very afternoon. The power was out in my neighborhood for a bit that day (a squirrel got into something it shouldn’t have, I think), so I was extra grateful for a no-bake recipe that didn’t need the oven. I made a mess of the microwave melting the marshmallows—spattered butter everywhere—but the treats turned out ridiculously good.
You know that feeling when a recipe just works, even when you’re half-distracted and cleaning up a butter spill? That was this. The candy corn doesn’t just sit on top looking pretty; it gets all soft and gooey, blending into the marshmallow mixture in a way that feels intentional and clever. I’ve been making them every fall since, and they’ve become my go-to for Halloween parties, classroom treats, and honestly, just for those afternoons when I need a little bit of color in my kitchen. Maybe you’ve been there, staring at a bag of candy corn and wondering what to actually do with it. Well, I’ve got the answer.
Why You’ll Love This Recipe
Let me tell you why these Easy No-Bake Candy Corn Rice Krispie Treats have earned a permanent spot in my fall rotation. I’ve tested this recipe about five times now—adjusting the ratio of candy corn to marshmallows, trying different butter amounts, even sneaking in a little vanilla extract one time (which was good, but not necessary). This version is the one that finally made me close my eyes after the first bite. It’s that good.
- Quick & Easy: We’re talking about 15 minutes from start to finish, including the time it takes to stare at the pan and decide if you should eat one immediately (you should). Perfect for those last-minute Halloween party invites or when the kids suddenly need a treat for their class party tomorrow morning.
- Simple Ingredients: You need exactly five things: butter, marshmallows, Rice Krispies cereal, candy corn, and a pinch of salt. That’s it. No fancy extracts, no specialty baking chocolate, no trip to a craft store for weird decorations.
- Perfect for Fall Gatherings: These treats are basically edible fall decorations. The orange, yellow, and white colors look festive on any dessert table, and they’re way easier than making a pie or a cake. Great for Halloween parties, Thanksgiving dessert tables, or just a cozy afternoon snack.
- Crowd-Pleaser: I brought these to a neighborhood potluck last October, and they were gone before the pumpkin pie. Kids love the candy corn pieces, and adults appreciate the nostalgic twist on a classic treat. Even people who claim they don’t like candy corn have been converted.
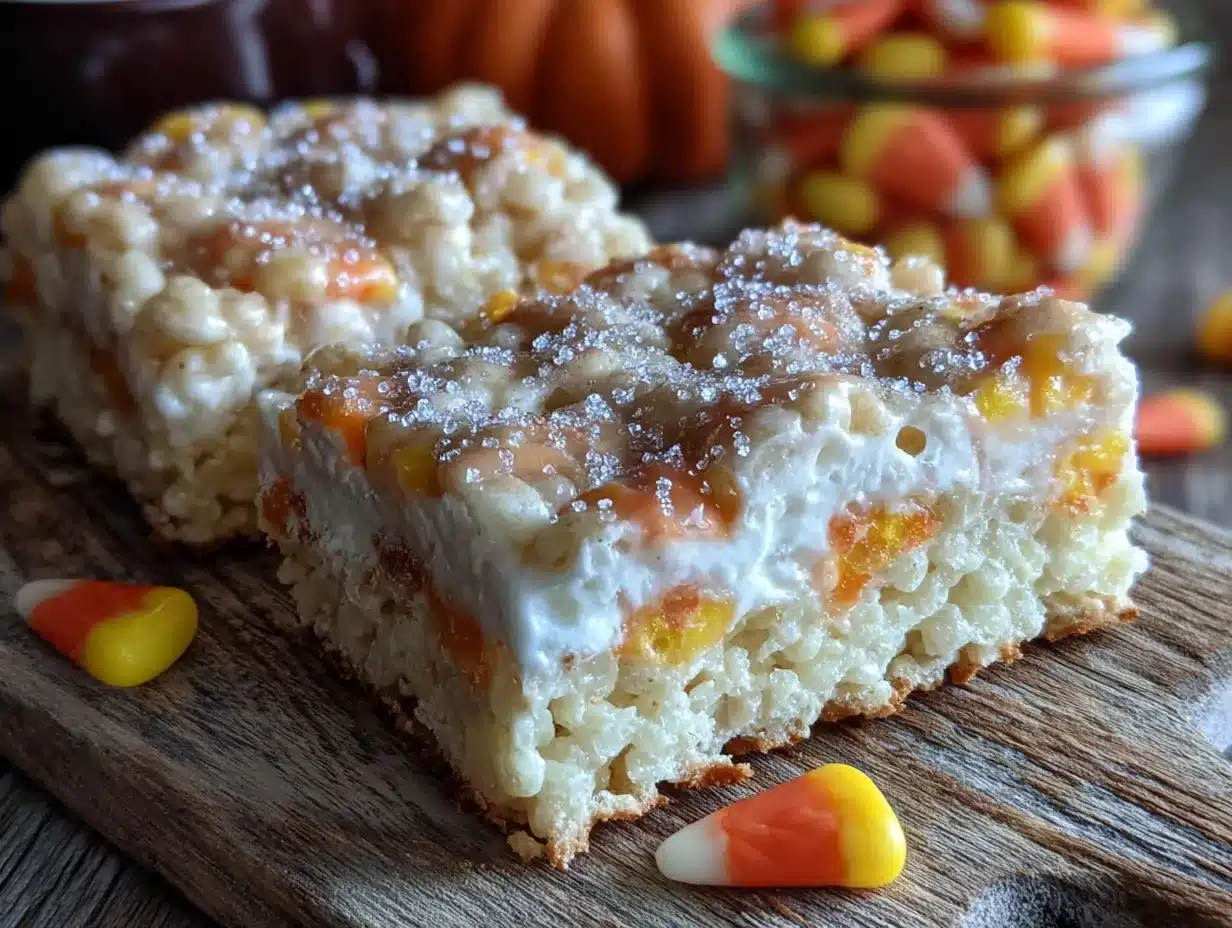
- Unbelievably Delicious: The texture is where this recipe really shines. You get the classic crunch of the Rice Krispies, the gooey chewiness of the marshmallow, and then these little pockets of soft, sweet candy corn that melt in your mouth. It’s comfort food reimagined—faster, easier, but with the same soul-soothing satisfaction.
What makes this recipe different from every other Rice Krispie treat recipe out there is the way the candy corn integrates into the marshmallow base. Most recipes just sprinkle the candy corn on top, but I found that folding it in while the mixture is still warm creates these beautiful marbled layers of color and flavor. It’s not just another version—it’s your best version, the one that makes people ask for the recipe before they’ve even finished their first bite.
What Ingredients You Will Need
This recipe uses simple, mostly pantry-staple ingredients to deliver that classic Rice Krispie treat texture with a festive fall twist. The magic really happens when the candy corn meets the warm marshmallow mixture, so choose your ingredients thoughtfully.
For the Base
- 3 tablespoons unsalted butter (plus a little extra for greasing the pan) — I use salted butter in a pinch, but unsalted lets you control the salt level yourself. Land O’Lakes is my go-to brand for consistent flavor.
- 1 package (10 ounces) regular marshmallows — Don’t use mini marshmallows here; they melt too fast and can make the mixture gummy. Jet-Puffed is reliable and melts evenly. If you’re using a store brand, just make sure they’re fresh and soft.
- 6 cups Rice Krispies cereal — Generic crispy rice cereal works fine here, but I’ve noticed the name brand holds its crunch a little longer in the finished treats. If you’re making these a day ahead, spring for the real thing.
- 1 cup candy corn — This is the star of the show, so don’t skimp. Brach’s is the classic choice, but any brand works. Look for fresh candy corn that’s still soft, not the hard, stale bags that have been sitting on a shelf since last October. Give the bag a squeeze in the store—if it’s hard, pick a different one.
- ¼ teaspoon fine sea salt — This is optional but highly recommended. It balances the sweetness and makes the candy corn flavor pop. I forgot it once, and the treats were still good, but they were missing that little something.
Optional Add-Ins
- ½ cup white chocolate chips — Fold these in at the same time as the candy corn for extra sweetness and a creamy texture. I did this for a Halloween party, and it was a hit.
- ¼ cup chopped pecans or walnuts — Adds a nice crunch and a slightly savory note that contrasts with the sweet candy corn. Use toasted nuts for even more flavor.
- Orange food coloring — If you want a more vibrant orange color, add a drop or two when melting the marshmallows. I usually skip this because the candy corn provides enough color, but it’s an option if you’re feeling extra festive.
- 1 teaspoon vanilla extract — Stir this in after the marshmallows are melted. It adds warmth and depth without overpowering the candy corn flavor. I tried this once and liked it, but I don’t think it’s necessary every time.
Equipment Needed
You don’t need a fancy kitchen to pull off these Easy No-Bake Candy Corn Rice Krispie Treats. Here’s what you’ll need, plus a few tips I’ve learned along the way.
- 9×13-inch baking pan — This is the standard size for a full batch. If you want thicker treats, use an 8×8-inch pan, but you’ll need to adjust the cooking time slightly (let them set a little longer). I’ve also used a 9×9-inch pan, and the treats come out nice and thick, perfect for cutting into big squares.
- Large microwave-safe bowl — You need a big bowl because the marshmallows puff up a lot when they melt. A glass bowl works best because it heats evenly. I’ve used plastic before, but it can warp if the mixture gets too hot. Go with glass if you have it.
- Rubber spatula — A good, sturdy spatula is your best friend here. The marshmallow mixture is sticky, so a silicone spatula makes folding in the cereal and candy corn much easier. Spray it with a little non-stick cooking spray before you start, and the mixture won’t stick to it.
- Parchment paper or wax paper — Line your pan with parchment paper, leaving some overhang on the sides. This makes lifting the treats out of the pan a breeze. I learned this the hard way after trying to pry treats out of a greased pan for twenty minutes. Wax paper works too, but parchment is sturdier.
- Sharp knife — A chef’s knife or a large serrated knife works best for cutting clean squares. Spray the blade with non-stick spray between cuts to prevent sticking. I’ve used a pizza cutter before, and it works surprisingly well for a straight cut.
Budget-Friendly Alternative: If you don’t have a 9×13-inch pan, you can use a large baking sheet with sides. Just spread the mixture out evenly and let it set. You’ll end up with thinner treats, but they’ll still be delicious.
Preparation Method
Alright, let’s get to the good part. I’ve made these treats more times than I can count, so I’ve got a few tricks up my sleeve to make the process smooth and stress-free. Follow these steps, and you’ll have a pan of beautiful, festive treats in no time.
- Prep your pan. Line a 9×13-inch baking pan with parchment paper, leaving about 2 inches of overhang on the long sides. Lightly grease the parchment paper with a little butter or non-stick cooking spray. This step is crucial—I’ve skipped it before and ended up with treats that stuck to the paper. Just a light coating is all you need.
- Melt the butter and marshmallows. In a large microwave-safe bowl, combine the 3 tablespoons of unsalted butter and the entire 10-ounce bag of marshmallows. Microwave on high for 1 minute. Stir the mixture with your rubber spatula. It will look lumpy and separated at this point—don’t panic, that’s normal. Microwave for another 30 seconds, then stir again. The mixture should be smooth and glossy. If it’s not quite there, microwave in 15-second increments, stirring in between, until it’s completely smooth. Be careful not to overheat, or the marshmallows will turn into a hard, rubbery mess. I’ve done that, and it’s not fun.
- Add the salt and vanilla (if using). Stir in the ¼ teaspoon of fine sea salt and the 1 teaspoon of vanilla extract if you’re using it. The salt is non-negotiable in my book—it really does make a difference. Stir until everything is well combined.
- Fold in the cereal. Add the 6 cups of Rice Krispies cereal to the marshmallow mixture. Gently fold everything together using your rubber spatula. Work quickly but carefully—you want to coat every piece of cereal with the marshmallow mixture without crushing the cereal. It should take about 30 seconds of folding. If you see dry spots, keep folding, but don’t overmix or the treats will be dense.
- Fold in the candy corn. Once the cereal is mostly coated, add the 1 cup of candy corn. Fold it in gently, just until it’s evenly distributed. The candy corn will start to soften from the heat of the marshmallow mixture, which is exactly what you want. Don’t overmix, or the candy corn will melt completely and lose its distinct color and texture. A few streaks of orange and yellow are perfect.
- Press into the pan. Transfer the mixture to your prepared pan. Use your rubber spatula (spray it with non-stick spray first) or lightly greased hands to press the mixture into an even layer. Don’t press too hard—you want the treats to be firm but not compacted. If you press too hard, they’ll turn into hard, crunchy bricks. Just a gentle, even pressure is all you need.
- Let them set. Let the treats cool at room temperature for at least 30 minutes before cutting. If you’re in a hurry, you can pop them in the refrigerator for 15 minutes, but don’t leave them in there too long, or they’ll get too hard. I usually let them sit on the counter while I clean up the kitchen, and by the time I’m done, they’re ready to cut.
- Cut and serve. Lift the treats out of the pan using the parchment paper overhang. Place them on a cutting board. Use a sharp knife (sprayed with non-stick spray) to cut them into squares. I like to cut them into 12 large squares or 24 smaller ones, depending on the occasion. For Halloween parties, I cut them into small bite-sized pieces so people can grab a few without committing to a huge treat.
Sensory Cues: When you’re folding the marshmallow mixture, it should look glossy and smooth, like thick honey. The cereal should be evenly coated, with no dry spots. When you press the mixture into the pan, it should feel warm and pliable, not stiff. The candy corn should be visible as distinct pieces, not melted into a single orange blob. If it’s too warm, let it cool for a minute before pressing.
Cooking Tips & Techniques
I’ve made my fair share of mistakes with Rice Krispie treats over the years, and I’m here to save you from the same fate. Here are my best tips for getting perfect results every time.
Use fresh marshmallows. This is the single most important tip I can give you. Stale marshmallows don’t melt properly and will leave you with a lumpy, gritty mixture. Check the expiration date on the bag, and if the marshmallows feel hard or dry, buy a fresh bag. I learned this the hard way when I used a bag that had been sitting in my pantry for six months—the treats turned out terrible.
Don’t overheat the marshmallows. Marshmallows are finicky. If you microwave them too long, they’ll seize up and turn into a hard, rubbery mess. Always start with 1 minute, then stir, then add 30-second increments. If you see the mixture starting to bubble, stop immediately. It’s better to have a few unmelted lumps than a seized batch.
Work quickly but gently. Once the marshmallow mixture is ready, you need to work fast before it starts to set. But don’t rush so much that you crush the cereal or overmix the candy corn. Find a rhythm—fold, scrape, fold, scrape—and you’ll be fine. I usually set a timer for 2 minutes and aim to have everything in the pan by then.
Grease everything. The marshmallow mixture is sticky, so grease your spatula, your hands, and even the knife you’ll use to cut the treats. Non-stick cooking spray works great, but butter works too. I keep a little bowl of melted butter nearby and dip my spatula in it as I work. It makes a huge difference.
Let them cool completely. I know it’s tempting to cut into them while they’re still warm, but trust me on this one. If you cut them too soon, they’ll fall apart and the candy corn will smear everywhere. Give them at least 30 minutes at room temperature. If you’re really impatient, refrigerate for 15 minutes, but no longer.
Store them properly. These treats are best eaten within 2 days of making them. Store them in an airtight container at room temperature. Don’t refrigerate them, or they’ll get hard and lose their chewy texture. If you need to store them longer, wrap them individually in plastic wrap and freeze for up to 2 months. Thaw at room temperature for 30 minutes before serving.
Variations & Adaptations
One of the best things about this recipe is how easy it is to customize. I’ve tried several variations over the years, and here are my favorites.
Dietary Adaptations
- Gluten-Free: Rice Krispies are naturally gluten-free, but check the label to make sure they’re certified gluten-free if that’s a concern. The rest of the ingredients are gluten-free, so this recipe is a great option for gluten-sensitive guests.
- Vegan: Use vegan marshmallows (Dandies is a great brand) and vegan butter. The rest of the ingredients are plant-based. I’ve tried this version, and it works perfectly—just make sure the vegan marshmallows are fresh and soft.
- Nut-Free: If you’re adding nuts, make sure to use certified nut-free options. Otherwise, the base recipe is naturally nut-free, which is great for school parties and other nut-free environments.
Flavor Variations
- Chocolate Drizzle: Melt ½ cup of chocolate chips with 1 teaspoon of coconut oil and drizzle it over the cooled treats. It adds a beautiful finish and a rich chocolate flavor that pairs wonderfully with the candy corn. I did this for a Halloween party, and it was a showstopper.
- Peanut Butter Swirl: Warm ¼ cup of peanut butter and swirl it into the marshmallow mixture before adding the cereal. It adds a salty, nutty flavor that balances the sweetness. I’ve used crunchy peanut butter for extra texture, and it’s amazing.
- Spiced Version: Add 1 teaspoon of pumpkin pie spice or cinnamon to the marshmallow mixture. It gives the treats a warm, cozy fall flavor that’s perfect for Thanksgiving. I tried this with a little extra salt, and it was like eating a pumpkin pie in Rice Krispie form.
Seasonal Adaptations
- Christmas: Swap the candy corn for red and green M&Ms or crushed candy canes. The same base recipe works beautifully with different mix-ins.
- Easter: Use pastel-colored candy corn or mini marshmallows in pastel colors. You can also add a few drops of food coloring to the marshmallow mixture for a festive look.
- Fourth of July: Use red, white, and blue candy corn or mix in some blue sprinkles. It’s a fun, patriotic twist that’s perfect for summer parties.
Serving & Storage Suggestions
These treats are versatile enough to serve at all kinds of gatherings. Here’s how I like to present and store them.
Serving Temperature: These treats are best served at room temperature. If you’ve refrigerated them, let them sit out for about 15 minutes before serving so they soften up a bit. They’re perfect as a snack, dessert, or even a lunchbox treat.
Presentation Ideas: For Halloween parties, I like to cut the treats into small squares and arrange them on a platter lined with orange and black napkins. You can also cut them into Halloween shapes using cookie cutters—just spray the cutters with non-stick spray first. For a more elegant presentation, stack them on a cake stand and sprinkle a little extra candy corn on top.
Complementary Dishes: These treats pair beautifully with a warm cup of apple cider or a pumpkin spice latte. For a dessert table, serve them alongside pumpkin bars, caramel apples, or chocolate chip cookies. They also make a great addition to a Halloween candy buffet.
Storage Instructions: Store the treats in an airtight container at room temperature for up to 3 days. If you need to store them longer, wrap them individually in plastic wrap and place them in a freezer-safe bag. They’ll keep in the freezer for up to 2 months. To thaw, remove from the freezer and let them sit at room temperature for about 30 minutes.
How Flavors Develop: These treats are actually better the next day. The flavors meld together overnight, and the candy corn softens even more, creating a more cohesive texture. If you can resist eating them all on the first day, you’ll be rewarded with an even better treat on day two.
Nutritional Information & Benefits
Let’s be real—these are a treat, not a health food. But here’s what you need to know if you’re keeping an eye on your intake.
Estimated Nutritional Values (per serving, based on 12 servings):
- Calories: 280
- Total Fat: 8g
- Saturated Fat: 4g
- Cholesterol: 15mg
- Sodium: 200mg
- Total Carbohydrates: 52g
- Dietary Fiber: 0g
- Sugars: 32g
- Protein: 2g
Health Benefits: While these treats are definitely a indulgence, the Rice Krispies cereal does provide some iron and B vitamins. The butter adds a small amount of vitamin A. And hey, a little bit of sugar now and then is part of a balanced life. I believe in enjoying treats in moderation, and these are worth every bite.
Dietary Considerations: This recipe is naturally gluten-free (check your cereal label) and nut-free. It contains dairy from the butter, but you can easily substitute vegan butter for a dairy-free version. The main allergens are milk and gluten (if using non-certified cereal).
Personal Wellness Perspective: I’m a firm believer that food should be enjoyed, not feared. These treats are a celebration of fall flavors and childhood nostalgia. They’re perfect for special occasions, and I never feel guilty about having one (or two) with a cup of coffee. Life’s too short to skip the candy corn.
Conclusion
These Easy No-Bake Candy Corn Rice Krispie Treats are the kind of recipe that makes you wonder why you didn’t think of it sooner. They’re quick, simple, and absolutely bursting with fall flavor. The combination of crunchy cereal, gooey marshmallow, and soft candy corn is pure magic—the kind that makes you close your eyes after the first bite and smile.
I love this recipe because it’s so forgiving. You can customize it a hundred different ways, and it always turns out delicious. Whether you’re making them for a Halloween party, a Thanksgiving dessert table, or just a cozy afternoon snack, these treats are guaranteed to bring a little extra joy to your day. And honestly, isn’t that what cooking is all about?
So go ahead—grab a bag of candy corn and a box of Rice Krispies. Make a mess in your kitchen. Spill a little butter. And then enjoy the most perfect fall treat you’ve ever tasted. I’d love to hear how yours turn out—drop a comment below and let me know if you tried any fun variations. Happy fall, friends!
Frequently Asked Questions
Can I use mini marshmallows instead of regular marshmallows?
I don’t recommend it. Mini marshmallows melt too quickly and can make the mixture gummy or grainy. Regular marshmallows melt more evenly and give you that classic, chewy texture. Stick with the full-size ones for the best results.
Why did my treats turn out hard and crunchy?
This usually happens when you press the mixture too firmly into the pan. You want to press gently—just enough to create an even layer. If you compact the mixture too much, the treats will be dense and hard. Also, make sure you’re not overcooking the marshmallows, which can also lead to hardness.
Can I make these treats ahead of time?
Absolutely! These treats actually taste better the next day. Make them up to 2 days in advance and store them in an airtight container at room temperature. If you need to make them further ahead, wrap them individually in plastic wrap and freeze for up to 2 months.
Can I use a different type of cereal?
Yes, you can experiment with other crispy rice cereals or even puffed rice. Just keep in mind that different cereals have different textures and absorb moisture differently. I’ve tried this with a generic brand, and it worked fine, but the treats were slightly less crunchy. Stick with Rice Krispies for the best results.
How do I prevent the treats from sticking to the knife when cutting?
Spray your knife with non-stick cooking spray before each cut. You can also dip the knife in hot water and wipe it dry between cuts. I’ve found that a sharp chef’s knife works better than a serrated knife for clean cuts. Just make sure to spray it well, and you’ll get perfect squares every time.
Pin This Recipe!
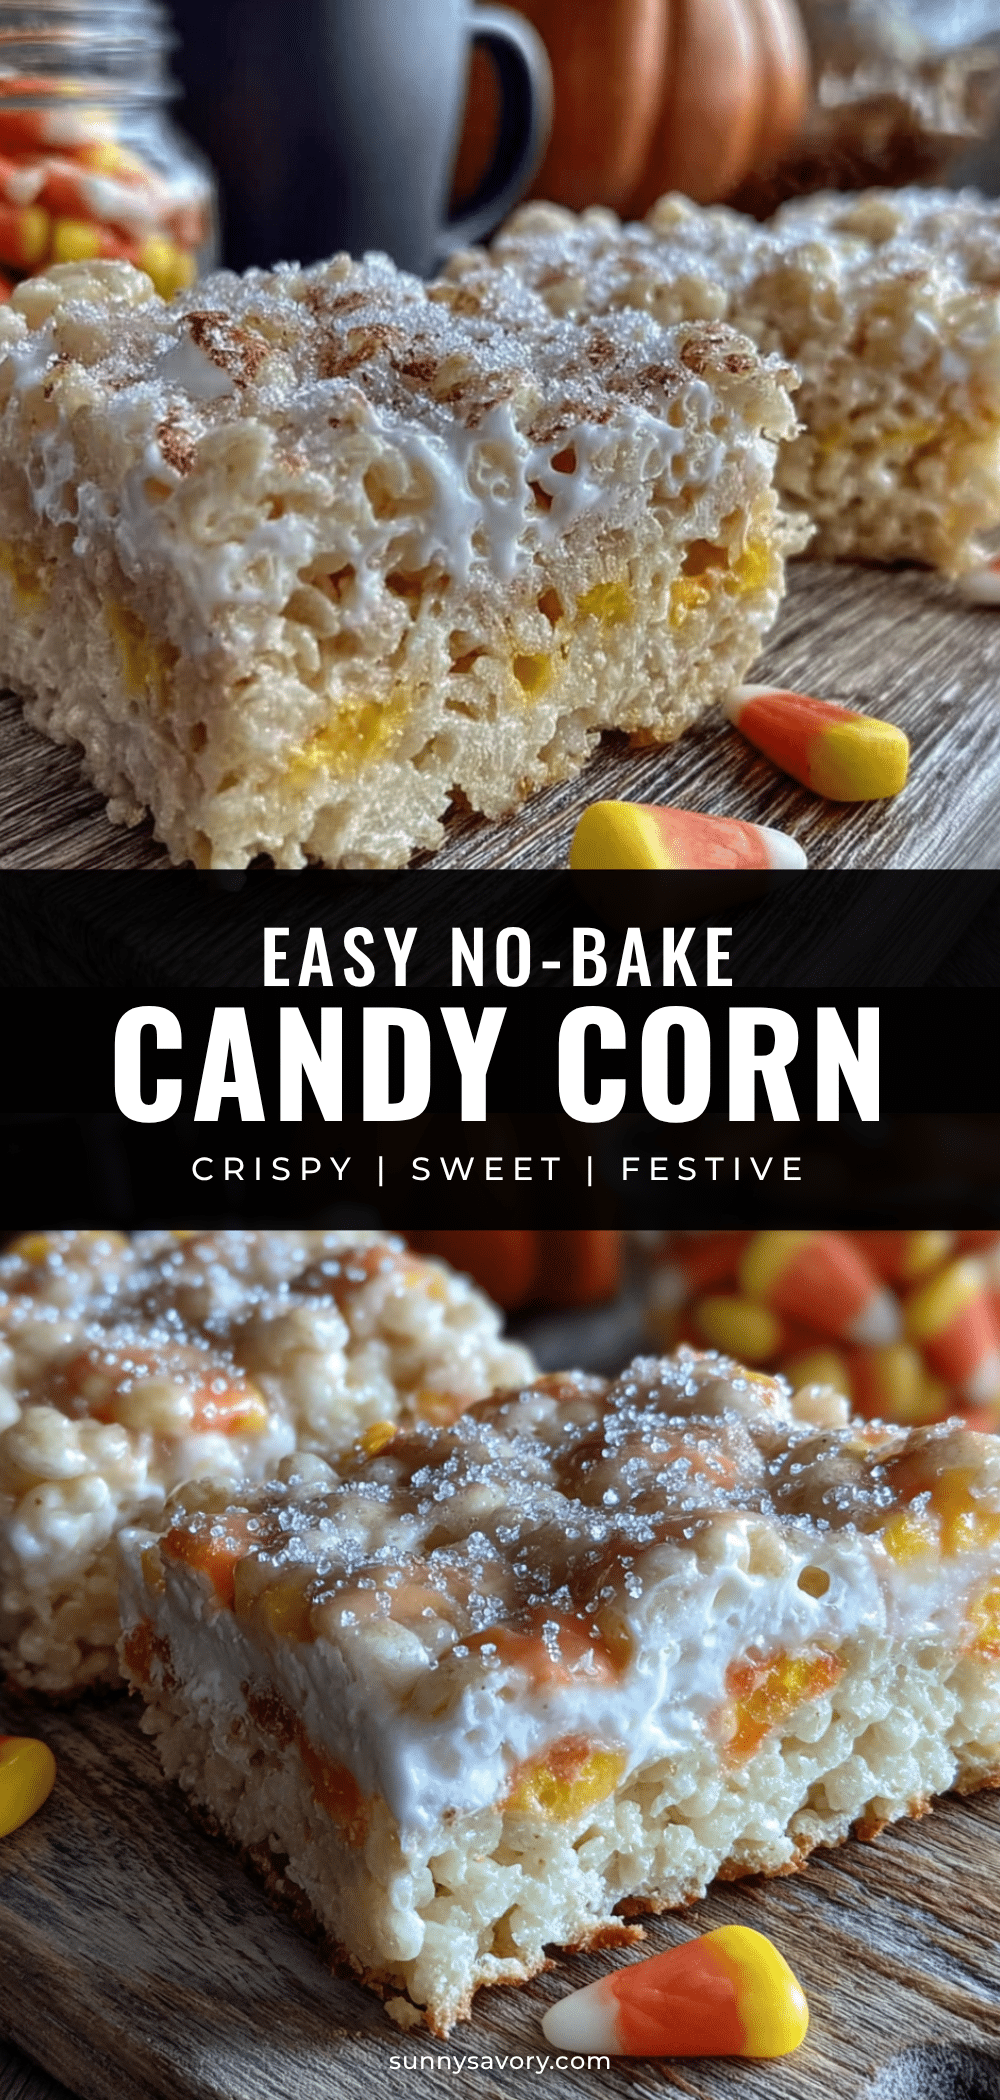
Easy No-Bake Candy Corn Rice Krispie Treats

These quick and easy no-bake treats combine crunchy Rice Krispies, gooey marshmallows, and soft candy corn for a festive fall dessert that’s perfect for Halloween parties and cozy afternoons.
- Prep Time: 15 minutes
- Cook Time: 5 minutes
- Total Time: 20 minutes
- Yield: 12 servings 1x
- Category: Dessert
- Cuisine: American
Ingredients
- 3 tablespoons unsalted butter (plus extra for greasing)
- 1 package (10 ounces) regular marshmallows
- 6 cups Rice Krispies cereal
- 1 cup candy corn
- ¼ teaspoon fine sea salt
- ½ cup white chocolate chips (optional)
- ¼ cup chopped pecans or walnuts (optional)
- Orange food coloring (optional)
- 1 teaspoon vanilla extract (optional)
Instructions
- Line a 9×13-inch baking pan with parchment paper, leaving about 2 inches of overhang on the long sides. Lightly grease the parchment with butter or non-stick spray.
- In a large microwave-safe bowl, combine 3 tablespoons unsalted butter and the entire 10-ounce bag of marshmallows. Microwave on high for 1 minute. Stir; it will look lumpy. Microwave for another 30 seconds, then stir until smooth and glossy. If needed, microwave in 15-second increments, stirring in between.
- Stir in ¼ teaspoon fine sea salt and 1 teaspoon vanilla extract (if using) until well combined.
- Add 6 cups Rice Krispies cereal to the marshmallow mixture. Gently fold until every piece is coated, about 30 seconds. Do not overmix.
- Add 1 cup candy corn and fold gently until evenly distributed. The candy corn will soften from the heat.
- Transfer the mixture to the prepared pan. Use a greased spatula or greased hands to press into an even layer with gentle pressure.
- Let the treats cool at room temperature for at least 30 minutes (or refrigerate for 15 minutes if in a hurry).
- Lift the treats out using the parchment overhang. Place on a cutting board. Spray a sharp knife with non-stick spray and cut into squares (12 large or 24 small).
Notes
Use fresh marshmallows for best melting. Do not overheat marshmallows. Work quickly but gently. Grease spatula and knife to prevent sticking. Treats are best eaten within 2 days; store in an airtight container at room temperature. For longer storage, wrap individually and freeze for up to 2 months.
Nutrition
- Serving Size: 1 square (based on 1
- Calories: 280
- Sugar: 32
- Sodium: 200
- Fat: 8
- Saturated Fat: 4
- Carbohydrates: 52
- Protein: 2
Keywords: candy corn, Rice Krispie treats, no-bake, Halloween, fall, easy dessert



