Love this? Save it for later!
Share the inspiration with your friends
This was supposed to be a quick stovetop chicken piccata. I had the capers ready, the lemon waiting, a half-stick of butter softening on the counter. But somewhere between answering a text from my sister and realizing I was out of all-purpose flour, the whole plan fell apart. I stood there staring into the pantry like it had personally betrayed me. No flour. No breadcrumbs either. Just a box of panko hiding behind a bag of lentils and a block of Parmesan that was getting a little hard around the edges.
I was already running late for a dinner thing. Honestly, I almost just ordered pizza. But I had these beautiful chicken breasts sitting out, and you know that feeling when you’ve already committed to cooking and turning back feels like defeat? So I grabbed the panko, grated that sad Parmesan until my knuckles hurt, and threw it all together in a baking dish with a little olive oil and a lot of hope. I figured worst case, I’d have dry, sad chicken and we’d order takeout anyway.
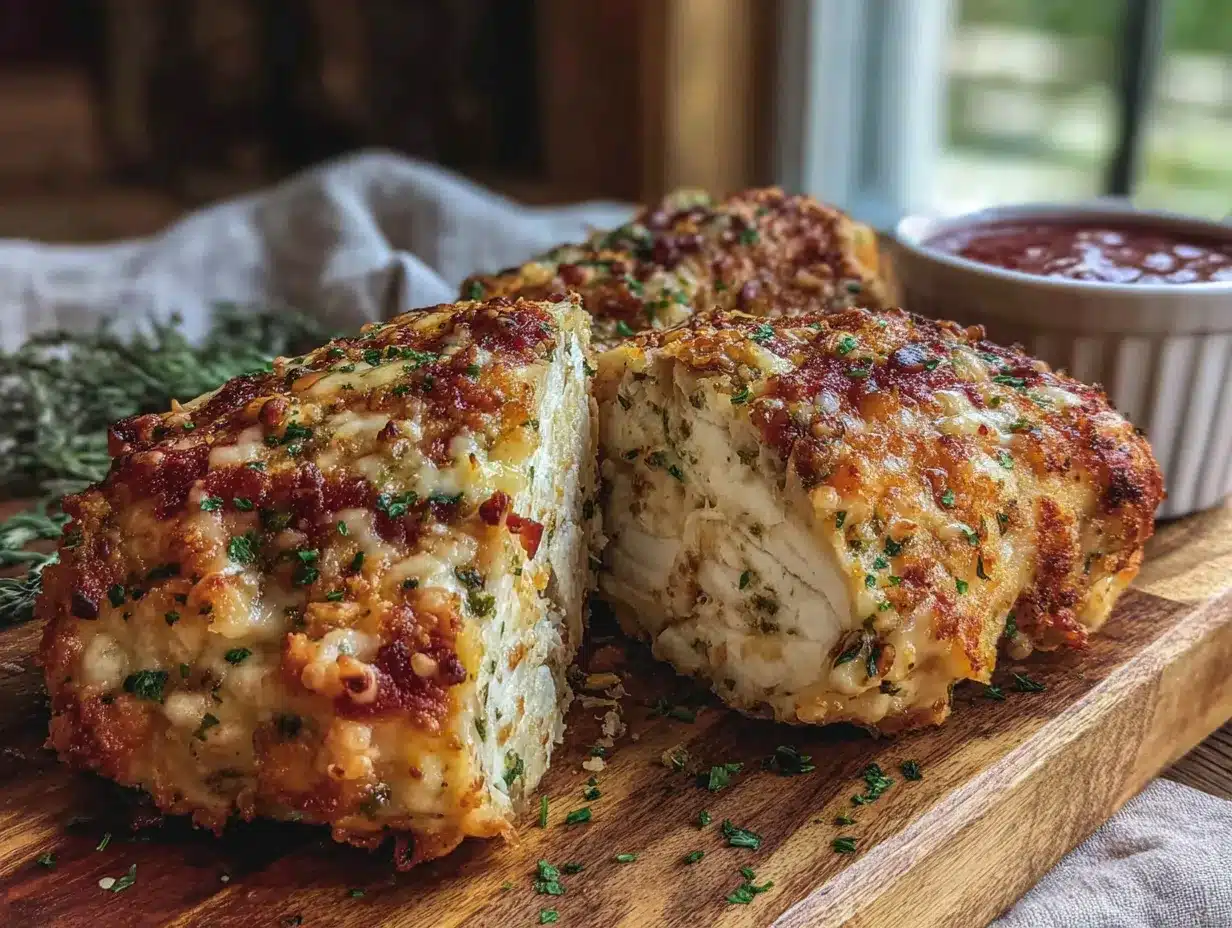
What came out of the oven was nothing like the plan — and better. The crust was this golden, craggy, impossibly crunchy situation that shattered when you cut into it. The chicken underneath was somehow still juicy and tender. My roommate walked in and asked what restaurant I’d ordered from. I mean, that’s the kind of compliment you remember. I’ve made this crispy baked parmesan crusted chicken breast at least once a week since that night. It’s the recipe that taught me that sometimes the best dishes come from the moments you almost gave up.
Why You’ll Love This Recipe
Let me tell you why this crispy baked parmesan crusted chicken breast has earned a permanent spot in my weekly rotation. It’s not just because it tastes like something from a fancy bistro — though it absolutely does. It’s because this recipe actually delivers on the promise of crispy chicken without the mess and stress of deep frying.
- Quick & Easy: From fridge to table in about 30 minutes. No marinating, no complicated techniques, no standing over a sputtering pan of hot oil.
- Simple Ingredients: You probably have most of this in your kitchen right now. Chicken, Parmesan, panko, eggs, and a few seasonings. That’s it.
- Perfect for Busy Weeknights: This is the kind of dinner that makes a Tuesday feel like a Saturday. It’s special enough for guests but easy enough for a tired Wednesday.
- Crowd-Pleaser: I’ve served this to picky kids, diet-restricted friends, and hard-to-impress in-laws. Empty plates every single time.
- Unbelievably Delicious: The crust is actually crispy. Not soggy, not falling off, but genuinely shatter-crunchy. And the chicken stays moist and tender underneath.
What makes this version different from all the other baked chicken recipes out there? It’s the technique. Instead of just breading and baking, I use a combination of finely grated Parmesan mixed into the panko and a quick pre-bake at high heat to set the crust. That little extra step makes all the difference between a crust that’s just browned and one that’s actually crispy. I tested this about seven times before I got it right, so you don’t have to.
This isn’t just another chicken recipe. It’s the one that makes you close your eyes after the first bite. It’s comfort food reimagined — faster, simpler, but with the same soul-soothing satisfaction. Perfect for impressing guests without stress, or turning a simple Tuesday into something memorable.
What Ingredients You Will Need
This recipe uses simple, wholesome ingredients to deliver that golden, crunchy crust and juicy chicken without any fuss. Most of these are pantry staples, which is exactly why this recipe works so well for last-minute dinners.
- Boneless, skinless chicken breasts (about 4 pieces, 6-8 ounces each) — Look for breasts that are similar in thickness so they cook evenly. If they’re huge, you can butterfly them or pound them to about 1/2 inch thick.
- Panko breadcrumbs (1 1/2 cups) — Regular breadcrumbs won’t give you the same crunch. Panko is the secret to that light, crispy texture. I like the Kikkoman brand for consistent results.
- Freshly grated Parmesan cheese (3/4 cup, packed) — Please, please buy a block and grate it yourself. The pre-shredded stuff has anti-caking agents that prevent it from melting and sticking properly. It makes a real difference in the crust.
- Large eggs (2, beaten) — These help the breading adhere. Make sure they’re at room temperature for easier mixing.
- Olive oil (2 tablespoons) — This helps the crust brown and get crispy. You can use avocado oil if you prefer.
- Garlic powder (1 teaspoon) — Don’t use garlic salt unless you adjust the added salt. Garlic powder distributes flavor more evenly.
- Paprika (1 teaspoon) — Regular or smoked both work. Smoked paprika adds a lovely depth.
- Dried oregano (1/2 teaspoon) — Optional but recommended. Italian seasoning works in a pinch.
- Salt (1/2 teaspoon) — I use fine sea salt. Adjust based on how salty your Parmesan is.
- Black pepper (1/4 teaspoon, freshly ground) — Freshly ground makes a difference here.
- Cooking spray or extra olive oil — For spraying the tops of the chicken before baking. This is key for browning.
For the best texture, I recommend using a microplane or the fine side of a box grater for the Parmesan. The finer the grate, the better it incorporates into the panko. If you’re dairy-free, you can try a high-quality vegan Parmesan, but I haven’t tested that version myself. Let me know if you do!
Equipment Needed
You don’t need anything fancy for this recipe, which is honestly one of the reasons I love it so much. Here’s what you’ll need:
- Baking sheet (rimmed, preferably) — A half-sheet pan works perfectly. Line it with parchment paper or foil for easier cleanup.
- Wire rack (that fits inside the baking sheet) — This is optional but highly recommended. It elevates the chicken so air circulates underneath, keeping the bottom crust crispy instead of soggy.
- Three shallow bowls — For the breading station. Pie plates or wide soup bowls work great.
- Box grater or microplane — For grating the Parmesan. Trust me on this one.
- Meat mallet or rolling pin — For pounding the chicken to even thickness. A heavy skillet works too.
- Tongs — For transferring the chicken between bowls and to the baking sheet without making a mess.
- Instant-read thermometer — Not strictly necessary, but it takes the guesswork out of knowing when the chicken is done. I use a Thermapen and it’s worth every penny.
If you don’t have a wire rack, just place the chicken directly on the parchment-lined baking sheet. The bottom won’t be quite as crispy, but it’ll still be delicious. I’ve done it both ways and honestly, I only use the rack when I’m trying to impress someone.
Preparation Method
- Preheat your oven to 425°F (220°C). Place a wire rack on a rimmed baking sheet and spray it lightly with cooking spray. This high heat is what gives you that golden, crunchy crust.
- Prepare the chicken. Place each chicken breast between two sheets of plastic wrap or parchment paper. Use a meat mallet or rolling pin to gently pound them to an even thickness of about 1/2 inch. Don’t go crazy — you’re not making chicken paper. Just even them out so they cook uniformly. Pat them dry with paper towels and season both sides with salt and pepper.
- Set up your breading station. In the first shallow bowl, place 1/4 cup of all-purpose flour (yes, I know I said I was out of it that first time — keep some on hand for this step). In the second bowl, beat the 2 eggs with a tablespoon of water. In the third bowl, combine the panko, grated Parmesan, garlic powder, paprika, oregano, and a pinch of salt and pepper. Mix it all together with your fingers, breaking up any clumps of cheese.
- Bread the chicken. Working with one piece at a time, dredge the chicken in the flour, shaking off any excess. Dip it into the egg mixture, letting the excess drip off. Then press it firmly into the panko-Parmesan mixture, making sure it’s completely coated on both sides. Really press it in — this is what makes the crust stick.
- Arrange on the rack. Place the breaded chicken pieces on the prepared wire rack, leaving a little space between each piece. Don’t let them touch or they’ll steam instead of crisp. Lightly spray the tops with cooking spray or drizzle with a tiny bit of olive oil.
- Bake for 15-18 minutes. No flipping required! Bake until the crust is deep golden brown and the chicken is cooked through. The internal temperature should reach 165°F (74°C) when measured with an instant-read thermometer. Mine usually takes exactly 16 minutes, but ovens vary.
- Let it rest. Remove from the oven and let the chicken rest on the rack for 5 minutes. This is crucial — it lets the juices redistribute so the chicken stays moist when you cut into it. I know it’s hard to wait, but trust me.
- Serve immediately. The crust is at its crispiest right out of the oven. Slice against the grain and serve with your favorite sides.
A quick note: if your chicken breasts are on the thicker side (like 1 inch or more), you might need to add a couple of minutes to the bake time. Just keep an eye on the internal temperature. The crust should be a deep golden brown — if it’s getting too dark before the chicken is done, tent loosely with foil for the last few minutes.
Cooking Tips & Techniques
I’ve made this crispy baked parmesan crusted chicken breast probably fifty times by now, and I’ve learned a few things the hard way. Let me save you some trouble.
Don’t skip the flour step. I know it seems like an extra bother, but the flour helps the egg stick, and the egg helps the breading stick. Skip it, and you’ll end up with patches of bare chicken where the crust fell off. I learned this the sad way when I was in a hurry and thought I could get away with it. I could not.
Use a light hand with the spray oil. You want just enough to help the crust brown, not so much that it gets greasy. A quick spritz from about 6 inches away is perfect. Too much oil and the panko gets heavy and soggy instead of light and crispy.
Temperature matters. Make sure your oven is fully preheated before the chicken goes in. If you put it in a cold oven, the crust will absorb oil and get sad before it has a chance to crisp. I usually start preheating while I’m pounding the chicken.
Don’t crowd the pan. Air circulation is your friend here. If you try to cram all four pieces onto one rack, they’ll steam each other. Use two racks if you need to, rotating them halfway through.
Fresh Parmesan is non-negotiable. I know I’ve said this already, but I’ll say it again because it’s the most important tip. The pre-grated stuff in the green can won’t melt into the panko the same way. It’ll just sit on top and possibly burn. Grate your own. Your taste buds will thank you.
One more thing — if you’re making a double batch, keep the breaded chicken in the fridge while the first batch bakes. Cold chicken holds its shape better and the crust sets more evenly.
Variations & Adaptations
One of the best things about this recipe is how easy it is to adapt. Here are some of my favorite variations:
Spicy version: Add 1/2 teaspoon of cayenne pepper and 1 teaspoon of chili flakes to the panko mixture. I did this on a whim one night when I was craving heat, and it was incredible. Serve with a cooling ranch or blue cheese dip.
Gluten-free option: Swap the all-purpose flour for a gluten-free blend (I like Cup4Cup) and use gluten-free panko. The texture is slightly different — a little more delicate — but still deliciously crispy. My friend with celiac disease gives this version her seal of approval.
Herb-crusted variation: Add 2 tablespoons of finely chopped fresh herbs to the panko mixture. Parsley, thyme, and a little rosemary work beautifully. I do this in the summer when my herb garden is going crazy.
Lemon-Parmesan version: Add the zest of one lemon to the panko mixture and squeeze a little fresh lemon juice over the chicken right before serving. The brightness cuts through the richness perfectly.
Air fryer adaptation: Cook at 375°F (190°C) for 10-12 minutes, flipping halfway through. The air fryer makes the crust even crispier, honestly. Just don’t overcrowd the basket — work in batches if needed.
For a dairy-free version, try using nutritional yeast instead of Parmesan. It won’t be exactly the same, but it adds a nice cheesy flavor. I haven’t perfected this one yet, so let me know if you try it!
Serving & Storage Suggestions
This crispy baked parmesan crusted chicken breast is best served immediately, right when the crust is at its peak crunchiness. I like to serve it with a simple side salad dressed with lemon vinaigrette — the acidity cuts through the richness of the crust. Roasted asparagus or a pile of garlicky green beans are also fantastic choices.
For a heartier meal, serve it alongside creamy mashed potatoes or a simple pasta with olive oil and herbs. The chicken is also amazing sliced thin and served over a Caesar salad for lunch the next day — if there’s any left.
Storage: Leftover chicken keeps in the refrigerator for up to 4 days in an airtight container. The crust will soften over time, but it’s still delicious. I don’t recommend freezing this dish — the crust gets weird and soggy when thawed.
Reheating: The oven is your best friend here. Preheat to 375°F (190°C) and place the chicken on a wire rack over a baking sheet. Bake for 8-10 minutes until heated through and the crust crisps back up. The microwave will make it sad and rubbery — don’t do it. I speak from experience.
If you’re meal prepping, I recommend storing the breaded but unbaked chicken in the fridge for up to 24 hours. Just bake it fresh when you’re ready to eat. The crust actually sets better after resting in the fridge for a bit.
Nutritional Information & Benefits
Here’s the approximate nutritional breakdown for one serving (one chicken breast, using the recipe as written):
- Calories: 385
- Protein: 42g
- Fat: 18g
- Carbohydrates: 14g
- Fiber: 1g
- Sugar: 1g
This recipe is a great source of lean protein, which keeps you full and satisfied. Chicken breast is naturally low in fat and high in important nutrients like niacin, vitamin B6, and selenium. The Parmesan adds calcium and a little extra protein, while the olive oil provides heart-healthy monounsaturated fats.
If you’re watching your sodium intake, you can reduce the added salt and use a low-sodium Parmesan. The paprika and garlic powder add plenty of flavor without extra salt.
This recipe is naturally low-carb and can easily be made keto-friendly by using almond flour instead of regular flour in the breading station. It’s also a great option for those following a high-protein or balanced diet. I personally love that I can serve this to my family without any guilt — it feels indulgent but is actually pretty wholesome.
Conclusion
This crispy baked parmesan crusted chicken breast has become my go-to recipe for so many reasons. It’s fast enough for a frantic weeknight, fancy enough for company, and forgiving enough for beginner cooks. The crust is genuinely crispy — not that sad, soggy situation that gives baked chicken a bad name — and the chicken stays juicy and tender every single time.
What I love most about this recipe is how it came from a moment of near-failure. It reminds me that some of the best things in life come from when plans fall apart and you just have to make do with what you have. That first accidental batch taught me to trust my instincts in the kitchen a little more.
I’d love to hear how this turns out for you! Did you try any of the variations? Did you discover your own twist? Drop a comment below and let me know. And if you loved it as much as I do, share it with a friend who needs an easy, impressive dinner in their back pocket. Happy cooking!
Frequently Asked Questions
Can I use chicken thighs instead of breasts?
Absolutely! Boneless, skinless chicken thighs work great with this recipe. Just adjust the cooking time — thighs usually need about 18-22 minutes at 425°F. They’re also more forgiving if you accidentally overcook them a little.
Why is my crust not crispy?
This usually happens for one of three reasons: the oven wasn’t hot enough, the chicken was crowded on the pan, or too much oil was sprayed on top. Make sure your oven is fully preheated to 425°F, leave space between the pieces, and use a light hand with the cooking spray.
Can I prepare this ahead of time?
Yes! You can bread the chicken and keep it in the fridge for up to 24 hours before baking. Just place it on the wire rack, cover loosely with plastic wrap, and bake when you’re ready. The crust actually adheres better after resting.
How do I know when the chicken is fully cooked?
The most reliable way is to use an instant-read thermometer. The chicken is done when it reaches 165°F (74°C) at the thickest part. If you don’t have a thermometer, cut into the thickest piece — the juices should run clear and there should be no pink in the center.
Can I freeze the breaded chicken before baking?
You can, but I don’t recommend it. The moisture from freezing and thawing tends to make the crust soggy. If you must freeze it, freeze the breaded chicken in a single layer on a baking sheet, then transfer to a freezer bag. Bake from frozen, adding about 5-7 minutes to the cooking time.
Pin This Recipe!
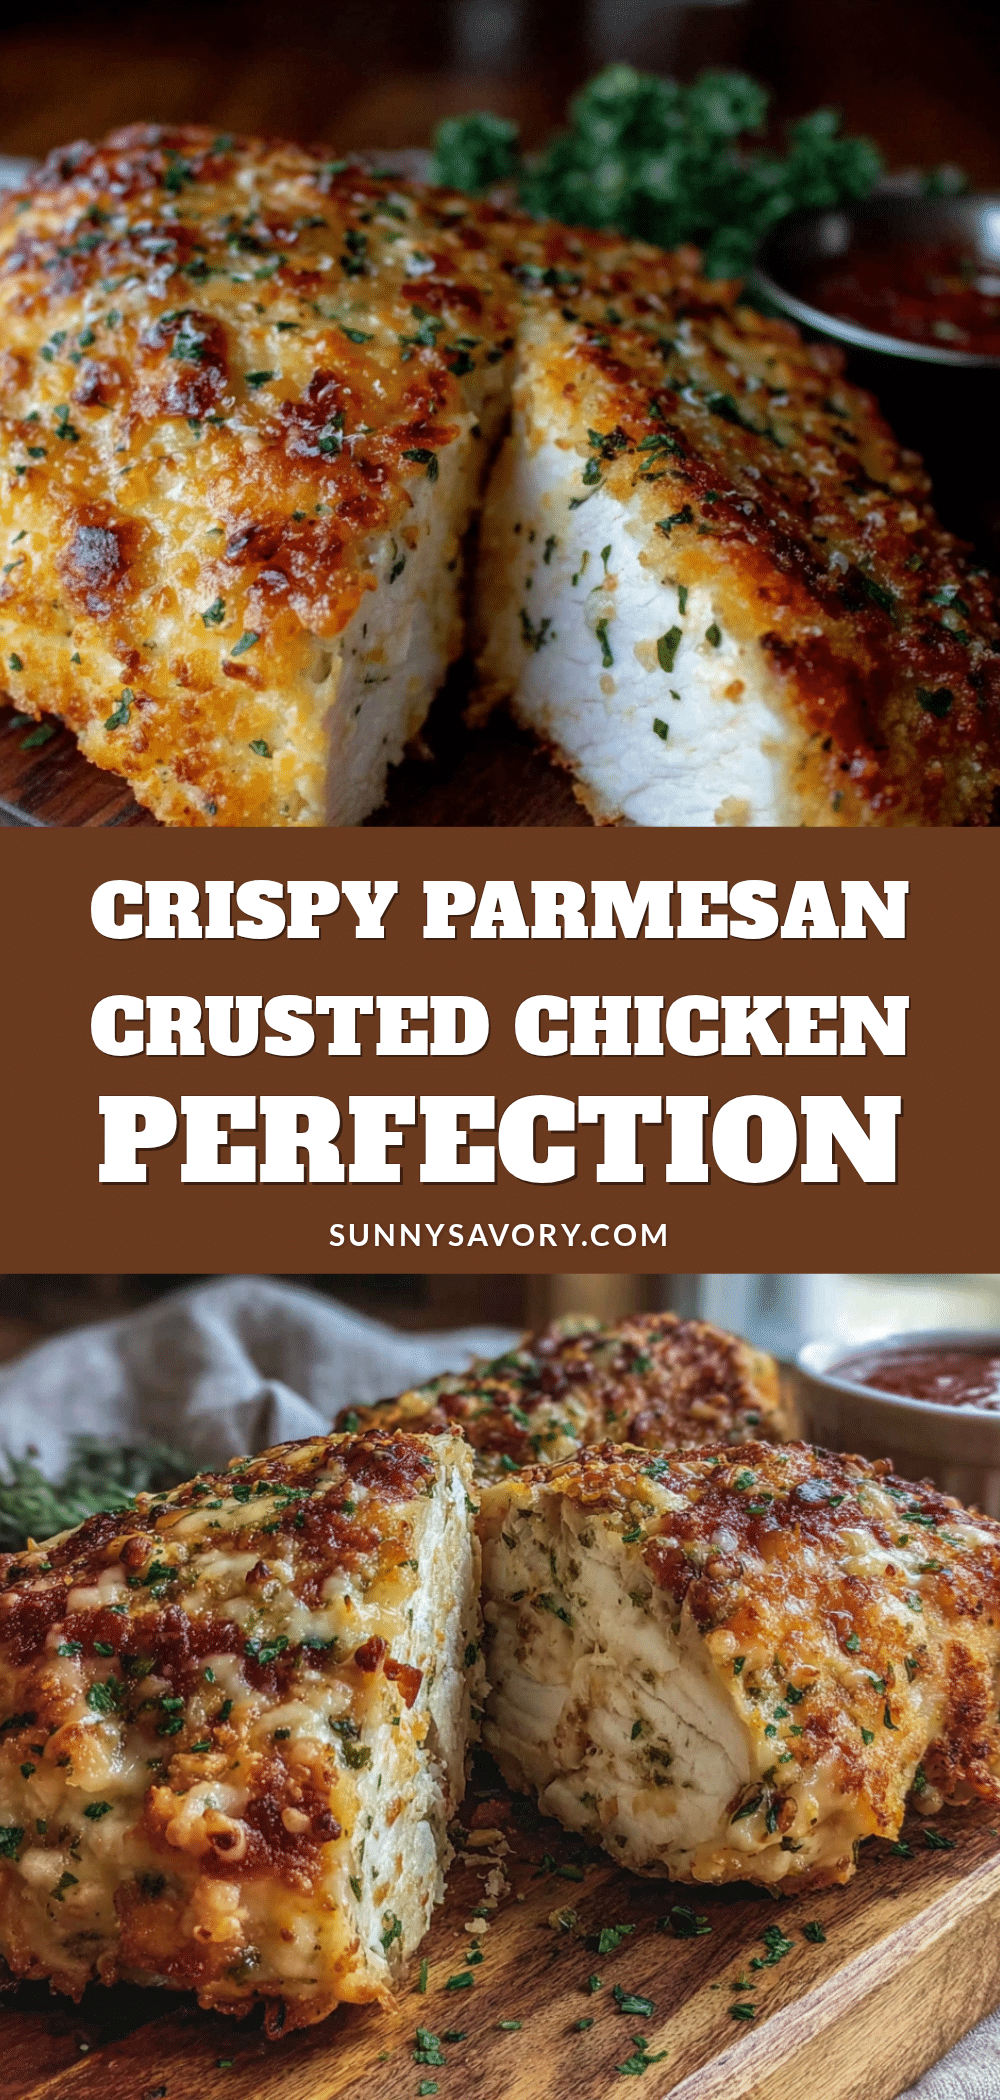
Crispy Baked Parmesan Crusted Chicken Breast: Easy 30-Min Recipe
This crispy baked parmesan crusted chicken breast is a quick and easy 30-minute recipe that delivers a golden, crunchy crust and juicy, tender chicken without the mess of deep frying. Perfect for busy weeknights, it uses simple ingredients and a clever technique for a restaurant-quality meal at home.
- Prep Time: 15 minutes
- Cook Time: 18 minutes
- Total Time: 33 minutes
- Yield: 4 servings 1x
- Category: Main Course
- Cuisine: American
Ingredients
- 4 boneless, skinless chicken breasts (6–8 ounces each)
- 1 1/2 cups panko breadcrumbs
- 3/4 cup freshly grated Parmesan cheese (packed)
- 2 large eggs (beaten)
- 2 tablespoons olive oil
- 1 teaspoon garlic powder
- 1 teaspoon paprika (regular or smoked)
- 1/2 teaspoon dried oregano (optional)
- 1/2 teaspoon fine sea salt
- 1/4 teaspoon freshly ground black pepper
- 1/4 cup all-purpose flour
- Cooking spray or extra olive oil (for spraying tops)
Instructions
- Preheat your oven to 425°F (220°C). Place a wire rack on a rimmed baking sheet and spray it lightly with cooking spray.
- Prepare the chicken: Place each chicken breast between two sheets of plastic wrap or parchment paper. Use a meat mallet or rolling pin to gently pound them to an even thickness of about 1/2 inch. Pat them dry with paper towels and season both sides with salt and pepper.
- Set up your breading station: In the first shallow bowl, place 1/4 cup of all-purpose flour. In the second bowl, beat the 2 eggs with a tablespoon of water. In the third bowl, combine the panko, grated Parmesan, garlic powder, paprika, oregano, and a pinch of salt and pepper. Mix well.
- Bread the chicken: Working with one piece at a time, dredge the chicken in the flour, shaking off any excess. Dip it into the egg mixture, letting the excess drip off. Then press it firmly into the panko-Parmesan mixture, making sure it’s completely coated on both sides.
- Arrange on the rack: Place the breaded chicken pieces on the prepared wire rack, leaving a little space between each piece. Lightly spray the tops with cooking spray or drizzle with a tiny bit of olive oil.
- Bake for 15-18 minutes: No flipping required. Bake until the crust is deep golden brown and the chicken is cooked through. The internal temperature should reach 165°F (74°C) when measured with an instant-read thermometer.
- Let it rest: Remove from the oven and let the chicken rest on the rack for 5 minutes.
- Serve immediately: Slice against the grain and serve with your favorite sides.
Notes
Don’t skip the flour step—it helps the breading stick. Use freshly grated Parmesan for best results. For thicker chicken breasts, add a couple of minutes to the bake time. If the crust browns too quickly, tent loosely with foil. For a double batch, keep breaded chicken in the fridge while the first batch bakes.
Nutrition
- Serving Size: 1 chicken breast
- Calories: 385
- Sugar: 1
- Sodium: 680
- Fat: 18
- Saturated Fat: 6
- Carbohydrates: 14
- Fiber: 1
- Protein: 42
Keywords: crispy baked chicken, parmesan crusted chicken, easy chicken recipe, 30-minute meal, baked chicken breast, weeknight dinner, panko chicken



