Love this? Save it for later!
Share the inspiration with your friends
There used to be a tiny Mexican joint on the corner of 8th and Elm called El Sazón that made the most incredible taco skillet I’ve ever had. When they closed after a rent hike three years ago, I literally stood outside staring at the “For Lease” sign with a half-eaten burrito in my hand. After 12 tries — some embarrassingly watery, one that my fire alarm genuinely protested — I finally got it. This cheesy ground beef taco skillet is that exact weeknight miracle I’ve been chasing.
Honestly, the first few attempts were rough. I kept trying to replicate their slow-cooked magic, but who has three hours on a Tuesday? Let me tell you, the breakthrough came when I stopped overthinking and started embracing what makes this recipe work: speed doesn’t have to sacrifice flavor. The secret is in how you layer the cheese and season the beef — it’s almost like a cheat code for your taste buds.
Maybe you’ve been there too — craving that restaurant-quality taco night but staring at your clock with pure dread. This skillet is my love letter to busy people who still want to eat like royalty. It’s become my go-to for potlucks, lazy Sundays, and those nights when I need dinner on the table before my kids stage a mutiny. Trust me, once you make this, you’ll wonder why you ever bothered with taco Tuesday the hard way.
Why You’ll Love This Recipe
This isn’t just another taco recipe — it’s the one that’ll make you feel like a kitchen rockstar with zero effort. I’ve tested this on picky eaters, spice wimps, and even my neighbor who swears she can’t cook. Every single person asked for the recipe.
- Quick & Easy: From fridge to table in 15 minutes flat. Seriously, this is faster than ordering takeout and waiting for delivery.
- Simple Ingredients: You probably have 90% of this in your pantry right now. No fancy trips to specialty stores required.
- Perfect for Hosting: This dish is a lifesaver when guests show up hungry. Serve it straight from the skillet with tortilla chips — it’s an instant party.
- Crowd-Pleaser: Kids devour it, adults fight over seconds, and everyone loves the gooey cheese pull.
- Unbelievably Delicious: The combination of seasoned beef, melted cheese, and fresh toppings is pure comfort food magic.
What makes this different from every other taco skillet out there? It’s the technique — browning the beef until it’s genuinely crispy on the edges before adding any liquid. Most recipes skip this step and end up with sad, soggy meat. Trust me, that extra minute of patience pays off big time.
This recipe is the kind that makes you close your eyes after the first bite. It’s comfort food reimagined — faster, cheesier, and with the same soul-soothing satisfaction that makes you want to lick the pan clean. Perfect for impressing guests without stress, or turning a simple Tuesday into something memorable.
What Ingredients You Will Need
This recipe uses simple, honest ingredients to deliver bold taco flavor without the fuss. Most of these are pantry staples, which makes this perfect for those “I have nothing for dinner” moments.
- Ground beef, 1 lb (450g): Go for 80/20 lean-to-fat ratio for the best flavor. The fat renders into the skillet and carries all those taco spices beautifully. I personally prefer grass-fed beef from a local butcher when I can find it.
- Taco seasoning, 2 tablespoons (store-bought or homemade): If you’re using a packet, I recommend the Ortega or Old El Paso brand for consistent results. For homemade, mix 1 tablespoon chili powder, 1 teaspoon cumin, 1/2 teaspoon paprika, 1/2 teaspoon garlic powder, 1/2 teaspoon onion powder, and a pinch of cayenne.
- Shredded cheddar cheese, 1 cup (120g): Sharp cheddar melts beautifully and adds that classic taco flavor. Pre-shredded works in a pinch, but freshly shredded melts smoother because it doesn’t have anti-caking agents.
- Shredded Monterey Jack cheese, 1 cup (120g): This adds that gooey, stretchy texture that makes the skillet irresistible. You can substitute with mozzarella if needed.
- Diced tomatoes with green chiles, 1 can (10 oz / 280g): Rotel is the gold standard here. The acidity cuts through the richness of the beef and cheese perfectly. Drain them slightly if you want a thicker skillet.
- Black beans, 1 can (15 oz / 425g), drained and rinsed: These add fiber, protein, and a lovely creamy texture. Feel free to skip them if you’re not a bean fan.
- Corn kernels, 1 cup (frozen, canned, or fresh): I use frozen sweet corn because it’s always available and adds a pop of sweetness. Canned corn works too — just drain it well.
- Jalapeño, 1 medium, diced (optional): For heat lovers. Remove the seeds if you want mild heat, or leave them in for a real kick.
- Fresh cilantro, 1/4 cup, chopped: For garnish and that fresh finish. If you’re one of those people who thinks cilantro tastes like soap, use fresh parsley instead.
- Lime, 1 large: A squeeze of fresh lime juice right before serving brightens everything up. Don’t skip this — it’s not optional.
- Salt and black pepper: To taste. Go easy on the salt since the taco seasoning and cheese both have plenty.
- Optional toppings: Sour cream, diced avocado, sliced green onions, hot sauce, crushed tortilla chips for crunch.
Equipment Needed
You don’t need a professional kitchen for this one. Most of this stuff you probably already own.
- Large skillet or cast iron pan (12-inch / 30cm): A cast iron skillet gives you that beautiful even heat and nice crispy edges on the beef. I use my trusty Lodge that I’ve had for years — it just keeps getting better. If you don’t have cast iron, any heavy-bottomed non-stick skillet works perfectly.
- Wooden spoon or spatula: For breaking up the ground beef as it cooks. A wooden spoon won’t scratch your pans and gives you good leverage.
- Cutting board and sharp knife: For dicing the jalapeño and chopping cilantro. A dull knife is a dangerous knife — take my word on that one.
- Can opener: Unless you’re buying the pop-top cans. I’ve definitely tried opening a can with a knife before and learned my lesson.
- Measuring spoons: For the taco seasoning. Eyeballing it works if you’re experienced, but measuring ensures consistency.
- Cheese grater: If you’re shredding your own cheese. Pre-shredded is fine, but freshly grated melts so much better and doesn’t have that weird powdery coating.
Budget-friendly tip: You can find a perfectly good cast iron skillet at thrift stores or garage sales for under $10. Just scrub it well and season it before using.
Preparation Method
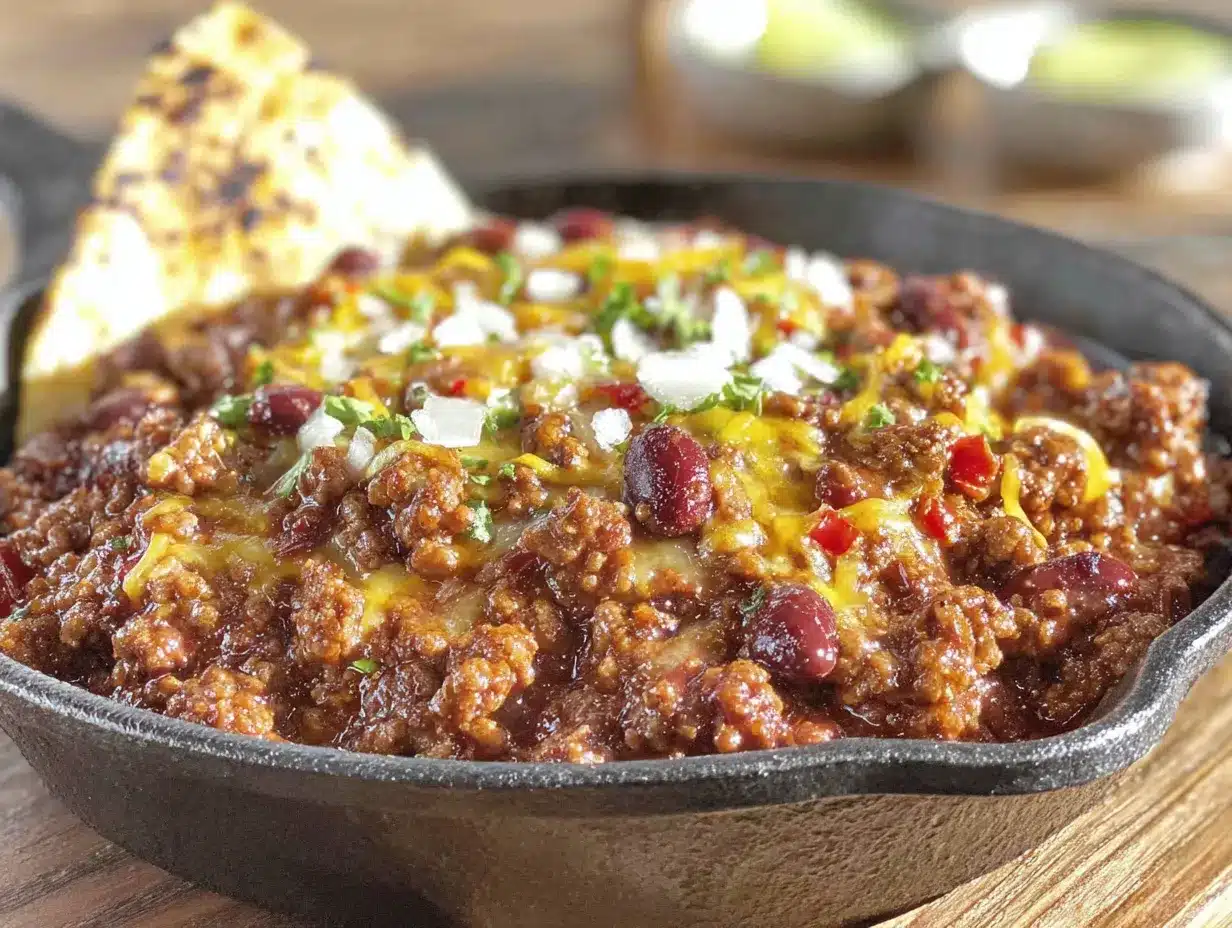
This comes together faster than you think. Here’s the step-by-step process that guarantees perfect results every time.
- Preheat your skillet over medium-high heat for about 2 minutes. You want it hot enough that a drop of water sizzles on contact. Add the ground beef and break it apart with your wooden spoon. Let it cook undisturbed for 3 minutes — this creates those beautiful browned bits that are pure flavor.
- Continue cooking the beef for another 3-4 minutes, stirring occasionally, until it’s fully browned and starting to get crispy around the edges. Don’t rush this step! If you stir too much, you’ll steam the meat instead of browning it. Drain off any excess fat, leaving about 1 tablespoon in the pan for flavor.
- Sprinkle the taco seasoning evenly over the cooked beef. Stir well to coat every piece of meat. Let it cook for 30 seconds — this “blooms” the spices and makes them more aromatic. You’ll smell that amazing taco scent filling your kitchen.
- Add the diced tomatoes with green chiles (drained slightly), black beans, and corn kernels. Stir everything together until well combined. Reduce the heat to medium-low and let it simmer for 3-4 minutes, stirring occasionally. The mixture should be bubbling gently, not boiling aggressively.
- Taste and adjust seasoning at this point. Add salt and black pepper if needed. Remember that the cheese will add saltiness, so go easy. If you want more heat, add the diced jalapeño now.
- Sprinkle both cheeses evenly over the top of the skillet mixture. Don’t stir it in — you want that beautiful cheese layer on top. Cover the skillet with a lid or a piece of aluminum foil. Let it cook for 2 minutes, or until the cheese is completely melted and bubbly.
- Remove from heat and let it rest for 1 minute. This allows the cheese to set slightly so it doesn’t slide off when you serve it. Garnish with fresh cilantro and a generous squeeze of lime juice.
- Serve immediately straight from the skillet. Scoop it onto warm tortillas, over rice, or with tortilla chips for dipping. Add your favorite toppings — sour cream, avocado, hot sauce, you name it.
A quick sensory note: The beef should sizzle loudly when it hits the pan, the spices should smell warm and earthy, and the finished dish should have a golden-brown cheese crust on top with bubbling edges. If your cheese isn’t melting, your pan might not be hot enough.
Cooking Tips & Techniques
Here’s the stuff I wish someone had told me before my first attempt. These little details make a huge difference.
Don’t overcrowd the pan. If you’re doubling the recipe, use two skillets instead of one giant one. When there’s too much meat in the pan, it steams instead of browning. You want those crispy edges, not gray, sad meat.
Let the beef develop a crust. I know it’s tempting to stir constantly, but resist! Let the meat sit for a few minutes to develop that deep brown color. This is called the Maillard reaction, and it’s where most of the flavor comes from. I learned this after making about ten batches of bland tacos.
Toast your spices. That 30 seconds after adding the taco seasoning isn’t just for show. Toasting the spices in the hot fat releases their essential oils and makes them exponentially more flavorful. You’ll notice the difference immediately.
Watch your heat levels. Medium-high for browning, medium-low for simmering. If you keep the heat too high after adding the tomatoes, the liquid will evaporate too quickly and you’ll end up with dry, tough meat. Low and slow is the way to go for the simmering stage.
Cheese strategy matters. Sprinkle the cheese evenly and don’t peek under the lid while it’s melting. Every time you lift that lid, you release steam and heat, which means your cheese takes longer to melt. Just trust the process.
One of my biggest failures? I once used pre-shredded cheese that had been sitting in my fridge for weeks. It had that weird white coating and refused to melt properly. The whole dish was a stringy, clumpy mess. Freshly shredded cheese is worth the extra 30 seconds of effort.
Variations & Adaptations
This recipe is incredibly forgiving, so feel free to make it your own. Here are some of my favorite twists.
Dietary adaptations: Use ground turkey or chicken instead of beef for a leaner option. For a vegetarian version, substitute the meat with 2 cups of cooked lentils or a plant-based ground meat alternative. Both work beautifully with the same seasoning and cooking method.
Low-carb/Keto version: Skip the black beans and corn, and serve the skillet over cauliflower rice or in lettuce wraps. The cheese and beef keep it satisfying without the carbs. I’ve made this for keto friends and they always ask for seconds.
Spice level variations: For a mild version, use plain diced tomatoes instead of Rotel and skip the jalapeño. For extra heat, add a diced serrano pepper or a teaspoon of chipotle powder along with the taco seasoning. My brother-in-law adds ghost pepper flakes — I don’t recommend that unless you have a high tolerance.
Seasonal twists: In summer, add diced zucchini or bell peppers along with the corn. In fall, stir in some roasted butternut squash cubes. The sweetness of the squash pairs amazingly with the taco spices.
Different cheese options: Try pepper jack for extra heat, or a Mexican blend for authentic flavor. Smoked gouda adds a whole different dimension — I tried it once on a whim and it was incredible.
My personal favorite variation? I add a handful of crushed tortilla chips on top of the cheese before it melts. They get slightly soft and create this amazing crust that everyone fights over. Just don’t tell anyone it’s not part of the original recipe.
Serving & Storage Suggestions
This skillet is incredibly versatile when it comes to serving. Here’s how to make the most of it.
Serving temperature and presentation: Serve this straight from the skillet while it’s hot and bubbly. The cheese should be stretchy and the beef should be steaming. Presentation-wise, nothing beats the rustic look of a cast iron skillet on the table. Garnish with fresh cilantro, a few lime wedges, and maybe some sliced radishes for color.
What to serve alongside: Warm corn or flour tortillas are essential for scooping. A simple side of Mexican rice or cilantro-lime rice rounds out the meal perfectly. For a lighter option, serve with a crisp green salad dressed with lime vinaigrette. Guacamole and salsa are never bad ideas either.
Beverage pairings: A cold Mexican beer like Modelo or Corona is classic. For non-alcoholic options, horchata or a tart limeade complement the flavors beautifully. If you’re feeling fancy, a margarita (on the rocks, not frozen) is a perfect match.
Storage instructions: Let the skillet cool completely before transferring to an airtight container. It will keep in the refrigerator for up to 4 days. The flavors actually meld together overnight and taste even better the next day — if you can resist eating it all.
Reheating methods: The best way to reheat is in a skillet over medium heat with a splash of water or broth to restore moisture. Cover and cook for 5-7 minutes, stirring occasionally. Microwave works in a pinch, but the texture won’t be as good. If you’re reheating from frozen, thaw overnight in the fridge first.
Freezing tips: This freezes beautifully for up to 3 months. Portion it into individual containers for quick lunches or dinners. Just remember to leave out the fresh toppings — add those after reheating. I always keep a couple of portions in my freezer for emergency dinners.
Nutritional Information & Benefits
Here’s the nutritional breakdown for one serving (about 1 cup, without toppings). Keep in mind these are estimates and will vary based on your specific ingredients.
- Calories: Approximately 380-420 per serving
- Protein: 28-32g (excellent for muscle repair and satiety)
- Fat: 22-26g (mostly from beef and cheese, with some healthy monounsaturated fats)
- Carbohydrates: 18-22g (from beans, corn, and tomatoes)
- Fiber: 5-7g (thanks to black beans and corn)
- Iron: 15-20% of daily value (from beef)
- Calcium: 25-30% of daily value (from cheese)
Health benefits: Ground beef is an excellent source of B vitamins, zinc, and high-quality protein. Black beans add fiber and plant-based protein, which helps with digestion and blood sugar stability. The tomatoes provide lycopene, a powerful antioxidant. And yes, cheese has calcium and vitamin D — so it’s practically health food, right?
Dietary considerations: This recipe is naturally gluten-free (check your taco seasoning label to be sure). To make it dairy-free, use a plant-based cheese alternative. For low-sodium, use homemade taco seasoning and low-sodium canned beans.
Potential allergens: Contains dairy (cheese). The corn and beans are common allergens for some people, though less common than wheat or nuts. Always check labels if cooking for someone with severe allergies.
My personal take? This isn’t diet food, and it’s not pretending to be. It’s honest, satisfying comfort food that happens to have some nutritional redeeming qualities. Balance is everything — enjoy this with a side of veggies and you’re golden.
Conclusion
This cheesy ground beef taco skillet is proof that you don’t need hours in the kitchen to eat like a king. It’s the recipe I turn to when I’m tired, when I’m busy, and when I want to impress people without breaking a sweat. The best part? It’s completely customizable — make it spicier, cheesier, or loaded with whatever toppings your heart desires.
I honestly believe this recipe has saved my sanity more times than I can count. Between work deadlines, school runs, and life’s general chaos, having something this delicious ready in 15 minutes feels like a superpower. And the way people’s faces light up when they take that first bite? Priceless.
Now I want to hear from you! Have you tried this recipe? Did you add your own twist? Drop a comment below and tell me about it. And if you loved it, share it with a friend who needs a quick dinner win. Let’s make taco night happen any night of the week.
Happy cooking, friends — may your cheese always be melty and your skillet always be full.
Frequently Asked Questions
Can I use ground turkey instead of beef?
Absolutely! Ground turkey works perfectly. Just add a tablespoon of olive oil to the pan since turkey is leaner. The cooking time remains the same, and the taco seasoning will mask any difference in flavor.
How do I make this spicier?
Add a diced jalapeño or serrano pepper with the tomatoes, or stir in a teaspoon of chipotle powder with the taco seasoning. For serious heat, add a few dashes of your favorite hot sauce at the end.
Can I make this ahead of time?
Yes! Prepare the entire skillet up to step 5 (before adding cheese). Refrigerate for up to 2 days. When ready to serve, reheat in the skillet, then add the cheese and follow the remaining steps. It’s a great make-ahead option for busy weeks.
What can I serve with this besides tortillas?
This skillet is incredibly versatile. Serve it over rice, quinoa, or cauliflower rice. Use it as a filling for stuffed bell peppers or baked potatoes. Or simply scoop it up with tortilla chips for a killer nacho-style meal.
How do I prevent the cheese from becoming greasy?
Use freshly shredded cheese instead of pre-shredded, which contains anti-caking agents that can cause greasiness. Also, don’t overheat the cheese — melt it just until bubbly, then remove from heat immediately. Overcooked cheese separates and becomes oily.
Pin This Recipe!
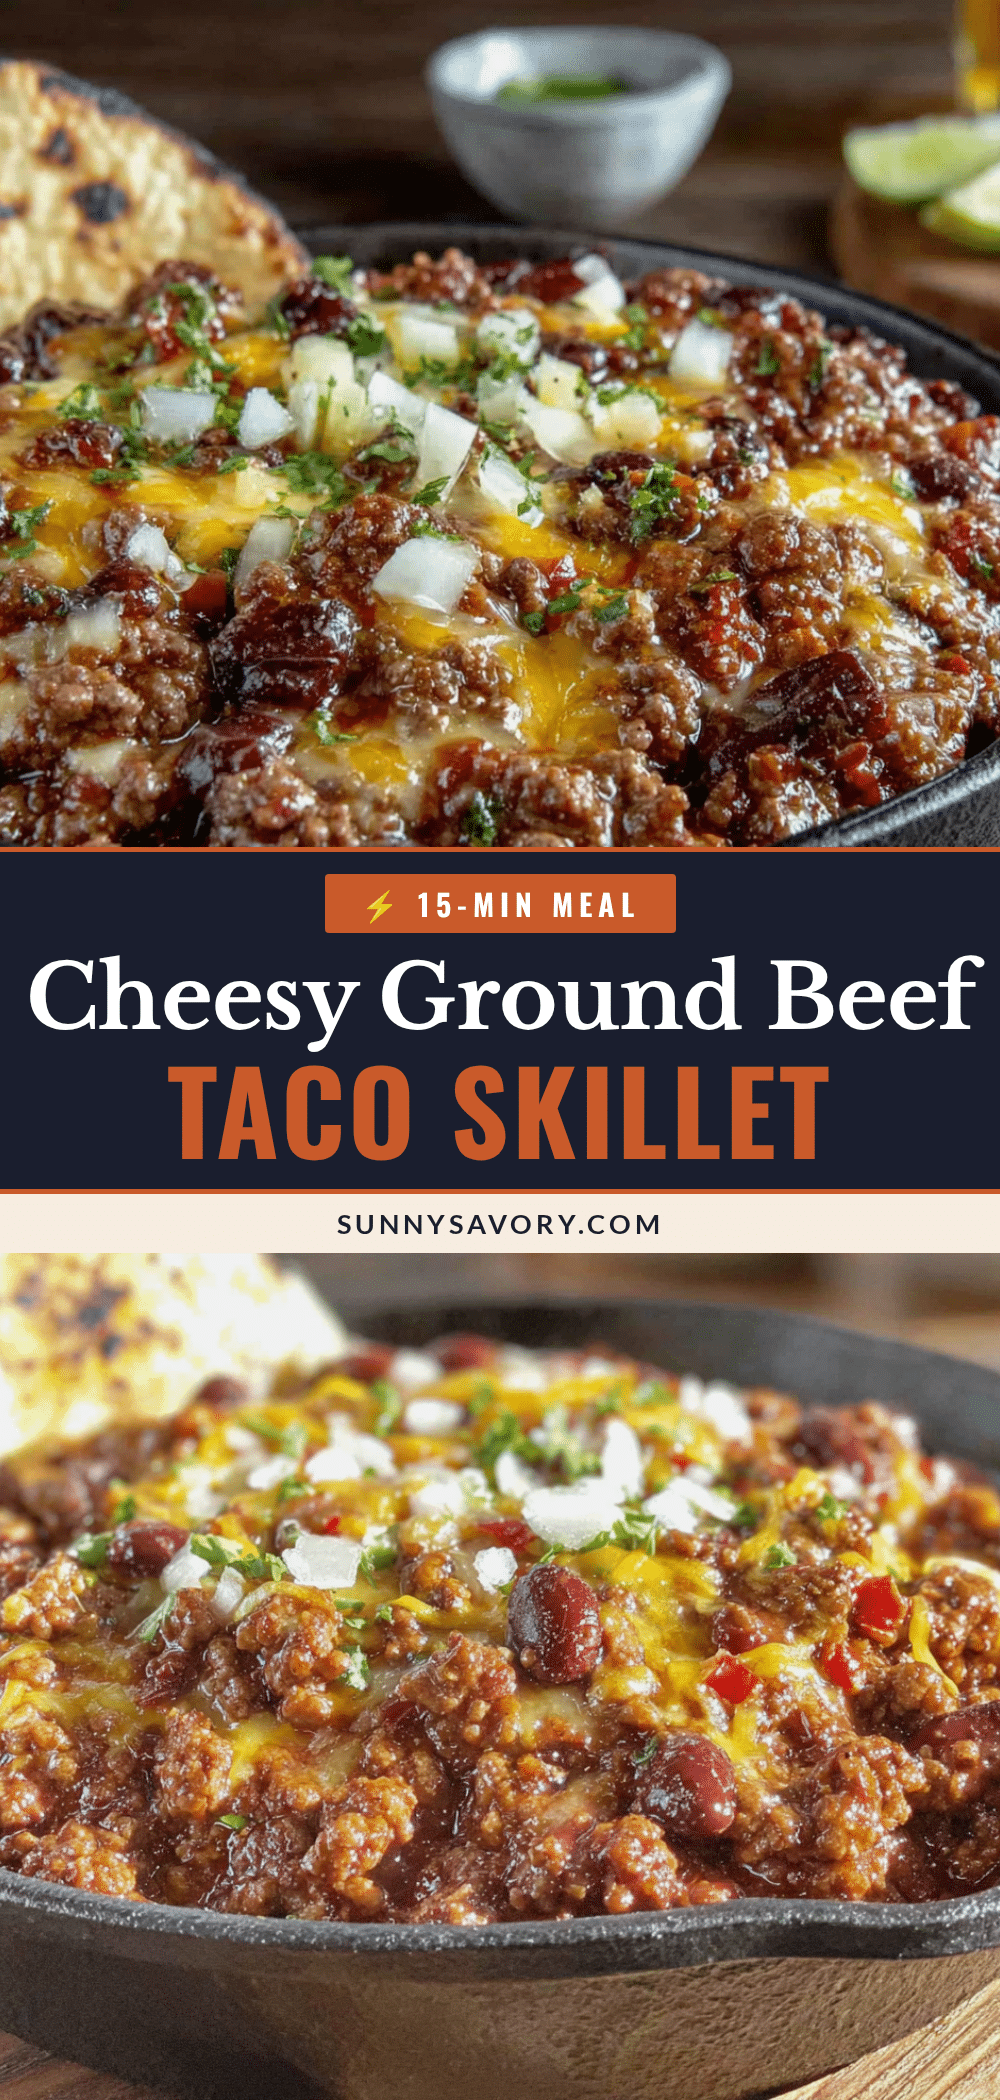
Easy 15-Minute Cheesy Taco Skillet Recipe
A quick and easy cheesy ground beef taco skillet that comes together in just 15 minutes. Perfect for busy weeknights, this one-pan meal is loaded with seasoned beef, melted cheese, black beans, and corn, and is sure to be a crowd-pleaser.
- Prep Time: 5 minutes
- Cook Time: 10 minutes
- Total Time: 15 minutes
- Yield: 4 servings 1x
- Category: Main Course
- Cuisine: Mexican
Ingredients
- 1 lb (450g) ground beef (80/20 lean-to-fat ratio)
- 2 tablespoons taco seasoning (store-bought or homemade)
- 1 cup (120g) shredded cheddar cheese
- 1 cup (120g) shredded Monterey Jack cheese
- 1 can (10 oz / 280g) diced tomatoes with green chiles (e.g., Rotel), drained slightly
- 1 can (15 oz / 425g) black beans, drained and rinsed
- 1 cup (frozen, canned, or fresh) corn kernels
- 1 medium jalapeño, diced (optional)
- 1/4 cup fresh cilantro, chopped
- 1 large lime
- Salt and black pepper to taste
- Optional toppings: sour cream, diced avocado, sliced green onions, hot sauce, crushed tortilla chips
Instructions
- Preheat a large skillet or cast iron pan over medium-high heat for about 2 minutes. Add the ground beef and break it apart with a wooden spoon. Let it cook undisturbed for 3 minutes to create browned bits.
- Continue cooking the beef for another 3-4 minutes, stirring occasionally, until fully browned and crispy around the edges. Drain off excess fat, leaving about 1 tablespoon in the pan.
- Sprinkle the taco seasoning evenly over the cooked beef. Stir well to coat every piece. Let it cook for 30 seconds to bloom the spices.
- Add the diced tomatoes with green chiles (drained slightly), black beans, and corn kernels. Stir everything together. Reduce heat to medium-low and let it simmer for 3-4 minutes, stirring occasionally.
- Taste and adjust seasoning with salt and black pepper if needed. Add diced jalapeño if desired.
- Sprinkle both cheeses evenly over the top of the skillet mixture. Do not stir. Cover the skillet with a lid or aluminum foil and cook for 2 minutes, or until the cheese is melted and bubbly.
- Remove from heat and let it rest for 1 minute. Garnish with fresh cilantro and a generous squeeze of lime juice.
- Serve immediately straight from the skillet with warm tortillas, over rice, or with tortilla chips. Add desired toppings.
Notes
For best results, use freshly shredded cheese as it melts more smoothly. Let the beef develop a crust by not stirring too much. Toast the spices for 30 seconds to enhance flavor. If doubling the recipe, use two skillets to avoid overcrowding.
Nutrition
- Serving Size: 1 cup (without toppi
- Calories: 380420
- Sugar: 46
- Sodium: 8001000
- Fat: 2226
- Saturated Fat: 1012
- Carbohydrates: 1822
- Fiber: 57
- Protein: 2832
Keywords: taco skillet, cheesy taco skillet, ground beef taco skillet, easy taco recipe, 15-minute dinner, weeknight dinner, one-pan meal



