Love this? Save it for later!
Share the inspiration with your friends
This was supposed to be a proper pumpkin roll. I had the cream cheese softening on the counter, the powdered sugar measured out, and I was feeling pretty good about myself. Then the power flickered. And flickered again. And then it just… stayed off. I stood there in my dark kitchen on a Tuesday afternoon, three days before Halloween, staring at a bowl of room-temperature cream cheese and wondering what kind of dessert I could possibly make without an oven. The kids were due home from school in an hour, and I had promised them we’d bake something spooky together. Let me tell you, I was this close to just handing out store-bought cookies and calling it a day.
I rummaged through my pantry like a woman possessed. Oreos? Check. Chocolate pudding mix? Check. Those little gummy worms I’d bought for a different project entirely? Check. And then it hit me — not the power coming back on, unfortunately, but an idea. I grabbed a bag of crushed Oreos I’d been meaning to use for a cheesecake crust, some clear plastic cups I’d bought for a party last summer, and that cream cheese that was now sweating on my counter. Honestly, I thought I was just making a snack to keep the kids busy. I had no idea I was about to stumble onto the most requested Halloween dessert in our neighborhood.
What came out of that dark, slightly panicked afternoon was nothing like the plan — and better. These little cups of chocolate pudding, crushed cookies, and creepy candy decorations became an instant legend. The neighbor kids started showing up at my door asking if I was making “the dirt cups” again. My sister-in-law asked for the recipe three times. And the best part? They take maybe fifteen minutes to throw together, no oven required, and they look like something you’d see at a fancy Halloween party. Maybe you’ve been there — staring at a half-failed plan and wondering how to save the day. That’s exactly how this recipe was born, and I’ve been making it every Halloween since.
Why You’ll Love This Recipe
Look, I’ve tested a lot of Halloween desserts over the years. Some were gorgeous but took all day. Others were quick but looked, well, sad. These graveyard dirt cups hit that perfect sweet spot where they’re genuinely impressive without making you want to pull your hair out. Here’s why they’ve become my go-to:
- No-Bake Magic : Comes together in under 20 minutes, which is perfect when you’re already juggling costumes, decorations, and that one kid who refuses to wear anything but a dinosaur costume for the third year in a row.
- Pantry-Friendly Ingredients : You probably have most of this stuff already. Oreos, pudding mix, milk, cream cheese — nothing weird or hard to find.
- Perfect for Halloween Parties : These little cups are made for gatherings. Everyone gets their own portion, they look incredible on a dessert table, and kids absolutely lose their minds over them.
- Crowd-Pleaser Across Ages : I’ve served these at adult Halloween parties and kids’ classroom celebrations alike. They disappear every single time.
- Unbelievably Delicious : The creamy chocolate pudding against the crunchy Oreo “dirt” with that tangy cream cheese layer in between? It’s next-level comfort food disguised as a spooky treat.
What makes these different from every other dirt cup recipe out there? It’s the cream cheese layer. Most recipes just do pudding and crushed cookies, which is fine, but it’s missing something. That silky, slightly tangy cream cheese mousse in the middle takes these from “cute kids’ snack” to “dessert adults fight over.” I learned this trick from my grandmother’s old chocolate cheesecake recipe, and honestly, it’s the secret weapon here.
This isn’t just another Halloween dessert — it’s the kind that makes people close their eyes after the first bite. It’s comfort food reimagined for a spooky night, with the same soul-soothing satisfaction as your favorite chocolate pudding but with a festive twist that makes it feel special. Perfect for impressing your Halloween guests without spending all day in the kitchen.
What Ingredients You Will Need
This recipe uses simple, mostly pantry-stable ingredients to deliver that creamy, crunchy, spooky magic without any fuss. Most of these are things you probably already have, which is exactly what you want when you’re throwing together a last-minute Halloween dessert.
For the Chocolate Pudding Layer:
- 2 boxes (3.9 oz each) instant chocolate pudding mix (I prefer Jell-O brand for consistent texture)
- 3 cups cold whole milk (2% works too, but whole milk gives a richer result)
- 1 teaspoon vanilla extract (adds depth and rounds out the chocolate flavor)
For the Cream Cheese Mousse Layer:
- 8 oz cream cheese, softened to room temperature (Philadelphia is my go-to — the texture is unbeatable)
- 1/2 cup powdered sugar
- 1 teaspoon vanilla extract
- 1 cup heavy whipping cream (you can use Cool Whip in a pinch, but fresh whipped cream is better)
For the “Dirt” Topping:
- 1 family-size package Oreo cookies (about 36 cookies — you’ll use the whole package)
- 2 tablespoons melted butter (optional, but it helps the “dirt” clump together more naturally)
For the Graveyard Decorations:
- Gummy worms (I use Trolli brand — they’re the most realistic looking)
- Halloween-themed candy eyeballs
- Chocolate gravestones (you can buy these or make them from chocolate bark)
- Pretzel sticks for fence posts or broken tombstone pieces
- Green-tinted shredded coconut for “moss” (optional but really fun)
A quick note on the pudding: don’t try to use cook-and-serve pudding here. It won’t set up the same way, and you’ll end up with soup. Instant pudding is non-negotiable for this recipe. Also, make sure your cream cheese is truly at room temperature — cold cream cheese will leave you with lumpy mousse, and nobody wants that. If you’re in a hurry, you can microwave it for about 10-15 seconds, but watch it carefully so it doesn’t start melting.
For the Oreos, you can use regular or double-stuf — both work fine. I actually prefer regular Oreos because the cream filling adds a little extra sweetness when you crush them up. If you’re feeling fancy, you can even try the Halloween-themed Oreos with orange creme, though the color doesn’t really show once they’re crushed into “dirt.”
Equipment Needed
You don’t need anything fancy for this recipe, which is part of its beauty. Here’s what you’ll want to have on hand:
- Clear plastic or glass cups (8-10 oz size works perfectly — I use 9 oz clear plastic cups from the party supply store)
- Electric hand mixer or stand mixer (for the cream cheese mousse — you can do it by hand, but your arm will thank you for the mixer)
- Food processor or zip-top bag and rolling pin (for crushing Oreos — I’ve used both methods, and honestly, the bag and rolling pin is more satisfying and less cleanup)
- Large mixing bowls (at least two — one for pudding, one for mousse)
- Whisk (for the pudding mix)
- Spatula (for scraping every last bit of that cream cheese goodness)
- Measuring cups and spoons
- Small spoon or offset spatula (for layering)
If you don’t have a food processor, seriously, just dump the Oreos in a zip-top bag and go to town with a rolling pin. It’s actually more fun, especially if you let the kids help. Just make sure the bag is well-sealed first — I learned that one the hard way when Oreo dust exploded all over my kitchen.
Preparation Method
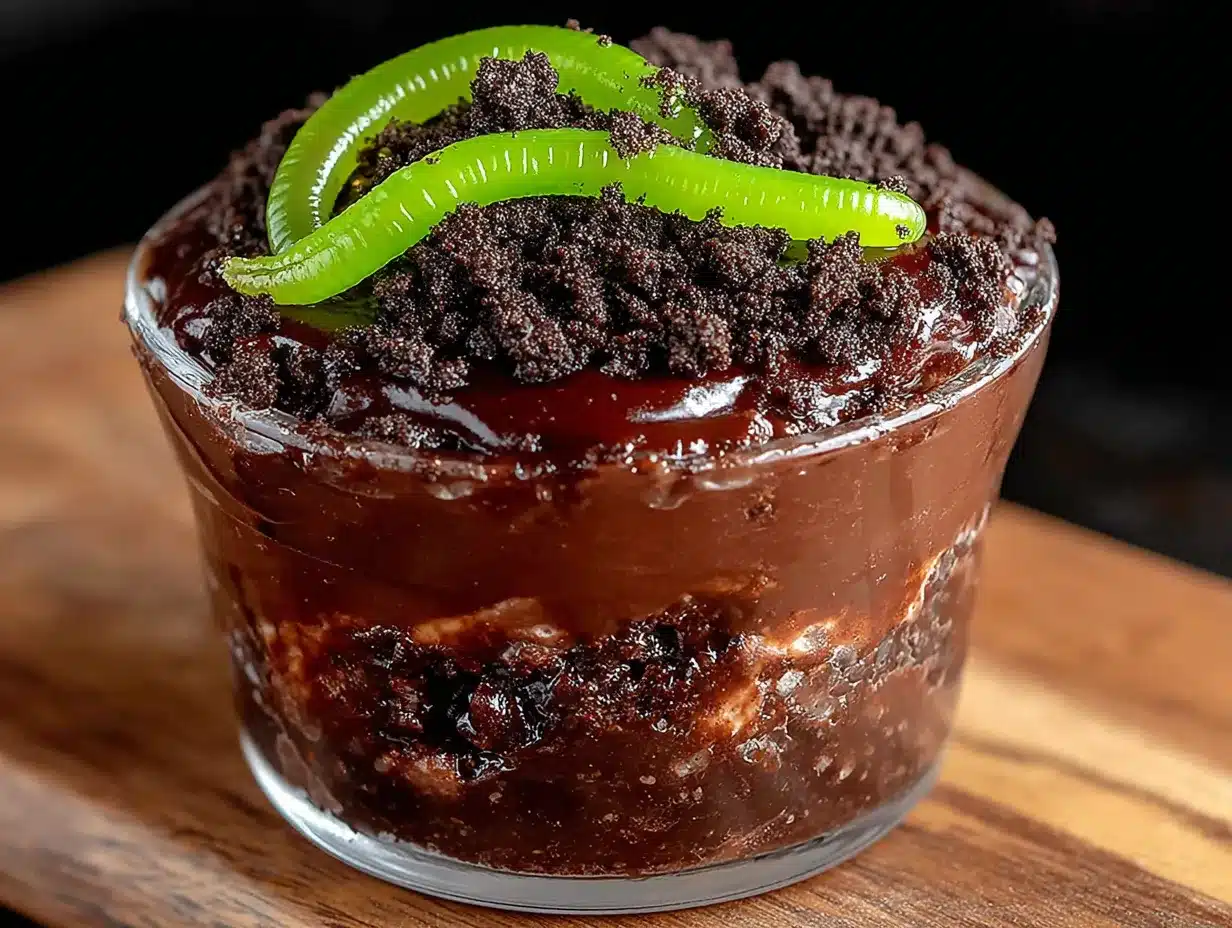
Alright, let’s make these spooky little masterpieces. The whole process takes about 20 minutes of active work, plus about an hour of chilling time. Trust me on the chilling — it makes a huge difference.
Step 1: Make the Chocolate Pudding
In a large bowl, whisk together both boxes of instant chocolate pudding mix with 3 cups of cold whole milk. Whisk vigorously for about 2 minutes until the mixture starts to thicken. You’ll feel it getting heavier as you whisk. Add the teaspoon of vanilla extract and give it one more stir. Let it sit for 5 minutes to fully set up while you work on everything else. Pro tip: if your pudding seems too thin after 5 minutes, pop it in the fridge while you prep the other layers.
Step 2: Crush the Oreos into “Dirt”
Place the entire package of Oreos (cream filling included) into a large zip-top bag. Seal it tightly — I mean really check that seal — and use a rolling pin to crush them into fine crumbs. You want a mix of fine dust and slightly chunkier pieces for texture. If you’re using a food processor, pulse about 10-12 times until you get that same variation. Transfer the crumbs to a bowl and stir in the melted butter if you’re using it. This helps the “dirt” clump together a bit and gives it a more realistic texture. Set aside.
Step 3: Make the Cream Cheese Mousse
In a large mixing bowl, beat the softened cream cheese with an electric mixer until it’s smooth and fluffy — about 2 minutes. Add the powdered sugar and vanilla extract and beat until combined, scraping down the sides of the bowl once. In a separate bowl, whip the heavy cream until stiff peaks form. You’re looking for that texture where the cream holds its shape when you lift the beaters. Gently fold the whipped cream into the cream cheese mixture using a spatula. Don’t stir vigorously — fold gently until you don’t see any white streaks. This should look light, airy, and luxurious.
Step 4: Assemble the Cups
Now for the fun part. Grab your clear cups and start layering. Begin with about 2 tablespoons of crushed Oreo “dirt” at the bottom of each cup. This gives a nice foundation. Next, add a layer of chocolate pudding — about 3 tablespoons per cup. Then add a generous layer of the cream cheese mousse — another 3 tablespoons or so. Top with another layer of crushed Oreos, about 2 tablespoons, pressing down gently to create a flat surface. You want the “dirt” to look like freshly turned soil, so don’t pack it too tightly.
Step 5: Decorate the Graveyard
This is where you get creative. Press gummy worms into the “dirt” so they look like they’re crawling out. Stick a chocolate gravestone into the top. Add candy eyeballs peeking out from the dirt. Break pretzel sticks into pieces and arrange them like a broken fence around the edge. If you’re using the green coconut “moss,” sprinkle a little around the gravestones. Each cup can tell its own little spooky story.
Step 6: Chill Before Serving
This step is crucial. Refrigerate the assembled cups for at least 1 hour before serving. The flavors meld together, the pudding sets up properly, and the textures become perfectly cohesive. If you can wait 2 hours, even better. I know it’s hard, but trust me on this.
Cooking Tips & Techniques
After making these about fifty times (I’m not exaggerating), I’ve picked up a few tricks that make the process smoother and the results better. Here’s what I’ve learned:
Room temperature cream cheese is non-negotiable. I learned this the hard way when I was rushing and used cold cream cheese. The mousse came out lumpy and never quite smoothed out. Take it out of the fridge 30 minutes before you start, or if you’re in a rush, cut it into small cubes and let them sit for 10 minutes.
Don’t overmix the pudding. Whisk it just until it starts to thicken. Overmixing can make it grainy and weird. You want it smooth and silky. Also, use cold milk — it helps the pudding set up faster and more evenly.
For the best “dirt” texture, leave some chunks. You don’t want it to be a fine powder. Aim for a mix of fine crumbs and small pieces about the size of peas. This gives it that realistic soil texture and adds nice crunch.
Make the mousse first if you’re short on time. The cream cheese mousse can sit in the fridge for up to an hour while you work on everything else. Just give it a quick stir before layering.
Use a piping bag for the mousse layer. If you want really clean layers, put the mousse in a piping bag and pipe it into the cups. This keeps it from mixing with the pudding and gives you those beautiful distinct layers that look so impressive in clear cups.
Let the kids help with crushing the Oreos. Seriously, this is the perfect job for little hands. Just supervise the bag-sealing situation — I’ve had more than one Oreo explosion in my kitchen.
Variations & Adaptations
One of the best things about this recipe is how customizable it is. Here are some variations I’ve tried and loved:
Gluten-Free Version: Use gluten-free chocolate sandwich cookies (they exist and work great) and make sure your pudding mix is labeled gluten-free. Most instant pudding is, but always check the label. The rest of the ingredients are naturally gluten-free.
Dairy-Free Version: Use dairy-free cream cheese (I like Kite Hill), coconut cream instead of heavy whipping cream, and a plant-based milk for the pudding. The texture will be slightly different — a bit less rich — but still delicious. Just make sure your Oreos are dairy-free (the original ones are).
Peanut Butter Twist: Add a layer of peanut butter mousse by mixing 1/2 cup creamy peanut butter into the cream cheese mixture. This is dangerously good and tastes like a Reese’s cup in dirt form. I made this version for a Halloween party last year and it was gone in 10 minutes.
Pumpkin Spice Version: For a fall twist, add 1/2 cup pumpkin puree and 1 teaspoon pumpkin pie spice to the cream cheese mousse. Top with crushed graham crackers instead of Oreos and use candy corn for decoration. It’s more Thanksgiving than Halloween, but nobody’s complaining.
Individual vs. Large Format: Instead of individual cups, you can make this as a large trifle dish. Layer everything in a clear glass bowl and let guests scoop their own portions. This works great for bigger parties where you don’t want to mess with individual cups.
Serving & Storage Suggestions
These graveyard dirt cups are best served cold, right out of the fridge. The contrast between the cold, creamy layers and the crunchy “dirt” is part of the magic. I like to set them out on a tray about 10 minutes before serving so they’re not ice-cold, but still nicely chilled.
For presentation, arrange the cups on a black or orange platter. Scatter a few extra gummy worms and candy eyeballs around the base of the platter for a creepy effect. You can even add a few dry ice cubes (handle carefully!) around the platter for a fog effect that will absolutely wow your guests.
Storage: These keep well in the refrigerator for up to 3 days, but the Oreo “dirt” will start to soften after about 24 hours. If you’re making them ahead for a party, I recommend assembling everything except the Oreo topping and decorations. Add those right before serving for maximum crunch. Store the crushed Oreos in an airtight container at room temperature.
Freezing: I don’t recommend freezing these. The pudding and mousse will separate when thawed, and the texture gets watery. Just keep them in the fridge.
Flavor Development: The flavors actually get better after about 4-6 hours in the fridge. The pudding sets up perfectly, the mousse firms up, and everything melds together beautifully. If you can make them the morning of your party, you’ll be rewarded.
Nutritional Information & Benefits
Let’s be real — this is a dessert, not a health food. But here’s what you’re looking at per serving (based on 8 servings):
- Calories: Approximately 420-480 per cup
- Fat: 24-28g
- Carbohydrates: 52-58g
- Protein: 6-8g
- Sugar: 38-42g
That said, there are a few redeeming qualities. The cream cheese adds a decent amount of protein and calcium. The dark cocoa in the Oreos contains antioxidants (I’m reaching here, but it counts, right?). And honestly, if you’re making these for a Halloween party, nobody’s counting calories anyway.
Dietary Considerations: As mentioned above, this recipe can be adapted for gluten-free and dairy-free diets. It contains eggs (in the pudding mix) and soy (in the Oreos), so keep that in mind if you have allergies. The original version is vegetarian.
My personal take? This is a special occasion dessert. It’s not something you eat every day, but for Halloween? Absolutely worth every single calorie. Life’s too short to skip dessert on Halloween.
Conclusion
These graveyard dirt cups have become my Halloween signature, and I honestly can’t imagine the holiday without them anymore. They started as a desperate improvisation in a dark kitchen and turned into the dessert that people request weeks in advance. There’s something about that combination of creamy chocolate, tangy mousse, and crunchy “dirt” that hits exactly right, especially when it’s dressed up with gummy worms and candy eyeballs.
What I love most about this recipe is how forgiving it is. You can’t really mess it up. The layers don’t have to be perfect. The decorations can be as simple or as elaborate as you want. It’s the kind of recipe that lets you be creative without any pressure. And when you set those cups out on the dessert table and watch people’s faces light up — that’s the best part.
I’d love to hear how yours turn out! Drop a comment below and tell me about your Halloween party, or share your own creative decoration ideas. Did you add something weird and wonderful? Did your kids help with the Oreo crushing? Let me know! And if you’re looking for more Halloween treats, check out my recipe for spiderweb dip — it’s another no-bake winner that’s perfect for parties.
Happy Halloween, and happy eating!
Frequently Asked Questions
Can I make these dirt cups the day before?
Yes, absolutely! In fact, they taste even better after sitting in the fridge overnight. Just wait to add the Oreo “dirt” topping and decorations until right before serving so everything stays crunchy.
Can I use sugar-free pudding mix?
You can, but the texture will be slightly different. Sugar-free pudding tends to be a bit softer and less rich. If you’re watching your sugar intake, it’s a decent option, just know the final result won’t be quite as decadent.
How many servings does this recipe make?
This recipe makes about 8-10 servings, depending on the size of your cups. I usually get 8 generous cups from 9 oz cups, or 10 smaller portions if I’m using 6 oz cups.
Can I use Cool Whip instead of making fresh whipped cream?
You can, and it works fine. Just fold it into the cream cheese mixture the same way you would with fresh whipped cream. The texture will be slightly lighter and less rich, but it’s a perfectly good shortcut.
How do I keep the gummy worms from sticking to everything?
Toss your gummy worms in a little bit of powdered sugar before placing them in the “dirt.” This keeps them from getting sticky and helps them stay in place. It also adds a little extra sweetness, which never hurts.
Pin This Recipe!
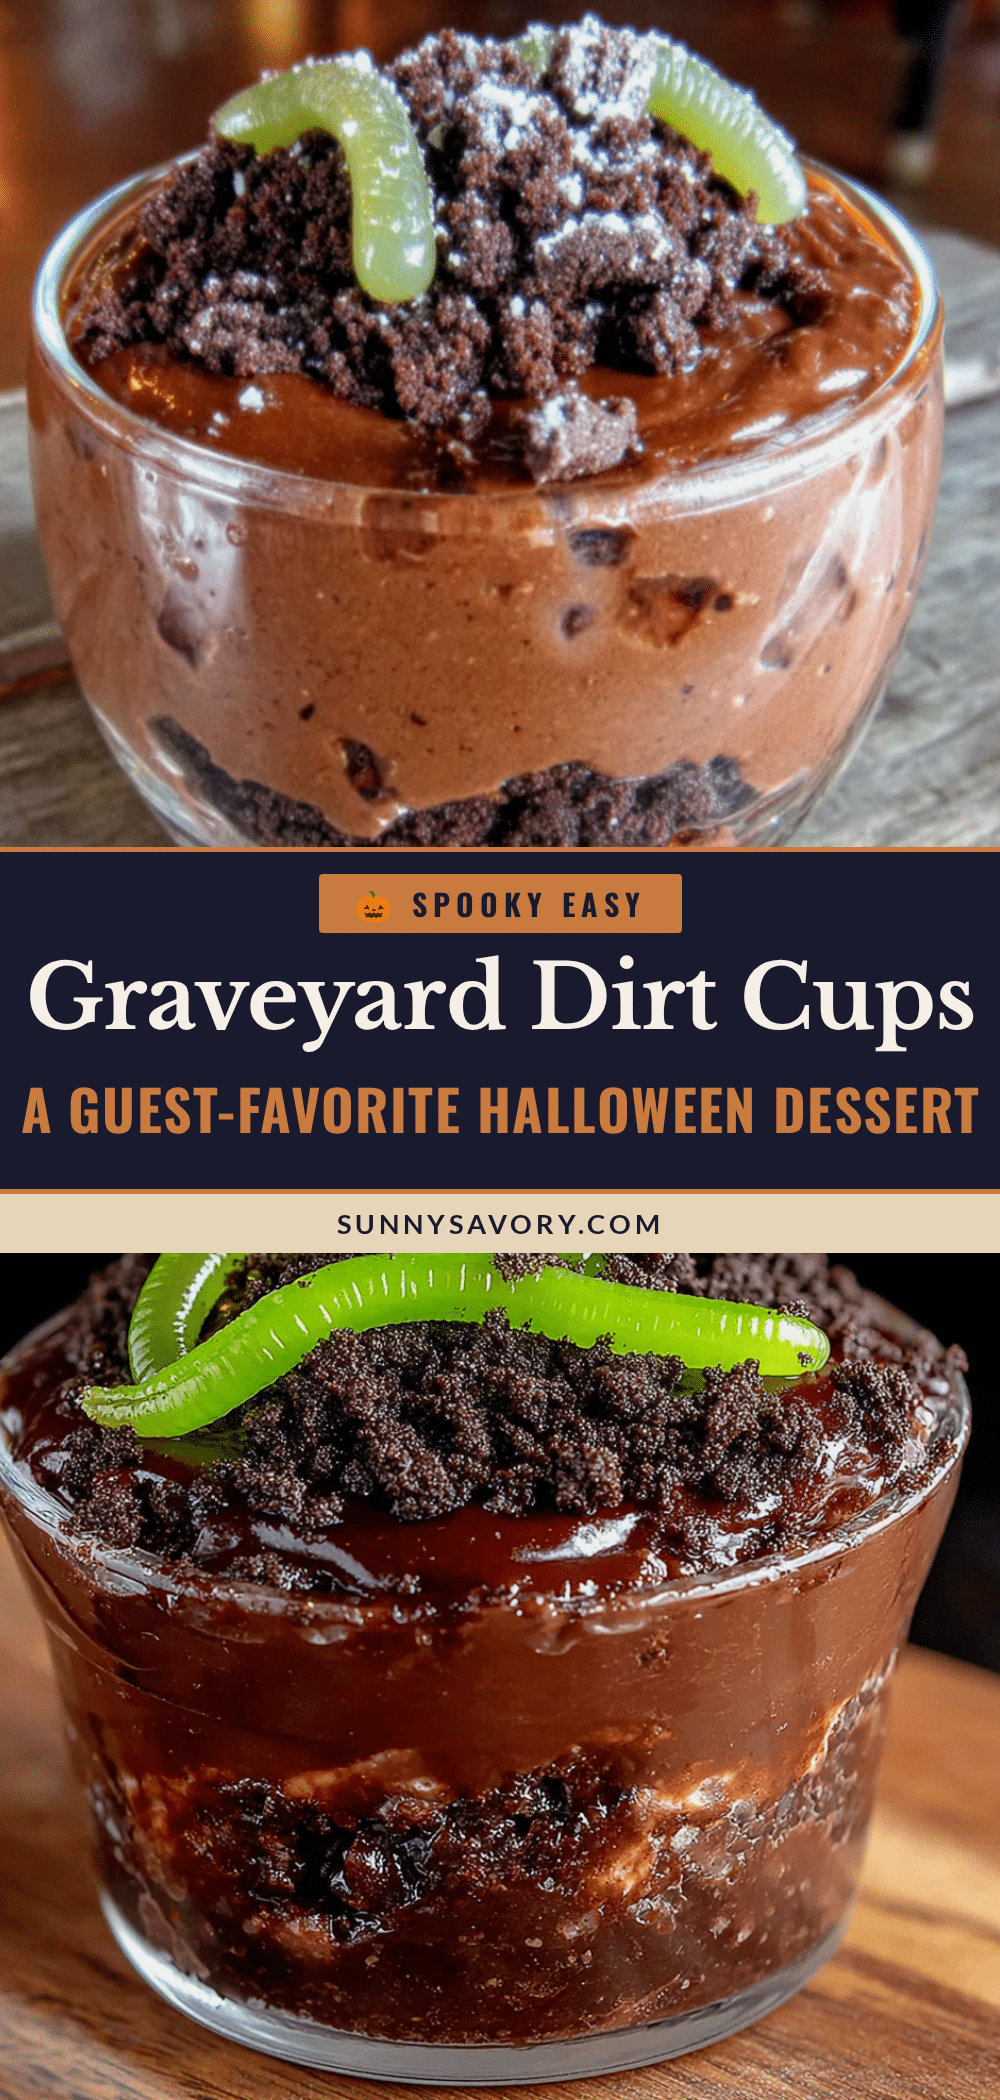
Easy Graveyard Dirt Cups: Best Halloween Dessert Recipe
These no-bake graveyard dirt cups feature layers of creamy chocolate pudding, tangy cream cheese mousse, and crunchy Oreo ‘dirt,’ topped with spooky decorations like gummy worms and candy eyeballs. Perfect for Halloween parties, they come together in under 20 minutes and are a guaranteed crowd-pleaser.
- Prep Time: 20 minutes
- Cook Time: 0 minutes
- Total Time: 1 hour 20 minutes (including chilling)
- Yield: 8 servings 1x
- Category: Dessert
- Cuisine: American
Ingredients
- 2 boxes (3.9 oz each) instant chocolate pudding mix
- 3 cups cold whole milk
- 1 teaspoon vanilla extract
- 8 oz cream cheese, softened
- 1/2 cup powdered sugar
- 1 teaspoon vanilla extract
- 1 cup heavy whipping cream
- 1 family-size package Oreo cookies (about 36 cookies)
- 2 tablespoons melted butter (optional)
- Gummy worms (for decoration)
- Halloween-themed candy eyeballs (for decoration)
- Chocolate gravestones (for decoration)
- Pretzel sticks (for decoration)
- Green-tinted shredded coconut (optional, for decoration)
Instructions
- In a large bowl, whisk together both boxes of instant chocolate pudding mix with 3 cups of cold whole milk. Whisk vigorously for about 2 minutes until the mixture starts to thicken. Add 1 teaspoon vanilla extract and stir. Let sit for 5 minutes to set up.
- Place the entire package of Oreos (cream filling included) into a large zip-top bag. Seal tightly and crush with a rolling pin into fine crumbs with some chunkier pieces. Transfer to a bowl and stir in melted butter if using. Set aside.
- In a large mixing bowl, beat the softened cream cheese with an electric mixer until smooth and fluffy (about 2 minutes). Add powdered sugar and 1 teaspoon vanilla extract, beat until combined. In a separate bowl, whip heavy cream until stiff peaks form. Gently fold whipped cream into cream cheese mixture until no white streaks remain.
- Assemble the cups: Start with about 2 tablespoons of crushed Oreo ‘dirt’ at the bottom of each clear cup. Add about 3 tablespoons of chocolate pudding. Add about 3 tablespoons of cream cheese mousse. Top with another 2 tablespoons of crushed Oreos, pressing down gently.
- Decorate: Press gummy worms into the ‘dirt,’ add chocolate gravestones, candy eyeballs, broken pretzel sticks, and optional green coconut ‘moss.’
- Refrigerate assembled cups for at least 1 hour before serving (2 hours is even better).
Notes
Make sure cream cheese is at room temperature to avoid lumps. For best texture, use instant pudding mix (not cook-and-serve). The Oreo ‘dirt’ will soften after 24 hours, so add topping just before serving if making ahead. For gluten-free, use gluten-free sandwich cookies and check pudding mix label. For dairy-free, use dairy-free cream cheese, coconut cream, and plant-based milk.
Nutrition
- Serving Size: 1 cup
- Calories: 450
- Sugar: 40
- Sodium: 380
- Fat: 26
- Saturated Fat: 14
- Carbohydrates: 55
- Fiber: 2
- Protein: 7
Keywords: Halloween dessert, dirt cups, no-bake, chocolate pudding, Oreo, cream cheese mousse, graveyard, spooky, kids, party



