Love this? Save it for later!
Share the inspiration with your friends
There used to be a tiny farm-to-table place tucked away on a gravel road just outside of Asheville called The Gilded Beet. It wasn’t fancy—mismatched chairs, a chalkboard menu that changed daily, and this one dish that people literally drove hours for. Their maple butter acorn squash. When they closed suddenly in 2019 (the owner moved to Portugal, of all things), I honestly felt a little lost. I mean, where was I supposed to get that perfect caramelized edge, that buttery melt-in-your-mouth texture, that hint of warmth that felt like a hug on a plate?
After twelve tries—twelve!—I finally cracked it. The first few attempts were disasters. Too watery. Too sweet. Burnt butter (that one hurt). But somewhere around attempt number eight, I realized the secret wasn’t in some fancy technique. It was in the patience. Letting the squash roast long enough to coax out its natural sugars, then finishing it with that glossy maple butter glaze at just the right moment. When I pulled that perfect pan out of the oven, I actually teared up a little. Maybe you’ve been there—that feeling when a memory comes back through taste?
This is that recipe. The one that makes people close their eyes after the first bite. The one that disappears first at every gathering. And honestly? It’s almost embarrassing how simple it is. But don’t tell anyone that. Let them think you spent hours in the kitchen. Let them ask for the recipe. Let them think you’re some kind of squash wizard. I won’t tell.
Why You’ll Love This Recipe
Let me tell you why this maple butter acorn squash recipe has become my secret weapon for every gathering. It’s not just another side dish—it’s the dish that gets texted around the next day.
- Effortlessly Impressive : This looks like something from a fancy restaurant menu, but it comes together with about ten minutes of active work. The oven does the heavy lifting while you focus on your guests.
- Simple Pantry Ingredients : Acorn squash, butter, maple syrup, and a few spices. That’s it. No weird specialty items that you’ll use once and forget about.
- Perfect for Entertaining : This was literally designed for dinner parties, potlucks, and holiday tables. It holds up beautifully, looks stunning on a serving platter, and pairs with almost any main dish you can think of.
- Crowd-Pleaser Status : I’ve served this to kids who swore they hated squash, to picky eaters, and to serious foodies. Every single one of them asked for seconds. It’s honestly weird how universally loved it is.
- Make-Ahead Friendly : You can prep this hours before your guests arrive. Just roast it, keep it warm, and glaze it right before serving. No last-minute panic.
What makes this version different from all the other maple squash recipes out there? It’s the double-roasting technique. Most recipes just toss everything together and bake it once. But I’ve found that roasting the squash first without any glaze—just a little salt and oil—lets it develop that deep, caramelized flavor. Then you add the maple butter in the last twenty minutes, and it creates this glossy, almost candied exterior that’s absolutely irresistible. The texture is perfect: tender but not mushy, with those gorgeous golden-brown edges that everyone fights over.
This is comfort food that feels special. It’s the kind of dish that makes people feel cared for, like you put thought into every detail. And honestly, that’s what hosting is all about, right?
What Ingredients You Will Need
This recipe uses simple, wholesome ingredients that work together to create something truly memorable. Most of these are probably already in your kitchen, which makes this perfect for those “I need to bring something” moments.
For the Squash:
- 2 medium acorn squash (about 2-3 pounds total) — Look for squash that feels heavy for its size with firm, unblemished skin. The green ones with orange patches are perfectly ripe. I’ve found that smaller squash tend to be sweeter and less stringy.
- 2 tablespoons olive oil — Use a good quality extra virgin here. It helps the squash roast evenly and adds a subtle fruity note. Avocado oil works great too if that’s what you have.
- 1/2 teaspoon salt — I prefer kosher salt for its clean taste and easy pinchability. Diamond Crystal is my go-to brand.
- 1/4 teaspoon black pepper — Freshly ground makes a difference here. Don’t skip it—the pepper cuts through the sweetness beautifully.
For the Maple Butter Glaze:
- 4 tablespoons unsalted butter — European-style butter like Kerrygold adds an extra richness, but any good unsalted butter works. If you only have salted, just reduce the added salt by half.
- 1/3 cup pure maple syrup — Please, please use real maple syrup here. Not pancake syrup, not “maple-flavored” anything. Grade A dark amber is my preference for its deeper, more complex flavor. It makes a noticeable difference in the final dish.
- 1 teaspoon vanilla extract — Pure vanilla, not imitation. It rounds out the maple flavor and adds warmth. I always have Nielsen-Massey in my pantry.
- 1/2 teaspoon ground cinnamon — This adds that cozy, familiar warmth. Fresh cinnamon is more aromatic, but honestly, the jarred stuff works perfectly here.
- 1/4 teaspoon ground nutmeg — Freshly grated if you have it, but pre-ground is totally fine. Just a tiny pinch—it should whisper, not shout.
- 1/8 teaspoon ground cloves — Optional, but I love the subtle depth it adds. Go easy, cloves are powerful little things.
For Garnish (Optional but Recommended):
- Fresh thyme sprigs — The herbal notes cut through the sweetness and make it look gorgeous on a platter.
- Flaky sea salt — A sprinkle of Maldon or similar right before serving adds that perfect salty crunch that makes everything better.
- Toasted pecans or walnuts — Adds texture and a nutty depth. Toast them in a dry pan for about 3 minutes until fragrant.
Substitution Notes: For a dairy-free version, use vegan butter or coconut oil instead of regular butter. The coconut oil adds a subtle tropical note that’s actually lovely with the maple. If you’re watching your sugar intake, you can reduce the maple syrup to 1/4 cup and add an extra tablespoon of butter—it’ll still be delicious, just less sweet.
Equipment Needed
You don’t need a fancy kitchen to pull this off. Here’s what you’ll need:
- Large baking sheet — A half-sheet pan (18×13 inches) works perfectly. Make sure it has a rim to catch any glaze drips. I’ve ruined a few pans with sticky maple syrup, so line yours with parchment paper or foil for easy cleanup.
- Sharp chef’s knife — Acorn squash can be stubborn. A sharp 8-inch knife makes cutting through it much safer and easier. Trust me, a dull knife is a dangerous knife with these things.
- Vegetable peeler — Optional, but I like to peel strips of the skin off for a prettier presentation. You can leave it on too—the skin is edible once roasted.
- Small saucepan — For making the maple butter glaze. Any small pot works.
- Mixing bowl — For tossing the squash with oil and seasonings.
- Pastry brush — For brushing the glaze onto the squash. A silicone one is easiest to clean. No pastry brush? Just use a spoon to drizzle it on.
- Measuring cups and spoons — Accuracy matters here, especially with the maple syrup and butter ratio.
Budget-friendly tip: If you don’t have a pastry brush, you can absolutely just drizzle the glaze over the squash and toss it gently. It’ll still taste amazing. And skip the fancy parchment paper—foil works just as well for lining your pan.
Preparation Method
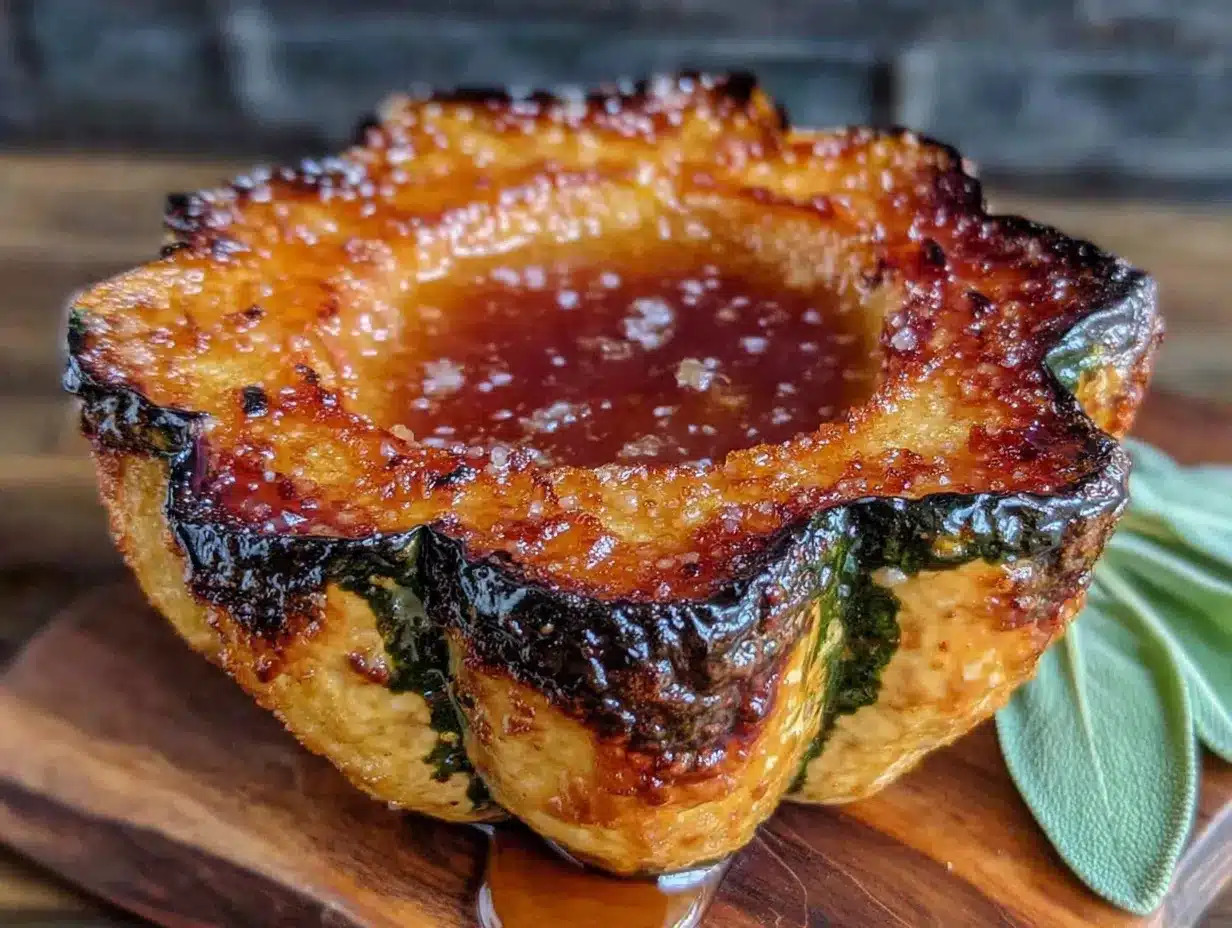
Let’s get cooking! This recipe is straightforward, but a few key moments make all the difference. Here’s exactly how to nail it.
- Preheat your oven to 400°F (200°C). Getting the oven properly hot is crucial for that caramelization. Give it a full 15-20 minutes to come to temperature. While it’s heating, position your rack in the middle of the oven.
- Prep the squash. Using your sharpest chef’s knife, carefully cut each acorn squash in half from stem to tip. Scoop out the seeds and stringy pulp with a spoon. I use a metal spoon with a sharp edge—it makes quick work of the seeds. Don’t throw those seeds away! You can roast them separately with a little salt for a snack.
- Slice the squash into wedges. Cut each half into 1-inch thick wedges. You should get about 4-5 wedges per half, depending on the size of your squash. Try to make them relatively uniform so they cook evenly. I’ve learned this the hard way—those skinny pieces burn while the chunky ones stay raw.
- Season the squash. In your large mixing bowl, toss the squash wedges with the olive oil, salt, and pepper. Use your hands to really massage the oil into all the cut surfaces. This isn’t just about flavor—the oil helps the squash brown properly. Spread the wedges in a single layer on your prepared baking sheet. Make sure they’re not touching each other, or they’ll steam instead of roast.
- First roast (the secret step). Roast the squash for 20 minutes without any glaze. This is where the magic starts. The squash begins to soften and develop those beautiful brown edges. You’ll start smelling that sweet, nutty aroma around the 15-minute mark. Don’t skip this step! I tried rushing it once and ended up with soggy, sad squash.
- Make the maple butter glaze. While the squash is roasting, combine the butter, maple syrup, vanilla extract, cinnamon, nutmeg, and cloves in your small saucepan. Heat over medium-low heat, stirring occasionally, until the butter is fully melted and the mixture is smooth and bubbly. This takes about 3-4 minutes. Watch it carefully—maple syrup can burn quickly if the heat is too high. Remove from heat and set aside.
- Glaze the squash. After the first 20 minutes of roasting, remove the baking sheet from the oven. Using your pastry brush, generously brush the maple butter mixture over all cut surfaces of the squash wedges. Don’t be shy here—every surface should be coated. Flip the wedges over and brush the other side too. Pour any remaining glaze over the top.
- Second roast. Return the baking sheet to the oven and roast for another 15-20 minutes. The squash should be fork-tender and the edges should be caramelized and golden-brown. The glaze will be bubbly and slightly thickened. If you want extra caramelization, switch your oven to broil for the last 2 minutes—but watch it like a hawk. I’ve burned more batches than I’d like to admit by walking away during broiling.
- Rest and garnish. Let the squash rest on the baking sheet for 5 minutes. This allows the glaze to set slightly and makes the squash easier to handle. Transfer to a serving platter, drizzle any pan juices over the top, and sprinkle with flaky sea salt, fresh thyme, and toasted nuts if using.
Sensory cues to watch for: When the squash is done, a knife should slide through the thickest part with almost no resistance. The edges should look sticky and dark brown, almost like they’ve been caramelized. The aroma should be sweet and buttery with warm spice notes. If the squash smells burnt or the glaze looks smoking, you’ve gone too far—pull it out immediately.
Cooking Tips & Techniques
After making this maple butter acorn squash more times than I can count (and messing it up plenty along the way), here are the things I wish someone had told me.
Don’t overcrowd the pan. This is probably the most common mistake I see. If your squash wedges are touching or overlapping, they’ll steam instead of roast. You’ll end up with soft, pale squash instead of those gorgeous caramelized edges. Use two baking sheets if you need to, and rotate them halfway through cooking.
Room temperature butter matters. Cold butter won’t emulsify properly with the maple syrup. Let your butter sit out for about 30 minutes before starting the glaze. If you forget (I do, constantly), cut the butter into small cubes—it’ll warm up faster when you add it to the pan.
Watch your maple syrup. Pure maple syrup burns at a lower temperature than you might think. If your glaze starts smoking or smelling bitter, you’ve overheated it. Keep the heat at medium-low and stir constantly. When in doubt, take it off the heat earlier rather than later. You can always warm it back up gently.
Timing is everything for entertaining. Here’s my hosting strategy: Roast the squash through step 5 (the first roast) up to 4 hours ahead of time. Let it cool, cover it, and leave it at room temperature. About 30 minutes before serving, make the glaze, brush it on, and do the second roast. This way, you’re not stuck in the kitchen when your guests arrive, and the squash comes out hot and fresh.
One failure I’ll never forget: I once tried to double this recipe for a Thanksgiving potluck. I crammed everything onto one pan, skipped the first roast, and used cheap “pancake syrup” because I ran out of real maple syrup. It was a disaster. Soggy, cloyingly sweet, and nobody touched it. I brought home a full dish of sad squash. Learn from my mistakes—quality ingredients and proper technique matter here.
Consistency tip: If your squash wedges are different sizes, cut the smaller ones in half again. Uniform pieces cook at the same rate, which means every single wedge will be perfectly tender and caramelized. No more fighting over the good pieces at the dinner table.
Variations & Adaptations
One of the best things about this recipe is how flexible it is. Here are some of my favorite variations that I’ve tested over the years.
Savory Herb Version: Omit the cinnamon, nutmeg, and cloves. Add 2 tablespoons of fresh chopped sage and 1 teaspoon of fresh rosemary to the maple butter glaze. The herbs cut through the sweetness beautifully and make this perfect alongside roasted chicken or pork. I served this at a fall dinner party last year and got three recipe requests.
Spicy Maple Kick: Add 1/4 teaspoon of cayenne pepper and a pinch of smoked paprika to the glaze. The heat builds slowly and plays wonderfully with the sweet maple. This version is incredible with grilled meats or as part of a taco bar. My brother-in-law, who claims to hate sweet sides, ate half a pan of this.
Vegan Adaptation: Substitute the butter with coconut oil or a high-quality vegan butter. I’ve had great results with Miyoko’s European-style cultured vegan butter. The coconut oil version adds a subtle tropical note that’s surprisingly good with the maple. Use 100% pure maple syrup (which is naturally vegan) and skip the honey-based alternatives.
Air Fryer Method: Cut the squash into smaller, 1/2-inch thick wedges. Toss with the oil and seasonings, then air fry at 375°F (190°C) for 12 minutes. Brush with the glaze and air fry for another 5-7 minutes. The texture is even crispier than the oven version, and it’s ready in half the time. Perfect for when you’re cooking for just two people.
Maple Bourbon Twist: Replace 2 tablespoons of the maple syrup with good bourbon. Add it to the glaze after you’ve removed it from the heat. The alcohol cooks off during the second roast, leaving behind a warm, smoky depth that’s absolutely heavenly. This version got me invited back to a friend’s annual holiday party after I brought it last year.
Dietary Notes: This recipe is naturally gluten-free and can be made dairy-free and vegan with the substitutions above. For a lower-sugar version, reduce the maple syrup to 2 tablespoons and add an extra tablespoon of butter. The squash itself is naturally sweet, so you won’t miss the extra sugar.
Serving & Storage Suggestions
This maple butter acorn squash is incredibly versatile when it comes to serving. Here’s how to make it shine at your next gathering.
Serving Temperature: Serve this squash warm, not piping hot. Let it rest for 5-10 minutes after roasting. The glaze sets up slightly as it cools, creating a beautiful glossy finish. If you’re serving it buffet-style, keep it in a warm oven (200°F) for up to 30 minutes before serving.
Presentation Tips: Arrange the squash wedges on a large white platter in a fan pattern. Drizzle any remaining pan juices over the top. Sprinkle with flaky sea salt, fresh thyme leaves, and toasted pecans. The contrast of the dark caramelized edges against the light platter is stunning. For holiday tables, I like to add a few pomegranate arils for a pop of red.
What to Serve Alongside: This squash pairs beautifully with roasted chicken, grilled pork chops, or a holiday turkey. It’s also fantastic alongside a simple green salad with vinaigrette—the acidity cuts through the richness. For a vegetarian main, serve it over creamy polenta or alongside a hearty lentil stew. And don’t forget the creamy mashed potatoes—they’re a classic pairing that never disappoints.
Storage Instructions: Store leftovers in an airtight container in the refrigerator for up to 4 days. The squash will soften further as it sits, but the flavor actually improves. I’ve been known to eat cold leftovers straight from the fridge—don’t judge me until you’ve tried it.
Reheating Methods: For the best texture, reheat the squash in a 350°F oven for 8-10 minutes. The microwave works in a pinch (about 60 seconds), but the squash will be softer. If you’re reheating for a gathering, add a fresh drizzle of maple syrup and a pat of butter before warming to revive the glaze.
Freezing: You can freeze roasted squash for up to 3 months. Let it cool completely, then transfer to a freezer-safe container. To serve, thaw overnight in the refrigerator and reheat in the oven. The texture won’t be quite as perfect as fresh, but it’s still delicious. I usually freeze a batch in the fall to enjoy during the winter months.
Flavor Development: Here’s a little secret—this squash actually tastes better the next day. The flavors meld together overnight, and the sweetness becomes more complex. If you’re hosting, consider making it a day ahead. Just reheat gently before serving. Your guests will never know you didn’t make it fresh.
Nutritional Information & Benefits
This maple butter acorn squash isn’t just delicious—it actually brings some solid nutritional benefits to the table. Here’s what you’re getting in each serving (based on 6 servings):
| Nutrient | Amount Per Serving |
|---|---|
| Calories | 195 |
| Total Fat | 10g |
| Saturated Fat | 5g |
| Carbohydrates | 28g |
| Fiber | 4g |
| Sugar | 12g |
| Protein | 2g |
| Vitamin A | 45% DV |
| Vitamin C | 30% DV |
| Potassium | 15% DV |
| Magnesium | 10% DV |
Health Highlights: Acorn squash is packed with vitamin A (from beta-carotene), which supports eye health and immune function. It’s also a great source of vitamin C and fiber. The maple syrup provides antioxidants and minerals like zinc and manganese. And yes, there’s butter in this recipe, but a moderate amount of saturated fat from quality sources can be part of a balanced diet.
Dietary Considerations: This recipe is naturally gluten-free and nut-free (if you skip the pecan garnish). With the substitutions mentioned in the variations section, it can easily be made vegan and dairy-free. The sugar content comes primarily from the maple syrup and the natural sugars in the squash—there’s no refined white sugar here.
My personal take: I don’t believe in demonizing any food. This is a vegetable dish with some butter and maple syrup. It’s meant to be enjoyed, not overthought. If you’re serving it alongside a lean protein and a green salad, you’ve got a perfectly balanced meal. And honestly, the joy it brings to a dinner table has its own health benefits, if you ask me.
Conclusion
This maple butter acorn squash has become my signature dish for a reason. It’s the recipe that people text me about the next day, the one that gets requested for every holiday gathering, the one that makes me look like I know what I’m doing in the kitchen. And the best part? It’s genuinely simple. You don’t need culinary training or fancy equipment. You just need good ingredients, a little patience, and the willingness to let the oven do its thing.
I love this recipe because it proves that you don’t have to choose between impressive and easy. You can have both. You can walk into a dinner party with a dish that makes people stop mid-conversation, and you can do it without spending all day in the kitchen. That’s the kind of cooking I live for.
Now I want to hear from you. What’s your go-to dish for impressing guests? Have you tried this recipe? Did you add your own twist? Drop a comment below and let me know—I read every single one, and I love hearing about your kitchen victories (and your kitchen disasters too, honestly). And if you loved this recipe, share it with a friend who needs a new party trick. Happy cooking, friends!
Frequently Asked Questions
Can I use butternut squash instead of acorn squash?
Absolutely! Butternut squash works beautifully in this recipe. Cut it into 1-inch cubes instead of wedges, and reduce the first roasting time by about 5 minutes since butternut tends to cook a bit faster. The flavor will be slightly sweeter and nuttier, but just as delicious.
Can I make this recipe ahead of time for a party?
Yes, and I actually recommend it! Roast the squash through the first stage (without glaze) up to 4 hours ahead. Let it cool, cover it, and leave it at room temperature. When your guests are about 30 minutes away, make the glaze and finish the second roast. The squash comes out hot, fresh, and perfect.
Why is my squash turning out mushy instead of caramelized?
This usually happens for one of two reasons: overcrowding the pan or skipping the first roast. Make sure your squash wedges are in a single layer with space between them. And don’t skip that initial 20-minute roast without glaze—it’s essential for developing those caramelized edges before the sugar from the maple syrup goes on.
Can I use honey instead of maple syrup?
You can, but the flavor will be different. Honey is sweeter and has a more floral taste. If you’re substituting, use about 1/4 cup of honey instead of 1/3 cup maple syrup, and reduce the oven temperature by 25°F since honey burns more easily. The texture will be slightly different too—stickier and less glossy.
How do I cut an acorn squash safely without losing a finger?
I feel you—these things are tough! First, microwave the whole squash for 2 minutes to soften it slightly. Let it cool for a minute, then use a sharp chef’s knife (not a paring knife). Cut a thin slice off the bottom so it sits flat, then carefully cut from top to bottom. If you’re still nervous, you can roast the squash whole for 20 minutes first to soften it enough to cut safely.
Pin This Recipe!
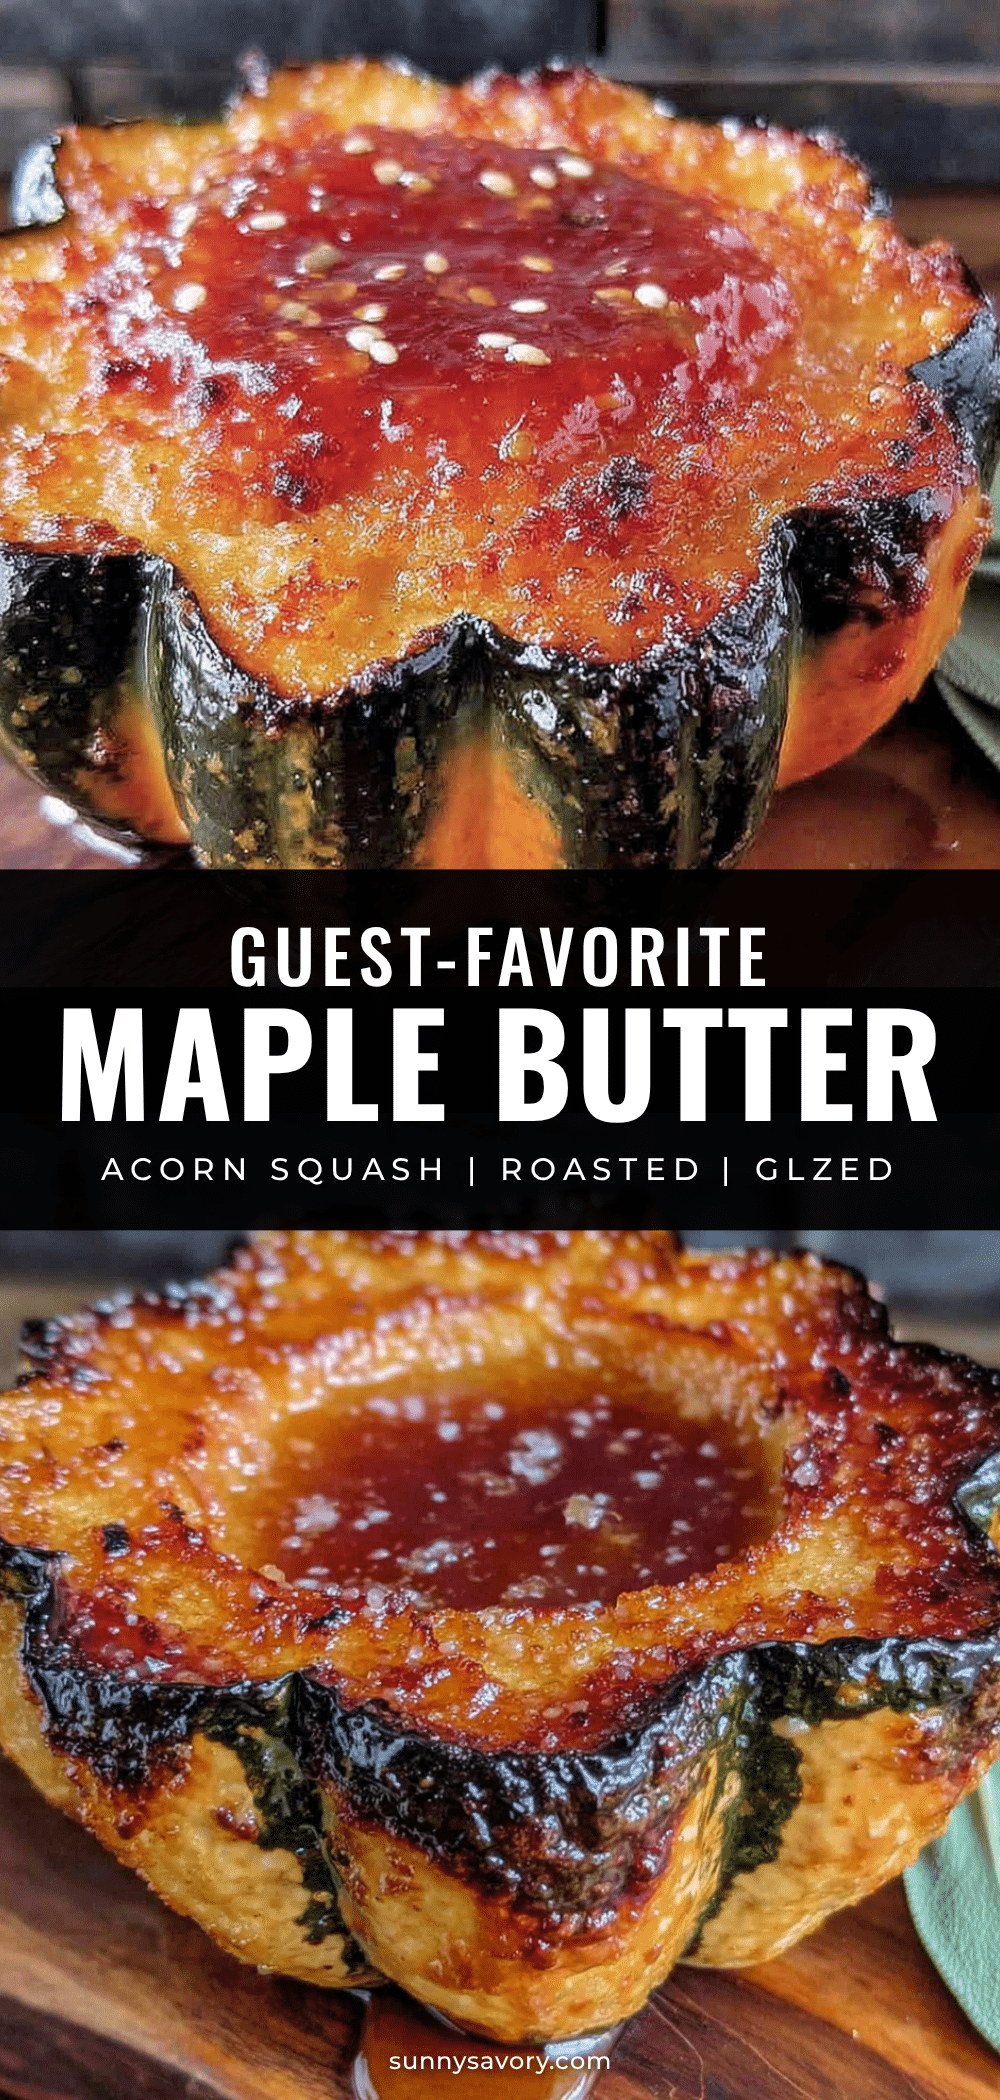
Best Easy Maple Butter Acorn Squash Recipe
This maple butter acorn squash features a double-roasting technique that creates caramelized edges and a glossy, buttery glaze. It’s an effortlessly impressive side dish perfect for entertaining, made with simple pantry ingredients.
- Prep Time: 15 minutes
- Cook Time: 35 minutes
- Total Time: 50 minutes
- Yield: 6 servings 1x
- Category: Side Dish
- Cuisine: American
Ingredients
- 2 medium acorn squash (about 2–3 pounds total)
- 2 tablespoons olive oil
- 1/2 teaspoon salt
- 1/4 teaspoon black pepper
- 4 tablespoons unsalted butter
- 1/3 cup pure maple syrup
- 1 teaspoon vanilla extract
- 1/2 teaspoon ground cinnamon
- 1/4 teaspoon ground nutmeg
- 1/8 teaspoon ground cloves (optional)
- Fresh thyme sprigs (for garnish, optional)
- Flaky sea salt (for garnish, optional)
- Toasted pecans or walnuts (for garnish, optional)
Instructions
- Preheat your oven to 400°F (200°C). Position the rack in the middle of the oven.
- Carefully cut each acorn squash in half from stem to tip. Scoop out the seeds and stringy pulp with a spoon.
- Slice each half into 1-inch thick wedges (about 4-5 wedges per half).
- In a large mixing bowl, toss the squash wedges with olive oil, salt, and pepper. Use your hands to coat all cut surfaces.
- Spread the wedges in a single layer on a prepared baking sheet, making sure they are not touching.
- Roast the squash for 20 minutes without any glaze.
- While the squash is roasting, combine butter, maple syrup, vanilla extract, cinnamon, nutmeg, and cloves in a small saucepan. Heat over medium-low heat, stirring occasionally, until the butter is melted and the mixture is smooth and bubbly (about 3-4 minutes). Remove from heat.
- After the first 20 minutes of roasting, remove the baking sheet from the oven. Brush the maple butter mixture generously over all cut surfaces of the squash wedges. Flip the wedges and brush the other side. Pour any remaining glaze over the top.
- Return the baking sheet to the oven and roast for another 15-20 minutes, until the squash is fork-tender and the edges are caramelized and golden-brown. For extra caramelization, broil for the last 2 minutes, watching carefully.
- Let the squash rest on the baking sheet for 5 minutes. Transfer to a serving platter, drizzle any pan juices over the top, and sprinkle with flaky sea salt, fresh thyme, and toasted nuts if using.
Notes
For a dairy-free version, use vegan butter or coconut oil. For a lower-sugar version, reduce maple syrup to 1/4 cup and add an extra tablespoon of butter. The double-roasting technique is key: roast the squash first without glaze to develop caramelization, then add the maple butter glaze for the last 20 minutes. Do not overcrowd the pan to avoid steaming. Leftovers can be stored in an airtight container in the refrigerator for up to 4 days.
Nutrition
- Serving Size: 1 serving (about 1/6
- Calories: 195
- Sugar: 12
- Sodium: 200
- Fat: 10
- Saturated Fat: 5
- Carbohydrates: 28
- Fiber: 4
- Protein: 2
Keywords: maple butter acorn squash, roasted acorn squash, maple glaze, fall side dish, holiday side dish, easy squash recipe



