Love this? Save it for later!
Share the inspiration with your friends
I wasn’t expecting cooking advice from my accountant, but there I was, knee-deep in spreadsheets during tax season, listening to him describe exactly how to make mummy hot dogs for his kid’s Halloween party. I mean, let me tell you, this guy wore suspenders and talked about amortization tables with more passion than anyone I’d ever met. So when he started miming wrapping crescent dough around a hot dog, I honestly thought I’d misheard him over the crackling office phone line. But he was dead serious—and surprisingly animated about it.
“You just gotta make the eyes look scared,” he insisted, and I could hear him shuffling papers on his desk. “That’s the whole trick.”
I scribbled his instructions on the back of an envelope—right next to some quarterly projections—and forgot about them for months. Then Halloween rolled around, and I was staring at a package of hot dogs in my fridge, completely uninspired by the usual party snacks. You know that feeling when you want something festive but don’t have the energy for a Pinterest fail? That was me. Then I remembered the envelope.
That first batch came out lopsided, with one mummy missing an eye and another that looked more like a sad burrito than a spooky snack. But my niece took one bite and declared them “the best thing ever,” and honestly? That’s all it took. I’ve been making them every Halloween since, tweaking the technique until they turned out consistently adorable and delicious. These easy mummy-wrapped Halloween hot dogs are the kind of recipe that makes you look like a kitchen genius with almost zero effort—and honestly, isn’t that the best kind of recipe?
Why You’ll Love This Recipe
I’ve tested these mummy hot dogs more times than I’d like to admit—some batches came out looking like tangled bandages, others like confused little ghosts. But after trial and error (and one particularly memorable incident involving melted cheese and a smoke alarm), I landed on a method that works every single time. Here’s why this version stands out:
- Quick & Easy: From fridge to table in under 25 minutes. Perfect for last-minute Halloween prep when you’ve got costumes to wrangle and decorations to hang.
- Simple Ingredients: You only need hot dogs, crescent dough, and mustard. That’s it. No specialty grocery runs, no obscure spices—just pantry staples you probably already have.
- Perfect for Halloween Parties: These little guys steal the show at any gathering. Kids love the spooky look, and adults appreciate how effortlessly they come together.
- Crowd-Pleaser: I’ve yet to meet a kid—or adult, honestly—who can resist a hot dog wrapped in flaky, buttery dough. They disappear faster than candy at a parade.
- Unbelievably Delicious: The combination of salty hot dog, golden crescent dough, and tangy mustard eyes is weirdly perfect. It’s comfort food with a Halloween twist.
What makes these different from other mummy hot dog recipes? It’s the wrapping technique. Most recipes tell you to wrap the dough tightly, but that leaves gaps where the hot dog peeks through unevenly. I learned to wrap loosely and slightly overlap each strip, creating that authentic “mummy bandage” look without the hot dog bulging out in weird places. Plus, I use a specific brand of crescent dough that holds its shape better during baking—trust me on this one.
These mummy hot dogs aren’t just a snack—they’re the kind of thing that makes people smile. The first time I brought them to a Halloween potluck, someone actually took a picture before anyone could eat one. That’s when I knew I’d stumbled onto something special.
What Ingredients You Will Need
This recipe uses simple, everyday ingredients to create something that looks way more impressive than it actually is. You probably have most of these in your kitchen right now—which is exactly the point.
- Hot dogs (8 standard-size) — I recommend using all-beef hot dogs for the best flavor and texture. They hold up better during baking and don’t shrink as much as cheaper varieties. My personal preference is Hebrew National or Nathan’s Famous, but any brand you like will work. If you’re feeding a crowd, go with cocktail-sized hot dogs for bite-sized mummies.
- 1 can (8 oz) refrigerated crescent roll dough — This is the magic ingredient. Pillsbury is my go-to because it consistently bakes up flaky and golden without getting soggy. The dough unrolls into perforated triangles, which you’ll cut into thin strips. Pro tip: keep the dough cold until you’re ready to use it—warm dough gets sticky and harder to work with.
- Mustard (yellow or Dijon) — For the mummy eyes. Yellow mustard gives that classic spooky look, but Dijon adds a slightly sharper flavor if that’s your thing. You only need a tiny dab per mummy, so a squeeze bottle makes application way easier. I’ve also used ketchup in a pinch, but mustard looks more authentic—like little glowing eyes peeking out from the bandages.
Optional but Recommended:
- Cooking spray or parchment paper — The crescent dough can stick to baking sheets if you’re not careful. I prefer parchment paper for easy cleanup, but a light spritz of non-stick spray works too.
- Pretzel sticks or thin breadsticks — If you want to get fancy, you can insert a pretzel stick into each hot dog before wrapping to create a “lollipop” effect. It makes them easier to hold and looks adorable at parties.
- Everything bagel seasoning — Sprinkle this over the dough before baking for extra flavor and texture. The sesame seeds and poppy seeds add a nice crunch that complements the soft dough.
Substitution Guidance:
- For gluten-free: Use gluten-free crescent dough (available at most major grocery stores) and check that your hot dogs are gluten-free certified. Most all-beef hot dogs are naturally gluten-free, but always read the label.
- For dairy-free: Most crescent dough contains butter, but you can find dairy-free versions or make your own dairy-free pastry dough. The hot dogs themselves are typically dairy-free.
- For vegetarian: Swap the hot dogs for vegetarian sausages or even cheese sticks. Plant-based hot dogs work surprisingly well—just make sure they’re firm enough to hold their shape during baking.
Equipment Needed
You don’t need any fancy kitchen gadgets for this recipe. Here’s what you’ll need:
- Baking sheet — A standard half-sheet pan works perfectly. If you’re making a double batch, you’ll need two sheets to avoid overcrowding.
- Parchment paper or silicone baking mat — This prevents sticking and makes cleanup a breeze. I’ve forgotten to line my sheet before, and let me tell you, scraping baked-on dough is not fun.
- Sharp knife or pizza cutter — You’ll use this to cut the crescent dough into thin strips. A pizza cutter gives you cleaner edges, but a sharp knife works just fine. I actually prefer a knife because I have more control over the width of the strips.
- Small bowl — For holding the mustard while you dot the eyes. You could also just squeeze directly from the bottle, but a small bowl with a toothpick gives you more precision.
- Toothpicks or skewers — Optional, but helpful for securing the dough ends if they start to unroll during baking. I’ve only needed this once, but it saved a batch that was determined to unwrap itself.
- Cooling rack — Not strictly necessary, but it helps the mummies cool evenly without getting soggy on the bottom. If you don’t have one, just transfer them to a plate after a few minutes.
Preparation Method
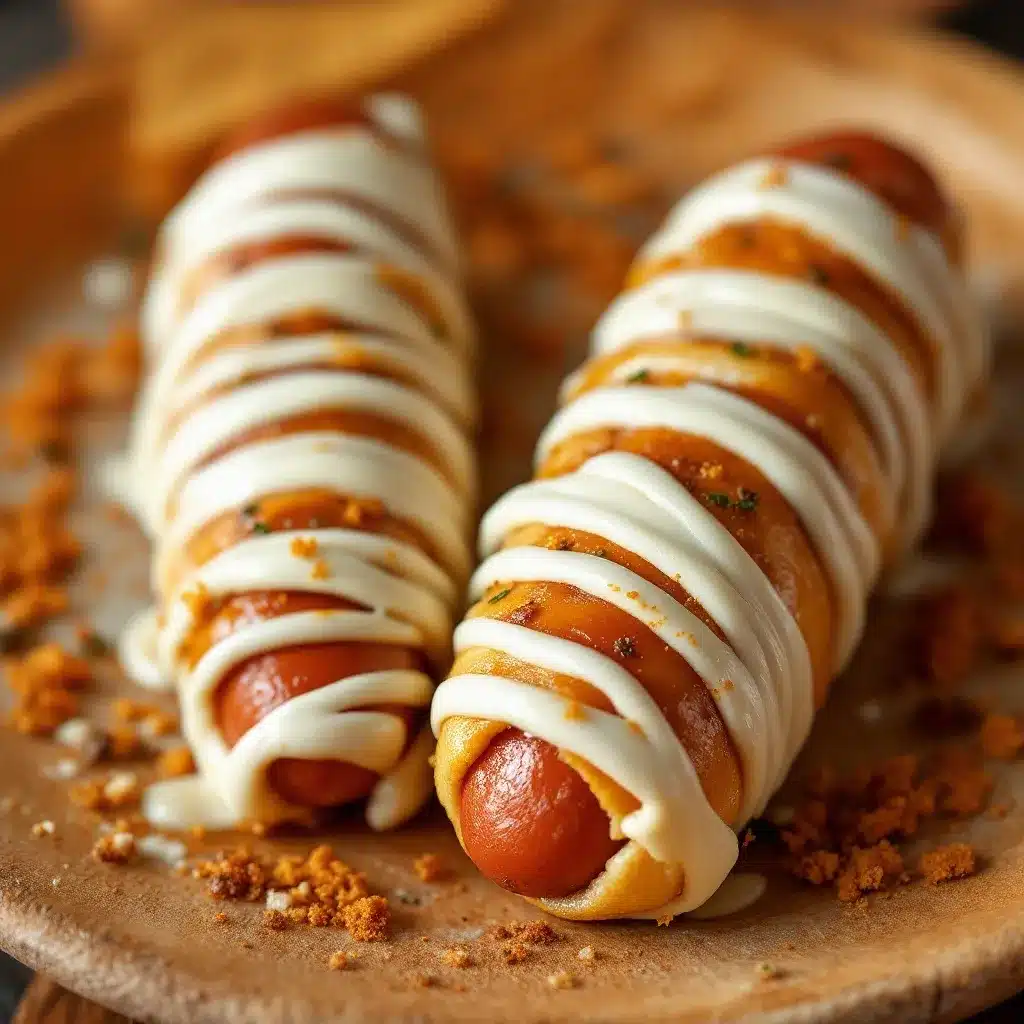
Making these mummy hot dogs is surprisingly straightforward. Here’s how I do it, step by step:
- Preheat your oven to 375°F (190°C). Line a baking sheet with parchment paper or a silicone baking mat. Getting the oven hot before you start is key—you want that dough to start puffing up immediately.
- Unroll the crescent dough onto a clean cutting board or countertop. You’ll see perforated triangles—press the seams together gently to create one solid sheet of dough. Don’t press too hard, just enough to seal the perforations.
- Cut the dough into thin strips. Using a sharp knife or pizza cutter, slice the dough lengthwise into strips about ¼ to ½ inch wide. I usually get 8-10 strips from one can of dough. The strips don’t need to be perfectly even—slight imperfections make the mummies look more authentic, honestly.
- Pat the hot dogs dry with a paper towel. This helps the dough stick better and prevents sogginess. I forgot to do this once, and the dough slid right off the hot dogs while they baked. Learn from my mistake!
- Wrap each hot dog with dough strips. Start at one end and wrap the strip around the hot dog at a slight angle, overlapping each layer slightly. Leave a small gap at the top for the “face”—about ½ inch of exposed hot dog. Press the end of the dough gently to seal it. Don’t wrap too tightly; loose wrapping creates those nice, puffy bandages.
- Place the wrapped hot dogs on the prepared baking sheet, seam-side down. Space them about 2 inches apart to allow for even browning. If the dough ends start to unroll, tuck them under the hot dog or use a toothpick to hold them in place.
- Bake for 12-15 minutes, or until the dough is golden brown and puffy. The hot dogs should be heated through and slightly sizzling. Keep an eye on them during the last few minutes—ovens vary, and you don’t want burnt mummies.
- Let them cool for 2-3 minutes on the baking sheet before transferring to a cooling rack or serving plate. This gives the dough time to set so it doesn’t fall apart when you move them.
- Add the mustard eyes. Using a toothpick or the tip of a knife, dab two small dots of mustard on the exposed hot dog to create the eyes. You can make them scared-looking by adding tiny mustard eyebrows above the eyes, or go for a classic blank stare. I like to vary the expressions—some get angry eyebrows, others look surprised.
- Serve immediately. These are best enjoyed warm when the dough is still flaky and the hot dog is juicy. If you’re making them for a party, you can keep them warm in a low oven (200°F) for up to 30 minutes.
Sensory cues to watch for: The dough should smell buttery and toasty when it’s done. The tops will be golden brown with slightly darker edges. When you tap a mummy gently, the dough should feel firm and crisp, not soft or doughy. If the hot dogs start to split open during baking, that’s totally fine—it adds to the “mummy” look.
Cooking Tips & Techniques
After making these mummy hot dogs more times than I can count, I’ve picked up a few tricks that make a real difference:
Keep the dough cold. Crescent dough gets sticky and hard to work with when it warms up. If your kitchen is warm, pop the unopened can in the fridge for 10 minutes before you start. If the dough starts sticking to your knife while cutting strips, throw it in the freezer for 2 minutes—it’ll firm right up.
Don’t overwork the dough. When you press the seams together, use a light touch. Pressing too hard makes the dough tough and less flaky. I learned this the hard way when my first batch came out dense and chewy instead of light and buttery.
Leave room for the eyes. It’s tempting to wrap the dough all the way to the top of the hot dog, but leaving that ½-inch gap is crucial. The exposed hot dog creates the “face,” and the mustard dots need a clean surface to stick to. Plus, it looks more like a mummy peeking out from its bandages.
Watch the baking time. Every oven runs a little differently. Start checking at the 12-minute mark. The dough should be golden brown, not pale. If the edges start getting too dark before the center is done, tent the baking sheet loosely with foil for the last few minutes.
Make ahead tip: You can assemble the mummy hot dogs up to 4 hours ahead of time and keep them covered in the refrigerator. Just add 2-3 minutes to the baking time since they’ll be starting from cold. I’ve done this for parties, and it’s a lifesaver—no last-minute wrapping stress.
Common mistake: Wrapping the dough too tightly. I did this my first few times because I thought tighter would look neater. But tight wrapping makes the dough split during baking, and the hot dog ends up looking more like a snake than a mummy. Loose wrapping with slight overlap is the way to go.
Variations & Adaptations
One of the best things about this recipe is how easy it is to customize. Here are some variations I’ve tried and loved:
Cheesy Mummy Hot Dogs: Before wrapping, slice the hot dog lengthwise (not all the way through) and stuff a thin strip of cheddar or mozzarella cheese inside. The cheese melts out slightly during baking, creating a gooey, delicious mess. Just be careful—the cheese gets hot! I tried this with pepper jack once, and the spicy kick was amazing.
Pizza Mummies: Brush the dough strips with garlic butter and sprinkle with dried oregano before wrapping. After baking, drizzle with warm marinara sauce instead of mustard eyes. They taste like little pizza rolls—perfect for kids who aren’t into mustard.
Breakfast Mummies: Swap the hot dogs for breakfast sausage links and use pancake batter instead of crescent dough. Cook them on a griddle until golden brown, then add maple syrup “eyes.” I made these for a Halloween morning breakfast, and my family devoured them.
Spicy Mummies: Use spicy Italian sausage or chorizo links instead of hot dogs. Brush the dough with sriracha or hot honey before wrapping. The sweet-spicy combo is incredible, and the red color of the sausage makes the mustard eyes pop even more.
Veggie Mummies: For a meatless version, use vegetarian hot dogs or even thick carrot sticks (blanched first so they’re tender). The carrot version is surprisingly good—the natural sweetness pairs well with the buttery dough.
Dipping Sauces: Beyond mustard, try serving these with ketchup, ranch dressing, barbecue sauce, or even queso. I once set up a “mummy dipping bar” at a party with five different sauces, and it was a huge hit.
Serving & Storage Suggestions
These mummy hot dogs are best served warm, straight from the oven. The dough is at its flakiest and the hot dog is perfectly juicy. Here’s how to serve and store them:
Serving temperature: Warm, but not piping hot. Let them cool for 3-5 minutes after baking so the dough sets and the mustard eyes don’t slide off. Room temperature is also fine if you’re serving them at a buffet—they’re still delicious even when slightly cooled.
Presentation ideas: Arrange the mummies on a platter lined with black or orange napkins for a festive look. You can scatter some candy corn or Halloween sprinkles around the edges for extra flair. I like to serve them on a wooden cutting board with small bowls of dipping sauces arranged around them.
Complementary dishes: These pair well with other finger foods like veggie sticks, chips and dip, or mini sliders. For a full Halloween meal, serve them alongside a bowl of spicy chili or pumpkin soup. They’re also great with a side of roasted sweet potato wedges.
Storage instructions: Leftover mummy hot dogs can be stored in an airtight container in the refrigerator for up to 3 days. The dough will soften slightly, but they’ll still taste good. To reheat, place them on a baking sheet in a 350°F oven for 5-7 minutes, or until heated through. Avoid microwaving—it makes the dough soggy and the hot dogs rubbery.
Freezer instructions: You can freeze unbaked mummy hot dogs for up to 2 months. Assemble them as directed, place them on a baking sheet lined with parchment paper, and freeze until solid. Transfer to a freezer bag or container. When ready to bake, add 5-7 minutes to the baking time—no need to thaw first. Baked mummies can also be frozen, but the texture won’t be as good as fresh.
Flavor development: Honestly, these are best fresh. The dough loses its crispness after a few hours, and the hot dog starts to dry out. But if you have leftovers, they make a great lunch the next day—just reheat in the oven and add fresh mustard eyes.
Nutritional Information & Benefits
Let’s be real—these mummy hot dogs are a treat, not a health food. But here’s the nutritional breakdown for one mummy (made with standard ingredients):
- Calories: Approximately 220-250 per serving
- Protein: 8-10 grams (from the hot dog and dough)
- Carbohydrates: 18-22 grams (mostly from the crescent dough)
- Fat: 14-16 grams (varies by hot dog brand)
- Sodium: 600-800 mg (hot dogs are naturally high in sodium)
Health considerations: If you’re watching your sodium intake, look for low-sodium hot dogs or turkey hot dogs. The crescent dough can be swapped for whole wheat or gluten-free versions. For a lighter option, use chicken or turkey hot dogs and bake until extra crispy to reduce the fat content.
Dietary notes: This recipe contains wheat (gluten) and dairy (butter in the dough). It’s not suitable for vegans unless you use plant-based hot dogs and dairy-free crescent dough. Always check labels if you’re cooking for someone with allergies.
Personal perspective: I don’t make these every day—they’re a special occasion thing. But when Halloween rolls around, I don’t stress about the nutritional stats. Food is about joy and connection, and these little mummies bring a lot of both. Balance is key, and a few mummy hot dogs once a year isn’t going to derail anyone’s health goals.
Conclusion
These easy mummy-wrapped Halloween hot dogs are proof that you don’t need complicated recipes to create something memorable. They’re fun, fast, and forgiving—perfect for busy parents, last-minute party planners, or anyone who wants to bring a little spooky charm to their table without spending hours in the kitchen.
I love how this recipe brings people together. Every time I make them, someone asks for the recipe, and I get to tell the story about my accountant and his surprising culinary wisdom. It’s become a Halloween tradition in my house, and I hope it becomes one in yours too.
Feel free to customize these however you like—add different fillings, play with the eye expressions, or experiment with dipping sauces. The beauty of this recipe is that it’s a canvas for your creativity. And honestly? Even if your mummies come out looking a little wonky, they’ll still taste amazing.
I’d love to hear how yours turn out! Drop a comment below and let me know what variations you tried, or tag me in your photos on social media. Happy Halloween, and happy eating!
Frequently Asked Questions
Can I make these mummy hot dogs ahead of time?
Yes! You can assemble them up to 4 hours ahead and keep them covered in the fridge. Just add a couple of extra minutes to the baking time since they’ll be cold. For longer storage, freeze them unbaked for up to 2 months.
What kind of hot dogs work best?
All-beef hot dogs are my top pick because they hold their shape and don’t shrink too much. But turkey, chicken, or even vegetarian hot dogs work well too. Just avoid extra-thin hot dogs—they can get lost in the dough.
Can I use puff pastry instead of crescent dough?
Absolutely! Puff pastry gives a flakier, more buttery result. Just roll it out slightly thinner than usual and cut into strips. The baking time might be a minute or two longer, so keep an eye on them.
How do I get the mustard eyes to stay put?
Make sure the hot dog surface is dry before adding the mustard. If the eyes still slide off, you can use a tiny dab of cream cheese or mayonnaise as “glue” before adding the mustard. I’ve also used black sesame seeds for a non-mustard option.
Can I make these in an air fryer?
Yes! Air fry at 350°F for 8-10 minutes, flipping halfway through. The dough gets extra crispy in the air fryer, which is honestly amazing. Just don’t overcrowd the basket—work in batches if needed.
Pin This Recipe!
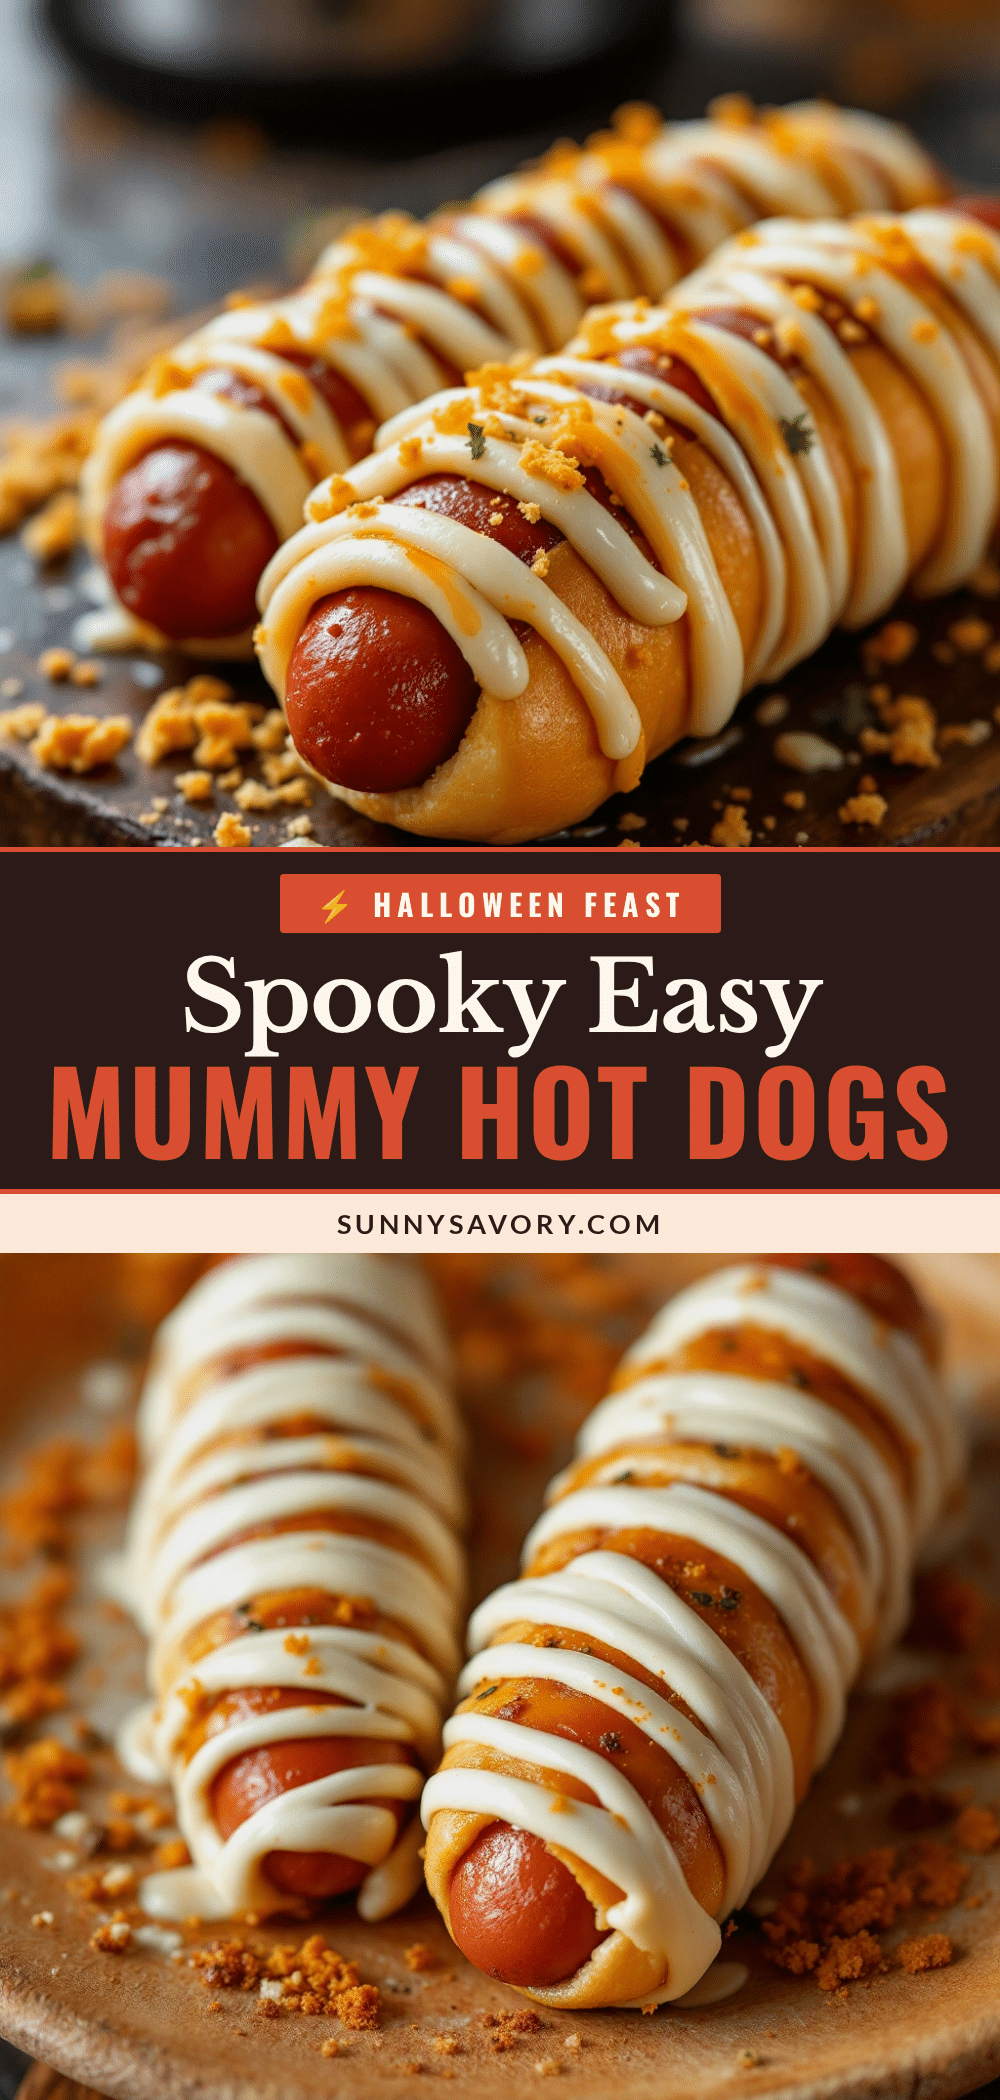
Best Easy Mummy Hot Dogs – Perfect Halloween Recipe
These easy mummy-wrapped Halloween hot dogs are the kind of recipe that makes you look like a kitchen genius with almost zero effort. Made with just hot dogs, crescent dough, and mustard, they’re quick, fun, and perfect for Halloween parties.
- Prep Time: 10 minutes
- Cook Time: 15 minutes
- Total Time: 25 minutes
- Yield: 8 servings 1x
- Category: Appetizer
- Cuisine: American
Ingredients
- 8 standard-size hot dogs (all-beef recommended, e.g., Hebrew National or Nathan’s Famous)
- 1 can (8 oz) refrigerated crescent roll dough (e.g., Pillsbury)
- Mustard (yellow or Dijon) for eyes
- Cooking spray or parchment paper (optional)
- Pretzel sticks or thin breadsticks (optional, for lollipop effect)
- Everything bagel seasoning (optional)
Instructions
- Preheat your oven to 375°F (190°C). Line a baking sheet with parchment paper or a silicone baking mat.
- Unroll the crescent dough onto a clean cutting board or countertop. Press the perforated seams together gently to create one solid sheet of dough.
- Using a sharp knife or pizza cutter, slice the dough lengthwise into thin strips about ¼ to ½ inch wide. You should get 8-10 strips from one can.
- Pat the hot dogs dry with a paper towel to help the dough stick and prevent sogginess.
- Wrap each hot dog with dough strips. Start at one end and wrap the strip around the hot dog at a slight angle, overlapping each layer slightly. Leave a small gap at the top for the ‘face’—about ½ inch of exposed hot dog. Press the end of the dough gently to seal. Wrap loosely for puffy bandages.
- Place the wrapped hot dogs on the prepared baking sheet, seam-side down. Space them about 2 inches apart. If dough ends start to unroll, tuck them under or use a toothpick to hold them in place.
- Bake for 12-15 minutes, or until the dough is golden brown and puffy. The hot dogs should be heated through and slightly sizzling.
- Let them cool for 2-3 minutes on the baking sheet before transferring to a cooling rack or serving plate.
- Using a toothpick or the tip of a knife, dab two small dots of mustard on the exposed hot dog to create the eyes. Optionally, add tiny mustard eyebrows for different expressions.
- Serve immediately. These are best enjoyed warm when the dough is still flaky and the hot dog is juicy.
Notes
Keep the dough cold for easier handling. Don’t overwork the dough to keep it flaky. Leave room for the eyes. Watch the baking time—start checking at 12 minutes. For make-ahead, assemble up to 4 hours ahead and refrigerate, then add 2-3 minutes to baking time. For freezing, assemble unbaked and freeze for up to 2 months; bake from frozen adding 5-7 minutes.
Nutrition
- Serving Size: 1 mummy hot dog
- Calories: 235
- Sugar: 4
- Sodium: 700
- Fat: 15
- Saturated Fat: 5
- Carbohydrates: 20
- Protein: 9
Keywords: mummy hot dogs, Halloween recipe, easy appetizer, crescent dough hot dogs, spooky snacks, party food



