Love this? Save it for later!
Share the inspiration with your friends
The neighborhood pie contest was in twelve hours and I’d completely forgotten. Everyone else would be bringing their grandmother’s legendary recipes—the ones that had won blue ribbons for three generations. I had a single sugar pumpkin sitting on my counter, a stick of butter, and no idea what I was doing. Honestly, I almost just grabbed a store-bought pie and called it a day.
But you know that stubborn voice that pipes up when you really want to impress someone? Mine was screaming, “You can do this. It’s just a pie.” So at 10 PM, with flour dusted across my kitchen and a slightly frantic energy, I started making a wholesome classic pumpkin pie from scratch. I didn’t have a proper pie dish—used a glass casserole dish instead. The first batch of crust crumbled because I overworked the dough. Let me tell you, I was ready to cry into that sad pile of butter and flour.
I started over. This time, I chilled everything—the bowl, the butter, even my hands. And something clicked. The crust came together like it knew what it was doing. The filling was this gorgeous amber color, spiced just right. I slid it into the oven at midnight, crossed my fingers, and went to sleep smelling cinnamon and nutmeg. The next morning, I walked into that contest feeling like a fraud carrying my humble pie. It won first place. I mean, I was as shocked as anyone. But that pie—with its flaky, buttery crust and silky, spiced filling—had something special. It was simple, honest, and made with my own two hands. Maybe you’ve been there, thrown into a situation where you had to fake it till you made it. This recipe is proof that sometimes the best things come from a little bit of panic and a whole lot of heart.
Why You’ll Love This Recipe
This isn’t just another pumpkin pie recipe. It’s the one I’ve tested, tweaked, and perfected over countless Thanksgivings and random Tuesday cravings. It’s the kind of pie that makes people close their eyes after the first bite—and then ask for the recipe before they’ve finished their slice.
- Made from Scratch, But Totally Doable: We’re using a real sugar pumpkin here, not just canned puree. But I promise, it’s easier than you think. Roasting the pumpkin is almost hands-off, and the flavor is night-and-day different from anything in a can.
- Perfectly Spiced, Not Overpowering: The spice blend is balanced so the pumpkin flavor shines through. No one wants a mouthful of cinnamon that burns. This is warm, cozy, and just right.
- That Flaky, Buttery Crust: The crust is the unsung hero of any great pie. This one is tender, flaky, and holds up beautifully against the creamy filling. No soggy bottoms here!
- Wholesome Ingredients You Feel Good About: Real pumpkin, fresh cream, eggs, and butter. No preservatives, no weird additives. You know exactly what’s going into your dessert.
- Crowd-Pleaser, Every Single Time: I’ve brought this pie to potlucks, holiday dinners, and casual get-togethers. It disappears fast. Kids love it, adults crave it, and it always gets rave reviews.
What makes this recipe different from the rest? It’s the technique. Roasting the pumpkin concentrates its natural sweetness and gives the filling a velvety texture you just can’t get from a can. Plus, the par-baked crust ensures every bite is crisp and delicious. This isn’t just another version of pumpkin pie—it’s the best version, born from a midnight baking panic and perfected through years of happy accidents.
What Ingredients You Will Need
This recipe uses simple, wholesome ingredients to deliver that classic pumpkin pie flavor with a from-scratch depth. Most of these are pantry staples, but a few key choices make all the difference.
For the Crust
- All-purpose flour, 1 ¼ cups (160g) – gives structure and flakiness
- Unsalted butter, ½ cup (113g), very cold and cut into small cubes – the key to a flaky crust (I prefer Kerrygold for its rich flavor)
- Ice water, 3-4 tablespoons – just enough to bring the dough together
- Salt, ½ teaspoon – enhances the buttery flavor
- Granulated sugar, 1 teaspoon – a touch of sweetness for balance
For the Pumpkin Filling
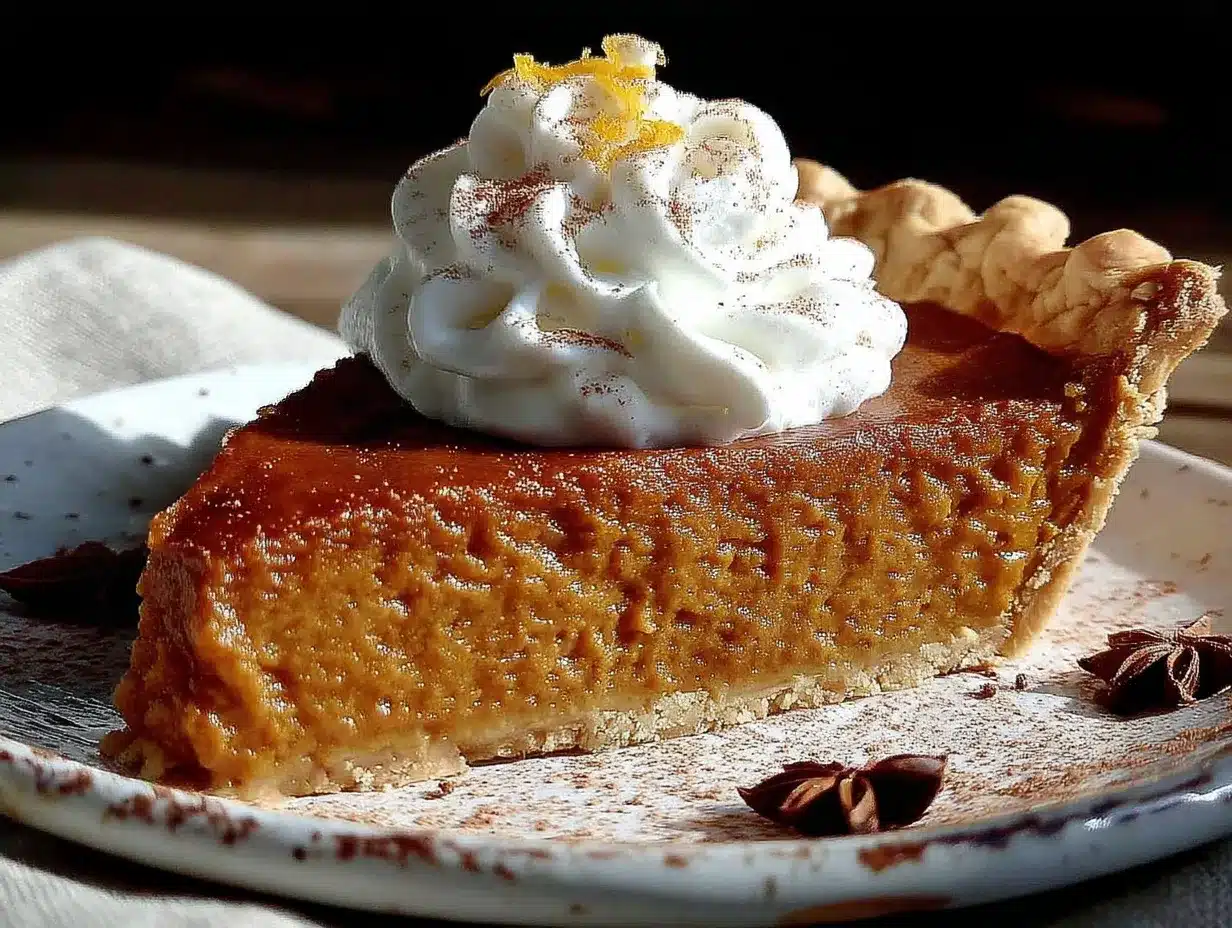
- 1 small sugar pumpkin (about 2-3 lbs), or 2 cups (450g) roasted pumpkin puree – look for pumpkins labeled “pie pumpkins” or “sugar pumpkins”; they’re sweeter and less watery than carving pumpkins
- Heavy cream, 1 cup (240ml) – adds richness and a silky texture (half-and-half works too)
- Large eggs, 2 – for structure and binding
- Packed brown sugar, ¾ cup (150g) – gives a deeper, molasses-like sweetness
- Granulated sugar, ¼ cup (50g) – rounds out the sweetness
- Ground cinnamon, 1 ½ teaspoons – the star spice
- Ground ginger, ½ teaspoon – adds warmth without heat
- Ground nutmeg, ¼ teaspoon – freshly grated if possible (trust me on this)
- Ground cloves, ⅛ teaspoon – just a pinch for depth
- Salt, ½ teaspoon – balances the sweetness and brightens the flavors
- Vanilla extract, 1 teaspoon – enhances the overall flavor profile
Ingredient Selection Tips
When choosing your sugar pumpkin, look for one that feels heavy for its size and has a firm, unblemished skin. Smaller pumpkins are generally sweeter and less stringy. If you’re in a pinch, you can use high-quality canned pumpkin puree (not pumpkin pie filling), but the flavor won’t be quite as vibrant. I recommend Libby’s 100% Pure Pumpkin if going that route.
For the butter in the crust, the colder the better. Pop it in the freezer for 10 minutes before cutting it into the flour. This ensures those little pockets of butter stay solid, creating steam pockets that result in a flaky, tender crust.
Equipment Needed
You don’t need a professional bakery setup to make a stunning pie from scratch. Here’s what you’ll need:
- 9-inch pie dish – glass or ceramic works best for even baking. I use a classic Pyrex dish.
- Baking sheet – place the pie dish on this to catch any drips and ensure even bottom heat.
- Rolling pin – for rolling out the crust. A wine bottle works in a pinch!
- Large mixing bowls – one for the crust, one for the filling.
- Pastry cutter or two forks – for cutting butter into the flour.
- Chef’s knife and cutting board – for prepping the pumpkin.
- Baking dish – for roasting the pumpkin halves.
- Food processor or blender – to puree the roasted pumpkin until smooth.
- Fine-mesh sieve – optional, but great for straining the puree if it seems watery.
- Measuring cups and spoons – accuracy matters in baking.
- Parchment paper and pie weights or dried beans – for par-baking the crust.
If you don’t have pie weights, dried beans or even uncooked rice work perfectly. Just line the crust with parchment and fill it up. I’ve used the same bag of dried beans for years—they’re dedicated pie weights now!
Preparation Method
Step 1: Roast the Pumpkin (Hands-On: 10 minutes | Total: 1 hour)
Preheat your oven to 375°F (190°C). Cut your sugar pumpkin in half from stem to base. Scoop out all the seeds and stringy bits—save the seeds for roasting later if you like! Brush the cut sides with a little oil and place them cut-side down on a baking sheet. Roast for 45-60 minutes, until the flesh is very tender when pierced with a fork. Let it cool until you can handle it, then scoop the flesh into a food processor. Blend until completely smooth. If it seems watery, let it drain in a fine-mesh sieve lined with cheesecloth for 30 minutes.
Step 2: Make the Pie Crust (Hands-On: 15 minutes | Chill: 1 hour)
In a large bowl, whisk together the flour, salt, and sugar. Add the cold butter cubes. Using a pastry cutter or your fingertips, work the butter into the flour until the mixture looks like coarse meal with some pea-sized butter pieces remaining. This is crucial—those little butter bits create flakiness. Drizzle in ice water, one tablespoon at a time, tossing with a fork until the dough just comes together when squeezed. It should be shaggy, not wet. Turn it out onto a piece of plastic wrap, flatten into a disk, and refrigerate for at least 1 hour.
Step 3: Par-Bake the Crust (Hands-On: 10 minutes | Bake: 15 minutes)
On a lightly floured surface, roll the dough into a 12-inch circle, about ⅛-inch thick. Gently transfer it to your pie dish, pressing it into the bottom and sides. Trim the overhang to about ½ inch, then tuck it under and crimp the edges. Prick the bottom all over with a fork. Line the crust with parchment paper and fill with pie weights or dried beans. Bake at 375°F (190°C) for 15 minutes. Remove the parchment and weights, then bake for another 5-7 minutes until the bottom looks dry and lightly golden. Set aside to cool slightly.
Step 4: Make the Filling (Hands-On: 10 minutes)
In a large bowl, whisk together the roasted pumpkin puree, heavy cream, eggs, brown sugar, granulated sugar, cinnamon, ginger, nutmeg, cloves, salt, and vanilla extract. Whisk until completely smooth and well combined. The mixture should be thick but pourable. Give it a taste—it should be sweet, spiced, and incredibly pumpkin-y.
Step 5: Bake the Pie (Hands-On: 5 minutes | Bake: 45-55 minutes)
Place the par-baked crust on a baking sheet. Pour the filling into the warm crust. Carefully transfer to the oven and bake at 375°F (190°C) for 15 minutes. Then, reduce the oven temperature to 350°F (175°C) and continue baking for 30-40 minutes. The pie is done when the edges are set and the center jiggles slightly—like Jell-O, not like liquid. A knife inserted near the center should come out mostly clean. The internal temperature should reach 175°F (80°C).
Step 6: Cool and Serve (Cool: 2 hours minimum)
Let the pie cool completely on a wire rack. This is critical—the filling needs time to set properly. At least 2 hours, but overnight is even better. The flavors meld and deepen as it rests. Serve at room temperature or slightly warm, with a dollop of whipped cream if you’re feeling fancy.
Cooking Tips & Techniques
I’ve made this pie more times than I can count, and I’ve learned a few things the hard way. Here are my best tips for success:
- Don’t skip the par-bake. I know it’s an extra step, but it’s the difference between a crisp crust and a soggy one. The hot oven sets the crust before the wet filling has a chance to soak in.
- Use room temperature ingredients for the filling. Eggs and cream that are too cold can cause the filling to curdle or not set properly. Let them sit out for 30 minutes before mixing.
- Don’t overmix the crust. Overworking the dough develops gluten, which makes it tough. Mix just until it comes together, and handle it as little as possible.
- Watch the edges of the crust. If they start browning too quickly, cover them with a pie shield or strips of foil. I’ve burned more edges than I care to admit.
- Let it cool completely. I know it’s tempting to dig in while it’s warm, but the pie needs time to set. Cutting it too early will result in a runny mess. Patience, my friend.
- Use a kitchen scale for the flour. Measuring flour by volume can be inconsistent. A scale ensures you get the right amount every time. I use 160g for this recipe.
Variations & Adaptations
This classic recipe is a fantastic base for customization. Here are a few ways to make it your own:
Dairy-Free Version
Swap the heavy cream with full-fat coconut cream (the kind from a can, refrigerated so the cream separates). Use a vegan butter stick (like Miyoko’s) in the crust. The texture will be slightly different—a bit more dense—but the flavor is still incredible.
Gluten-Free Version
Use a 1:1 gluten-free all-purpose flour blend (I like King Arthur Measure for Measure) in the crust. The dough will be a bit more fragile, so handle it gently. You can also press the dough into the dish instead of rolling it out.
Spiced-Up Version
Add a pinch of cayenne pepper or black pepper to the filling for a subtle warmth that plays beautifully with the sweetness. I tried this on a whim one year and it was a huge hit.
Maple Pumpkin Pie
Replace the granulated sugar with ⅓ cup (80ml) of pure maple syrup. Reduce the heavy cream by 2 tablespoons to compensate for the extra liquid. The maple flavor pairs gorgeously with the pumpkin.
Pumpkin Tart
Use a 9-inch tart pan with a removable bottom instead of a pie dish. The crust will be a bit thinner and the presentation is stunning. Adjust the bake time slightly—the tart will likely be done a few minutes earlier.
Serving & Storage Suggestions
This pie is best served at room temperature or slightly warm. If you want to reheat individual slices, pop them in a 300°F (150°C) oven for 5-10 minutes. The crust crisps back up beautifully.
For the classic presentation, serve with a generous dollop of lightly sweetened whipped cream. A sprinkle of cinnamon or nutmeg on top adds a nice touch. It also pairs wonderfully with a scoop of vanilla bean ice cream—the cold creaminess against the spiced pie is pure magic.
To store, cover the pie loosely with plastic wrap or foil and keep it in the refrigerator for up to 4 days. The flavors actually get better after a day or two as they meld together. I honestly think day-old pumpkin pie is the best pumpkin pie.
For longer storage, you can freeze the baked pie. Cool it completely, then wrap it tightly in plastic wrap and a layer of foil. Freeze for up to 3 months. Thaw overnight in the refrigerator before serving. You can also freeze the unbaked pie—just assemble it, don’t bake it, wrap it well, and freeze. Bake from frozen, adding about 15-20 minutes to the bake time.
Nutritional Information & Benefits
Here’s the estimated nutritional breakdown for one slice (assuming 8 slices per pie):
| Nutrient | Amount per Serving |
|---|---|
| Calories | ~380 |
| Total Fat | 22g |
| Saturated Fat | 13g |
| Cholesterol | 105mg |
| Sodium | 280mg |
| Total Carbohydrates | 44g |
| Dietary Fiber | 3g |
| Sugars | 28g |
| Protein | 5g |
Beyond the numbers, this pie offers some real benefits. Pumpkin is packed with vitamin A (in the form of beta-carotene), which is great for eye health and immune function. It’s also a good source of fiber, which helps with digestion. The eggs provide high-quality protein, and the spices—cinnamon, ginger, nutmeg—are known for their anti-inflammatory properties. This isn’t health food, but it’s a dessert made with real, wholesome ingredients. And honestly, that counts for a lot.
Conclusion
This wholesome classic pumpkin pie from scratch is more than just a recipe—it’s a little piece of baking magic. It’s the pie I turn to when I want to impress without stress, when I need comfort food that feels a bit special, and when I want to remind myself that I can actually do this whole from-scratch thing. The flaky crust, the silky spiced filling, the way it makes your whole kitchen smell like autumn—it’s all worth the effort.
I hope you give this recipe a try. Don’t be intimidated by the from-scratch part—you’ve got this. And if it doesn’t turn out perfect the first time? That’s okay. I burned my first crust and my third filling cracked. But every pie taught me something, and now this one is foolproof. Make it your own. Add a little extra cinnamon. Serve it with a giant dollop of cream. Share it with people you love. That’s what this pie is really about.
I’d love to hear how it goes! Drop a comment below and tell me about your pumpkin pie adventure. Did you make any fun variations? Did it win you a blue ribbon? Let me know!
Frequently Asked Questions
Can I use canned pumpkin instead of roasting a fresh one?
Absolutely! If you’re short on time, use 2 cups of 100% pure pumpkin puree (like Libby’s). Just avoid pumpkin pie filling, which is pre-sweetened and spiced. The flavor won’t be quite as deep, but it will still be delicious.
How do I know when the pie is done baking?
The edges should be set and the center should jiggle slightly—like Jell-O, not like liquid. A knife inserted near the center should come out mostly clean. For accuracy, use an instant-read thermometer; the internal temperature should reach 175°F (80°C).
Why did my pie crust shrink during baking?
This usually happens when the dough is overworked or not chilled enough. Make sure to refrigerate your dough for at least 1 hour before rolling. Also, don’t stretch the dough when fitting it into the dish—gently press it in instead.
Can I make this pie ahead of time?
Yes! In fact, I recommend it. The pie can be baked a day ahead and stored in the refrigerator. The flavors meld and deepen overnight. Just let it come to room temperature before serving, or warm slices gently in the oven.
My pie filling cracked. What went wrong?
Cracks usually happen from overbaking or a sudden temperature change. The filling continues to cook from residual heat after it comes out of the oven, so it’s better to underbake slightly than overbake. Also, let the pie cool gradually on a wire rack—don’t put it in the fridge while it’s still hot.
Pin This Recipe!
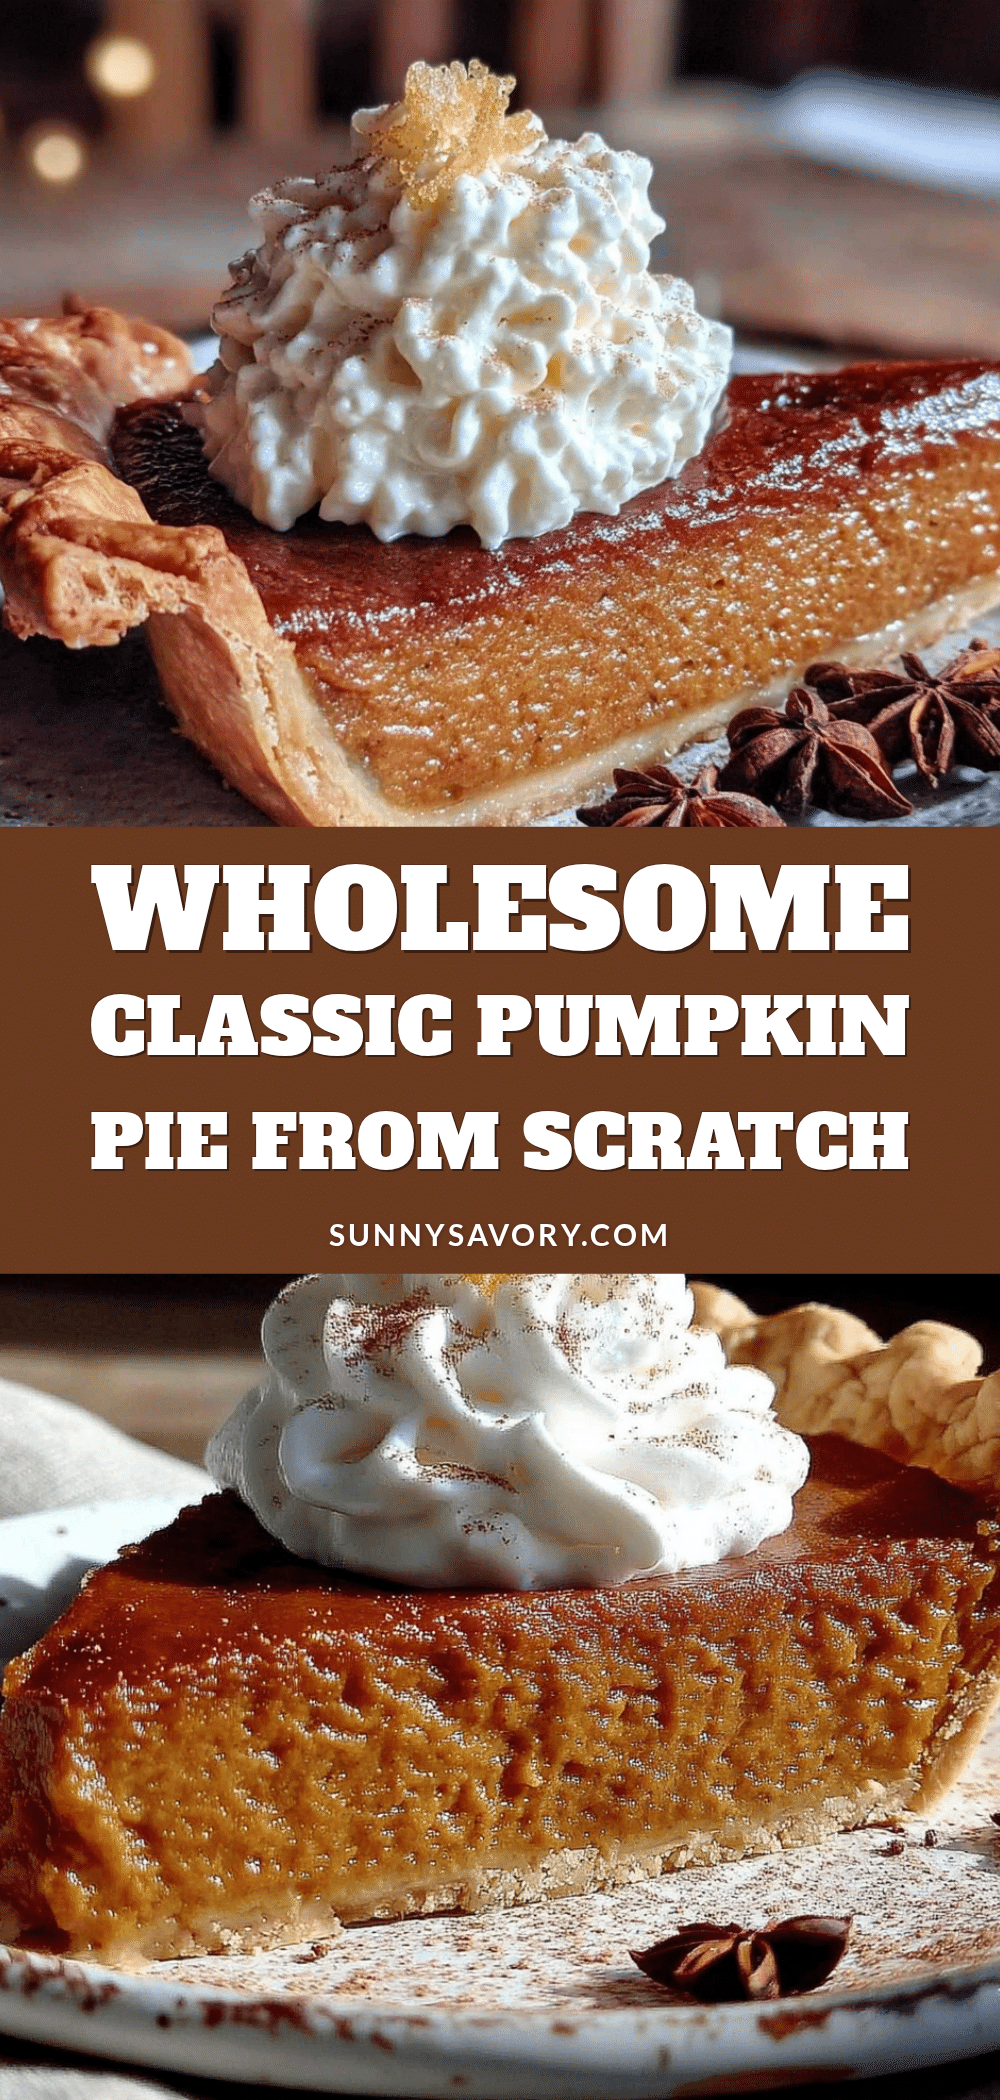
Best Homemade Classic Pumpkin Pie Recipe
This wholesome classic pumpkin pie from scratch features a flaky, buttery crust and a silky, spiced filling made from roasted sugar pumpkin. It’s the perfect dessert for Thanksgiving or any autumn gathering, and it’s sure to impress.
- Prep Time: 15 minutes
- Cook Time: 1 hour 30 minutes
- Total Time: 2 hours 45 minutes
- Yield: 8 servings 1x
- Category: Dessert
- Cuisine: American
Ingredients
- 1 ¼ cups (160g) all-purpose flour
- ½ cup (113g) unsalted butter, very cold and cut into small cubes
- 3–4 tablespoons ice water
- ½ teaspoon salt
- 1 teaspoon granulated sugar
- 1 small sugar pumpkin (about 2–3 lbs), or 2 cups (450g) roasted pumpkin puree
- 1 cup (240ml) heavy cream
- 2 large eggs
- ¾ cup (150g) packed brown sugar
- ¼ cup (50g) granulated sugar
- 1 ½ teaspoons ground cinnamon
- ½ teaspoon ground ginger
- ¼ teaspoon ground nutmeg
- ⅛ teaspoon ground cloves
- ½ teaspoon salt
- 1 teaspoon vanilla extract
Instructions
- Preheat oven to 375°F (190°C). Cut sugar pumpkin in half, scoop out seeds, brush cut sides with oil, and place cut-side down on a baking sheet. Roast for 45-60 minutes until tender. Let cool, scoop flesh into a food processor, and blend until smooth. If watery, drain in a fine-mesh sieve for 30 minutes.
- In a large bowl, whisk together flour, salt, and sugar. Add cold butter cubes. Using a pastry cutter or fingertips, work butter into flour until mixture resembles coarse meal with pea-sized butter pieces. Drizzle in ice water, one tablespoon at a time, tossing with a fork until dough just comes together. Flatten into a disk, wrap in plastic, and refrigerate for at least 1 hour.
- On a lightly floured surface, roll dough into a 12-inch circle, about ⅛-inch thick. Transfer to a 9-inch pie dish, pressing into bottom and sides. Trim overhang to ½ inch, tuck under, and crimp edges. Prick bottom with a fork. Line with parchment and fill with pie weights or dried beans. Bake at 375°F (190°C) for 15 minutes. Remove parchment and weights, bake 5-7 minutes more until dry and lightly golden. Set aside to cool slightly.
- In a large bowl, whisk together roasted pumpkin puree, heavy cream, eggs, brown sugar, granulated sugar, cinnamon, ginger, nutmeg, cloves, salt, and vanilla extract until smooth and well combined.
- Place par-baked crust on a baking sheet. Pour filling into warm crust. Bake at 375°F (190°C) for 15 minutes, then reduce oven temperature to 350°F (175°C) and continue baking for 30-40 minutes, until edges are set and center jiggles slightly (like Jell-O). Internal temperature should reach 175°F (80°C).
- Let pie cool completely on a wire rack for at least 2 hours (overnight is best). Serve at room temperature or slightly warm, with whipped cream if desired.
Notes
Don’t skip the par-bake—it prevents a soggy crust. Use room temperature ingredients for the filling. Don’t overmix the crust. Watch the edges of the crust and cover with foil if browning too quickly. Let the pie cool completely before slicing to allow the filling to set. Use a kitchen scale for the flour for best results.
Nutrition
- Serving Size: 1 slice
- Calories: 380
- Sugar: 28
- Sodium: 280
- Fat: 22
- Saturated Fat: 13
- Carbohydrates: 44
- Fiber: 3
- Protein: 5
Keywords: pumpkin pie, classic pumpkin pie, homemade pumpkin pie, from scratch pumpkin pie, Thanksgiving dessert, fall dessert



