Love this? Save it for later!
Share the inspiration with your friends
This was supposed to be a full-sized pumpkin cheesecake. I had the springform pan greased, the water bath heating up, and I was feeling pretty good about myself. Then my phone rang—my sister, needing a last-minute favor—and by the time I got back to the kitchen, the gingersnap crust was already pressed into a muffin tin. I had grabbed the wrong pan without even thinking. The oven was preheated, the filling was mixed, and I was already running late for a potluck. So I just poured the batter into those little cups and hoped for the best. What came out was nothing like the plan—and better.
I mean, honestly? Those first mini cheesecake cups were a mess in the best way. The crust was too thick in some spots, the filling domed a little, and I burned my tongue trying to taste one straight out of the pan. But my neighbor Karen—yes, that Karen—took one bite at the potluck and said, and I quote, “You need to make these for everything.” She wasn’t wrong. These mini pumpkin cheesecake cups with gingersnap crust have become my go-to for every gathering, from Thanksgiving to random Tuesday dinners with friends.
Maybe you’ve been there—standing in a messy kitchen, something going sideways, wondering if you should just order pizza instead. Let me tell you, sometimes the happy accidents are the ones worth keeping. These little cups are proof that you don’t need a perfect plan to make something unforgettable. They’re creamy, spiced just right, and that crunchy, buttery gingersnap crust? It’s the kind of thing that makes people close their eyes after the first bite. I’ve been making them for three years now, and I still get asked for the recipe every single time.
Why You’ll Love This Recipe
I’ve tested this recipe more times than I care to admit. I’ve made it with store-bought crusts (fine, but not the same), tried different pumpkin purée brands, and even experimented with dairy-free cream cheese for a friend’s dietary needs. After all that trial and error, this version is the one I keep coming back to. It’s the one that gets the most compliments, the one that disappears fastest from the dessert table, and the one I actually look forward to making.
- Perfect for Hosting: These mini cheesecake cups are made for gatherings. They’re individual portions, so no slicing or serving drama. Just set them out and watch them vanish.
- Make-Ahead Magic: You can make these a day or two in advance. Actually, they taste even better after chilling overnight. That’s a host’s dream.
- Simple Ingredients: Nothing weird here. Cream cheese, pumpkin purée, spices, gingersnaps. You probably have most of this in your pantry right now.
- Crowd-Pleaser Guaranteed: I’ve served these to kids, grandparents, picky eaters, and self-proclaimed pumpkin haters. Every single person has asked for seconds.
- No Water Bath Needed: Full-sized cheesecakes are fussy. These little cups bake up perfectly without any of that hassle. Thank goodness.
What makes this recipe different from all the other pumpkin cheesecake recipes out there? It’s the crust, honestly. Most recipes use graham crackers, which are fine but a little boring. Gingersnaps bring a warm, spicy kick that pairs perfectly with the creamy pumpkin filling. It’s not just another version—it’s the best version. And when you’re hosting a dinner party or potluck, bringing something that stands out is everything. This is comfort food reimagined: fancy enough to impress, but simple enough that you won’t stress about it.
What Ingredients You Will Need
This recipe uses simple, wholesome ingredients to deliver bold flavor and satisfying texture without the fuss. Most of these are pantry staples, especially if you do any fall baking. Here’s what you’ll need:
For the Gingersnap Crust
- 1 ½ cups gingersnap cookie crumbs (about 25-30 cookies, crushed finely)
- ¼ cup granulated sugar (adds just enough sweetness)
- 5 tablespoons unsalted butter, melted (I use salted butter in a pinch, just reduce the added salt elsewhere)
- Pinch of salt (optional, but balances the sweetness)
Pro tip: You can buy pre-crushed gingersnap crumbs, but honestly, crushing them yourself in a zip-top bag with a rolling pin is more satisfying. Plus, you get a more consistent texture. I recommend using Nabisco or a store-brand gingersnap that’s snappy, not soft.
For the Pumpkin Cheesecake Filling
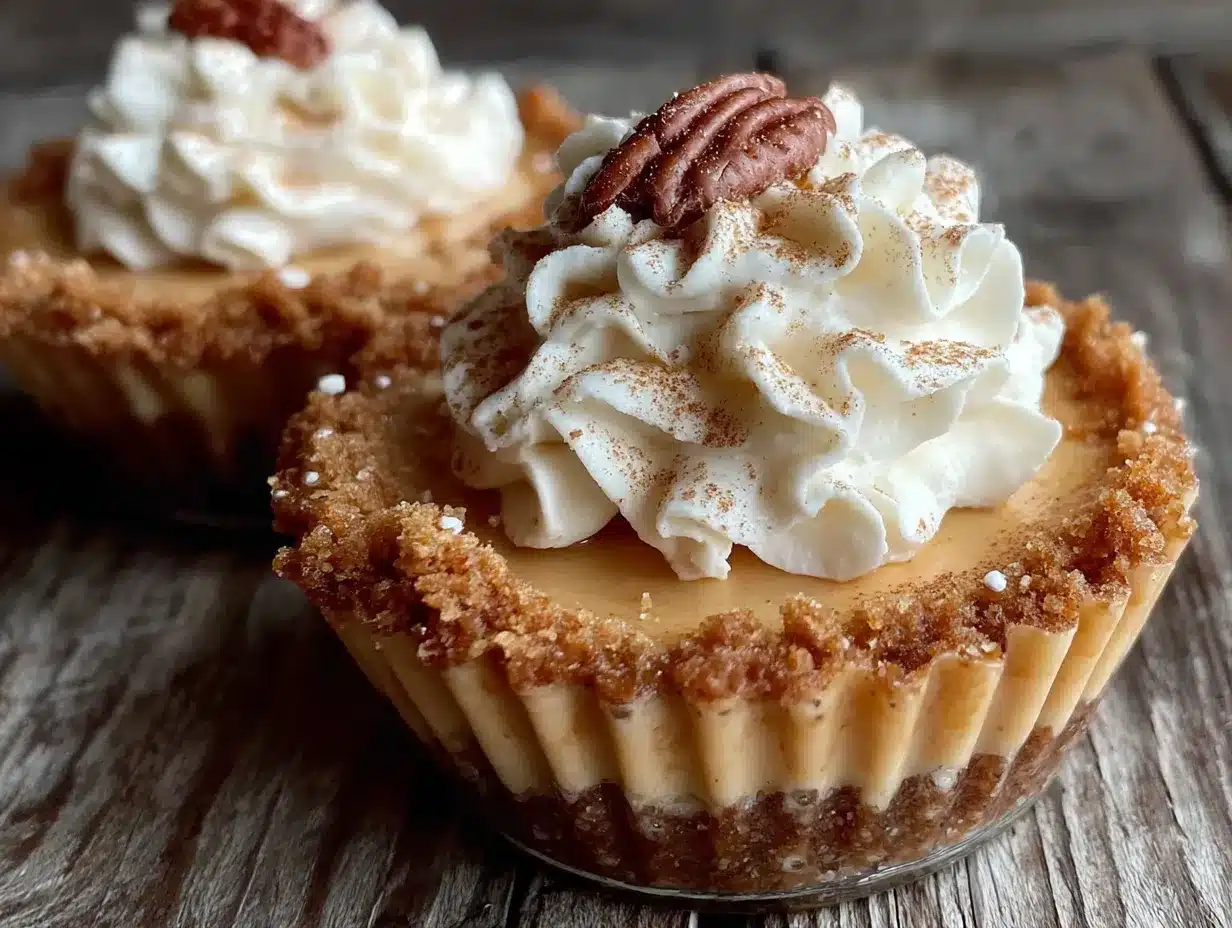
- 16 ounces cream cheese, softened to room temperature (full-fat is best for creaminess; low-fat works but the texture is slightly less rich)
- ½ cup granulated sugar
- ¼ cup packed light brown sugar (adds depth and moisture)
- 1 cup pumpkin purée (not pumpkin pie filling—make sure it’s 100% pumpkin)
- 2 large eggs, room temperature (cold eggs can make the filling lumpy)
- 1 teaspoon vanilla extract
- 1 teaspoon pumpkin pie spice (or make your own with cinnamon, nutmeg, ginger, and cloves)
- ½ teaspoon ground cinnamon (for extra warmth)
- ¼ teaspoon salt
For the pumpkin purée, I always reach for Libby’s. It’s consistently thick and not watery, which makes a difference in the final texture. If you’re using a different brand, you might need to drain off some excess liquid before adding it to the batter.
For the Topping (Optional but Recommended)
- ½ cup heavy cream, cold
- 1 tablespoon powdered sugar
- ¼ teaspoon vanilla extract
- Extra crushed gingersnaps or cinnamon for garnish
You can skip the whipped cream topping if you’re short on time, but honestly? It takes these from “really good” to “oh my gosh, can I have the recipe?” level. Just saying.
Equipment Needed
You don’t need a ton of fancy equipment for these mini pumpkin cheesecake cups, which is part of why I love making them for gatherings. Here’s what you’ll need:
- Muffin tin (12-cup): Standard size works best. You could use a mini muffin tin for even smaller bites, but you’ll get about 24 mini cups and the bake time will be shorter.
- Muffin liners (paper or foil): I prefer foil liners because they hold their shape better and peel off easily. Paper liners work too, but they might stick a little.
- Mixing bowls: One medium for the crust, one large for the filling.
- Electric hand mixer or stand mixer: You can mix by hand, but a mixer makes the cream cheese silky smooth without lumps.
- Rolling pin or food processor: For crushing the gingersnaps. A food processor is faster, but a rolling pin and a zip-top bag work great if you want to keep it simple.
- Measuring cups and spoons: Accuracy matters, especially for the spices.
- Spatula: For scraping every last bit of filling into the cups. Waste not, want not.
If you don’t have a muffin tin, you can use small ramekins or oven-safe cups. Just adjust the bake time since they’ll be deeper. I’ve also used silicone muffin molds with success—no liners needed, and they pop right out.
Preparation Method
Let’s get to the good part. Here’s how to make these crowd-pleasing mini pumpkin cheesecake cups with gingersnap crust. Take your time, and don’t rush—the results are worth it.
- Preheat your oven to 325°F (160°C). Line a 12-cup muffin tin with paper or foil liners. If you’re using foil liners, give them a light spray of non-stick cooking spray just to be safe.
- Make the crust: In a medium bowl, combine the gingersnap crumbs, granulated sugar, and salt. Pour in the melted butter and stir until every crumb is coated. The mixture should look like wet sand and hold together when you squeeze it.
- Press the crust into the liners: Divide the crust mixture evenly among the 12 muffin cups. Use the bottom of a small glass or a shot glass to press it down firmly. You want it compact so it holds together after baking. Aim for about a ¼-inch thick layer. Don’t worry if it comes up the sides a little—that’s actually nice.
- Bake the crusts: Pop the muffin tin into the preheated oven and bake for 8 minutes. They should be lightly golden and smell amazing. Remove from the oven and let them cool while you make the filling. Keep the oven on.
- Make the filling: In a large bowl, beat the softened cream cheese with an electric mixer on medium speed until smooth and creamy, about 2 minutes. Scrape down the sides of the bowl with a spatula.
- Add the sugars: Add the granulated sugar and brown sugar to the cream cheese. Beat on medium speed until well combined, about 1 minute. Scrape the bowl again.
- Add the pumpkin and flavorings: Add the pumpkin purée, vanilla extract, pumpkin pie spice, cinnamon, and salt. Beat on low speed until just combined. Don’t overmix—you don’t want to incorporate too much air.
- Add the eggs: Add the eggs one at a time, beating on low speed after each addition until just combined. Again, don’t overmix. The batter should be smooth and creamy, with a beautiful orange color.
- Fill the cups: Divide the filling evenly among the 12 muffin cups, pouring it over the pre-baked crusts. Each cup should be almost full—the cheesecake will rise a little but won’t overflow.
- Bake the cheesecake cups: Bake for 18-22 minutes, or until the edges are set and the centers are slightly jiggly. They should look puffed and lightly golden around the edges. A toothpick inserted near the center should come out mostly clean, with a little moisture.
- Cool completely: Remove the muffin tin from the oven and let it cool on a wire rack for 20 minutes. Then carefully transfer the cheesecake cups to the refrigerator (still in the liners) and chill for at least 4 hours, or overnight. This step is crucial—they need time to set properly.
- Make the whipped cream: Just before serving, beat the cold heavy cream, powdered sugar, and vanilla extract in a chilled bowl until soft peaks form. Don’t overbeat or you’ll end up with butter.
- Serve: Top each chilled cheesecake cup with a dollop of whipped cream and a sprinkle of extra crushed gingersnaps or cinnamon. Serve cold.
One thing I learned the hard way: don’t skip the chilling time. I once served these after only two hours, and they were a bit too soft and messy. Patience pays off here.
Cooking Tips & Techniques
After making these mini pumpkin cheesecake cups more times than I can count, I’ve picked up a few tricks that make the process smoother and the results better. Here are my best tips:
- Room temperature ingredients are non-negotiable. Cold cream cheese and cold eggs will give you a lumpy filling. Set them out on the counter at least an hour before you start. Trust me, I’ve tried rushing it, and the texture is never as good.
- Don’t overmix the filling. Overmixing incorporates too much air, which can cause cracks and a spongy texture. Mix just until everything is combined and smooth. A few small lumps are fine—they’ll bake out.
- Use a cookie scoop for even filling. A #20 or #24 scoop works perfectly to divide the filling evenly among the cups. No more guessing and ending up with some cups overflowing and others half-empty.
- Watch the bake time closely. Ovens vary, so start checking at 18 minutes. The centers should still jiggle slightly when you gently shake the pan. They’ll continue to set as they cool.
- Let them cool gradually. Don’t go straight from the oven to the fridge. Let them cool on the counter first, then transfer to the fridge. Sudden temperature changes can cause cracking.
I once forgot to set my eggs out ahead of time and tried to warm them up in a bowl of hot water. One of them cracked and ended up in the bowl anyway. The filling was a little lumpy, but honestly? Nobody noticed. So don’t stress too much—these are forgiving little desserts.
Variations & Adaptations
One of the best things about this recipe is how easy it is to adapt. Here are some variations I’ve tried and loved:
- Gluten-Free Version: Use gluten-free gingersnap cookies for the crust. Most brands work well, just make sure they’re certified gluten-free if that’s a concern. The filling is naturally gluten-free.
- Dairy-Free Version: Use dairy-free cream cheese (I like Kite Hill or Violife) and a dairy-free butter alternative for the crust. The texture will be slightly different, but still delicious. Use coconut cream whipped topping instead of regular whipped cream.
- Extra Spicy: Add ¼ teaspoon of ground ginger and a pinch of cloves to the filling for an even warmer, more complex spice profile. This is my personal favorite for fall gatherings.
- Chocolate Twist: Drizzle melted dark chocolate over the top of the chilled cheesecake cups before serving. The bitterness of the chocolate pairs beautifully with the sweet, spiced pumpkin.
- Mini Bites: Use a mini muffin tin and reduce the bake time to 10-12 minutes. You’ll get about 24 mini cups—perfect for parties where people want to sample multiple desserts.
I once made a batch with a pecan shortbread crust instead of gingersnaps, and it was amazing. The buttery, nutty flavor was a great pairing. Don’t be afraid to experiment—that’s how the best recipes are born.
Serving & Storage Suggestions
These mini pumpkin cheesecake cups are best served cold, straight from the refrigerator. The texture is creamy and firm, and the flavors are perfectly balanced. Here’s how to serve and store them:
- Serving Temperature: Serve chilled. If you’ve made them ahead, take them out of the fridge about 10 minutes before serving to take the edge off the cold, but don’t let them sit out too long.
- Presentation: Arrange them on a platter or cake stand. Top each with a swirl of whipped cream and a sprinkle of crushed gingersnaps or a dusting of cinnamon. They look beautiful and inviting.
- What to Serve Alongside: These pair wonderfully with a cup of hot coffee, spiced apple cider, or even a glass of bourbon for an adult gathering. For a full dessert spread, serve them alongside apple crisp, pecan pie bars, or a simple chocolate tart.
- Storage: Store any leftovers in an airtight container in the refrigerator for up to 5 days. The texture stays creamy and the crust stays crunchy for the first 2-3 days.
- Freezing: These freeze beautifully! Place the cooled, unfrosted cheesecake cups on a baking sheet and freeze until solid, then transfer to a freezer-safe container. They’ll keep for up to 3 months. Thaw in the refrigerator overnight, then add the whipped cream before serving.
One thing I love about these is that the flavors actually get better after a day or two in the fridge. The spices meld together, and the texture becomes even creamier. So don’t be afraid to make them ahead—your future self will thank you.
Nutritional Information & Benefits
Here’s a rough estimate of the nutritional content for one mini pumpkin cheesecake cup (without the whipped cream topping):
- Calories: Approximately 280-320
- Fat: 18-22g
- Carbohydrates: 28-32g
- Protein: 5-7g
- Fiber: 1-2g
- Sugar: 18-22g
These numbers will vary depending on the exact ingredients and brands you use. If you’re watching your sugar intake, you can reduce the sugar in the filling by a couple of tablespoons without affecting the texture too much.
Pumpkin is packed with vitamin A, which is great for eye health and immune function. It’s also a good source of fiber and antioxidants. The cream cheese adds calcium and protein, and the gingersnaps provide a little bit of iron from the molasses. Are these a health food? No. But they’re a treat you can feel a little better about, especially during the holiday season when indulgence is part of the fun.
If you’re hosting guests with dietary restrictions, the gluten-free and dairy-free variations above work beautifully. Just be sure to check all your ingredient labels for hidden allergens.
Conclusion
These mini pumpkin cheesecake cups with gingersnap crust are the kind of recipe that makes you look like a hero with minimal effort. They’re creamy, spiced perfectly, and that crunchy, buttery crust is absolutely unforgettable. Whether you’re hosting a Thanksgiving dinner, a fall potluck, or just a casual get-together with friends, these little cups will steal the show.
I love this recipe because it reminds me that sometimes the best things come from happy accidents. That distracted moment when I grabbed the wrong pan? It turned into a dessert that’s become a staple in my kitchen. And honestly? I don’t think I’ll ever go back to making a full-sized pumpkin cheesecake. These mini cups are just better—easier to serve, easier to share, and somehow even more delicious.
I’d love to hear how these turn out for you! Leave a comment below and let me know if you tried any variations or made them for a special occasion. And if you loved them as much as I do, share this recipe with a friend who loves to host. Happy baking, friends!
Frequently Asked Questions
Can I use a different type of cookie for the crust?
Absolutely! Graham crackers, shortbread cookies, or even vanilla wafers work well. Just keep in mind that the flavor will change. Gingersnaps add that warm, spicy kick that pairs perfectly with pumpkin, but feel free to experiment.
Can I make these without a mixer?
Yes, you can mix the filling by hand with a whisk. Just make sure your cream cheese is very soft so it blends smoothly. It’ll take a little more elbow grease, but the result will be just as delicious.
Why did my cheesecake cups crack on top?
Cracks usually happen from overmixing the batter or overbaking. Mix just until combined, and pull the cups out of the oven when the centers are still slightly jiggly. They’ll set as they cool. If they do crack, don’t worry—the whipped cream topping covers it right up!
Can I use canned pumpkin pie filling instead of pumpkin purée?
I wouldn’t recommend it. Pumpkin pie filling is already sweetened and spiced, which will throw off the balance of the recipe. Stick with 100% pumpkin purée for the best results.
How far in advance can I make these for a party?
You can make them up to 3 days in advance. Store them in an airtight container in the refrigerator, and add the whipped cream topping just before serving. They actually taste better after a day or two as the flavors meld together.
Pin This Recipe!
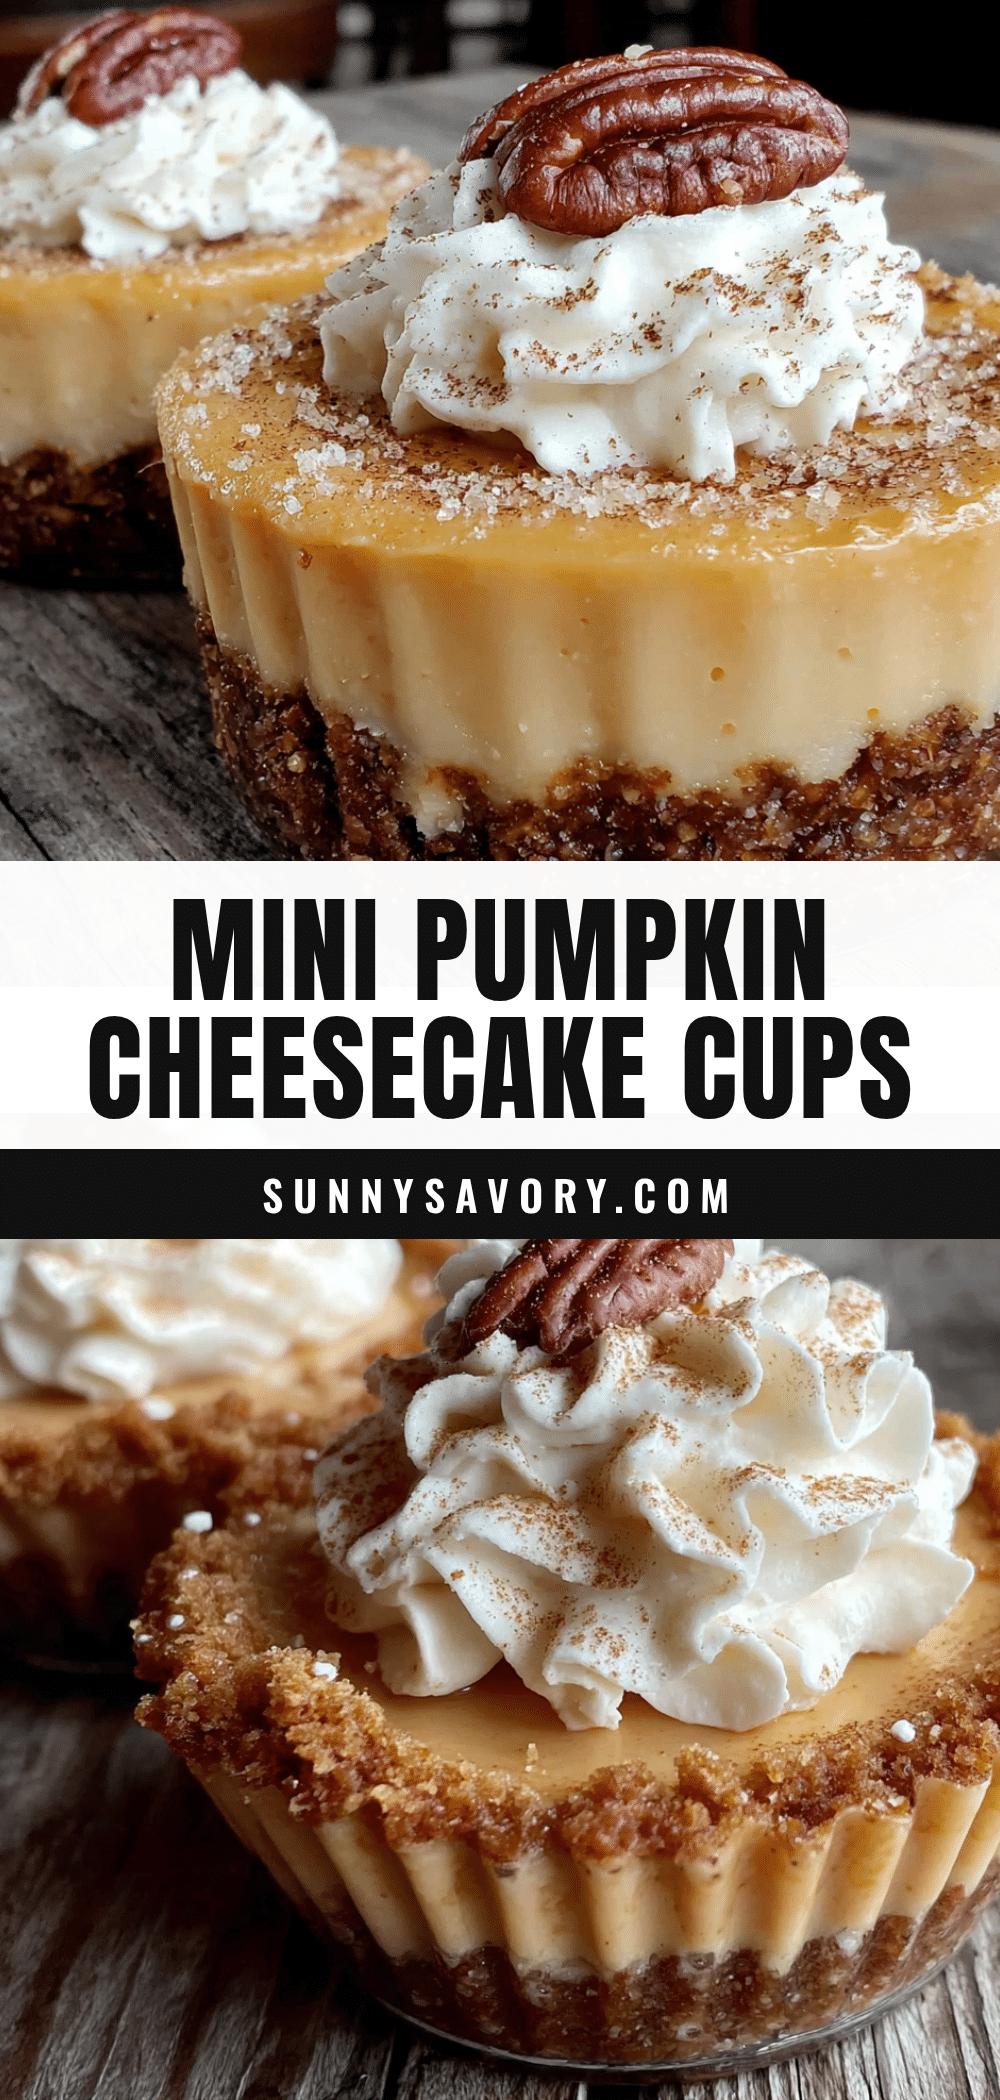
Best Mini Pumpkin Cheesecake Cups with Gingersnap Crust
These mini pumpkin cheesecake cups with a crunchy, buttery gingersnap crust are creamy, spiced just right, and perfect for gatherings. They’re easy to make ahead and always a crowd-pleaser.
- Prep Time: 20 minutes
- Cook Time: 26-30 minutes
- Total Time: 4 hours 50 minutes (includes chilling)
- Yield: 12 servings 1x
- Category: Dessert
- Cuisine: American
Ingredients
- 1 ½ cups gingersnap cookie crumbs (about 25–30 cookies, crushed finely)
- ¼ cup granulated sugar
- 5 tablespoons unsalted butter, melted
- Pinch of salt (optional)
- 16 ounces cream cheese, softened to room temperature
- ½ cup granulated sugar
- ¼ cup packed light brown sugar
- 1 cup pumpkin purée (not pumpkin pie filling)
- 2 large eggs, room temperature
- 1 teaspoon vanilla extract
- 1 teaspoon pumpkin pie spice
- ½ teaspoon ground cinnamon
- ¼ teaspoon salt
- ½ cup heavy cream, cold
- 1 tablespoon powdered sugar
- ¼ teaspoon vanilla extract
- Extra crushed gingersnaps or cinnamon for garnish
Instructions
- Preheat your oven to 325°F (160°C). Line a 12-cup muffin tin with paper or foil liners. If using foil liners, give them a light spray of non-stick cooking spray.
- Make the crust: In a medium bowl, combine the gingersnap crumbs, ¼ cup granulated sugar, and salt. Pour in the melted butter and stir until every crumb is coated. The mixture should look like wet sand and hold together when squeezed.
- Press the crust into the liners: Divide the crust mixture evenly among the 12 muffin cups. Use the bottom of a small glass or shot glass to press it down firmly. Aim for about a ¼-inch thick layer.
- Bake the crusts: Bake for 8 minutes until lightly golden. Remove from the oven and let cool while you make the filling. Keep the oven on.
- Make the filling: In a large bowl, beat the softened cream cheese with an electric mixer on medium speed until smooth and creamy, about 2 minutes. Scrape down the sides.
- Add the sugars: Add ½ cup granulated sugar and brown sugar. Beat on medium speed until well combined, about 1 minute. Scrape the bowl again.
- Add the pumpkin and flavorings: Add pumpkin purée, 1 teaspoon vanilla extract, pumpkin pie spice, cinnamon, and ¼ teaspoon salt. Beat on low speed until just combined.
- Add the eggs: Add eggs one at a time, beating on low speed after each addition until just combined. Do not overmix.
- Fill the cups: Divide the filling evenly among the 12 muffin cups, pouring it over the pre-baked crusts. Each cup should be almost full.
- Bake the cheesecake cups: Bake for 18-22 minutes, until edges are set and centers are slightly jiggly. A toothpick inserted near the center should come out mostly clean.
- Cool completely: Remove from oven and cool on a wire rack for 20 minutes. Then transfer to the refrigerator (still in liners) and chill for at least 4 hours, or overnight.
- Make the whipped cream: Just before serving, beat cold heavy cream, powdered sugar, and ¼ teaspoon vanilla extract in a chilled bowl until soft peaks form.
- Serve: Top each chilled cheesecake cup with a dollop of whipped cream and a sprinkle of extra crushed gingersnaps or cinnamon. Serve cold.
Notes
Room temperature ingredients are crucial for a smooth filling. Don’t skip the chilling time—they need at least 4 hours to set properly. For best results, make a day ahead. If cracks appear, cover with whipped cream.
Nutrition
- Serving Size: 1 mini cheesecake cu
- Calories: 300
- Sugar: 20
- Sodium: 250
- Fat: 20
- Saturated Fat: 12
- Carbohydrates: 30
- Fiber: 1.5
- Protein: 6
Keywords: mini pumpkin cheesecake cups, gingersnap crust, pumpkin cheesecake, fall dessert, Thanksgiving dessert, mini cheesecake



